Search icon
Arrow left icon
All Products
Best Sellers
New Releases
Books
Videos
Audiobooks
Learning Hub
Newsletters
Free Learning
Arrow right icon
Architectural Visualization in Unreal Engine 5

You're reading from  Architectural Visualization in Unreal Engine 5

Product type Book
Published in Feb 2024
Publisher Packt
ISBN-13 9781837639762
Pages 496 pages
Edition 1st Edition
Languages
Concepts
Author (1):
Ludovico Palmeri Ludovico Palmeri
Profile icon Ludovico Palmeri

Table of Contents (24) Chapters

Preface 1. Part 1: Building the Scene
2. Chapter 1: Setting Up the Project 3. Chapter 2: Preparing the Scene 4. Chapter 3: Importing the Scene 5. Chapter 4: Managing Your Assets 6. Part 2: Illuminating and Materializing the Scene
7. Chapter 5: Lighting in Unreal – the Essentials 8. Chapter 6: Lighting the Scene 9. Chapter 7: Exploring Materials 10. Chapter 8: Creating Architectural Materials 11. Chapter 9: Detailing the Scene with Decals 12. Part 3: Completing the Scene
13. Chapter 10: Making Interactive Elements Using Blueprints 14. Chapter 11: Communicating between Blueprints 15. Chapter 12: Optimizing the Scene 16. Part 4: Rendering the Scene
17. Chapter 13: Setting Up Cameras 18. Chapter 14: Post-Processing Images 19. Chapter 15: Discovering the Sequencer 20. Chapter 16: Rendering the Scene 21. Index 22. Other Books You May Enjoy Appendix:Substrate Materials

Importing the Scene

Before we can import our scene into Unreal Engine 5, we need to export it from our 3D modeling software first. There are two methods for doing this: one is more general and suitable for gaming and other applications, which uses a modular and traditional workflow, and the other one is specially designed for Archviz and uses a plugin called Datasmith. Many people who come from the Archviz world only learn how to use the last one, but I think it’s important to learn both methods.

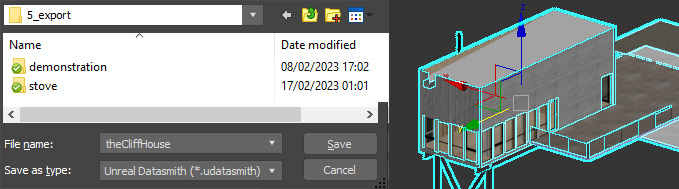
Exporting/importing is not very complicated, but you need to pay attention to a few things to do it correctly. We want to import our content into Unreal Engine properly so that we can continue to improve and polish our scene with lighting and materials before we render it.

In this chapter, we’re about to learn that, and we will cover the following topics:

  • Exporting/importing individual elements or scenes with a traditional workflow
  • Exporting/importing scenes...

Technical requirements

Exporting/importing with a traditional workflow

This is the most important workflow, even though it is not the one we will use as our primary one. This sentence may sound contradictory, but it is not. As already mentioned, the Datasmith workflow is the most useful for Archviz in general. However, it is mandatory to know the regular workflow for Unreal Engine in order to import all sorts of assets and pieces. This applies to many other things besides Archviz.

Exporting elements for use in Unreal is a straightforward process. We simply need to export our scene/assets in .fbx format, while making sure to check units, position, and orientation. As a general rule, consider these points:

  • Units inside Unreal are in centimeters. You can work in any unit you prefer, but make sure to convert the units during the export or import process (there are options for both). In general, this is automatically taken care of if you’re using Blender or 3ds Max on their default configuration...

Exporting/importing with Datasmith workflow

Datasmith is a file format specifically designed to bring content from other 3D programs and make it readable for Unreal Engine. It stores a lot of information and can be used to import various file formats directly into Unreal. There are plugins available that enable some 3D programs to export in the .udatasmith file format. These plugins are compatible with a lot of 3D software, including 3ds Max, SketchUp, Revit, Rhinoceros, and ArchiCAD. Some other formats, such as .c4d (Cinema 4D), can be read by the Datasmith importer immediately without the need for plugins.

The Datasmith format is ideal for Archviz and other similar industries because when exporting, it preserves object coordinates and actual pivot points, recognizes instance copies, performs lightmap operations, and translates Physically Based Rendering (PBR) materials to Unreal Engine-ready materials. Additionally, it maintains scene hierarchies, layers, lights, cameras, and...

Exploring the scene

It may be helpful to perform various operations such as inspecting the scene and models, examining their wireframe structure, checking their normal direction, ensuring their functionality, or modifying certain elements within the scene by adding or merging components. It is advisable to conduct a comprehensive review of all imported components to identify and resolve any issues before moving on. It is common to repeat this process a few times before commencing work on the project.

Navigating within the viewport

Navigating within the viewport is intuitive, with various possibilities and shortcuts. I recommend checking the official documentation directly at the following link for details: https://docs.unrealengine.com/5.3/en-US/viewport-controls-in-unreal-engine/.

Navigating the interface

Navigating the scene is a critical yet straightforward aspect. In Archviz, we frequently need to switch between views, verify alignment, and inspect minor details. Let...

Project

Let’s open our scene in 3ds Max and select all the meshes that make up the main architectural design, such as walls, doors, windows, and floors. After quickly checking the UV, normal direction, pivot, and position of the items, select all our architectonic meshes, go to File | Export selected | Datasmith, and click OK. I’m exporting just the structure for now, not the furniture, and since the house is quite small, I’m doing it in one single batch:

Figure 3.17: Exporting from 3ds Max

Figure 3.17: Exporting from 3ds Max

We repeat the same process for furniture already in the scene. Whenever possible, it’s best to add items directly in Unreal instead of positioning them in 3D software. However, in my case, I had a few specific items already in place, which I decided to keep. I will add the rest of the furniture later inside Unreal.

We ended up having two different Datasmith files: Architecture and Furniture.

Thus, I can open the project in Unreal, create...

Summary

In this chapter, we learned about exporting our scenes and assets from modeling software to Unreal Engine. We delved into both the conventional workflow and the recommended one for Archviz, which is through the use of Datasmith. Additionally, we learned how to reimport elements and modify them within Unreal. In the upcoming chapter, we will be exploring how to incorporate external content into Unreal and how to export from Unreal to other scenes or programs.

lock icon The rest of the chapter is locked
You have been reading a chapter from
Architectural Visualization in Unreal Engine 5
Published in: Feb 2024 Publisher: Packt ISBN-13: 9781837639762
Register for a free Packt account to unlock a world of extra content!
A free Packt account unlocks extra newsletters, articles, discounted offers, and much more. Start advancing your knowledge today.
Unlock this book and the full library FREE for 7 days
Get unlimited access to 7000+ expert-authored eBooks and videos courses covering every tech area you can think of
Renews at $15.99/month. Cancel anytime}