

Anatomy of the UI
Now you’ll learn what’s what in Blender’s UI. There’s a lot to see when you first open Blender, but it’s simpler than it looks. Launch Blender and you’ll be greeted by a splash screen. Admire the cool artwork for a minute and then click anywhere to get rid of it. You’re in a new, empty Blender file.
Files in Blender are called Scenes. It’ll look extremely complex at first—but don’t worry. You get to ignore most of that for now.
Blender’s UI is broken down into simple sections. I’ll cover the basics, but don’t worry—I won’t go into agonizing detail. The thing about the UI is that you’ll pick up most of it on your own the more you use Blender.
I’m just here to get you started.
The 3D Viewport
The open area in the middle is called the 3D Viewport. In this book, I’ll eventually get tired of typing the 3D Viewport so I’ll just be calling it the viewport.
The 3D Viewport is where all the 3D work happens. It’s where you create, edit, and manipulate 3D models. Figure 1.2 shows how the 3D Viewport looks:
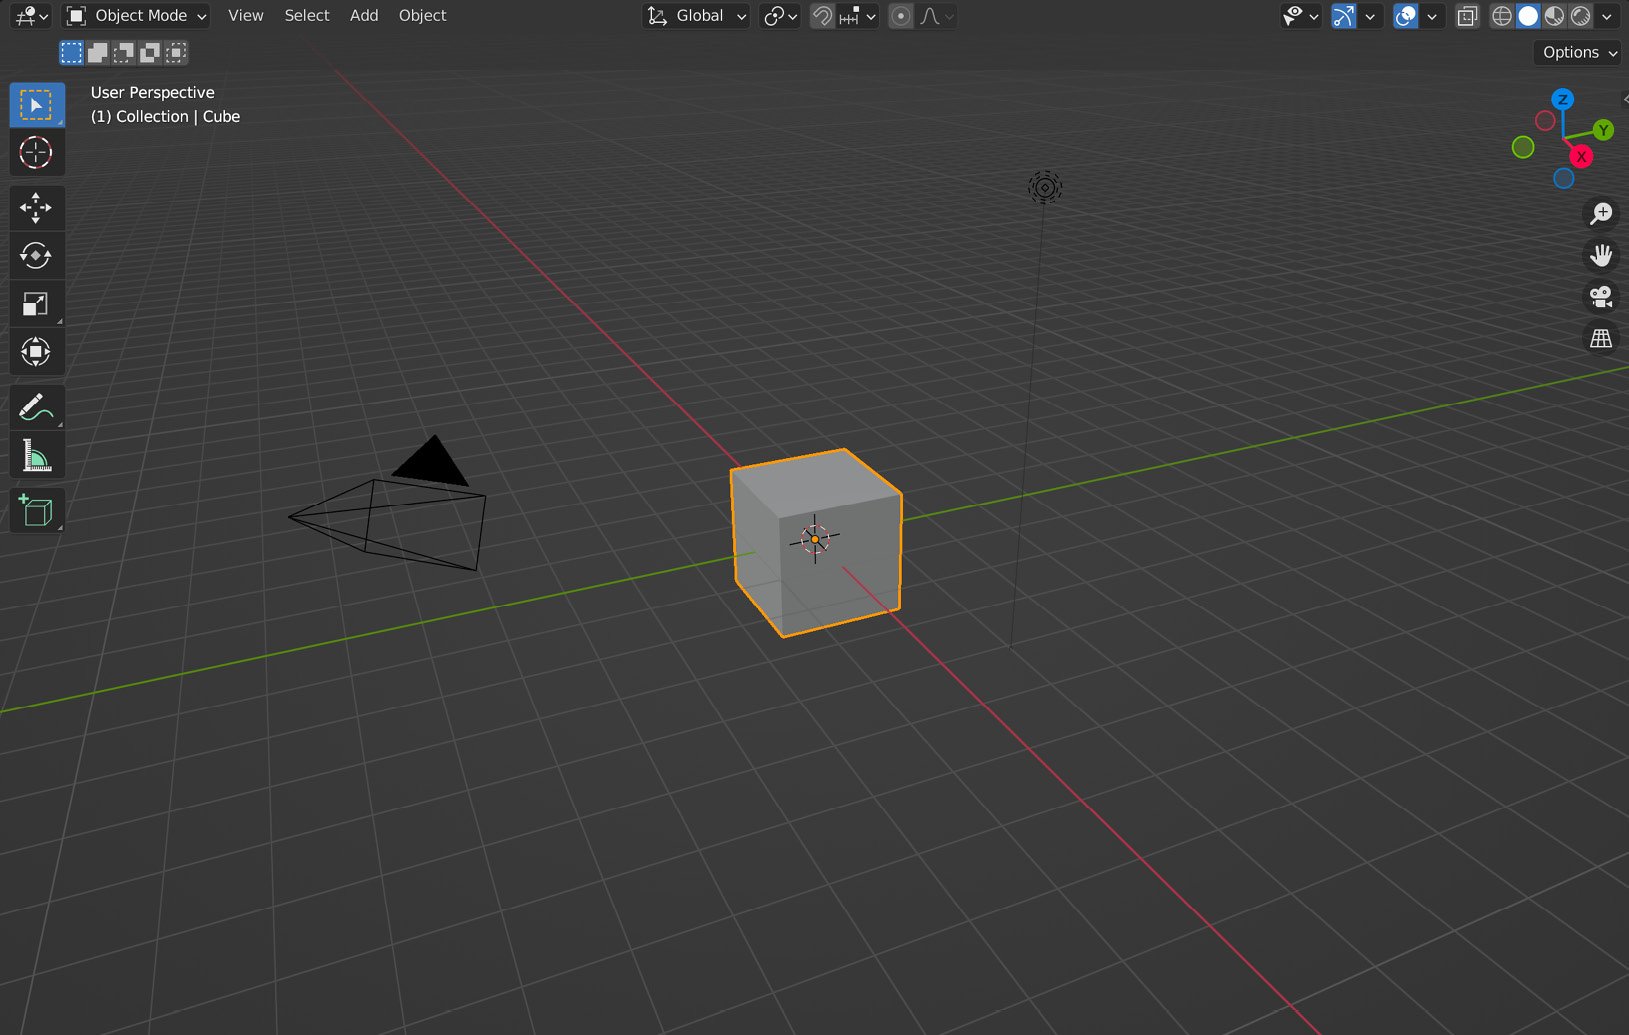
Figure 1.2 – The 3D Viewport
In the next section, let’s learn about the top bar.
The top bar
At the top of the window is the top bar.

Figure 1.3 – The top bar
The top bar allows you to switch between different configurations of views (called Workspaces) with a single click.
The Outliner
In the top right is the Outliner. This is a bit like a computer’s filesystem. It shows you a simple list of all the 3D objects in your Blender file, organized into folders called Collections:
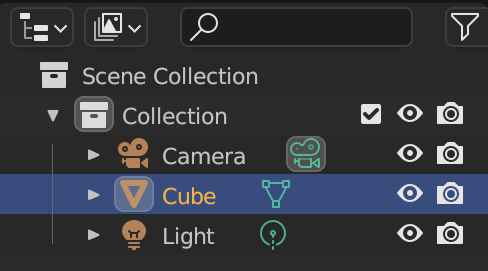
Figure 1.4 – The Outliner
You’ll see Camera, Light, and Cube in the default Collection. These make up the simple default setup that comes in with every new Blender file. (You’ll find yourself having to delete them a lot.)
The Properties panel
Below the Outliner is the Properties panel. Many of the most important settings you’ll use, such as render settings, modifiers, and output options, are located in the Properties panel. The Properties panel is divided into its own set of tabs, as shown in Figure 1.5:
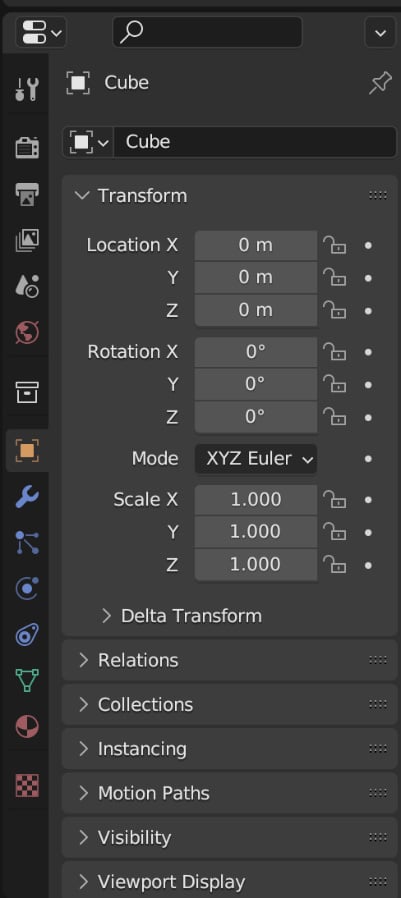
Figure 1.5 – The Properties panel
Next, let’s see what the timeline is.
The Timeline
At the bottom of the window is the Timeline. This gives you play/pause controls that you would use if you were creating an animation. We won’t be covering that in this book, though.
Below the Timeline is the Status bar. This is where you’ll see information on processes (such as how close a render is to completion) and tools (such as extra keyboard shortcuts):

Figure 1.6 – The Timeline
Finally, let’s see what customizing areas means.
Customizing areas
All the different panels we’ve just covered are called areas. Areas are extremely customizable, and it’s not hard to do. It’s super-useful to be able to reconfigure the view (for example, if you wanted two viewports side-by-side, or if you wanted to get rid of the Outliner).
All of your changes are file-specific: they’ll be saved when you save your file, but you won’t see them in other Blender files. In the corner of every area is the Editor Type menu. It looks slightly different depending on the area type, as shown in the following figure:

Figure 1.7 – The Editor Type menu
You can open this menu to change any type of area into any other type of area. For example, you could easily switch the 3D Viewport into a big Outliner by switching Editor Type to Outliner.
You can also adjust each area’s size. Simply hover your mouse over the border between two areas until the cursor turns into an arrow, then left-click and drag to resize the area. Adding new areas is even easier. Hover your cursor over the corner of an area until it becomes a cross, then click and drag inward toward the center of the area. This will create a new area.
To get rid of areas, you can join two areas together. Hover over the corner of an area until it turns into a cross again, but this time, drag outward toward another area (and don’t let go). Your cursor will turn into a little arrow, pointing outward. The areas will darken to show you how they will be joined.
Knowing how to manage areas is very important—so practice! Join and create some areas right now. It’s fine if you mess up your Blender window—it’ll all be fixed when you restart it.
In the next section, you’ll learn how to look around in the 3D Viewport.