Reader small image

You're reading from  Low Poly 3D Modeling in Blender

Product typeBook
Published inFeb 2024
PublisherPackt
ISBN-139781803245478
Edition1st Edition
Tools
Concepts
Right arrow
Author (1)
Samuel Sullins
Samuel Sullins
author image
Samuel Sullins

Samuel Sullins has been a Blender user since he was 15 years old. He's worked as a personal Blender consultant and written numerous Blender articles on Medium. He also writes about Blender on LinkedIn, where he's published hundreds of Blender micro-lessons and tips. He strongly recommends that you check out his YouTube channel, where he publishes Blender tutorials.
Read more about Samuel Sullins

Right arrow

Modeling a Kangaroo

So far in this book, we have trees, rocks, and even grass: all the pieces we need to build a world. But, who lives here?

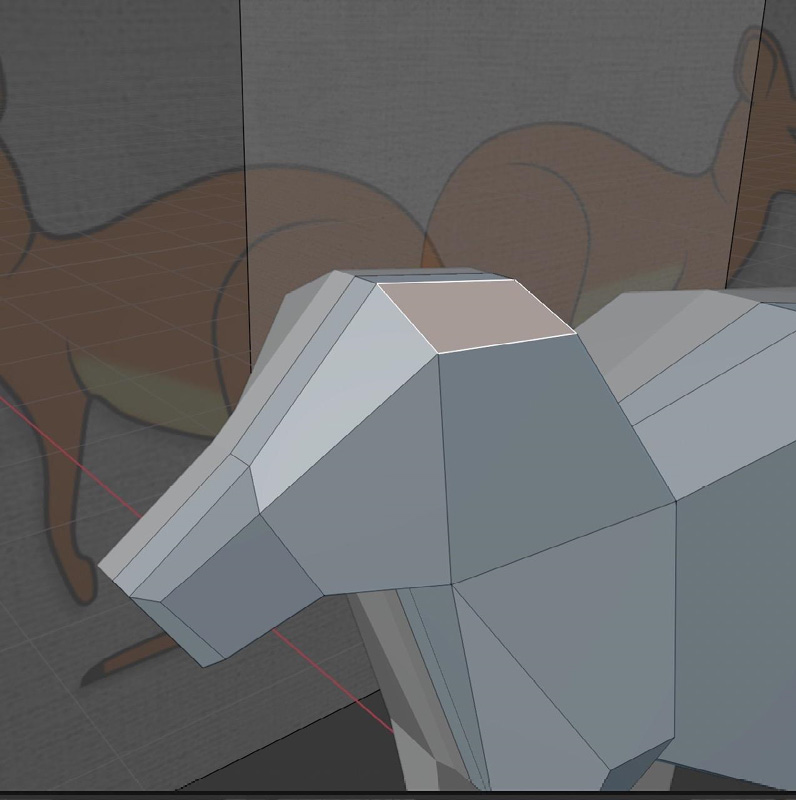
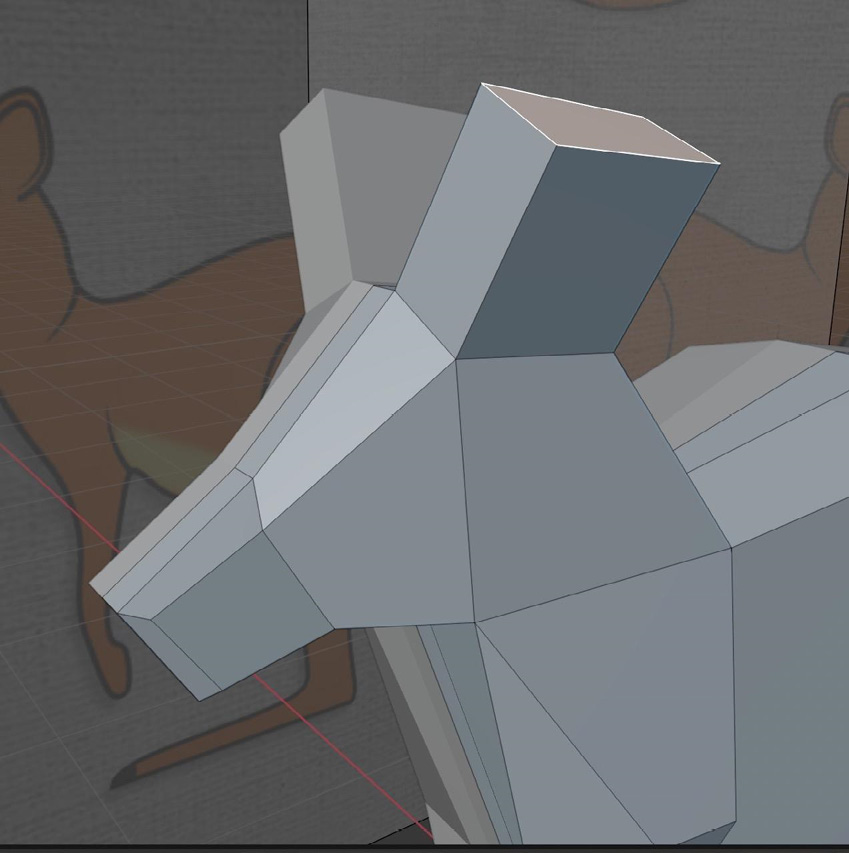
In this chapter, you’ll learn how to build a low poly animal. You’ll follow step-by-step instructions to build a low poly kangaroo from scratch.

The instructions in this chapter will be specific to the kangaroo, but also generalized enough that you can apply the same steps to any other animal. What you learn here will still apply.

By the end of this chapter, you’ll have achieved the following:

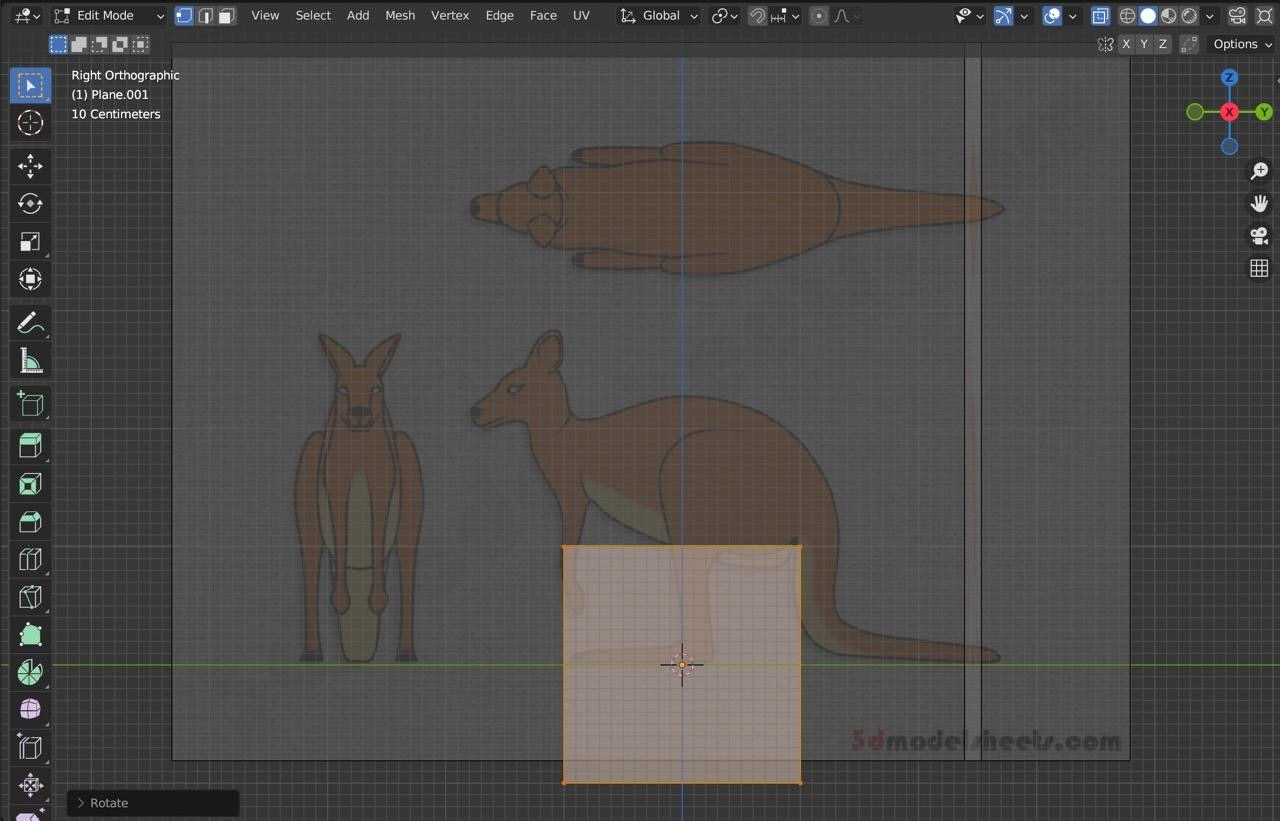
  • Know how to import reference images
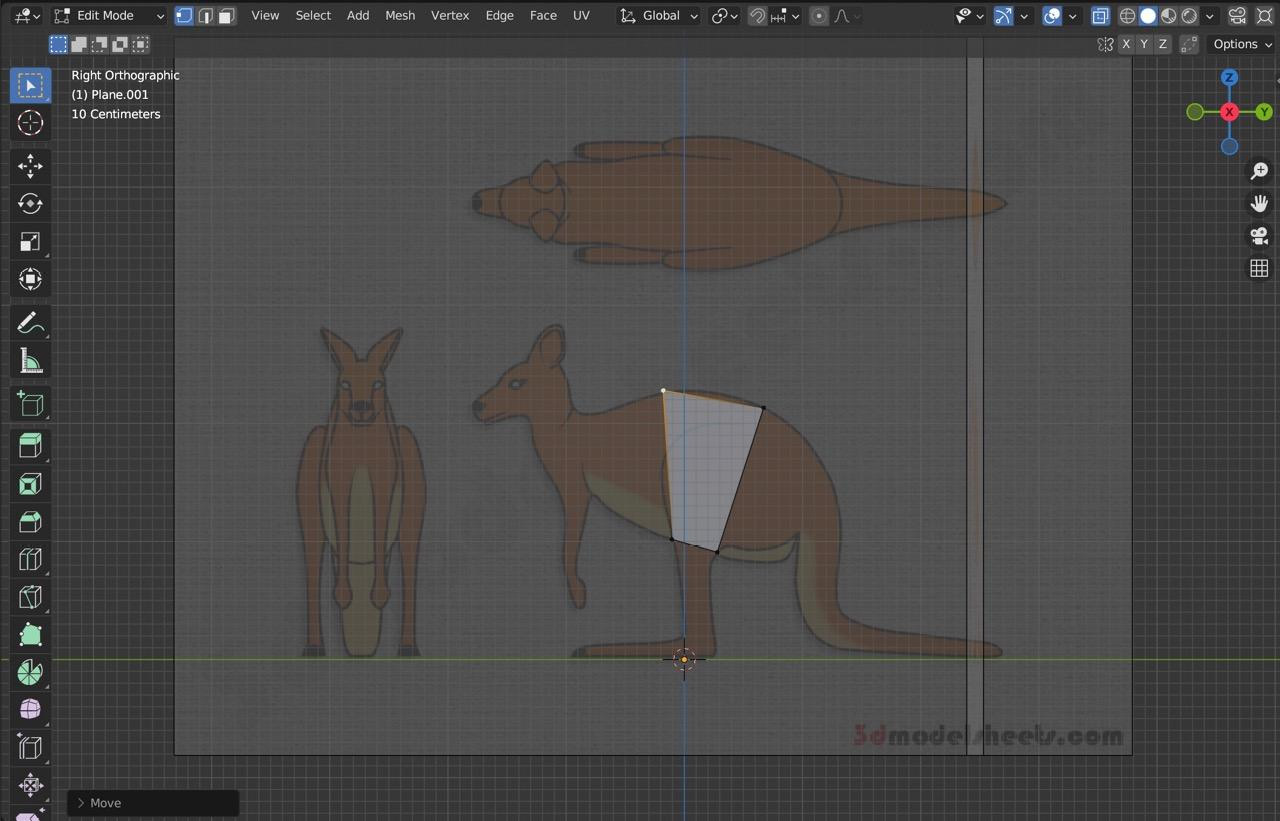
  • Understand where to start when modeling an animal
  • Have a firm grasp of the steps you’ll need to follow to model any animal in low poly
  • Have a sweet low poly kangaroo model

You’ll start by learning how to import your reference images.

Why modeling animals is hard

Modeling low poly animals is not easy. I started learning how to model animals just for this book—and I still have a long way to go. My animal models are not perfect. But if I can do it, so can you. This chapter will be one of the tougher ones. However, with a little effort and a lot of practice, you’ll be making some pretty cool animals in no time.

Practice is key here. Some of the process involves using more complex techniques – using tools such as the Knife tool to cut out edges where you think they’re needed. This will be difficult in the beginning, but will get easier the more you do it.

The steps in this chapter will be both specific and generalized. You’ll learn how to build a kangaroo with some example images. But the same steps will apply to building most other animals.

Figure 9.1 – The final result: a low poly kangaroo

Figure 9.1 – The final result: a low poly kangaroo

I’m no expert at modeling animals—...

Reference images

Reference images are pictures of whatever it is you’re trying to make.

These could be artwork that you made yourself, pictures off the internet, or pictures you took yourself. It’s often really hard to know what an animal will look like in low poly—try searching for low poly art of that animal online. There’s a good chance someone else has already done it, and you can get a general idea of what you might be trying to make.

Searching for a reference image

For reference, it helps to have pictures from multiple angles: one from the front, one from the side, and one from the top. This way you’ll have clear references from all sides of your model.

For example, for the kangaroo, I found the following picture online when I searched kangaroo blueprint image.

Figure 9.2 – Reference images of a kangaroo used in this chapter (image from: seamless-pixels.blogspot.com)

Figure 9.2 – Reference images of a kangaroo used in this chapter (image from: seamless-pixels.blogspot.com)

The best reference art for...

Modeling the body

We’ll make our animal starting from a plane. It’s fairly simple.

First, go to the Right view (3) and add a new plane. Press Shift + A and choose Mesh | Plane from the popup.

Now we’ll shape the plane into the rough shape of the animal’s body, head, and tail (not the legs):

  1. Tab into Edit Mode on the plane.
  2. Make sure you’re in Vertex Select mode, so you can adjust individual vertices.
  3. Press A to select everything.
  4. Press R, Y, and 90 to turn it vertical on the Y axis.
  5. Switch to X-Ray by pressing Alt + Z.

Here’s what the plane looks like so far:

Figure 9.6 – Adding a plane

Figure 9.6 – Adding a plane

6. Now select each vertex, and move them one at a time to position your plane as follows:

Figure 9.7 – Starting to build the body

Figure 9.7 – Starting to build the body

As you work, you’ll try to follow the shape of the kangaroo’s body. Since you’re going to extrude...

Extruding and mirroring the body

We’ll be using the Mirror modifier again, just like we did for the low poly tractor in Chapter 7. It should be pretty easy for us to mirror the mesh we have. First, we’ll extrude the mesh out along the X axis to give it some thickness, and then we’ll add the Mirror modifier:

  1. In Edit Mode, press A to select everything.
  2. Press E X to extrude it along the X axis (view it from the front to see super clearly).
  3. Bring it out a little, to somewhere just before the kangaroo’s eyes, to give it some thickness:
Figure 9.10 – Adding some thickness

Figure 9.10 – Adding some thickness

  1. Extrude it again, a little further. Here’s what we have so far, from the Front view:
Figure 9.11 – Adding another layer of thickness

Figure 9.11 – Adding another layer of thickness

  1. Now we need to delete the innermost faces so that we can mirror the mesh. Click and drag across these vertices (the ones selected in Figure 9.12) to...

Making legs

The legs will be pretty easy. We’ll extrude them out to match the reference, just like we did for the body.

We left some faces perfectly situated for making the legs when we were extruding the body out. We’ll start by extruding both of these faces outward along the X axis to form the shoulders, then downward to form the legs.

The Mirror modifier will take care of the other side for us automatically.

First, we need to extrude the back shoulders. Make sure you have Face Select mode enabled, and turn off X-Ray (Alt + Z). Now grab this face (shown in Figure 9.13) and extrude it outward:

Figure 9.13 – Extruding the shoulders

Figure 9.13 – Extruding the shoulders

Do the same for the front shoulder face:

Figure 9.14 – The front shoulders

Figure 9.14 – The front shoulders

Now, we can make the actual leg part by extruding out from the shoulder face. Since it’s not a single plane anymore, you’ll have to drag across vertices in the Right view...

Shaping the body

In this section, we’re going to improve the body. We’ll take it from a rough, blocky form to a nicer, more animal-like shape.

To get there, you’ll go through three separate phases:

  1. Tweaking the body and tail
  2. Tweaking the legs
  3. Tweaking the head

The head and the legs will be the most difficult, but since we have the front reference image to help, it won’t be too bad.

Tweaking the body and tail

First, let’s tweak the body and tail. What we need to adjust here is mostly the width—the body should be wider in the middle, with the head and tail thinner:

  1. Select the whole “middle part” by holding down Shift and clicking on each face (or each vertex, if you like).
Figure 9.17 – Selecting the middle part

Figure 9.17 – Selecting the middle part

  1. Then move the whole chunk outward (very slightly) with G and X:
Figure 9.18 – Moving the middle part slightly outward

Figure 9.18 – Moving the middle...

Extruding the ears

We haven’t made the ears yet. Our animal looks a bit funny because of it.

There’s two different ways you could make the ears. You could start with a separate object, model it into an ear shape, then add that to your mesh.

That works.

The other way is to figure out where the ears go and extrude them right out of the base mesh. That’s what you’ll be doing here for this animal model.

First we’ll extrude the ear shape, then we will tweak it to make sure it looks nice:

  1. Simply select the face highlighted in Figure 9.30:
Figure 9.30 – The faces that will become ears

Figure 9.30 – The faces that will become ears

  1. Then press E to extrude it outward:
Figure 9.31 – The extruded ears

Figure 9.31 – The extruded ears

Now we have the simple base of the ear shape. We’ll shape it into more of an ear shape by scaling the top face. You can check your reference image to make sure it’s looking accurate as you...

Adding materials

Most low poly animals you’ll make won’t need more than two different materials. For our kangaroo, though, we only need one material.

That makes this step pretty easy.

Since you already have the Material Utilities add-on enabled, it’ll be a breeze. All we have to do is assign the main material to the model.

Simply open the Material tab, assign the default material (or make a new one), name it Brown, and change its color to brown.

If you want, you could use the material techniques you learned in Chapter 6 to assign different materials to different parts of an animal mesh.

Summary

In this chapter, you tackled the complex task of modeling a low poly animal. You started from reference imagery. You learned how to make the outline of the animal and extrude the animal’s body, then clean up and refine the shape.

Great job!

If you only remember one thing from this chapter, it is that modeling low poly animals takes practice. A lot of it. Your first animal won’t look so nice. But the next one will be better. The next, even better still.

Do this a lot and it’ll get easier for you. You’ll start to understand how and where to make cuts and add geometry.

Next up, you’ll learn how to make low poly houses and buildings.

lock icon
The rest of the chapter is locked
You have been reading a chapter from
Low Poly 3D Modeling in Blender
Published in: Feb 2024Publisher: PacktISBN-13: 9781803245478
Register for a free Packt account to unlock a world of extra content!
A free Packt account unlocks extra newsletters, articles, discounted offers, and much more. Start advancing your knowledge today.
undefined
Unlock this book and the full library FREE for 7 days
Get unlimited access to 7000+ expert-authored eBooks and videos courses covering every tech area you can think of
Renews at $15.99/month. Cancel anytime

Author (1)

author image
Samuel Sullins

Samuel Sullins has been a Blender user since he was 15 years old. He's worked as a personal Blender consultant and written numerous Blender articles on Medium. He also writes about Blender on LinkedIn, where he's published hundreds of Blender micro-lessons and tips. He strongly recommends that you check out his YouTube channel, where he publishes Blender tutorials.
Read more about Samuel Sullins