
Introducing Texture Painting
In this chapter, we will introduce Blender’s powerful and versatile Texture Paint feature. We will learn to use the texture painting workspace and tools, creating our own custom brushes and textures. By the end of this chapter, you will be ready to start texture painting independently and greatly improve your textures and materials.
The following topics will be covered in this chapter:
- Understanding the basics of texture painting
- Improving edges with texture painting
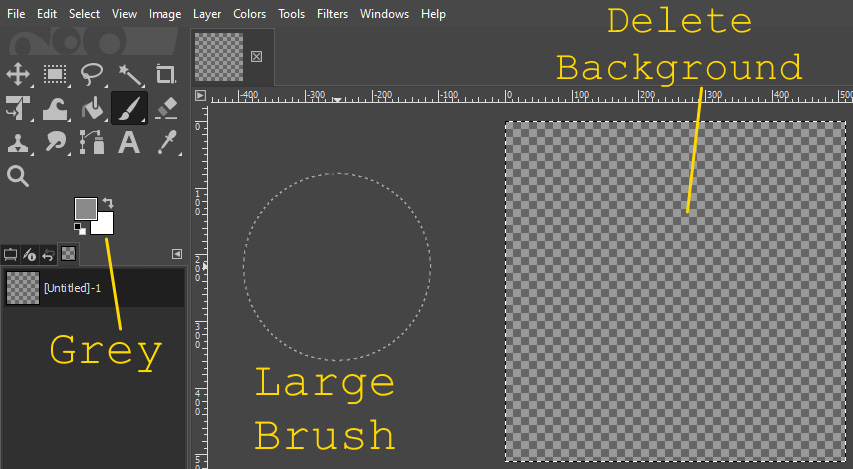
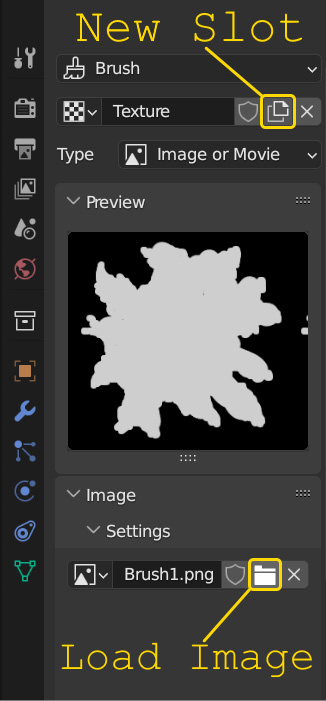
- Creating custom brushes in GIMP
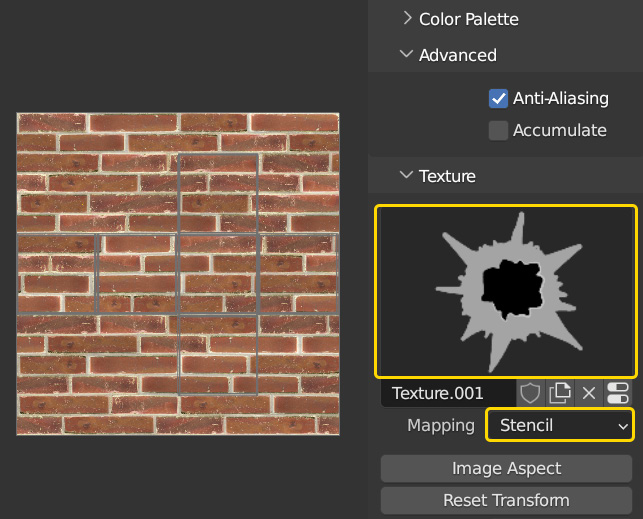
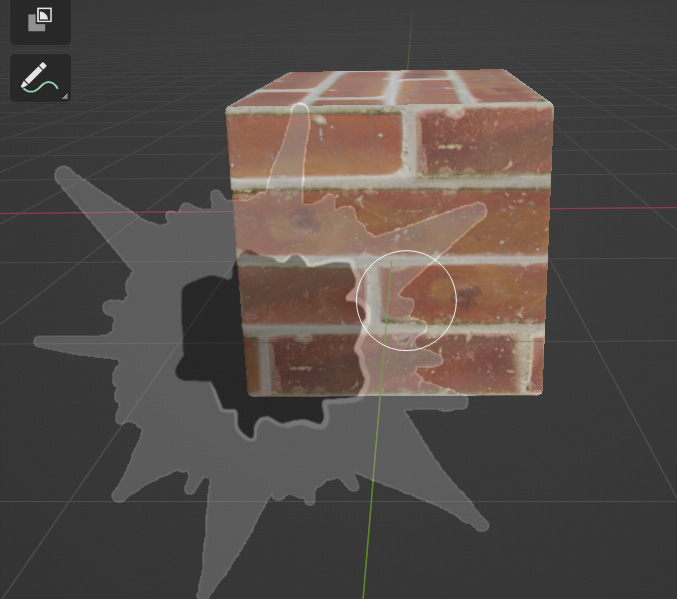
- Creating a bullet hole decal
- Using stencils in Blender