


Applying texture maps in Blender
We will now apply an Albedo map, Roughness map, and Normal map to a material in Blender using nodes. For this exercise, you can use any material from any of these websites, as they all work the same way.
Let us add the texture maps to a material on a cube:
- Add a Node Wrangler to a Principled BSDF node with Ctrl + T, and plug it into the base color.
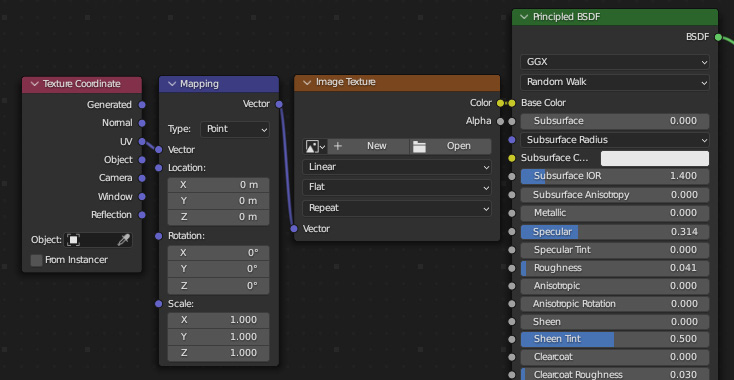
Figure 5.5 – Adding a Node Wrangler
- Click on the Open button in the Image Texture node, and load the Albedo map. The Albedo map file will most likely have a complex name, but it will end with the word
albedo. For example, the file might be namedTexturesCom_Wall_BrickPlain3_2.5x2.5_B_1K_albedo.

Figure 5.6 – Opening a file


