Creating Photorealistic Textures on a 3D Model
In this chapter, we will apply all the skills that we’ve learned so far in a project working with a 3D model. We will first download a steering wheel model and add some materials to it, before adding some unique, custom-made details.
By adding high-quality textures, we prepare our 3D models for impressive animations and renders. Models that appear realistic are highly sought after in advertising, product visualization, interior design, and other fields where aesthetics are important. By the end of this chapter, you will be able to apply photorealistic textures finished with high-quality texture maps to your models and create custom texture-painted details and features.
The following topics will be covered in this chapter:
- Adding basic materials to the steering wheel
- Baking a custom Normal map
- Applying a logo to the steering wheel
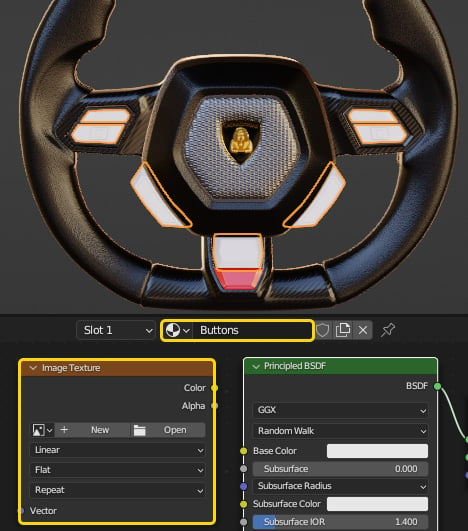
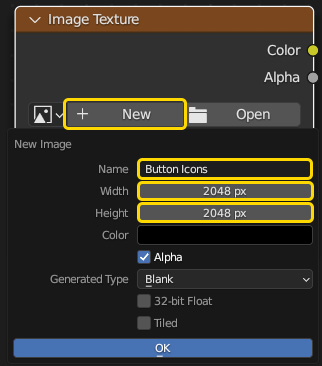
- Painting buttons with stencils