
UV-Unwrapping 3D Models for Texturing
In this chapter, we will learn how to UV-unwrap 3D models. This will give us more control over how textures are projected on a surface. We will begin by exploring what UV-unwrapping is and how it works, before learning how to do it correctly and practicing on some models.
We will learn about two methods of UV-unwrapping. First, we will learn how to unwrap objects manually, to give us full control over the result. Then, we will learn an easy method to automatically unwrap objects, which is quicker and easier but often looks less realistic.
By the end of this chapter, you will be ready to UV-unwrap complex 3D models both manually and automatically with Blender’s help. This will give us more control over the texture mapping process and allow us to bake custom textures and texture maps.
The following topics will be covered in this chapter:
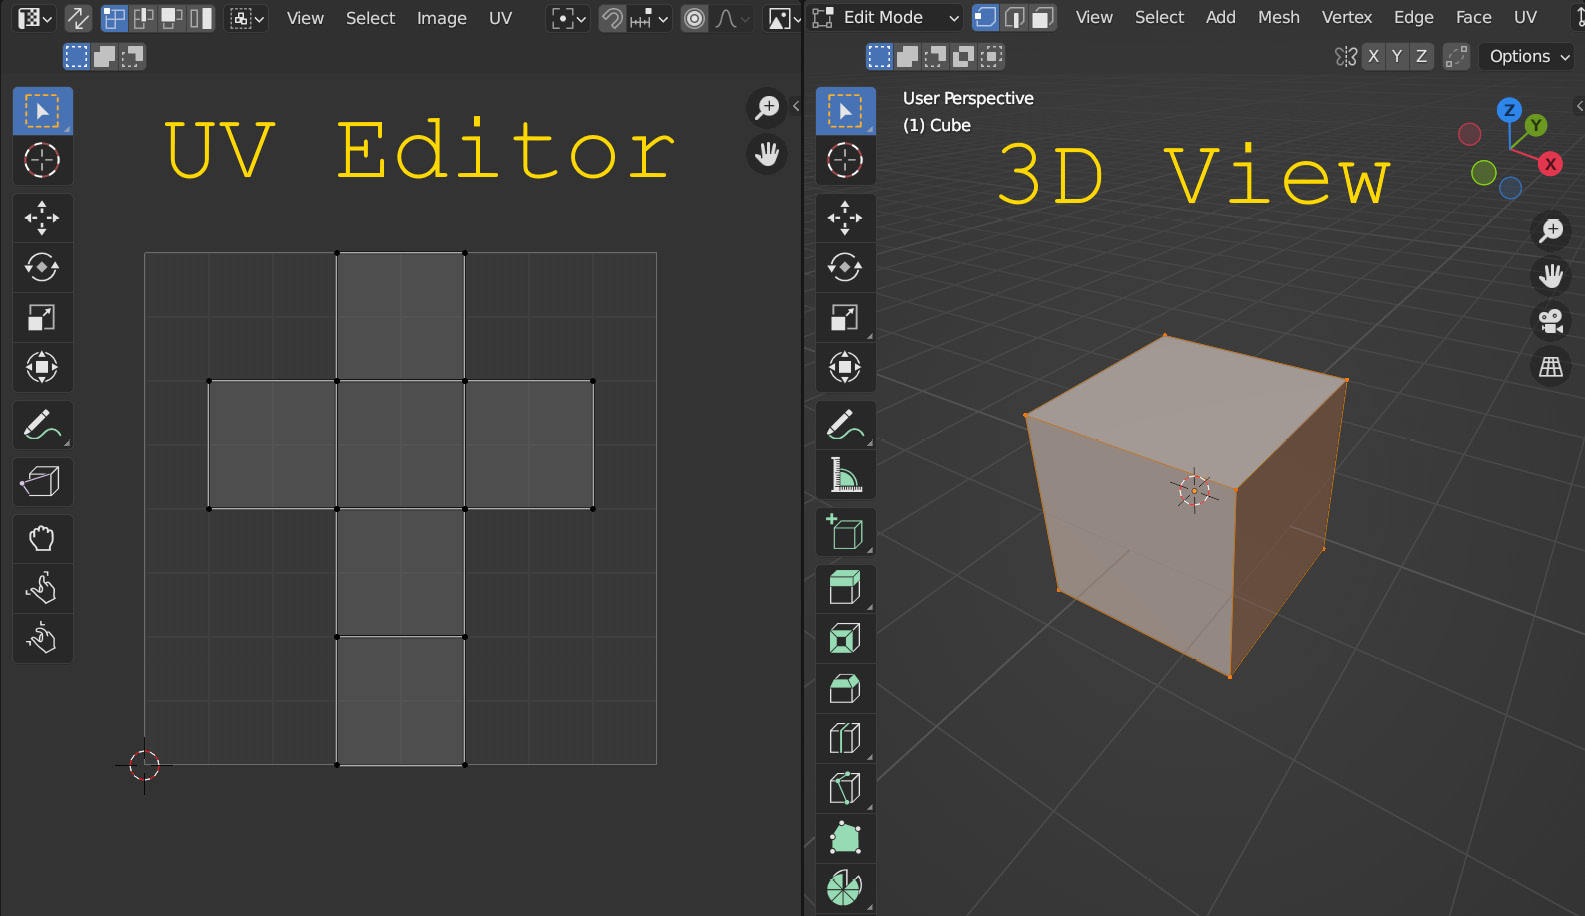
- Understanding UV mapping
- Unwrapping basic shapes
- Unwrapping a cylinder
- Unwrapping...