Reader small image

You're reading from  Virtual Filmmaking with Unreal Engine 5

Product typeBook
Published inFeb 2024
PublisherPackt
ISBN-139781801813808
Edition1st Edition
Tools
Concepts
Right arrow
Author (1)
Hussin Khan
Hussin Khan
author image
Hussin Khan

Hussin Khan is an authorized Unreal Engine Instructor (UAI) with a decade of experience as an educator. As a former head of education at an Academy Award-winning studio, Rhythm & Hues, he was involved in the production of movies such as Life of Pi (2012), 2036 Origin Unknown (2018), and, more recently, Rift, an animated movie made entirely using Unreal Engine by HaZimation. Currently, Hussin runs EFXCO Academy, a creative-based training academy in Malaysia, which offers professional training and certification in graphics and motion design, game development, virtual reality, and visual effects. He is also a certified instructor for Nuke and Unity. Hussin holds a firm conviction that real-time production stands poised as the next major breakthrough in the media and entertainment industry.
Read more about Hussin Khan

Right arrow

Importing 3D Objects and Creating Levels

In the last two chapters, we learned the importance of understanding the filmmaker’s main tool, the camera, and its properties, as well as collecting references and creating storyboards. In this chapter, we will start working on our virtual film in Unreal Engine.

First, we will start to understand the terminology used in film and in Unreal Engine. This knowledge will aid in the creation of a master sequence, which will outline the specific shots and camera angles needed for the scene.

Then we will create an Unreal Engine project, which will serve as the framework for the scene. Once this is done, it will enable us to add and use projects from the Unreal Engine Marketplace, which can include pre-made assets such as environments, props, and characters. After selecting the necessary assets, the next step is to add Levels and create bookmarks to aid in navigating the scene. Finally, we will import 3D objects into the project to flesh...
Technical requirements

All of the project files required for this book can be found through the following link: https://packt.link/gbz/9781801813808.

It contains the following:

  • The shot list, which shows exactly how and when we will be using the provided assets
  • The assets list, which consists of download links for the assets we will be using in the film
  • The 3D models, Textures, images, sound effects, and music we will be using in the film

Understanding Unreal Engine terminology

Unreal Engine is a game engine and has been since the beginning. Only recently, filmmakers started using Unreal Engine to create virtual films, and as such, there is certain terminology that differs between the two. Let us have a closer look:

Figure 4.1: Film versus Unreal Engine terminology

Figure 4.1: Film versus Unreal Engine terminology

A typical feature film is made by shooting takes. The best takes are then chosen as the final shots, which are grouped into scenes. The scenes then become part of a sequence and sequences become the complete film. In Unreal Engine, we will be using a feature called Level Sequencer to achieve this.

In our short film, we will be creating a master sequence (the complete film), which will consist of several scenes, which will in turn be made up of several shots and takes. It is important for us to plan this right at the beginning, so we have clear direction and clarity for production.

Figure 4.2: A typical film structure

Figure 4.2: A typical...

Reviewing our film’s shot list and structure

The shot list provided contains very detailed information about each shot—the location, cast members, visual effects needed, set dressing, sound effects, and music required. It’s good practice to have a shot list handy, especially when working in a team, so each team member has a specific task to carry out. However, the shot list is not set in stone; it is a guide and may change as we progress.

Let’s have a look at our virtual film structure:

Figure 4.3: “A New Beginning” film structure

Figure 4.3: “A New Beginning” film structure

We have a total of three sequences:

  • The spaceship interior sequence (shots 1 through 4): These are comprised of shots entirely done in the spaceship, which includes the flight deck area and the cargo area, where the cryo-pods will be placed
  • The space sequence (shot 5): This is the external shot of the space shuttle launching toward the planet after receiving instructions...

Creating the Unreal Engine project

By now, you should be familiar with running Unreal Engine and creating a project. Here, we are going to recap the process, so the next few steps are a repeat of Chapter 1.

First, open up the Epic Games Launcher. Then go to the Library section and click the Launch button for Unreal Engine version 5.2. This will open the Unreal Project Browser:

Figure 4.4: Creating an Unreal Engine project

Figure 4.4: Creating an Unreal Engine project

Here, do the following:

  1. Click on the GAMES category.
  2. Choose the Third Person template.
  3. Enable Starter Content (this will add additional content to your project so you can use it in your project) and Raytracing.
  4. Choose the project location.
  5. Fill in Project Name – like the name of our film, I will call the project A_New_Beginning. (Remember that Unreal Engine project names cannot be more than 20 characters, nor can they start with numbers, and they certainly can’t have spaces in between the words...

Importing Marketplace projects

As mentioned earlier, the first scene we’re going to work on is the internal part of the spaceship. To do this, we are going to use a free project available in the Unreal Engine Marketplace. The best way to get this project is by using the Epic Games Launcher.

Note

The Unreal Engine Marketplace is an excellent resource to buy and sell digital assets, including 3D models, Textures, animations, music, sound effects, and more, for use in games, films, and other digital projects. In this project, we will be using assets that are available for free.

Here’s how to do this:

  1. Open the Epic Games Launcher and select the Marketplace tab.
  2. In the search window, type Spaceship and press Enter.
  3. You’ll be presented with lots of options, so on the right of the screen, filter for free content by selecting Free under Max Price.
Figure 4.6: Choosing the Free option

Figure 4.6: Choosing the Free option

  1. Select Spaceship Interior...

Organizing the Outliner

In the Outliner panel (at the top right of the screen), you can see the list of items currently populating the scene. These consist of cameras, decals, lights, and 3D static meshes. Currently, there are 1,046 items (or Actors).

Figure 4.12: The Outliner

Figure 4.12: The Outliner

Note

All the items in the Content Browser are referred to as assets, but once they are used in the Level (scene), they are known as Actors.

Let’s start by removing Actors we don’t need and moving similar Actors into their respective folders:

  1. Select all the cameras in the Outliner and press the Delete key on your keyboard.

Figure 4.13: Deleting the cameras

Figure 4.13: Deleting the cameras

  1. We also need to delete all the SphereReflectionCapture Actors and the LightmassImportanceVolume Actors too.
  2. Next, select all the Decal Actors and click the Create Folder icon at the top right of the panel.
Figure 4.14: Creating folders

Figure 4.14: Creating...

Removing Lightmaps

In Unreal Engine 5, Epic Games introduced Lumen, a fully dynamic global illumination and reflection system. Prior to this, the precomputed (or “baked”) lighting method was used, where the light and shadow information was permanently “baked” onto the surface of 3D objects, thus moving the lights or changing their color and intensity would not have any effect. The only way was to re-bake the lights, which would usually take anything from minutes to hours, depending on the complexity of the scene. With Lumen, all light properties and positions are changeable in real time. This is an absolute game-changer!

To take advantage of the Lumen real-time lighting, we will need to ensure that we remove all remnants (if any) of baked lights in the scene. Here’s how to do so:

  1. Go to the Window drop-down menu and select World Settings.
Figure 4.16: Opening the World Settings panel

Figure 4.16: Opening the World Settings panel

  1. In the World Settings...

Creating Levels

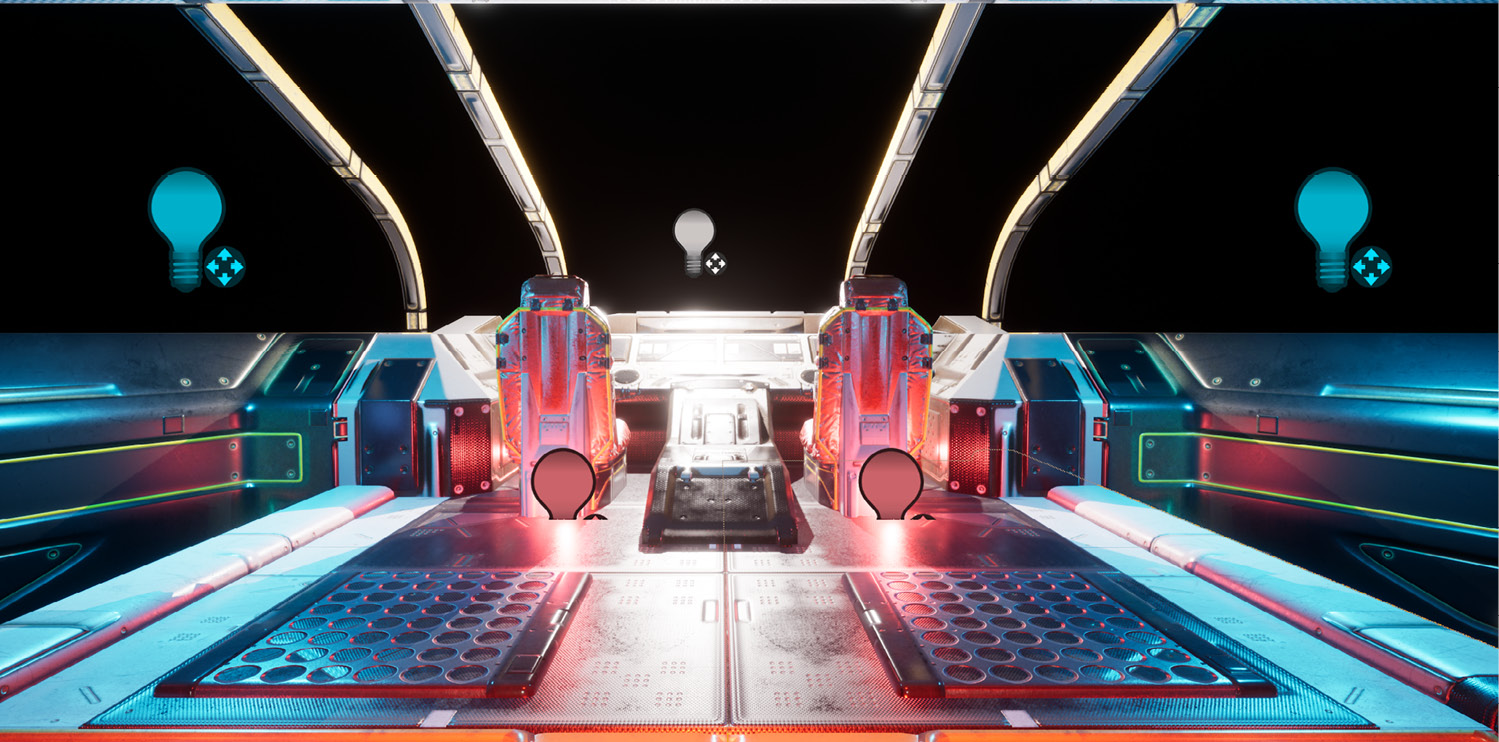
Referring to the storyboard, in our first Level (sequence), we have five shots in the spaceship. Here is the breakdown:

  • Shot 1: Fade-in and spaceship console lighting up
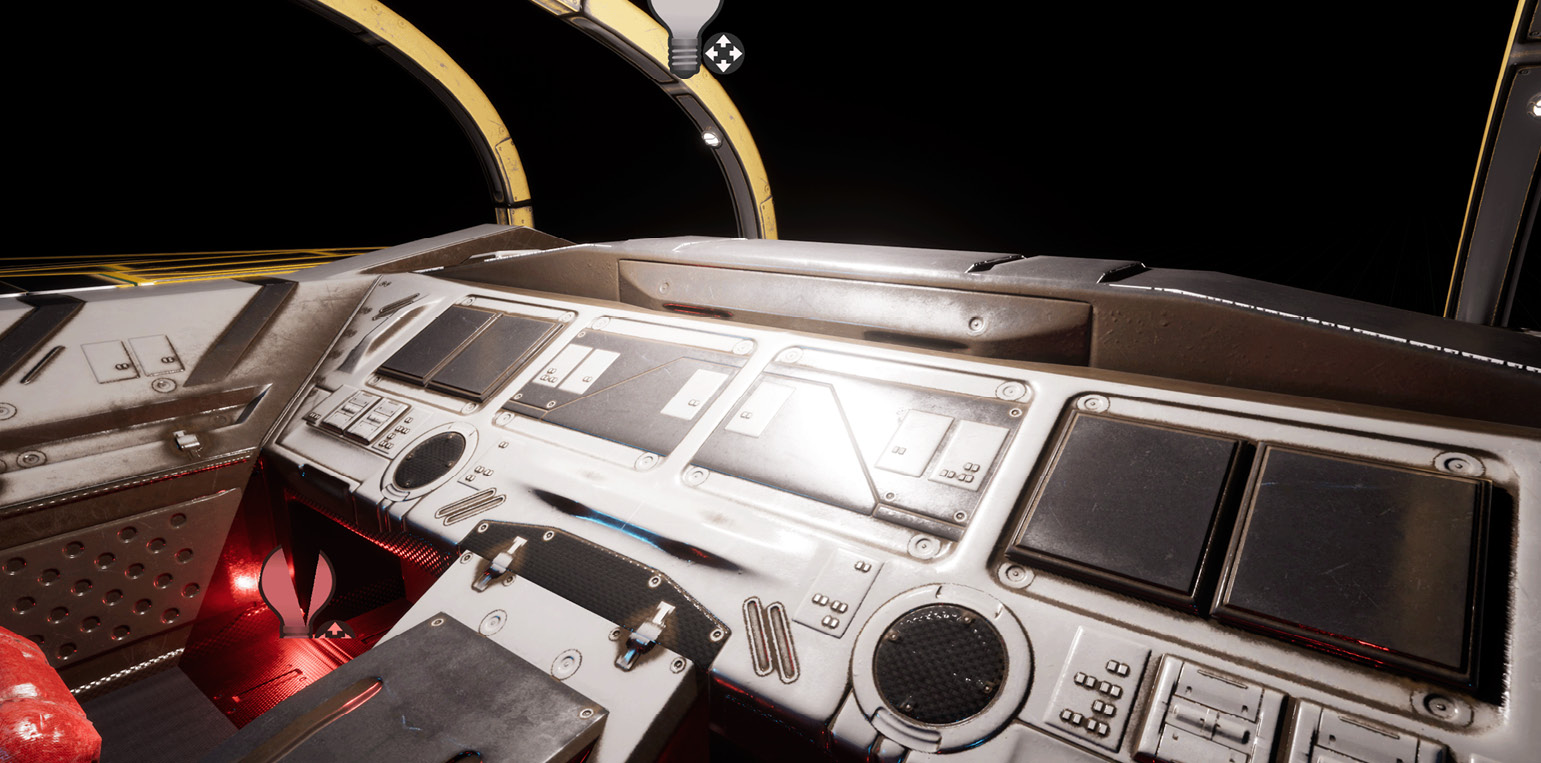
  • Shot 2: Close-up of console displaying a message indicating that the planet is habitable
  • Shot 3: Showing the cryo-pods
  • Shot 4: Showing the computer’s landing instructions screen

You can see the four shots that will make up the first sequence here:

Figure 4.22: Spaceship internal shots

Figure 4.22: Spaceship internal shots

Now that we’ve established our four shots, let’s go ahead and create our first Level/sequence:

  1. Select the Content folder in the Content Browser, then right-click and choose New Folder. Name the new folder A_New_Beginning. Then, open the folder and create another folder inside it named Levels.
Figure 4.23: Creating a new Levels folder

Figure 4.23: Creating a new Levels folder

We will use Demonstration as our first Level, but we will have to rename...

Adding Bookmarks

We initially discussed Bookmarks in Chapter 2. Now, it is time to create Bookmarks for our planned shots so that when we revisit this Level later, in Chapter 10, we can add cameras and animate them. Here’s how to create Bookmarks for planned shots:

  1. Move the current view closer to the bridge of the spaceship, then press Ctrl + 1 on the keyboard to create Bookmark 1. We will use this Bookmark for shot 1.
Figure 4.27: Bookmark 1 for shot 1

Figure 4.27: Bookmark 1 for shot 1

  1. Since shot 2 and shot 4 will be in the same vicinity, we will create a Bookmark for both shots here. Move closer to the console and set it in such a way that the whole console can be seen, as shown in Figure 4.28. Press Ctrl + 2 to create Bookmark 2.
Figure 4.28: Bookmark 2 for shots 2 and 4

Figure 4.28: Bookmark 2 for shots 2 and 4

  1. To create Bookmarks for the cryo-pods area shot (shot 3), we will move to the back of the spaceship. Go past the two doors and you will come to an area...

Importing 3D objects

To import the cryo-pod, we will be using a 3D model downloaded from Sketchfab (you can find the exact link in the provided assets list). I have made some modifications to the downloaded 3D model, including adding Material IDs in Blender, which will allow us to add custom Materials to the different parts of the cryo-pods (we will learn about creating custom Materials in Chapter 6).

Note

Material IDs are pre-defined surfaces created in a 3D application. This means surfaces of a 3D object can be isolated and textured differently. You’ll find the full instructions on how to create Material IDs using Blender in the Appendix of this book. Saying that, it’s good to have some basic skills with DCC software such as Blender (https://www.blender.org/), in case you need to augment the downloaded 3D assets before importing them into Unreal Engine.

It is also worth noting that Sketchfab, a great repository for buying and selling 3D assets, will likely...

Building the space scene

In the previous sections, we successfully created the first sequence of the film by adding the internal scene of the spaceship to the project, adding Bookmarks, and importing the cryo-pods. In this section, we will be creating the second sequence, which you can see here:

Figure 4.37: The completed space scene

Figure 4.37: The completed space scene

By now, you probably already have an idea that we are separating our sequences into different Levels. This will become very handy when we assemble our master sequence in Chapter 10.

This new sequence will contain the following Actors:

  • The Earth, moon, and stars: These are created using the Unreal Engine Modeling tool
  • The spaceship: This is imported into Unreal Engine from the downloaded project file

To get started, we will need to create a new Level.

Creating an empty Level

Here’s how to create an empty Level for our second sequence:

  1. Go to File and select New Level (Ctrl + N). In...

Summary

In this chapter, you have started to understand some Unreal Engine terminology and created your first Unreal Engine project. With that, you now know how to add free (or paid) Marketplace content to your Unreal Engine projects, and have learned why organizing the Outliner and the Content Browser using folders is an important workflow for any Unreal Engine project. Furthermore, you have also gained the knowledge of how easy it is to import 3D objects and Textures into Unreal Engine and how to create a simple custom Stars Material.

In the upcoming chapters, we will be revisiting this Level to add Textures, Materials, and camera animation. Specifically, in the next chapter, we will learn about the Quixel Bridge library and Quixel Megascans assets to enhance the planet’s environment.

lock icon
The rest of the chapter is locked
You have been reading a chapter from
Virtual Filmmaking with Unreal Engine 5
Published in: Feb 2024Publisher: PacktISBN-13: 9781801813808
Register for a free Packt account to unlock a world of extra content!
A free Packt account unlocks extra newsletters, articles, discounted offers, and much more. Start advancing your knowledge today.
undefined
Unlock this book and the full library FREE for 7 days
Get unlimited access to 7000+ expert-authored eBooks and videos courses covering every tech area you can think of
Renews at $15.99/month. Cancel anytime

Author (1)

author image
Hussin Khan

Hussin Khan is an authorized Unreal Engine Instructor (UAI) with a decade of experience as an educator. As a former head of education at an Academy Award-winning studio, Rhythm & Hues, he was involved in the production of movies such as Life of Pi (2012), 2036 Origin Unknown (2018), and, more recently, Rift, an animated movie made entirely using Unreal Engine by HaZimation. Currently, Hussin runs EFXCO Academy, a creative-based training academy in Malaysia, which offers professional training and certification in graphics and motion design, game development, virtual reality, and visual effects. He is also a certified instructor for Nuke and Unity. Hussin holds a firm conviction that real-time production stands poised as the next major breakthrough in the media and entertainment industry.
Read more about Hussin Khan