


Creating semi-procedural materials
Thus far, we’ve only worked with materials that we have applied to relatively small 3D models, where a single texture or color was enough to make them look good. However, that isn’t the only type of asset that we’ll encounter in a real-life project. Sometimes we will have to deal with bigger meshes, making the texturing process not as straightforward as we’ve seen so far. In those circumstances, we are forced to think creatively and find ways to make that asset look good, as we won’t be able to create high enough resolution textures that can cover the entirety of the object.
Thankfully, Unreal provides us with a very robust Material Editor and several ways of tackling this issue, as we are about to see next through the use of semi-procedural material creation techniques. This approach to the material-creation process relies on standard effects that aim to achieve a procedural look—that is, one that seems to follow mathematical functions in its operation rather than relying on existing textures. This is done with the intention of alleviating the problems inherent to using those assets, such as the appearance of obvious repetition patterns. This is what we’ll be doing in this recipe.
Getting ready
We are about to use several different assets to semi-procedurally texture a 3D model, but all the resources that you will need to use come bundled within the Starter Content asset pack in Unreal Engine 5. Be sure to include it if you want to follow along using the same textures and models I’ll be using, but don’t worry if you want to use your own, as everything we are about to do can be done using very simple models.
As always, feel free to open the scene named 02_05_ Start if you are working on the Unreal project provided alongside this book.
How to do it…
Let’s start this recipe by loading the 02_05_ Start level. Looking at the object at the center of the screen, you’ll see a large plane that acts as a ground floor, which has been placed there just so that we can see the problems that arise when using textures to shade a large-scale surface—as evidenced by the next screenshot:
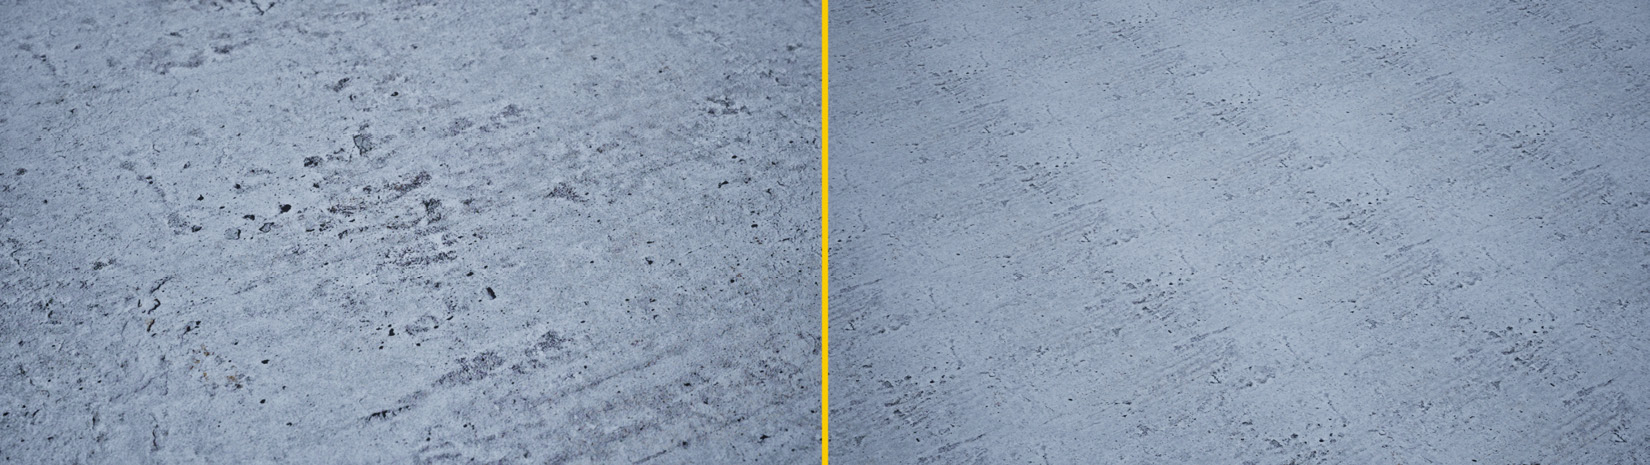
Figure 2.23 – A close-up look at the concrete floor next to a faraway shot showing the repetition of the same pattern over the entirety of the surface
As you can see, the first image in the screenshot could actually be quite a nice one, as we have a concrete floor that looks convincing. However, the illusion starts to fall apart once the camera gets farther from the ground plane. Even though it might be difficult to notice at first, the repetition of the texture across the surface starts to show up. This is what we are going to try to fix in this recipe: creating materials that look good both up close and far from the camera, all thanks to semi-procedural material creation techniques. Let’s dive right in:
- Open the material being applied to the plane, M_SemiProceduralConcrete_Start. You should see a lonely Texture Sample node (T_Concrete_Poured_D) being driven by a Texture Coordinate node, which is currently adjusting the tiling. This will serve as our starting point.
- Add another Texture Sample node and set the T_Rock_Marble_Polished_D texture from the Starter Content asset pack as its value. We are going to blend between these first two images thanks to the use of a third one, which will serve as a mask.
Using multiple similar assets can be key to creating semi-procedural content. Blending between two or more textures into a random pattern helps alleviate the visible tiling across big surfaces.
- Connect the output of the existing Texture Coordinate node to the UVs input pin of the previous Texture Sample node we created.
The next step will be to create a Lerp node, which we can use to blend between the first two images. We want to use a texture that has a certain randomness to it, and the Starter Content asset pack includes one named T_MacroVariation that could potentially work. However, we’ll need to adjust it a little bit, as it currently has a lot of gray values that wouldn’t work too well for masking purposes. Using it in its current state would have us blend between two textures simultaneously when we really want to use one or the other based on the previous texture.Let’s adjust the texture to achieve that effect.
- Create a new Texture Sample node and assign the T_MacroVariation asset to it.
- Include a Cheap Contrast node after the previous Texture Sample node and hook its input pin to the output of the said node.
- Add a Constant node and connect it to the Contrast slot in the Cheap Contrast node. Give it a value of 0.5 so that we achieve the desired effect we mentioned before.
Here is a screenshot of what we should have achieved through this process:
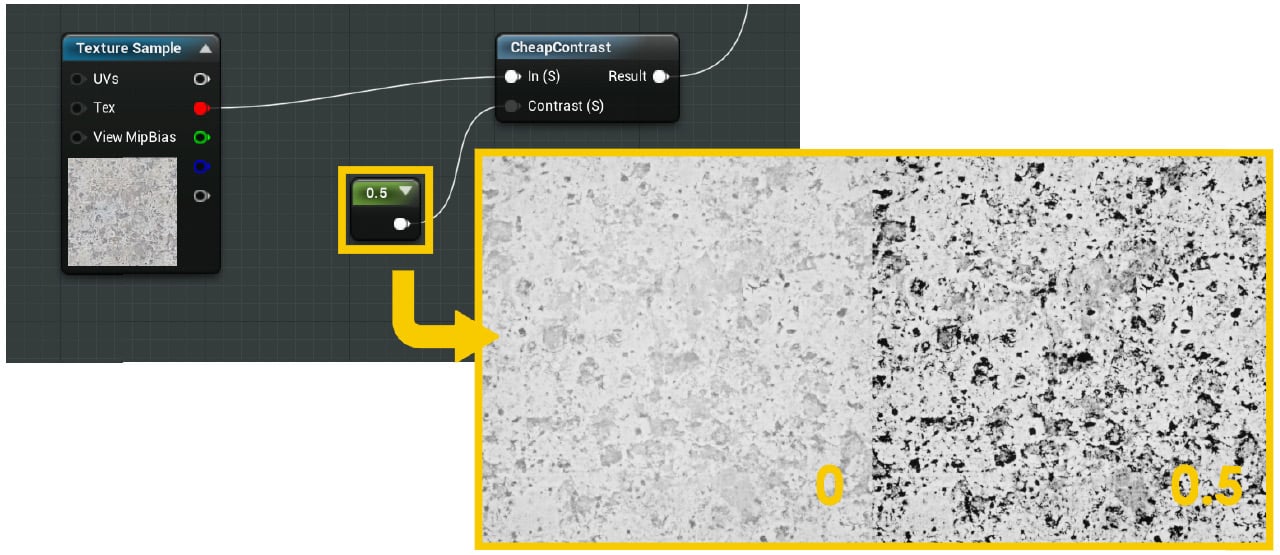
Figure 2.24 – The previous set of nodes and their result
- Create a Lerp node, which we’ll use in the next step to combine the first two Texture Sample nodes according to the mask we created in the previous step.
- Connect the output nodes of the first two texture assets (T_Rock_Marble_Polished_D and T_Concrete_Poured_D) to the A and B input pins of the Lerp node and connect the Alpha input pin to the output pin of the Cheap Contrast node. The graph should look something like this:
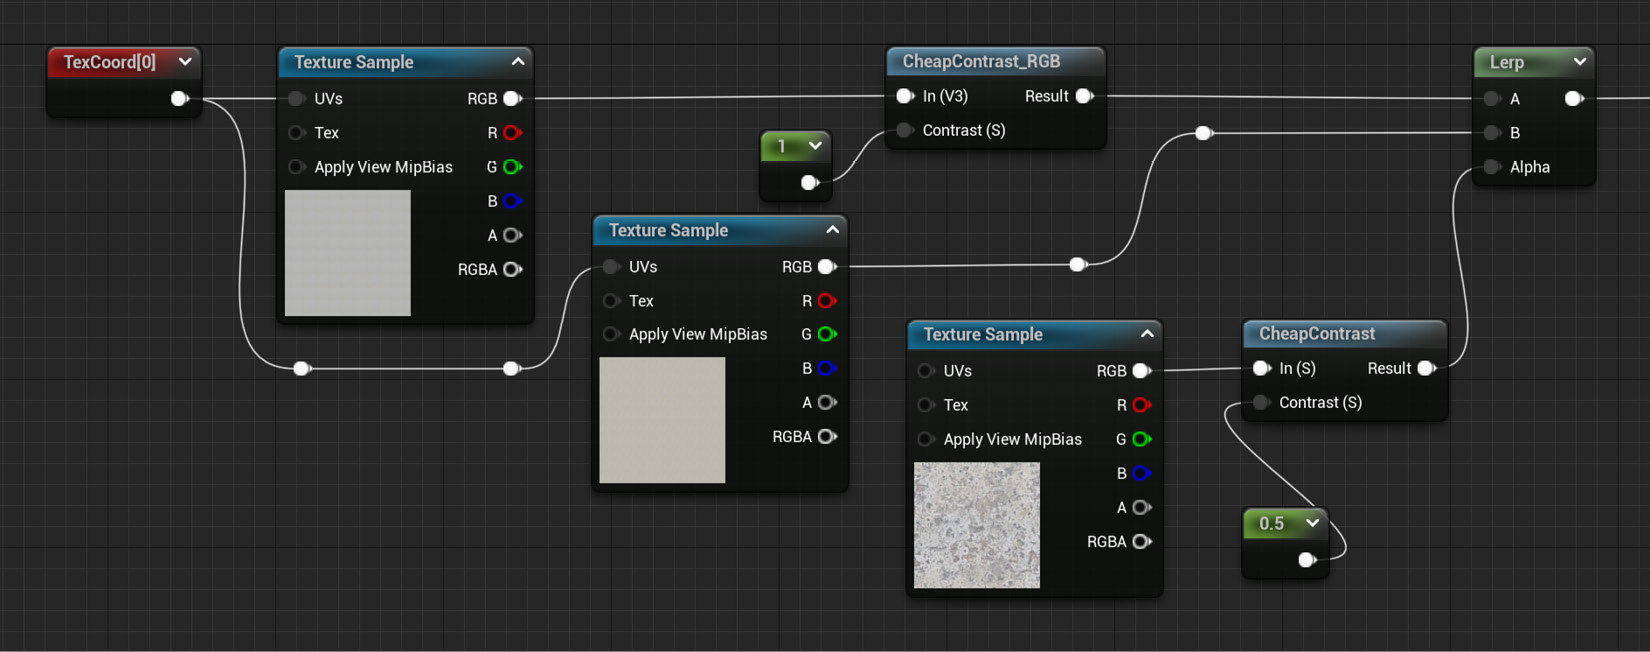
Figure 2.25 – The look of the material graph so far
We’ve managed to add variety and randomness to our material thanks to the nodes we created in the previous steps. Despite that, there’s still room for improvement, as we can take the previous approach one step further. We will now include a third texture, which will help further randomize the shader, as well as give us the opportunity to further modify an image within Unreal.
- Create a new couple of nodes—a Texture Coordinate node and a Texture Sample one.
- Assign the T_Rock_Sandstone_D asset as the default value of the Texture Sample node, and give the Texture Coordinate node a value of 15 in both the U Tiling and V Tiling fields.
- Continue by adding a Desaturation node and a Constant node right after the previous Texture Sample node. Give the Constant node a value of 0.8 and connect it to the Fraction input pin of the Desaturation node, whose job is to desaturate or remove the color from any texture we provide it, creating a black-and-white version of the same asset instead.
- Connect the output of the Texture Sample node to the Desaturation node.
This is what we should be looking at:
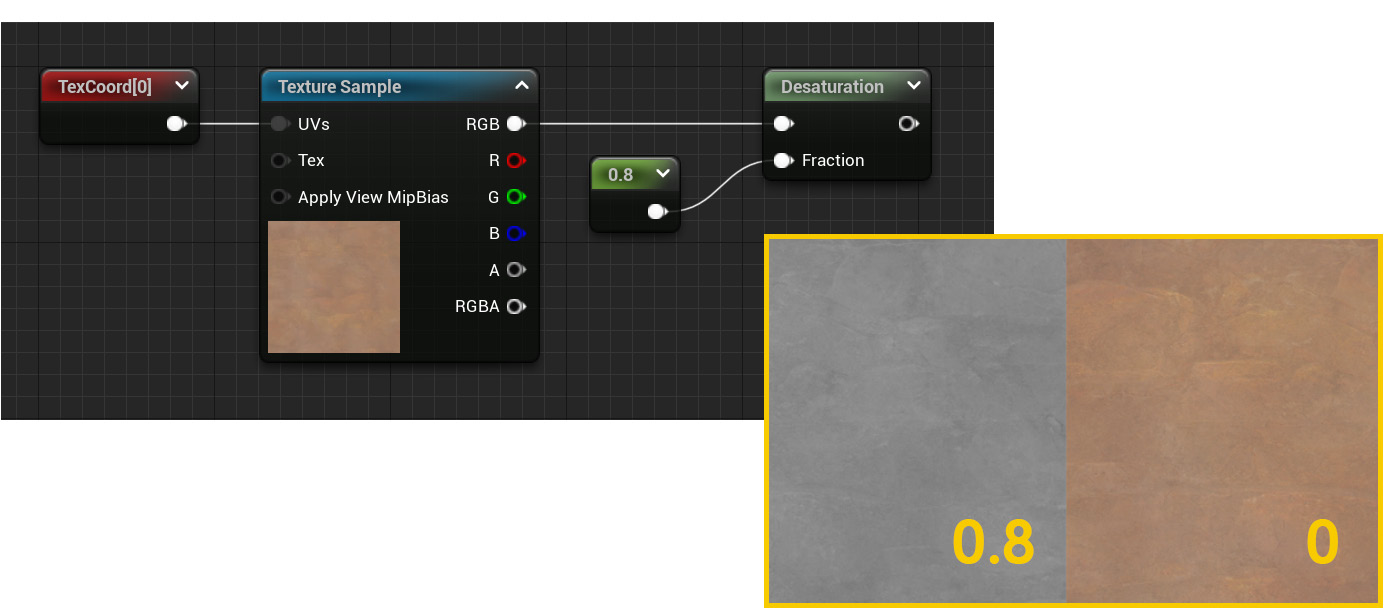
Figure 2.26 – The effect of the Desaturation node
Following these steps has allowed us to create a texture that can work as concrete, but that really wasn’t intended as such. Nice! Let’s now create the final blend mask.
- Start by adding a new Texture Sample node and assign the T_MacroVariation texture as its default value.
- Continue by including a Texture Coordinate node and give it a value of 2 in both its U Tiling and V Tiling parameters.
- Next, add a Custom Rotator node and connect its UVs input pin to the output of the previous Texture Coordinate one.
- Create a Constant node and feed it to the Rotation Angle input pin of the Custom Rotator node. Give it a value of 0.167, which will rotate the texture by 60 degrees.
Important note
You might be wondering why a value of 0.167 translates to a rotation of 60 degrees. This is for the same reason we saw a couple of recipes ago—the Custom Rotator node maps the 0-to-360-degree range to another one that goes from 0 to 1. This makes 0.167 roughly 60 degrees: 60.12 degrees if we want to be precise!
- Hook the Custom Rotator node into the UVs input pin of the Texture Sample node.
- Create a new Lerp node and feed the previous Texture Sample node into the Alpha input pin.
- Connect the A pin to the output of the original Lerp node and connect the B pin to the output of the Desaturation node.
- Wire the output of the previous Lerp node to the Base Color input pin in the main material node. We’ve now finished creating random variations for this material!
One final look at the plane in the scene with the new material applied to it should give us the following result:
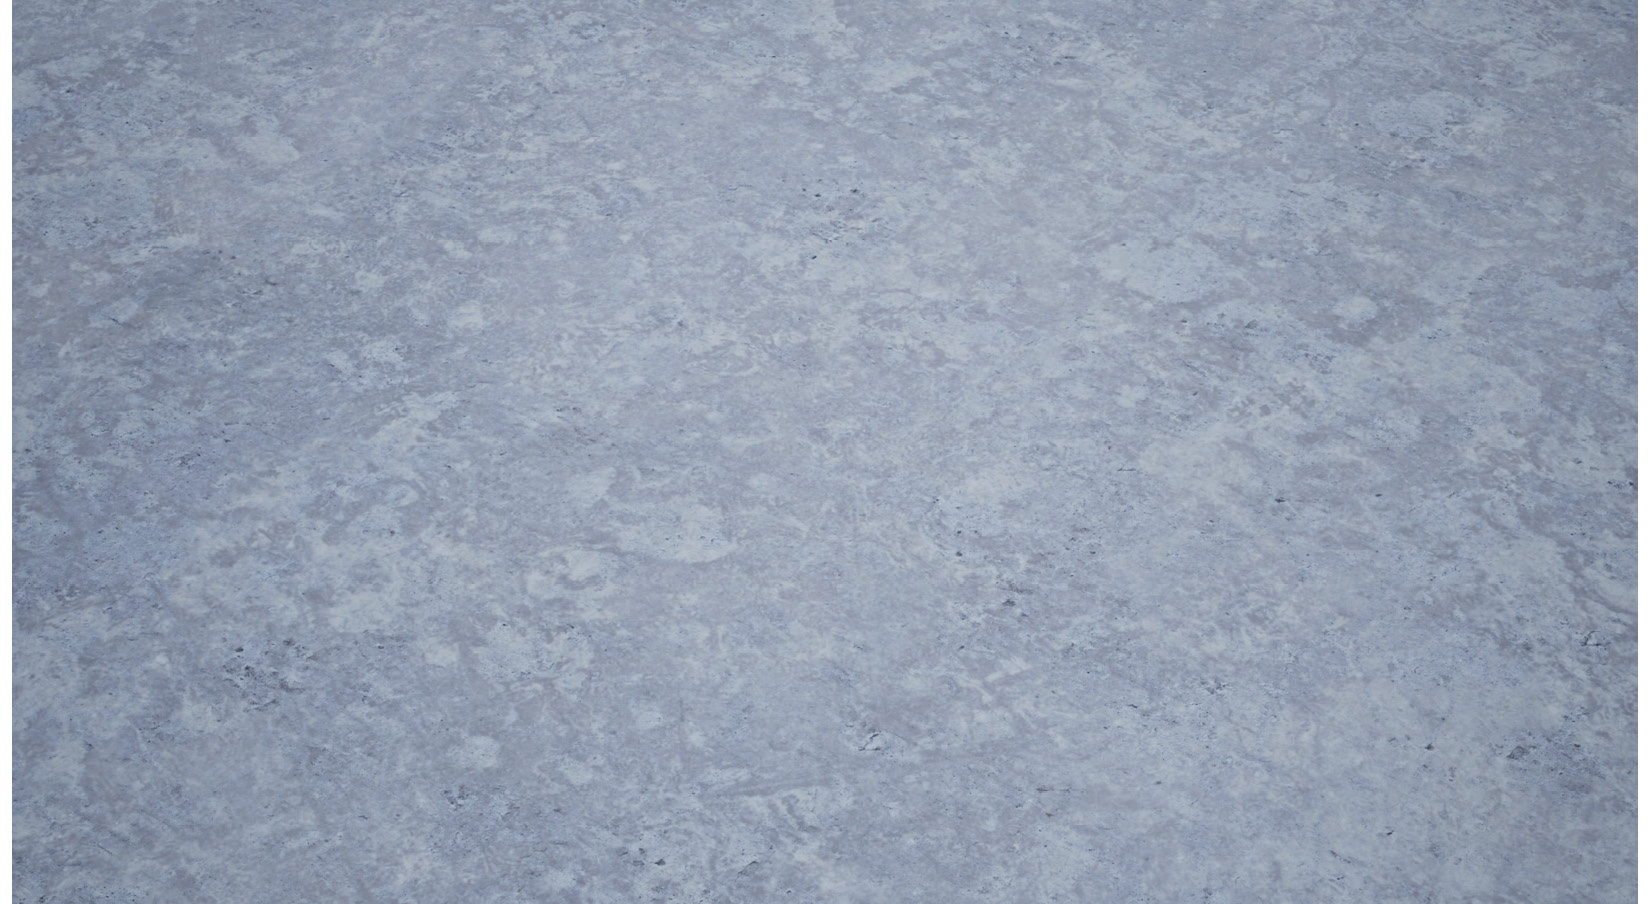
Figure 2.27 – The final look of the material
The final shader looks good both up close and far away from the camera. This is happening thanks to the techniques we’ve used, which help reduce the repetition across our 3D models quite dramatically. Be sure to remember this technique, as I’m sure it will be quite handy in the future!
How it works…
The technique we used in this recipe is quite straightforward—just introduce as much randomness as you can until the eye gets tricked into thinking that there’s no single texture repeating endlessly. Even though this principle can be simple to grasp, it is by no means simple—humans are very good at recognizing patterns, and as the surfaces we work on increase in size, so does the challenge.
Choosing the right textures for the job is part of the solution—be sure to blend gently between different layers, and don’t overuse the same masks all the time. Doing so could result in our brains figuring out what’s going on. This is a method that has to be used gently.
Focusing now on the new nodes that we used in this recipe, we probably need to highlight the Desaturation one. It is very similar to what you might have encountered in other image-editing programs: it takes an image and gradually takes the “color” away from it. I know these are all very technical terms—not!—but that is the basic idea. The Unreal node does the same thing: we start from an RGB image and we use the Fraction input to adjust the desaturation of the texture. The higher the value, the more desaturated the result. Simple enough!
Something else that I wanted to mention before we move on is the real procedural noise patterns available in Unreal. In this recipe, we created what can be considered semi-procedural materials through the use of several black-and-white gradient-noise textures. Those are limited in that they too repeat themselves, just like the images we hooked to the Base Color property—it was only through smart use of them that we achieved good enough results. Thankfully, we have access to the Noise node in Unreal, which gets rid of that limitation altogether. You can see some examples here:

Figure 2.28 – The Noise node and several of its available patterns
This node is exactly what we are looking for to create fully procedural materials. As you can see, it creates random patterns, which we can control through the settings in the Details panel, and the resulting maps are similar to the masks we used in this recipe.
The reason why we didn’t take advantage of this asset is that it is quite taxing with regard to performance, so it is often used to create nice-looking materials that are then baked. We’ll be looking at material-baking techniques in a later chapter, so be sure to check it out!
See also
You can find an extensive article on the Noise node at the following link:
https://www.unrealengine.com/es-ES/tech-blog/getting-the-most-out-of-noise-in-ue4
It’s also a great resource if you want to learn more about procedural content creation, so be sure to give it a go!