


Automating with modifiers
A modifier is a non-destructive way of applying an operation to change an object’s geometry. This is often preferred when you don’t want to take repetitive steps or the operation is complex enough that you don’t want to directly alter the object’s geometry.
When you applied the Solidify modifier, you must have seen that there are so many other modifiers. Could you imagine what you can do with each one? How about you use a few modifiers in a row? Yes, you read that right. You can stack up many modifiers and create complex shapes with little effort.
However, there is an important detail you must pay attention to – their order matters! New modifiers are always added at the bottom, and they work in conjunction with the previous modifiers in the stack. Thus, the effect is compounding. If you logically stack your modifiers, you could create something as complex as what’s shown in the following screenshot with only a few primitive objects in no time:
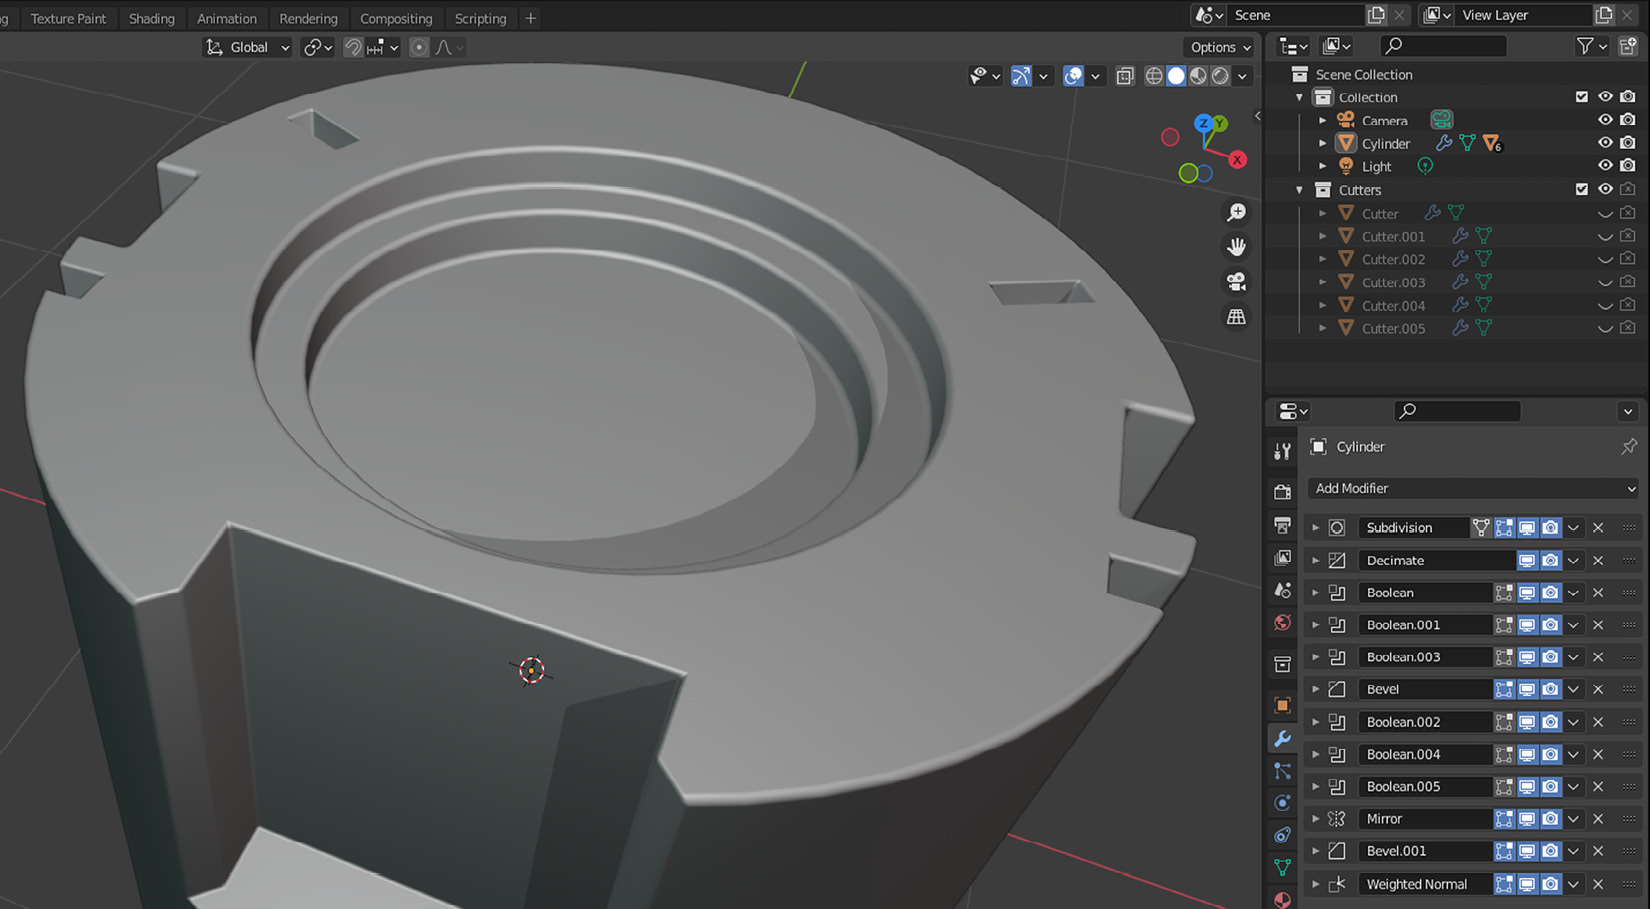
Figure 1.16 – Modifiers help you create something this complex easily
This object is using primitives such as cylinders and cubes, but the result looks interesting. This is thanks to a hefty list of modifiers and the order that they’ve been used. Some of the modifiers have been applied multiple times with different values, but here is a list:
- Subdivision
- Decimate
- Boolean
- Bevel
- Mirror
- Weighted Normal
At the time of writing, Blender has over 50 modifiers. Describing each would fill a book. Most likely, you’ll stick with the modifiers that are in the Generate category. Here is a set of modifiers you’ll use most of the time:
- Boolean: This is one of those modifiers that is used a lot and it comes in three sub-modes:
- Difference: Subtracts the value of one object from another
- Union: Will combine both objects
- Intersect: Will only keep what’s common in both meshes
- Bevel: Sometimes, you want to have more detail, especially along sharp edges so that they don’t look too harsh – the more surface there is for the light sources to reflect on, the more realistic it’ll look to the eye. This modifier will also work on vertices if you want to soften those sharp corners.
- Array: This makes copies of the object it’s assigned to in different axes, with or without some offset if you wish. You could have a fixed number of copies or fill a particular length with as many copies as you can fit in that distance.
- Mirror: This is like the Array modifier except it creates one copy along the axis you select. You can pick multiple axes. Thus, it’s possible to start with only a quarter of the object and mirror it on the X and Y axis so that you have one whole object. This allows you to keep your changes to a minimum in the original quarter so that you can mirror your changes to the rest of the mesh.
When you add your modifiers, it’s sometimes not obvious which order you should stack them in. Luckily, it’s possible to change their order or temporarily disable them by using the buttons that are part of the modifier’s header.
While creating rings for the barrel, you could have used a different technique to achieve the same result: extrusion. This would require you to select what needs to be extruded – in this case, all the faces that make up the ring – and extrude along each face’s outward-facing direction. Extrusion, in essence, is a technical term for moving vertices, faces, or edges.
Modifiers have a big advantage compared to classic methods such as pushing and pulling vertices and faces around. Wouldn’t it be convenient to come back later and fine-tune your changes further? If you happen to select the lid now and come back to the Body object, the modifier will still be there. You won’t have this kind of flexibility with permanent mesh modifying techniques such as extrusion.