Search icon
Arrow left icon
All Products
Best Sellers
New Releases
Books
Videos
Audiobooks
Learning Hub
Newsletters
Free Learning
Arrow right icon
Unity Virtual Reality Projects

You're reading from  Unity Virtual Reality Projects

Product type Book
Published in Sep 2015
Publisher Packt
ISBN-13 9781783988556
Pages 286 pages
Edition 1st Edition
Languages
Author (1):
Jonathan Linowes Jonathan Linowes
Profile icon Jonathan Linowes

Table of Contents (18) Chapters

Unity Virtual Reality Projects
Credits
About the Author
About the Reviewers
www.PacktPub.com
Preface
Virtually Everything for Everyone Objects and Scale VR Build and Run Gaze-based Control World Space UI First-person Character Physics and the Environment Walk-throughs and Rendering Using All 360 Degrees Social VR Metaverse What's Next?
Index

Chapter 9. Using All 360 Degrees

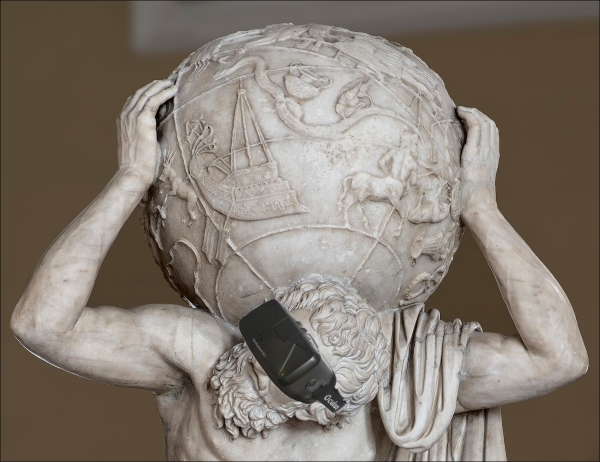
Statue of Atlas holding the celestial sphere, 2nd Cent BCE. (source http://ancientrome.ru/art/artworken/img.htm?id=4657).

360-degree photos and videos are different ways of using virtual reality that are accessible to consumers today, both in terms of experiencing them as well as producing and publishing them. Viewing prerecorded images requires much less compute power than rendering full 3D scenes, and this works very well on mobile VR devices. In this chapter, we will explore the following topics:

  • Using textures to view globes, panoramas, and photo spheres

  • Understanding what 360-degree media is?

  • Adding a photosphere and a 360-degree video to your Unity projects

  • What a field of view is and how one can record a 360-degree video?

Note that the projects in this chapter are separate and not directly required by the other chapters in this book. If you decide to skip any of it or not save your work, that's okay.

360-degree media


The "360-degree" and "virtual reality" terms have been tossed around a lot lately, often in the same sentence. Consumers may be led to believe that it's all the same thing, it's all figured out, and it's all very easy to produce, when in fact, it is not so simple.

Generally, the "360-degree" term refers to the viewing of prerecorded photos or videos in a manner that allows you to rotate your view's direction to reveal content that was just outside your field of view.

Non-VR 360-degree media has become relatively common. For example, many real-estate listing sites provide panoramic walkthroughs with a web-based player that lets you interactively pan around to view the space. Similarly, YouTube supports the uploading and playback of 360-degree videos and provides a player with interactive controls to look around during the playback. Google Maps lets you upload 360-degree still photosphere images, much like their Street View tool, that you can create with an Android or iOS app...

Crystal balls


To begin, let's have a little fun while we apply a regular rectangular image as a texture to a sphere, just to see what it does and how bad it looks.

First, set up a new scene for this chapter by performing the following steps:

  1. Create a new scene by navigating to File | New Scene. Then, navigate to File | Save Scene As... and name it 360Degrees.

  2. Create a new plane by navigating to GameObject | 3D Object | Plane and reset its transformation using the Transform component's gear icon | Reset.

  3. Insert an instance of MeMyselfEye from the project prefab, set its Position to (0, 1, -1), and delete the default Main Camera.

Now, create the first sphere and write a rotator script while you're at it. I'm using the EthanSkull.png image that was provided with this book (drag and drop it into the Project Assets/Textures folder). Then, perform the following steps:

  1. Create a new sphere by navigating to GameObject | 3D Object | Sphere, reset its transformation using the Transform component's gear icon...

Magic orbs


For the next example, we'll look at the sphere from the inside, mapping an ordinary image onto its inside surface. Then, we'll put a solid colored shell around the outside. So, you have to actually walk up to the sphere and stick your head into it to see what's there!

Follow these steps to build it (I'm using the GrandCanyon.png image that we introduced back in Chapter 2, Objects and Scale, but you can use any image—preferably a landscape with big sky):

  1. Move Sphere 1 out of the way and set its Position to (-3, 1.5, -1.5).

  2. Create a new sphere by navigating to GameObject | 3D Object | Sphere, set its Position to (0, 1.5, 0), and name it Sphere 2.

  3. Disable its Sphere Collider component by unchecking the checkbox.

  4. Create a new material by navigating to Assets | Create | Material and name it GrandCanyonInward.

  5. Drag the GrandCanyonInward material onto Sphere 2.

  6. Locate the GrandCanyon texture image and drag it onto the GrandCanyonInward component's Albedo texture (onto the square towards the...

Panoramas


What if the image was really wide, such as a panoramic photo that you can take with your phone? Let's try this and map it onto a cylinder.

I was in Los Angeles last year. I hiked to the top of the Hollywood sign, where I took two 180-degree panoramic images with my phone, and later I quickly stitched them together in Gimp. The Hollywood.png image is included with this book, or you can use your own panorama:

Putting it together, using the following steps:

  1. Move Sphere 2 out of the way and set its Position to (-3, 1.5, 0).

  2. Create a new cylinder by navigating to GameObject | 3D Object | Cylinder, set its Position to (0, 1.5, 0), and name it Cylinder 3.

  3. Set the Scale to (2, 0.5, 2).

  4. Disable its Capsule Collider component by unchecking the checkbox.

  5. Drag the Hollywood texture onto the cylinder.

  6. Ensure that the Cylinder 3 object is selected. On its Hollywood material component in Inspector, navigate to Shader | Custom | InwardShader.

A default cylinder in Unity is 2 units tall and 1 unit wide...

Infographics


An infographic is a visual chart or diagram used to represent information or data. To find examples, just do a Google Image search for "infographics". Infographics can get quite large, which makes them difficult to view on a desktop computer screen, let alone a mobile phone. However, we have virtually infinite space to work with in VR. Let's take a look.

I came across this awesome Histomap chart depicting the history of the world, produced in 1931 by John B. Sparks for Rand McNally. The original is 158 cm tall by 31 cm wide, with an aspect ratio of about 1:5. We'll map it onto a half of the cylinder. That's 180 degrees, twice:

Let's VR it, as follows:

  1. Move Cylinder 3 out of the way and set its Position to (3, 1.5, -3.5).

  2. Create a new cylinder by navigating to GameObject | 3D Object | Cylinder, set its Position to (0, 11.5, 0), and name it...

Equirectangular projections


Ever since it was discovered that the Earth is round, cartographers and mariners have struggled with how to project the spherical globe onto a two-dimensional chart. The variations are plentiful and the history is fascinating (if you're fascinated by that sort of thing!) The result is an inevitable distortion of some areas of the globe.

Note

To learn more about map projections and spherical distortions, visit http://en.wikipedia.org/wiki/Map_projection.

As a computer graphics designer, it's perhaps a little less mysterious than it was to ancient mariners because we know about UV Texture mapping.

3D computer models in Unity are defined by meshes—a set of Vector3 points connected with edges, forming triangular shaped facets. You can unwrap a mesh (in Blender, for instance) into a flattened 2D configuration to define the mapping of texture pixels to the corresponding areas on the mesh surface (the UV coordinates). A globe of the Earth, when unwrapped, will be distorted...

Globes


First, let's use a standard Unity sphere, such as the one that we used in the earlier Crystal Ball example with the Earth texture image. Import this Tissot_euirectangular.png image, which is included with this book and perform the following steps:

  1. Move Cylinder 4 out of the way and set its Position to (-3, 0, -3.5).

  2. Create a new sphere by navigating to GameObject | 3D Object | Sphere, set its Position to (0, 1.5, 0), and name it Sphere 5. Add the Rotator script if you want.

  3. Drag the texture named Tissot_equirectangular onto the sphere.

  4. Try it in VR. Take a close look at the globe, as shown in the following image:

Note that unfortunately, the Tissot circles are oval, not circular, except along the equator. It turns out that the default sphere provided in Unity does not mesh well for equirectangular texture maps. Instead, I have provided one designed specifically for this purpose, PhotoSphere.fbx (which happens to be the default sphere model in 3D Studio Max). Let's try it:

  1. Move Sphere 5...

Photospheres


Yes sir, it's all the rage these days. It's better than panoramas. It's better than selfies. It's maybe even better than Snapchat! We're finally getting to the moment that you've been waiting for! It's 360-degree photospheres!

We have covered a lot of topics in this chapter, which will now make it fairly easy to talk about 360-degree photospheres. Now, all we need is a 360-degree photo. You can try searching on Google Images for a 360-degree photo. Alternatively, you can check out the Flickr pool (https://www.flickr.com/groups/equirectangular/pool/). You can also make your own using a Ricoh Theta camera, or Google's Photo Sphere app that is available for Android and iOS. For this example, I'll use one named FarmHouse.jpg, which is provided with this book:

Let's build it. Here are the complete steps to set up a photo sphere in Unity, starting with a new empty scene:

  1. Create a new scene by navigating to File | New Scene. Then, navigate to File | Save Scene and name it PhotoSphere...

Field of view – FOV


OK, we looked at spheres, cylinders, balls, and orbs. That was fun! Now, let's talk some more about 360-degree media and virtual reality and why it seems so compelling. There's a huge difference in the experience of viewing a 360-degree video on a flat screen versus inside a VR headset. Why?

In a theater, on a computer screen, or in VR, the angle from one edge of the view area to the opposite is commonly referred to as the angle of view or field of view (FOV). For example, an IMAX cinema theater with larger screens than that of the conventional cinema encompasses more of your peripheral vision and has a wider field of view. The following table compares the horizontal field of view of various viewing experiences. A wider field of view is important to provide immersive experiences.

These FOV values pertain to looking in one direction without moving your head or eyes:

Capturing a 360-degree media


So far, we've been talking about monoscopic media—a 360-degree photo or video shot with a single lens point of view, albeit from all directions. When viewed in VR, yes, there are left and right eyes, but this is a stereo view of the same flat image that was projected onto a sphere. It doesn't provide any real parallax or illusion of depth through occlusion. You can rotate your head, but you should not move its position from the center of the sphere. Otherwise, the immersive illusion may be broken.

What about true 360-degree stereo? What if each eye has its own photo sphere offset from the other eye's position? Stereoscopic 360-degree recording and playback is a very difficult problem.

To capture non-stereo 360-degree media, you can use a rig such as GoPro Kolor, pictured in the following image on the left. It records all six directions at once with six separate GoPro cameras. The synchronized videos are then stitched together with special, advanced imaging software...

Summary


In this chapter, we started simply by mapping a regular image on to the outside of a sphere. Then, we inverted it with a custom shader, mapping the image inside the sphere. We explored cylindrical projections of panoramas and large infographics. Then, we took several sections to understand equirectangular spherical projections and photospheres and how they're used for 360-degree immersive media in virtual reality. Lastly, we explored some of the technology behind viewing and capturing 360-degree media.

In the next chapter, we go social as we look at ways to add multi-user networking to Unity VR projects and how to add scenes to the emerging metaverse. Multiplayer games are familiar to most of us, but when combined with virtual reality, this provides a social experience that is unparalleled by any other technology. We will learn about networking technology and the new Unity Networking features that were introduced in Unity 5.1.

lock icon The rest of the chapter is locked
You have been reading a chapter from
Unity Virtual Reality Projects
Published in: Sep 2015 Publisher: Packt ISBN-13: 9781783988556
Register for a free Packt account to unlock a world of extra content!
A free Packt account unlocks extra newsletters, articles, discounted offers, and much more. Start advancing your knowledge today.
Unlock this book and the full library FREE for 7 days
Get unlimited access to 7000+ expert-authored eBooks and videos courses covering every tech area you can think of
Renews at $15.99/month. Cancel anytime}

Viewing experience

Horizontal field of view (FOV)

A 27" computer monitor

26 degrees

A movie theater

54...