


Part 5 – finishing up
Congratulations on creating a complete, working game! In this section, you’ll add a few extra things to the game to make it a little more exciting. Game developers use the term juice to describe the things that make a game feel good to play. Juice can include things such as sound, visual effects, or any other addition that adds to the player’s enjoyment, without necessarily changing the nature of the gameplay.
Visual effects
When you pick up the coins, they just disappear, which is not very appealing. Adding a visual effect will make it much more satisfying to collect lots of coins.
What is a tween?
A tween is a way to interpolate (change gradually) some value over time using a particular mathematical function. For example, you might choose a function that steadily changes a value or one that starts slow but ramps up in speed. Tweening is also sometimes referred to as easing. You can see animated examples of lots of tweening functions at https://easings.net/.
When using a tween in Godot, you can assign it to alter one or more properties of a node. In this case, you’re going to increase the scale of the coin and also cause it to fade out using the Modulate property. Once the tween has finished its job, the coin will be deleted.
However, there’s a problem. If we don’t remove the coin immediately, then it’s possible for the player to move onto the coin again – triggering the area_entered signal a second time and registering it as a second pickup. To prevent this, you can disable the collision shape so that the coin can’t trigger any further collisions.
Your new pickup() function should look like this:
func pickup():
    $CollisionShape2d.set_deferred("disabled", true)
    var tw = create_tween().set_parallel().
        set_trans(Tween.TRANS_QUAD)
    tw.tween_property(self, "scale", scale * 3, 0.3)
    tw.tween_property(self, "modulate:a", 0.0, 0.3)
    await tw.finished
    queue_free()
That’s a lot of new code, so let’s break it down:
First, CollisionShape2D’s disabled property needs to be set to true. However, if you try setting it directly, Godot will complain. You’re not allowed to change physics properties while collisions are being processed; you have to wait until the end of the current frame. That’s what set_deferred() does.
Next, create_tween() creates a tween object, set_parallel() says that any following tweens should happen at the same time, instead of one after another, and set_trans() sets the transition function to the “quadratic” curve.
After that come two lines that set up the tweening of the properties. tween_property() takes four parameters – the object to affect (self), the property to change, the ending value, and the duration (in seconds).
Now, when you run the game, you should see the coins playing the effect when they’re picked up.
Sound
Sound is an important but often neglected piece of game design. Good sound design can add a huge amount of juice to your game for a very small amount of effort. Sounds can give a player feedback, connect them emotionally to the characters, or even be a direct part of gameplay (“you hear footsteps behind you”).
For this game, you’re going to add three sound effects. In the Main scene, add three AudioStreamPlayer nodes and name them CoinSound, LevelSound, and EndSound. Drag each sound from the res://assets/audio/ folder into the corresponding node’s Stream property.
To play a sound, you call the play() function on the node. Add each of the following lines to play the sounds at the appropriate times:
$CoinSound.play()to_on_player_pickup()$EndSound.play()togame_over()$LevelSound.play()tospawn_coins()(but not inside the loop!)
Powerups
There are many possibilities for objects that give the player a small advantage or powerup. In this section, you’ll add a powerup item that gives the player a small time bonus when collected. It will appear occasionally for a short time, and then disappear.
The new scene will be very similar to the Coin scene you already created, so click on your Coin scene and choose Scene -> Save Scene As and save it as powerup.tscn. Change the name of the root node to Powerup and remove the script by clicking the Detach script button – <IMG>.
In the Groups tab, remove the coins group by clicking the trash can button and add a new group called powerups instead.
In AnimatedSprite2D, change the images from the coin to the powerup, which you can find in the res://assets/pow/ folder.
Click to add a new script and copy the code from the coin.gd script.
Next, add a Timer node named Lifetime. This will limit the amount of time the object remains on the screen. Set its Wait Time value to 2 and both One Shot and Autostart to On. Connect its timeout signal so that the powerup can be removed at the end of the time period:
func _on_lifetime_timout():
    queue_free()
Now, go to your Main scene and add another Timer node called PowerupTimer. Set its One Shot property to On. There is also a Powerup.wav sound in the audio folder that you can add with another AudioStreamPlayer. Connect the timeout signal and add the following to spawn a powerup:
func _on_powerup_timer_timeout():
    var p = powerup_scene.instantiate()
    add_child(p)
    p.screensize = screensize
    p.position = Vector2(randi_range(0, screensize.x),
        randi_range(0, screensize.y))
The Powerup scene needs to be linked to a variable, as you did with the Coin scene, so add the following line at the top of main.gd and then drag powerup.tscn into the new property:
@export var powerup_scene : PackedScene
The powerups should appear unpredictably, so the wait time of PowerupTimer needs to be set whenever you begin a new level. Add this to the _process() function after the new coins are spawned with spawn_coins():
Now, you will have powerups appearing; the last step is to give the player the ability to collect them. Currently, the player script assumes that anything it runs into is either a coin or an obstacle. Change the code in player.gd to check what kind of object has been hit:
func _on_area_entered(area):
    if area.is_in_group("coins"):
        area.pickup()
        pickup.emit("coin")
    if area.is_in_group("powerups"):
        area.pickup()
        pickup.emit("powerup")
    if area.is_in_group("obstacles"):
        hurt.emit()
        die()
Note that now you emit the pickup signal with an additional argument that names the type of object. The corresponding function in main.gd must now be changed to accept that argument and decide what action to take:
func _on_player_pickup(type):
    match type:
        "coin":
            $CoinSound.play()
            score += 1
            $HUD.update_score(score)
        "powerup":
            $PowerupSound.play()
            time_left += 5
            $HUD.update_timer(time_left)
The match statement is a useful alternative to if statements, especially when you have a large number of possible values to test.
Try running the game and collecting the powerup (remember, it won’t appear on level 1). Make sure the sound plays and the timer increases by five seconds.
Coin animation
When you created the coin, you used AnimatedSprite2D, but it isn’t playing yet. The coin animation displays a “shimmer” effect, traveling across the face of the coin. If all the coins display this at the same time, it will look too regular, so each coin needs a small random delay in its animation.
First, click on AnimatedSprite2D and then on the SpriteFrames resource. Make sure Animation Looping is set to Off and Speed is set to 12 FPS.
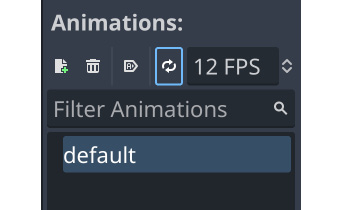
Figure 2.28: Animation settings
Add a Timer node to the Coin scene and then add this to the coin’s script:
func _ready():
    $Timer.start(randf_range(3, 8))
Then, connect the Timer’s timeout signal and add this:
func _on_timer_timeout():
    $AnimatedSprite2d.frame = 0
    $AnimatedSprite2d.play()
Try running the game and watching the coins animate. It’s a nice visual effect for a very small amount of effort, at least on the part of the programmer –the artist had to draw all those frames! You’ll notice a lot of effects like this in professional games. Although subtle, the visual appeal makes for a much more pleasing experience.
Obstacles
Finally, the game can be made more challenging by introducing an obstacle that the player must avoid. Touching the obstacle will end the game.
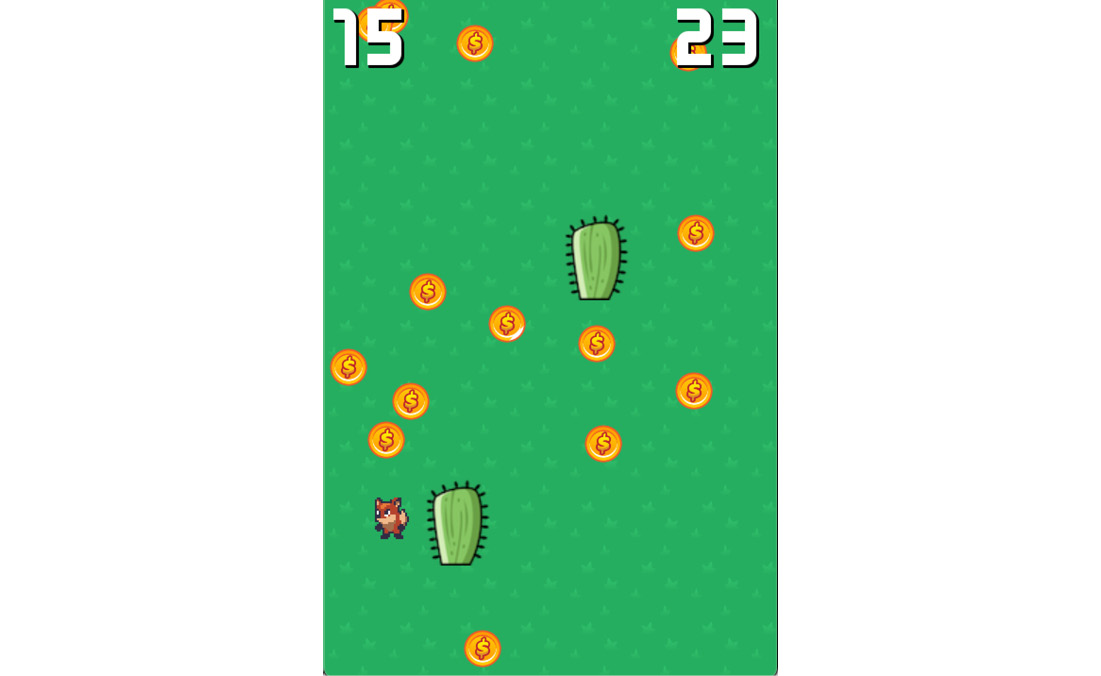
Figure 2.29: Example game with obstacles
Create a new Area2D scene and name it Cactus. Give it Sprite2D and CollisionShape2D children. Drag the cactus texture from FileSystem into the Texture property of Sprite2D. Add RectangleShape2D to the collision shape and size it so that it covers the image. Remember when you added if area.is_in_group("obstacles"?) to the player code? Add Cactus to the obstacles group using the Node tab. Play the game and see what happens when you run into the cactus.
You may have spotted a problem – coins can spawn on top of the cactus, making them impossible to pick up. When the coin is placed, it needs to move if it detects that it’s overlapping with the obstacle. In the Coin scene, connect its area_entered signal and add the following:
func _on_area_entered(area):
    if area.is_in_group("obstacles"):
        position = Vector2(randi_range(0, screensize.x),
            randi_range(0, screensize.y))
If you added the Powerup object from the previous section, you’ll need to do the same in its script.
Play the game, and test that the objects all spawn correctly and that they don’t overlap with an obstacle. Running into an obstacle should end the game.
Do you find the game challenging or easy? Before moving on to the next chapter, take some time to think about other things you might add to this game. Go ahead and see whether you can add them, using what you’ve learned so far. If not, write them down and come back later, after you’ve learned some more techniques in the following chapters.