Reader small image

You're reading from  Python Scripting in Blender

Product typeBook
Published inJun 2023
PublisherPackt
ISBN-139781803234229
Edition1st Edition
Right arrow
Author (1)
Paolo Acampora
Paolo Acampora
author image
Paolo Acampora

Paolo Acampora is a 3D artist and programmer, with experience in Animation, Visual Effects, and Real Time computer graphics. He provides tools that streamline the production workflow and let artists focus on the creative aspects of their craft. He has worked with several studios for more than a decade. He contributes to the blender development and releases his tools for the community.
Read more about Paolo Acampora

Right arrow

Structuring Our Code and Add-Ons

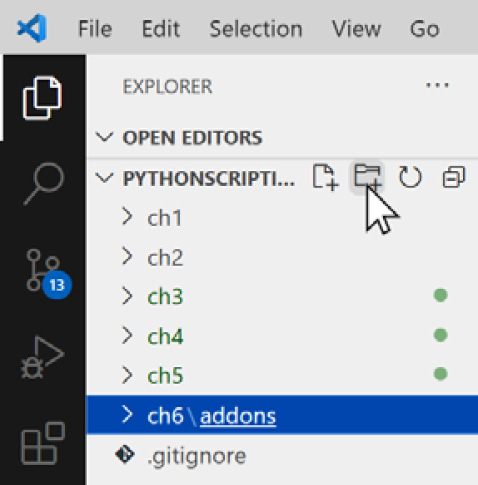
The add-ons we have created so far consist of single Python files. That’s ok, but to deal with complexity, we can split our code into related modules contained in the same directory.

Writing modules that interact with each other rather than a single huge file makes design and maintenance easier, allowing us to shift our focus to single aspects of our task.

The presence of non-code files, such as images and other media, can be another reason for adopting a folder structure. This is because sharing one folder is more practical than handling the Python script and the data separately.

In this chapter, you will learn how to code across separate modules of a package and blend everything using the import system. The packaged add-on that we are going to create will be easier to distribute, read, and maintain, and it will be possible to grasp the functionality of its different parts by just looking at the filenames.

This chapter will cover...

Technical requirements

We will use Blender and Visual Studio Code in this chapter. The examples created in this chapter can be found at https://github.com/PacktPublishing/Python-Scripting-in-Blender/tree/main/ch6.

Optionally, on Windows, we can use 7-Zip to create compressed archives. 7-Zip is a free application that can be downloaded from https://www.7zip.org.

Folders, packages, and add-ons

We know that an add-on consists of Python code accompanied by information for the Blender plugin system. While single-file Python scripts are called modules, a folder of scripts is called a package.

Writing an add-on folder implies that we will store the Blender information at the package level, so we will create a directory and create the package information first.

Creating a package folder and the init file

Let’s create a folder for this chapter in our Python project. Then, in the Blender Preferences area, set the ch6 folder as our Scripts Folder and restart Blender. To make a package, we need to create a new folder rather than a new file. We can do that using the file manager or, like in the following steps, use the files bar of our programmer editor:

  1. Select PythonScriptingBlender/ch6/addons.
  2. Create a new folder by clicking the New Folder icon:
Figure 6.1: Creating folders in Visual Studio Code

Figure 6.1: Creating folders in Visual Studio...

Packing external images

If we use image files for our add-on, we can create a folder in the structured_addon directory and name it pictures. Since we are going to write a module for loading icons, this folder can contain a collection of image files.

In the ch6\addons\structured_addon\pictures folder from the examples, we have pack_64.png, a clipart representing a package, and smile_64.png, the smiley face from the previous chapter:

Figure 6.5: The pictures used for this add-on are stored in a folder

Figure 6.5: The pictures used for this add-on are stored in a folder

Once all our images are in this folder, we can write the code to load them.

Writing an icon library

In Chapter 5, we wrote a function that loads a specific image file from disk. That worked great. Now that we are loading two icons, we can just use the same routine twice.

But now that we have an entire module for loading images, we can write a more sophisticated solution that works for any number of icons since it doesn’t rely on hardcoded...

Adding a user interface

We have already created the panel.py module, which will contain all the user interface classes and functions, so this file is going to contain our panel class.

Writing the UI module

We will start importing the bpy module and our collection of icons via a relative import of img_loader:

import bpy
from . import img_loader

The OBJECT_PT_structured class is derived from Panel. Like the one from Chapter 5, it contains the bl_* identifiers required by Blender in its static section:

class OBJECT_PT_structured(bpy.types.Panel):
    """Creates a Panel in the object context"""
    bl_label = "A Modular Panel"
    bl_idname = "MODULAR_PT_layout"
    bl_space_type = 'PROPERTIES'
    bl_region_type = 'WINDOW'
    bl_context = 'object'

For now, our draw function...

Reloading cached modules

When a module is imported, Python caches a copy of it for future access. Since the __init__.py file is the only one to be updated by the Reload Scripts operator, we are left with two options:

  • Close and restart Blender
  • Explicitly call the reload function inside __init__.py

The latter is preferred over restarting the application as it takes less time. The reload function is part of the importlib module.

Reloading via importlib

The utilities contained in the importlib library interact with the import system, and the reload function forces the Python interpreter to reload a module from disk.

If the img_loader module has changed and needs to be reloaded, we can use the following command:

from importlib import reload
reload(img_loader)

So, to make sure that the changes to our add-on .py files are always applied, we can add these lines of code to _init_.py:

from . import img_loader
from . import panel
from importlib import reload...

Using add-on preferences

Besides using Blender preferences, we can use bpy.types.AddonPreferences to display the add-on-specific custom settings under the add-on activation checkbox. It’s an interface, just like bpy.types.Panel, and we can add settings to its layout using its draw method.

The bl_idname attribute of AddonPreferences must match the Python name of the add-on. The usage of __name__ for single files and __package__ for folders makes our code easier to maintain: these variables always match the respective Python names, so changes in files and folders’ names would have no consequences.

Creating preferences

Since we are using multiple files, we will create preferences.py inside the folder of our structured_addon. It contains the StructuredPreferences class:

import bpy
class StructuredPreferences(bpy.types.AddonPreferences):
    bl_idname = __package__
    def draw(self, context):
     ...

Adding operators

Operators can be grouped into different files according to their purpose. For example, transform-related operators such as Elevate Objects, which we covered in Chapter 4, can be put into a file named ops_transform.py, while our first few operators, Create Type Collections, written in Chapter 3, can be put in an ops_collections.py file. All those classes would be then registered by __init__.py and, if needed, added to the add-on interface via relative import.

Another solution is creating one module for all the operators, which can be named operators.py. In this section, we will create an operators module for our add-on.

Writing the operators module

In the structured _addon folder, we will create the operators.py module. It will contain our operator class: we will reuse the Add Random Location operator from Chapter 5. Besides bpy, which is ubiquitous in Blender script, we will import the random module and use randint in the add_random_location function:

import...

Packaging and installing add-ons

We learned how to install single .py add-ons in the Installing our add-ons section of Chapter 3. To distribute an add-on that consists of more files, we must create a .zip archive of it. Most of you will be familiar with how a .zip file is a compressed archive that can contain more files or folders.

Blender can install folders from a standard .zip archive, but there are two requirements:

  • The .zip file must contain the add-on as a first-level folder
  • The name of the first-level folder must not contain any dot (.) as it won’t work with Python’s import system

There are third-party tools, such as 7-Zip, that provide a wide array of options, but it is possible to create .zip files using the file utilities of your operating system. In this section, we will learn how to compress an add-on folder on Windows OSX, and Ubuntu systems.

Cleaning up bytecode

If the structured_addon.zip\structured_addon folder contains a subfolder...

Summary

In this chapter, we learned how to set up a modular architecture for our code by splitting it into different files while keeping it coherent and clear. We also learned how to load files procedurally and how to write settings for our add-ons.

This approach confers interoperability and generical usefulness to our code and, by applying appropriate separation guidelines, eases our task in navigating the different parts of our tools.

In Chapter 7, we will learn how to animate with Python and change the animation settings with our scripts.

Questions

  1. Can Blender add-ons consist of multiple files?
  2. Which file of an add-on folder contains the info dictionary?
  3. How does relative import work?
  4. Does reloading an add-on refresh all its modules?
  5. Where do we store the settings of an add-on?
  6. How do we show the add-on properties in the preferences?
  7. How do we distribute multi-file add-ons?
lock icon
The rest of the chapter is locked
You have been reading a chapter from
Python Scripting in Blender
Published in: Jun 2023Publisher: PacktISBN-13: 9781803234229
Register for a free Packt account to unlock a world of extra content!
A free Packt account unlocks extra newsletters, articles, discounted offers, and much more. Start advancing your knowledge today.
undefined
Unlock this book and the full library FREE for 7 days
Get unlimited access to 7000+ expert-authored eBooks and videos courses covering every tech area you can think of
Renews at €14.99/month. Cancel anytime

Author (1)

author image
Paolo Acampora

Paolo Acampora is a 3D artist and programmer, with experience in Animation, Visual Effects, and Real Time computer graphics. He provides tools that streamline the production workflow and let artists focus on the creative aspects of their craft. He has worked with several studios for more than a decade. He contributes to the blender development and releases his tools for the community.
Read more about Paolo Acampora