Reader small image

You're reading from  Workflow Automation with Microsoft Power Automate - Second Edition

Product typeBook
Published inAug 2022
PublisherPackt
ISBN-139781803237671
Edition2nd Edition
Right arrow
Author (1)
Aaron Guilmette
Aaron Guilmette
author image
Aaron Guilmette

Aaron Guilmette is a Senior Program Manager with the Microsoft 365 Customer Experience, helping customers adopt and deploy the Microsoft 365 platform. He primarily focuses on collaborative technologies, including Microsoft Teams, Exchange Online, and Azure Active Directory.
Read more about Aaron Guilmette

Right arrow

Introducing AI Models

Throughout the examples in this book, you’ve used conditions to determine which branch of a flow should execute. You’ve used conditions like:

  • Is the purchase request value more or less than $1,000?
  • Does the user have more or less than 100 Twitter followers?
  • Is the approval response equal to Approved?

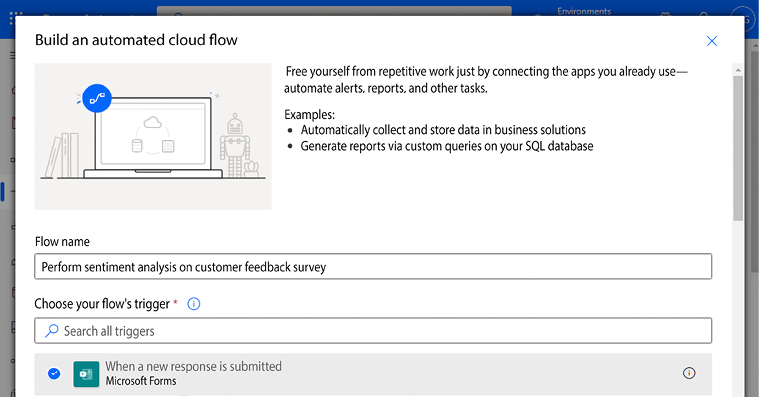
Those types of evaluations are useful when you’re working with hard data – numbers, Boolean values, or exact string matches. But what happens when you’re trying to make decisions with less straightforward data?

That’s where Artificial Intelligence (AI) models can become useful. AI models use AI to make determinations about a variety of different content and data types. For example, it may be very easy for a human to read a business card and determine what value is the individual’s name and what value is the individual’s job title, regardless of where they are placed on the...

Learning about AI models

There are many types of models available in the Power Platform, covering a range of data types and scenarios. You can use models to analyze text, scanned documents, images, email, or nearly any other type of input you can present to the service.

The data in Table 17.1 describes the type of content that a model is designed to work with, the name of the model, the build type of the model (whether it’s a prebuilt or custom model) and a sample business use case.

Model name

Data type

Build type

Business case

Business card reader

Documents

Prebuilt

Business card scanning

Form processing

...

Technical requirements

AI models (managed through AI Builder in the Power Platform) require access to the Microsoft Dataverse. If you’ve completed examples earlier in this book that required access to Dataverse, then you should have already met the requirements. If you haven’t created a Dataverse database yet, you can use the following process:

  1. Navigate to the Power Automate web portal (https://flow.microsoft.com).
  2. Expand AI Builder, and then select Explore:

Figure 17.1: Launching AI Builder

  1. If prompted, select Create a database.
  2. Select a Currency and a Language, and then select Create my database:

Figure 17.2: Creating the Dataverse database

  1. Use your browser’s refresh button to update the page.
  2. At the top of the screen, click Start free trial:

Figure 17.3: Enabling a trial for AI Builder

Once the trial has successfully started, you can start working with AI models...

Configuring prerequisites

As mentioned at the beginning of the chapter, the goal of this flow is to analyze customer feedback received through a form. In order to do this, we’re going to configure two things:

  • A Microsoft Forms survey to collect data such as a customer’s contact information, a product model, a product serial number, purchase date, and a text area where they can write their product feedback
  • An Excel spreadsheet in a SharePoint document library to store the form response data and sentiment analysis for later review

If you don’t want to create new SharePoint sites or forms, you can use existing forms that you’ve previously created but will have to adapt the flow accordingly.

Creating a Forms survey

The Forms survey will be used to capture the feedback. In this example, we’re going to capture a lot of data to emulate how something like this would look if an organization were to deploy it.

Here are...

Creating a sentiment analysis flow

By this point, we’ve configured mechanisms for data capture and storage. Now, we’ll turn to analyzing the data. To start building the flow, follow these steps:

  1. Navigate to the Microsoft Power Automate web portal (https://flow.microsoft.com) and click Create.
  2. Select Automated cloud flow.
  3. Enter a name and choose the When a new response is submitted Microsoft Forms trigger, as shown in Figure 17.10:

Figure 17.10: Creating a new automated cloud flow

  1. Click Create.
  2. In the When a new response is submitted trigger, select the Customer Feedback Survey form that you created during the prerequisites. If you don’t see your form listed, you can select Enter custom value and use the ID value (the highlighted portion after id=) that you captured at the end of the Creating a Forms survey section:

Figure 17.11: Extracting the form ID value

  1. Click New step.
  2. Select...

Testing the flow

To test this flow, you’ll need to submit several surveys with varying descriptions in the Feedback Value text area field. With each separate review, you’ll want to use different phrasing to express what you think are negative or positive impressions of a product or experience.

Let’s try a few:

  1. From the flow designer page, click Test.
  2. Select the Manually radio button and then click Test.
  3. Open a new browser tab and navigate to the Microsoft Forms landing page (https://forms.microsoft.com). Select Customer Feedback Survey and then click Preview.
  4. Fill out the survey. When you get to the Feedback Value text area, enter a value that you think indicates satisfaction or a positive experience:

Figure 17.25: Submitting a positive test case

  1. Click Submit.
  2. Click Submit another response.
  3. Repeat step 4, but substitute new test customer information. When you get to the Feedback Value text area...

Reviewing the output

The easiest way to verify the output is to return to the flow test window after one of the form submissions and begin expanding the outputs. The most informational output will be located in the Analyze positive or negative sentiment in text action. Expand the Apply to each function, and then expand the Analyze positive or negative sentiment in text action. Review the outputs:

Figure 17.26: Reviewing the sentiment analysis

In the OUTPUTS section found in Figure 17.26, you can see how the action returns its results, reporting a separate probability score for negative, neutral, and positive. The higher an individual score is, the more weight is given to that particular sentiment, as shown in Figure 17.27:

Figure 17.27: Reviewing sentiment scores

You can also open the Excel workbook that stores the data and review all the results together:

Figure 17.28: Reviewing customer survey and sentiment data

As an organization, you can...

Expanding further

Sentiment analysis is growing to be an increasingly critical part of helping organizations manage high volumes of unstructured data. Large organizations that receive a lot of feedback may desire to quickly decide if responses are positive or negative in order to focus resources on resolving potential product or service issues.

In a customer service and response scenario, it may be important to manage by exception and focus on resolving dissatisfaction. Now that you’ve seen how to configure sentiment analysis for a real-world situation such as processing customer feedback, think about ways that you can add to this flow to improve its usefulness. A few ideas might include:

  • If sentiment analysis is negative, send an email to a customer service manager or make an entry in a contact management database for a follow-up activity.
  • If sentiment analysis is positive, send the customer a promotional invite and ask them to leave a positive review...

Summary

Successful businesses capitalize on capturing and responding to customers. Modern sentiment analysis allows organizations to quickly categorize customer feedback and use it to analyze trends as well as position themselves to respond to customers based on business priorities and metrics.

In this chapter, you learned how to capture customer survey data with Microsoft Forms, detect the language of the submitted data, evaluate its sentiment, and save the results to an Excel workbook for later analysis. These skills can help you identify positive and negative trends with your customers and respond to the quickly changing market landscape.

Now that we have covered some advanced flow concepts, in the next chapter we will begin to look at administrative tasks in Power Automate, starting with exporting and sharing flows with others.

Learn more on Discord

To join the Discord community for this book – where you can share feedback, ask questions to the author, and...

lock icon
The rest of the chapter is locked
You have been reading a chapter from
Workflow Automation with Microsoft Power Automate - Second Edition
Published in: Aug 2022Publisher: PacktISBN-13: 9781803237671
Register for a free Packt account to unlock a world of extra content!
A free Packt account unlocks extra newsletters, articles, discounted offers, and much more. Start advancing your knowledge today.
undefined
Unlock this book and the full library FREE for 7 days
Get unlimited access to 7000+ expert-authored eBooks and videos courses covering every tech area you can think of
Renews at $15.99/month. Cancel anytime

Author (1)

author image
Aaron Guilmette

Aaron Guilmette is a Senior Program Manager with the Microsoft 365 Customer Experience, helping customers adopt and deploy the Microsoft 365 platform. He primarily focuses on collaborative technologies, including Microsoft Teams, Exchange Online, and Azure Active Directory.
Read more about Aaron Guilmette