Reader small image

You're reading from  Building IoT Visualizations using Grafana

Product typeBook
Published inJul 2022
PublisherPackt
ISBN-139781803236124
Edition1st Edition
Right arrow
Author (1)
Rodrigo Juan Hernández
author image
Rodrigo Juan Hernández

Rodrigo Juan Hernández is an electronic engineer passionate about IoT even before it existed. He has been working on tech for more than 18 years until now. For several years he has been focusing on the IoT ecosystem. He is currently giving consultation about IoT systems to clients around the world. He also produces content online about IoT and related subjects and the content is available on his blog, Youtube channel, and social networks - mainly LinkedIn. He also writes for companies that need good quality content about their products and services. His main objective nowadays is helping others to understand and implement IoT solutions.
Read more about Rodrigo Juan Hernández

Right arrow

Installing Grafana on a Raspberry Pi

The Single Board Computer (SBC) Raspberry Pi has been widely adopted for many uses, including IoT. So, it is quite natural to try to use Grafana on it.

In this section, we will see how to install and configure Grafana on a Raspberry Pi. To achieve good performance, we will use a Raspberry Pi version 2 or later.

Installation instructions

All the following instructions assume that you are using Raspberry Pi OS as the operating system.

Let’s start:

  1. First, it is always recommended to start with an update.

So, we run the following:

$ sudo apt-get update
$ sudo apt-get upgrade
  1. After that, we need to download the binary files for the installation:
    $ wget https://dl.grafana.com/oss/release/grafana-rpi_8.0.6_armhf.deb
    $ sudo dpkg -i grafana-rpi_8.0.6_armhf.deb

    Note about Versions

    Change the package version to the most recent stable version available. You can find all the available options at https://grafana.com/grafana/download?edition=oss.

  2. The next step is to make Grafana start at boot. To do this, we can use the systemd service file, included in Grafana packages.

So, we enable it by running the following:

 $ sudo systemctl enable grafana-server

And that’s it. Grafana will start at every boot.

  1. Now, to start Grafana manually, we can use the following:
    $ sudo systemctl start grafana-server

Now that you know how to install Grafana on a Raspberry Pi, let’s dive into how you can access Grafana for the first time.

Accessing Grafana for the first time

Now that you have Grafana running in your Raspberry Pi, you can access it through any web browser, pointing it to http://your-raspberry-ip-address:3000.

You can use your Raspberry Pi IP address, as well as its DNS name. Or, if you are accessing Grafana from the Raspberry Pi itself, you can use localhost or 127.0.0.1 in the URL.

After you access the web interface, you will have to enter the username and password to enter the platform.

The default credentials are user = admin and password = admin.
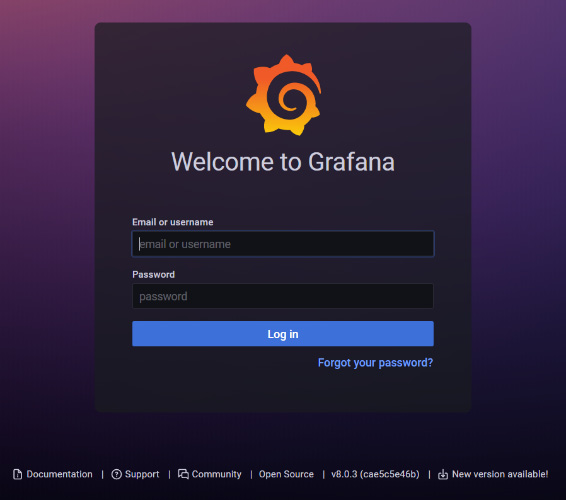
Figure 1.1 – Grafana login page

Figure 1.1 – Grafana login page

In this section, you have learned to install Grafana on a Raspberry Pi. In the next section, you will see how to do it on Ubuntu Server.

Previous PageNext Page
You have been reading a chapter from
Building IoT Visualizations using Grafana
Published in: Jul 2022Publisher: PacktISBN-13: 9781803236124
Register for a free Packt account to unlock a world of extra content!
A free Packt account unlocks extra newsletters, articles, discounted offers, and much more. Start advancing your knowledge today.
undefined
Unlock this book and the full library FREE for 7 days
Get unlimited access to 7000+ expert-authored eBooks and videos courses covering every tech area you can think of
Renews at $15.99/month. Cancel anytime

Author (1)

author image
Rodrigo Juan Hernández

Rodrigo Juan Hernández is an electronic engineer passionate about IoT even before it existed. He has been working on tech for more than 18 years until now. For several years he has been focusing on the IoT ecosystem. He is currently giving consultation about IoT systems to clients around the world. He also produces content online about IoT and related subjects and the content is available on his blog, Youtube channel, and social networks - mainly LinkedIn. He also writes for companies that need good quality content about their products and services. His main objective nowadays is helping others to understand and implement IoT solutions.
Read more about Rodrigo Juan Hernández