Search icon
Arrow left icon
All Products
Best Sellers
New Releases
Books
Videos
Audiobooks
Learning Hub
Newsletters
Free Learning
Arrow right icon
Creating an RTS Game in Unity 2023

You're reading from  Creating an RTS Game in Unity 2023

Product type Book
Published in Oct 2023
Publisher Packt
ISBN-13 9781804613245
Pages 548 pages
Edition 1st Edition
Languages
Author (1):
Bruno Cicanci Bruno Cicanci
Profile icon Bruno Cicanci

Table of Contents (23) Chapters

Preface 1. Part 1: Foundations of RTS Games
2. Chapter 1: Introducing Real-Time Strategy Games 3. Chapter 2: Setting Up Unity and the Dragoncraft Project 4. Chapter 3: Getting Started with Our Level Design 5. Chapter 4: Creating the User Interface and HUD 6. Part 2: The Combat Units
7. Chapter 5: Spawning an Army of Units 8. Chapter 6: Commanding an Army of Units 9. Chapter 7: Attacking and Defending Units 10. Chapter 8: Implementing the Pathfinder 11. Part 3: The Battlefield
12. Chapter 9: Adding Enemies 13. Chapter 10: Creating an AI to Attack the Player 14. Chapter 11: Adding Enemies to the Map 15. Part 4: The Gameplay
16. Chapter 12: Balancing the Game’s Difficulty 17. Chapter 13: Producing and Gathering Resources 18. Chapter 14: Crafting Buildings and Defense Towers 19. Chapter 15: Tracking Progression and Objectives 20. Chapter 16: Exporting and Expanding Your Game 21. Index 22. Other Books You May Enjoy

Setting up our base scene

Before we create our first level, we need to set up the base scene of the project, which will be used by our map editor to populate the map with the assets we are going to define in the configuration for each level. In addition to the base scene for every new level, we will also create a Playground scene, which, as the name suggests, will be used a lot during the game production so we can develop and test features freely without breaking our levels or being limited to the configuration we have.

Scenes

When we created the new Unity project following the instructions from the previous chapter, Unity automatically created a first scene for us called Sample Scene inside the Scenes folder, which is basically an empty scene with a standard main camera and directional light. Right-click on the scene and select Rename – we’ll change it to Playground, as you can see here:

Figure 3.1 – Renaming the scene to Playground

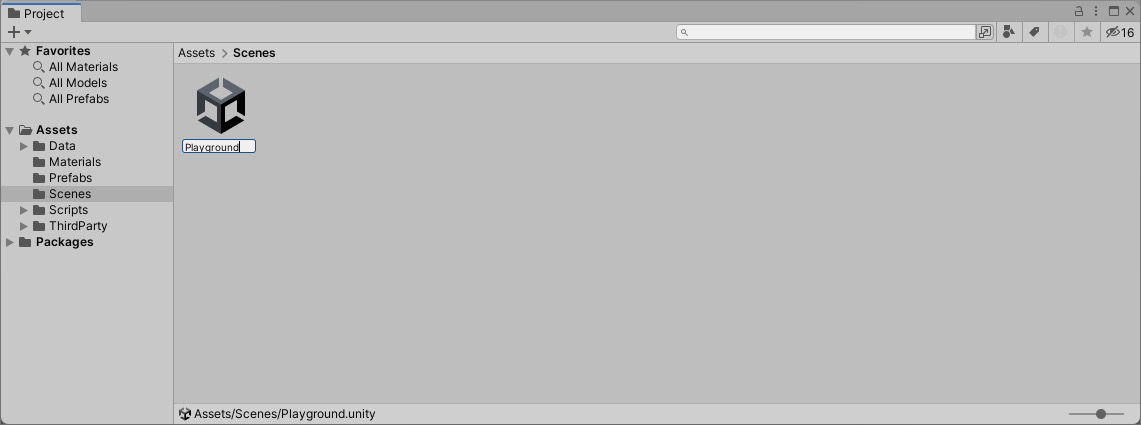
Figure 3.1 – Renaming the scene to Playground...

lock icon The rest of the chapter is locked
Register for a free Packt account to unlock a world of extra content!
A free Packt account unlocks extra newsletters, articles, discounted offers, and much more. Start advancing your knowledge today.
Unlock this book and the full library FREE for 7 days
Get unlimited access to 7000+ expert-authored eBooks and videos courses covering every tech area you can think of
Renews at €14.99/month. Cancel anytime}