Reader small image

You're reading from  Edit without Tears with Final Cut Pro

Product typeBook
Published inMar 2024
PublisherPackt
ISBN-139781804614921
Edition1st Edition
Right arrow
Author (1)
Bruce G. Macbryde
Bruce G. Macbryde
author image
Bruce G. Macbryde

Bruce G. Macbryde, a Final Cut Pro trainer with 20+ years of experience, spanning from the original release in 1999 to the latest version. He served as a sales manager for Australian Authorized Apple distributors (1998-2004) and later as a training manager for Apple-developed software through 2009. He established Wedding Media Productions in 2004, a wedding video business in Sydney, Australia. Bruce is a YouTube creator for the VideoTutors channel, with 500+ video tutorials. He began teaching marketing at NSW TAFE in the early 1980s, specializing in technology and business software such as Microsoft Office, Adobe Pagemaker, and Photoshop during a 7-year stint in New Zealand.
Read more about Bruce G. Macbryde

Right arrow

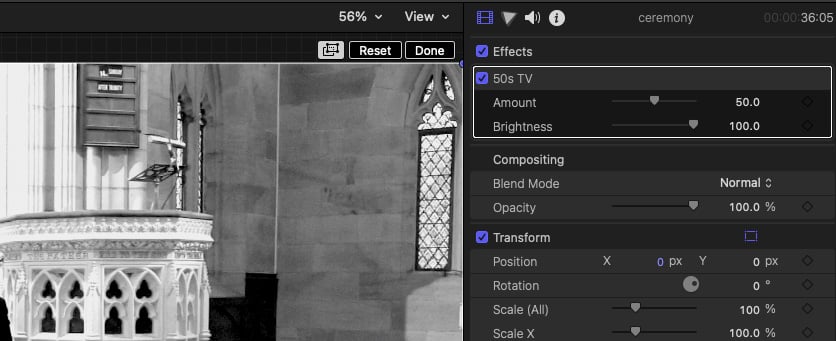
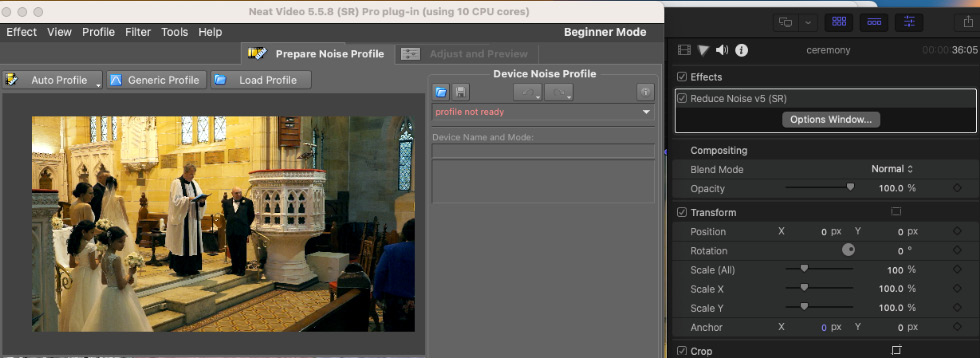
The Inspector Controls

This chapter and the next go hand in hand as they both discuss plug-ins and how they are adjusted in the inspector, which is the key to defining the look and feel of the edit. If anything in the timeline or browser needs to be adjusted, you need to check out the inspector first.

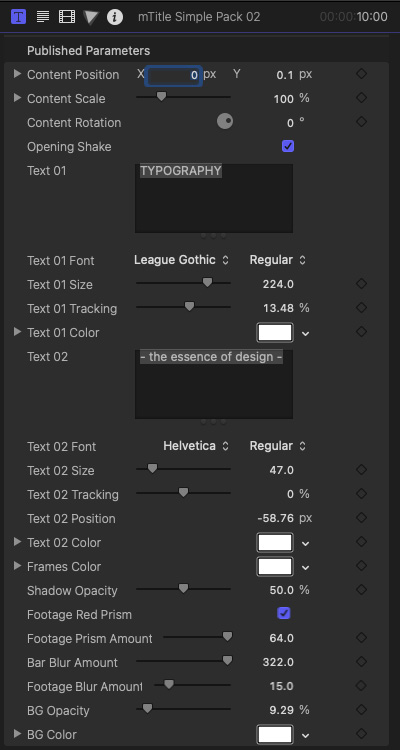
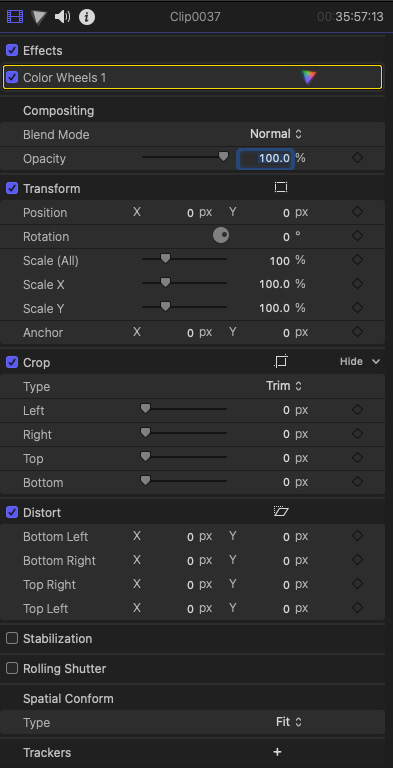
Specifically, in this chapter, you will learn about the finer details of the inspector. Think of it as inspecting the inspector. You will learn how the inspector is divided into four main sections: Video, Color, Audio, and Information. Each of these main sections is accessed via a tab at the top of the inspector panel. A temporary tab will appear when needed to allow access to titles and generators.

While there is a basic view of the inspector visible all the time, you will discover that the inspector is dynamic. It changes when different effects are being adjusted and different items are selected in either the browser or timeline; this is known as context-sensitive behavior.

...

The four main tabs of the inspector

The four main tabs of the inspector will be visible when a clip with audio is selected in the timeline window. From the left, the four tabs represent video adjustments, color, audio, and information. The following figure has the Video tab selected for a timeline clip – represented as a filmstrip icon in blue.

 Figure 10.1 – The Video tab for a timeline clip selected in the inspector

Figure 10.1 – The Video tab for a timeline clip selected in the inspector

You will see different sets of tabs when you select a clip in the browser as, essentially, only audio can be adjusted in a browser clip. When you choose a browser clip and select the filmstrip icon, only Spatial Conform shows. This will be explained later in the chapter.

 Figure 10.2 – Only Spatial Conform is offered for a browser clip

Figure 10.2 – Only Spatial Conform is offered for a browser clip

The following figure shows the Audio tab (represented by a speaker icon in blue) when a browser clip is selected:

 Figure 10.3 – The Audio tab selected in the inspector

Figure 10.3 ...

The Video inspector

As you can see in Figure 10.1, the Video inspector is divided into multiple sections. In this subsection, we will go over these sections and understand their uses.

Section 1 – Effects

At the top is the Effects heading, which displays any effects that have been added to the timeline clip from the Effects browser. I have applied the 50s TV effect in the following figure:

 Figure 10.6 – The 50s TV effect

Figure 10.6 – The 50s TV effect

While most of the effects will be color-based, be prepared for non -standard options to appear, such as the Neat Video Reduce Noise effect that has additionally been installed via a plug-in. In the following figure, you can see that Neat Video opens its own control panel:

 Figure 10.7 – The Neat Video Reduce Noise panel

Figure 10.7 – The Neat Video Reduce Noise panel

If you look back at Figure 10.1, you will see that Color Wheels, Compositing, and Blend Mode are also under the Effects heading. Blend Mode is used to merge the contents...

The Color inspector

To activate the Color inspector, click the triangle next to the video filmstrip. The triangle will become multicolored. When a newly added clip is selected in the timeline, the Color inspector will show the color correction preference as checked in the Final Cut Pro Settings/Preferences (see Chapter 2). The color triangle shows the color wheels, but it could optionally show the color board if that has been set in Settings/Preferences.

Figure 10.18 – Left: Color wheels; Right: Color board

Figure 10.18 – Left: Color wheels; Right: Color board

A detailed explanation of color correction is in Chapter 14; however, to give you a tour of the inspector settings, I will cover the Color inspector controls here. As shown in Figure 10.18, there are two sets of basic color controls that both achieve the same results. As stated, the preferred set will show as the default when setting it up in Settings/Preferences. You can change the selection and select all of the color control panels from the...

The Audio inspector

Chapter 7, discussed how to work with audio in the editing process, but it didn’t focus on how audio effects are selected and adjusted in the Audio inspector. This section looks at the grouping of audio effects and how their position is important in the structure of the Audio inspector.

At first view, the Audio inspector appears much more complex than the other inspector panels. The reason for this is that there are more audio enhancements included by default. These effects must be applied to the video before the other effects are added from the Effects browser.

The Audio inspector allows adjustments to clips both from the browser and the timeline, unlike the Video inspector, which only works with timeline clips.

 Figure 10.25 – Audio inspector

Figure 10.25 – Audio inspector

The big difference you will notice between the Video inspector and the Audio inspector is that the added effects are at the bottom of the Audio inspector, and at the top of...

The Information inspector

The Information inspector is accessed via the tab, and it gives individual metadata information about clips and projects in the browser, or clips, titles, or generators in the timeline.

There are several different ways of viewing the information, from Basic to specific metadata.

Figure 10.34 – Different ways of viewing the metadata

Figure 10.34 – Different ways of viewing the metadata

The General view gives most of what you will need to know on a daily basis:

Figure 10.35 – The general view of the Information inspector

Figure 10.35 – The general view of the Information inspector

At the bottom of the Information inspector, you will be shown the status of the Original, Optimized, and Proxy media, as well as another place to transcode media.

Project information

When you select a project to view in the Information inspector, you are given the option to modify the settings of the project:

Figure 10.36 – Modifying a project

Figure 10.36 – Modifying a project

You can change the Format and Resolution...

The Titles inspector

You should think of Final Cut Pro titles as little video clips that contain animated text and, in some cases, dropzones. The terms titles and text are different, and are not interchangeable. Titles are receptacles that contain textual items. Titles, with their associated text, are usually added to the timeline as connected clips. You can find more details about titles in Chapter 7.

When a title is added to a project in the timeline, a new tab for the Text inspector appears at the top left of the inspector panel.

Figure 10.40 – The Titles tab in blue with inspector details

Figure 10.40 – The Titles tab in blue with inspector details

The inspector panel for a title will show specific choices for that title. Every title will show different settings.

As stated before, a title is a container for you to add text, and since every title is different, the way that text can be added will sometimes be different as well.

Some titles will allow you to add text and others may not. Usually...

The Text inspector

The Text inspector has more adjustability than any other entity, so much so that the mind boggles at times, especially when venturing into the aspects of 3D text.

Important note

Note that text needs a Final Cut Pro title. Text cannot exist without having a title or generator as its container.

Figure 10.41 – The Text inspector panel

Figure 10.41 – The Text inspector panel

As noted in the previous section, every title is different, and so the way that text is handled will likely be different as well. I mention this here not to disturb you, but more to warn you that things may not always be as you would have expected. It’s this diversity that makes titling and adding text in Final Cut Pro so refreshingly unique.

I am not going to cover every little detail of the Text inspector panel, as a good proportion of it is what you would find in any word-processing app. However, there are sections in the panel that are specific to Final Cut Pro.

Text division

...

The Generator inspector

Chapter 7 showed how generators are like titles in the way they are little animated video clips. The tab for the Generator inspector is in the same location at the top left of the inspector window as the Titles tab is positioned.

Figure 10.48 – The Generator tab in blue

Figure 10.48 – The Generator tab in blue

By default, the content of the Generator inspector will look much more complex due to the inherent complexity of the generator itself. As with titles, each generator is unique and more likely to include dropzones as well as the ability to enter text.

Figure 10.49 – Generator with dropzones and Text panels

Figure 10.49 – Generator with dropzones and Text panels

The key to working in the Generator inspector is to expect the unexpected. It pushes the boundaries of what can be achieved with a plug-in, so will be complex by nature.

The next tab that I will cover is a temporary tab that will only appear when a transition is selected in the timeline.

The Transition inspector

The tab for the Transition inspector is located in the same position as the Titles and Generator tabs. When a transition is selected in the timeline, the tab is automatically activated to show the Transition inspector. In most cases, the sole adjustments will be for the Fade In and Fade Out settings of the audio related to the transition. A few transitions have Text and even Dropzone options, as in the Crypto Pop transition shown in Figure 10.50.

Figure 10.50 – Transition with Color and Text options

Figure 10.50 – Transition with Color and Text options

Summary

At first glance, the inspector is a single panel; it’s not until you look a little deeper that you see it is, in fact, several different inspectors that vary depending on whether you are inspecting a video clip from the browser or the timeline. The view of the inspector will be different when inspecting a project or a library.

In this chapter, you learned about the different panels for the Video inspector where built-in and purchased effects are added from the Effects browser. You saw how to transform and crop images in the viewer by using the numerical controls in the inspector. You were shown details of how the stabilization of shaky footage can make an unusable clip functional.

You were shown how the Color inspector enhances clips with either the Color Board approach or with Color Wheels. There was a discussion of the advantages of each and how inexperienced users should build up from using Color Board to become proficient with Color Wheels, mainly due to the...

lock icon
The rest of the chapter is locked
You have been reading a chapter from
Edit without Tears with Final Cut Pro
Published in: Mar 2024Publisher: PacktISBN-13: 9781804614921
Register for a free Packt account to unlock a world of extra content!
A free Packt account unlocks extra newsletters, articles, discounted offers, and much more. Start advancing your knowledge today.
undefined
Unlock this book and the full library FREE for 7 days
Get unlimited access to 7000+ expert-authored eBooks and videos courses covering every tech area you can think of
Renews at €14.99/month. Cancel anytime

Author (1)

author image
Bruce G. Macbryde

Bruce G. Macbryde, a Final Cut Pro trainer with 20+ years of experience, spanning from the original release in 1999 to the latest version. He served as a sales manager for Australian Authorized Apple distributors (1998-2004) and later as a training manager for Apple-developed software through 2009. He established Wedding Media Productions in 2004, a wedding video business in Sydney, Australia. Bruce is a YouTube creator for the VideoTutors channel, with 500+ video tutorials. He began teaching marketing at NSW TAFE in the early 1980s, specializing in technology and business software such as Microsoft Office, Adobe Pagemaker, and Photoshop during a 7-year stint in New Zealand.
Read more about Bruce G. Macbryde