Reader small image

You're reading from  Android Programming with Kotlin for Beginners

Product typeBook
Published inApr 2019
Reading LevelIntermediate
PublisherPackt
ISBN-139781789615401
Edition1st Edition
Languages
Right arrow
Author (1)
John Horton
John Horton
author image
John Horton

John Horton is a programming and gaming enthusiast based in the UK. He has a passion for writing apps, games, books, and blog articles. He is the founder of Game Code School.
Read more about John Horton

Right arrow

Chapter 2. Kotlin, XML, and the UI Designer

At this stage, we have a working Android development environment and we have built and deployed our first app. It is obvious, however, that code autogenerated by Android Studio is not going to make the next top-selling app on Google Play. We need to explore this autogenerated code so that we can begin to understand Android and then learn how to build on this useful template. With this aim in mind, we will do the following in this chapter:

  • See how to get technical feedback from our apps.

  • Examine the Kotlin code and User Interface (UI) XML code from our first app.

  • Get our first taste of using the Android UI designer.

  • Write our first Kotlin code.

  • Learn some core Kotlin fundamentals and how they relate to Android.

First, let's see how to get feedback from our apps.

Examining the log output


In the previous chapter, we mentioned that our app was running in debug mode on the emulator or real device; this is so that we can monitor it and get feedback when things go wrong. So, where is all this feedback?

You might have noticed a lot of scrolling text at the bottom of the Android Studio window. If not, click on the logcat tab, as shown by the highlighted area labeled as 1 in the following screenshot:

Note

Note that the emulator must be running, or a real device must be attached in debugging mode, for you to see the following window. Furthermore, if you restarted Android Studio for some reason and have not yet executed the app, then the logcat window will be empty. Refer to the first chapter to get the app running on an emulator or a real device:

You can drag the window to make it taller, just as you can in most other Windows applications, if you want to see more.

This window is called logcat, or, sometimes, it is referred to as console. It is our app's way of...

Exploring the project's Kotlin code and the main layout's XML code


We are going to look at the resource files containing the code that defines our simple UI layout and the file that has our Kotlin code. At this stage, we won't try to understand it all, as we need to learn some more basics before it makes sense to do so. What we will see, however, is the basic content and structure of both files, so we can reconcile their content with what we already know about Android resources and Kotlin.

Examining the MainActivity.kt file

Let's take a look at the Kotlin code first. You can see this code by left-clicking on the MainActivity.kt tab, as shown in the following screenshot:

As we are not looking at the intricate details of the code, an annotated screenshot is more useful than reproducing the actual code in text form. Regularly refer to the following screenshot while reading this section:

The first thing to note is that I have added a few empty lines in among the code to space things out and present...

Adding buttons to the main layout file


Here, we will add a couple of buttons to the screen and will then explore a quick way to make them do something. We will add a button in two different ways; first, using the visual designer, and second, by adding to and editing the XML code directly.

Adding a button via the visual designer

To get started adding our first button, switch back to the design view by clicking on the Design tab underneath the XML code that we have just been discussing. The button is highlighted in the following screenshot:

Notice that in the left-hand side of the layout, we have a window that is called Palette:

The palette window is divided into two parts. The left-hand list has the categories of the UI elements and allows you to select a category, while the right-hand side shows you all the available UI elements from the currently selected category.

Make sure that the Common category is selected, as shown in the previous screenshot. Now, left-click and hold on the Button widget...

Leaving comments in our Kotlin code


In programming, it is always a clever idea to write messages known as code comments, and sprinkle them liberally amongst your code. This is to remind us what we were thinking at the time we wrote the code. To do this, you simply append a double forward slash and then type your comment, as follows:

// This is a comment and it could be useful

In addition, we can use comments to comment out a line of code. Suppose we have a line of code that we temporarily want to disable; we can do so by adding two forward slashes, as follows:

// The code below used to send a message
// Log.i("info","our message here")
// But now it doesn't do anything
// And I am getting ahead of where I should be

Note

Using comments to comment out code should only be a temporary measure. Once you have found the correct code to use, commented-out code should be cut to keep the code file clean and organized.

Let's take a look at two separate ways to send messages in Android, and then we can write...

Coding messages to the user and the developer


In the introduction to this chapter and in the previous chapter, we talked a bit about using other people's code, specifically via the classes and their functions of the Android API. We saw that we could do some quite complex things with fairly insignificant amounts of code (such as talking to satellites).

To get us started on coding, we are going to use two different classes from the Android API that allow us to output messages. The first class, Log, allows us to output messages to the logcat window. The second class, Toast, is not a tasty breakfast treat, but it will produce a toast-shaped pop up message for our app's user to see.

Here is the code we need to write to send a message to logcat:

Log.i("info","our message here")

Exactly why this works will become clearer in Chapter 10, Object-Oriented Programming, but for now, we just need to know that whatever we put between the two sets of quote marks will be output to the logcat window. We will...

Writing our first Kotlin code


So, we now know the code that will output to logcat or the user's screen. However, where do we put the code? To answer this question, we need to understand that the onCreate function in MainActivity.kt executes as the app is preparing to be shown to the user. So, if we put our code at the end of this function, it will run just as the user sees it; that sounds good.

Note

We know that to execute the code in a function, we need to call it. We have wired our buttons up to call a couple of functions, such as topClick and bottomClick. Soon, we will write these functions. But who or what is calling onCreate? The answer to this mystery is that Android itself calls onCreate in response to the user clicking on the app icon to run the app. In Chapter 6, The Android Lifecycle, we will look deeper, and it will be clear what exactly the code executes and when. You don't need to completely comprehend this now; I just wanted to give you an overview of what was going on.

Let's...

Frequently asked questions


Q.1) Can you remind me what functions are?

A) Functions are containers for our code that can be executed (called) from other parts of our code.

Q.2) Like the first, I found this chapter tough going. Do I need to re-read it?

A) No, if you managed to build the app, you have made enough progress to handle all of the next chapter. All the blanks in our knowledge will be steadily filled in and replaced with glorious moments of realization as the book progresses.

Summary


We have achieved a lot in this exercise. It is true that much of the XML code is still generally incomprehensible. That's OK, because in the next two chapters, we will be really getting to grips with the visual designer and learning more about the XML code, although, ultimately, our aim is to use the XML code as little as possible.

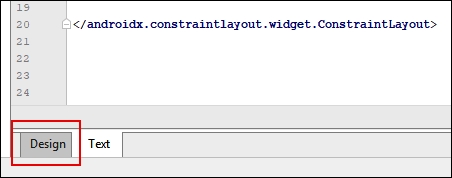
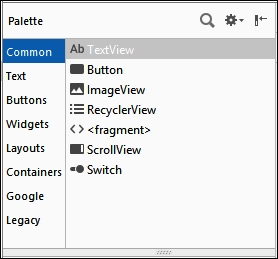
We have seen how, when we drag a button onto our design, the XML code is generated for us. Also, if we change an attribute in the Attributes window then, again, the XML code is edited for us. Furthermore, we can type (or, in our case, copy and paste) the XML code directly to create new buttons on our UI or edit existing ones.

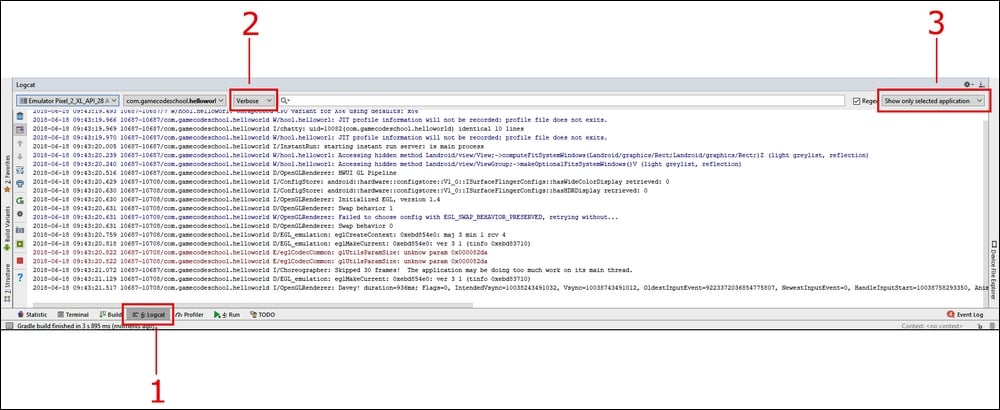
We have seen as well as written our first Kotlin code, including comments that help us document our code, and we have even added our own functions to output debugging messages to logcat and pop-up Toast messages to the user.

In the next chapter, we will take a full guided tour of Android Studio to see exactly where different things get...

lock icon
The rest of the chapter is locked
You have been reading a chapter from
Android Programming with Kotlin for Beginners
Published in: Apr 2019Publisher: PacktISBN-13: 9781789615401
Register for a free Packt account to unlock a world of extra content!
A free Packt account unlocks extra newsletters, articles, discounted offers, and much more. Start advancing your knowledge today.
undefined
Unlock this book and the full library FREE for 7 days
Get unlimited access to 7000+ expert-authored eBooks and videos courses covering every tech area you can think of
Renews at AU $19.99/month. Cancel anytime

Author (1)

author image
John Horton

John Horton is a programming and gaming enthusiast based in the UK. He has a passion for writing apps, games, books, and blog articles. He is the founder of Game Code School.
Read more about John Horton