Search icon
Arrow left icon
All Products
Best Sellers
New Releases
Books
Videos
Audiobooks
Learning Hub
Newsletters
Free Learning
Arrow right icon
Creating an RTS Game in Unity 2023

You're reading from  Creating an RTS Game in Unity 2023

Product type Book
Published in Oct 2023
Publisher Packt
ISBN-13 9781804613245
Pages 548 pages
Edition 1st Edition
Languages
Author (1):
Bruno Cicanci Bruno Cicanci
Profile icon Bruno Cicanci

Table of Contents (23) Chapters

Preface 1. Part 1: Foundations of RTS Games
2. Chapter 1: Introducing Real-Time Strategy Games 3. Chapter 2: Setting Up Unity and the Dragoncraft Project 4. Chapter 3: Getting Started with Our Level Design 5. Chapter 4: Creating the User Interface and HUD 6. Part 2: The Combat Units
7. Chapter 5: Spawning an Army of Units 8. Chapter 6: Commanding an Army of Units 9. Chapter 7: Attacking and Defending Units 10. Chapter 8: Implementing the Pathfinder 11. Part 3: The Battlefield
12. Chapter 9: Adding Enemies 13. Chapter 10: Creating an AI to Attack the Player 14. Chapter 11: Adding Enemies to the Map 15. Part 4: The Gameplay
16. Chapter 12: Balancing the Game’s Difficulty 17. Chapter 13: Producing and Gathering Resources 18. Chapter 14: Crafting Buildings and Defense Towers 19. Chapter 15: Tracking Progression and Objectives 20. Chapter 16: Exporting and Expanding Your Game 21. Index 22. Other Books You May Enjoy

Setting Up Unity and the Dragoncraft Project

Today, many different game engines can be used to develop games, and most of them are free to use or have a free license until you start making thousands of dollars in profit. Even with many options available, the Unity engine is probably the most popular choice for both new and experienced game developers, capable of making projects from small games, all the way up to AAA games with advanced features that push the hardware to its limits.

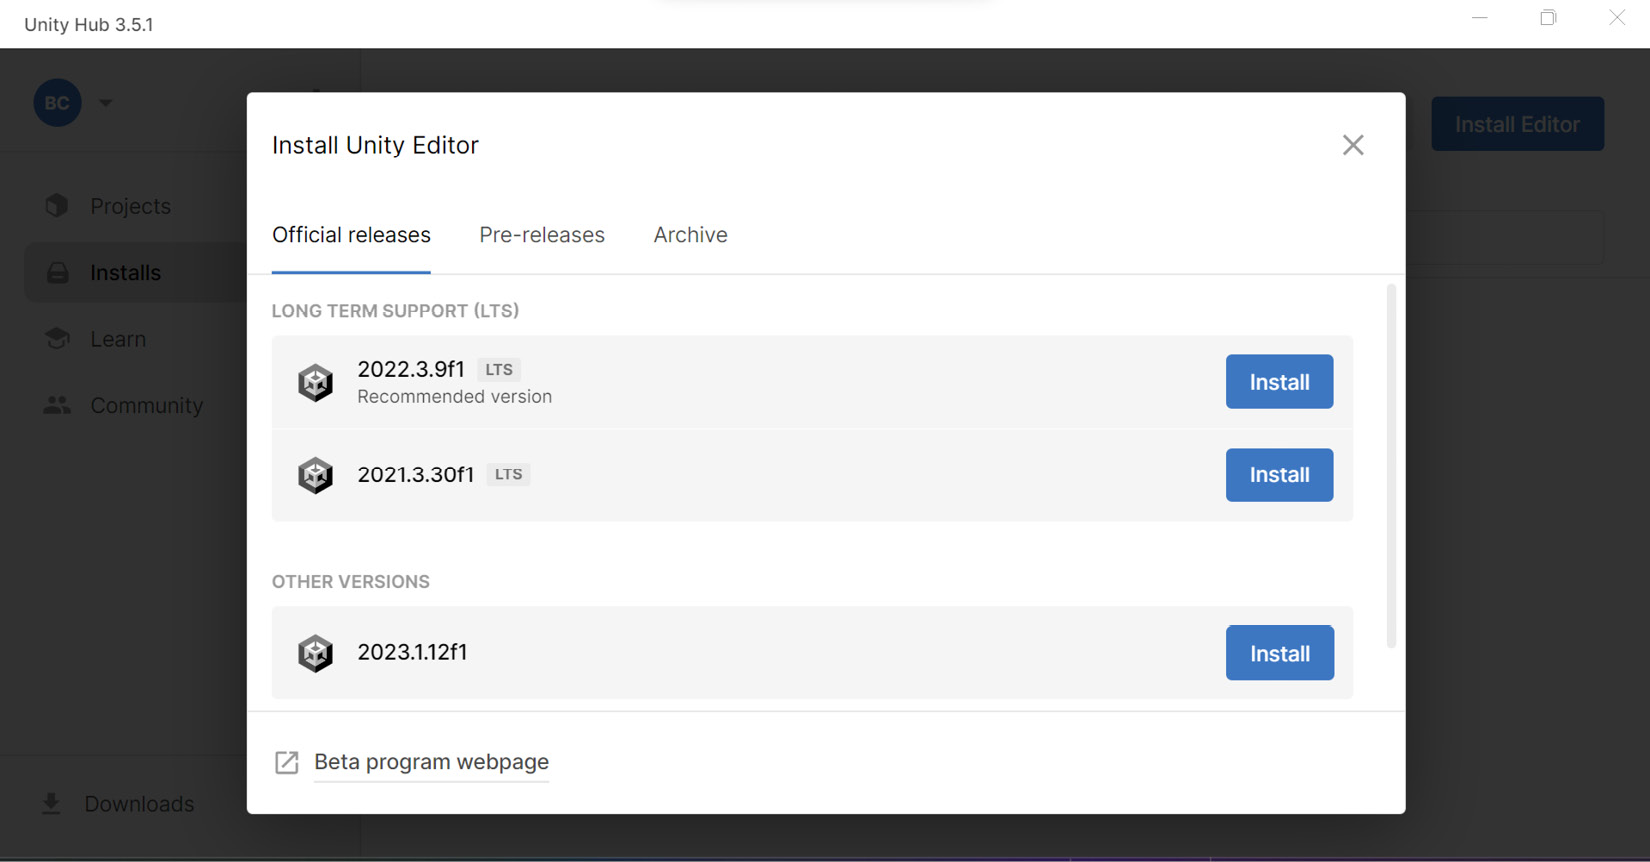
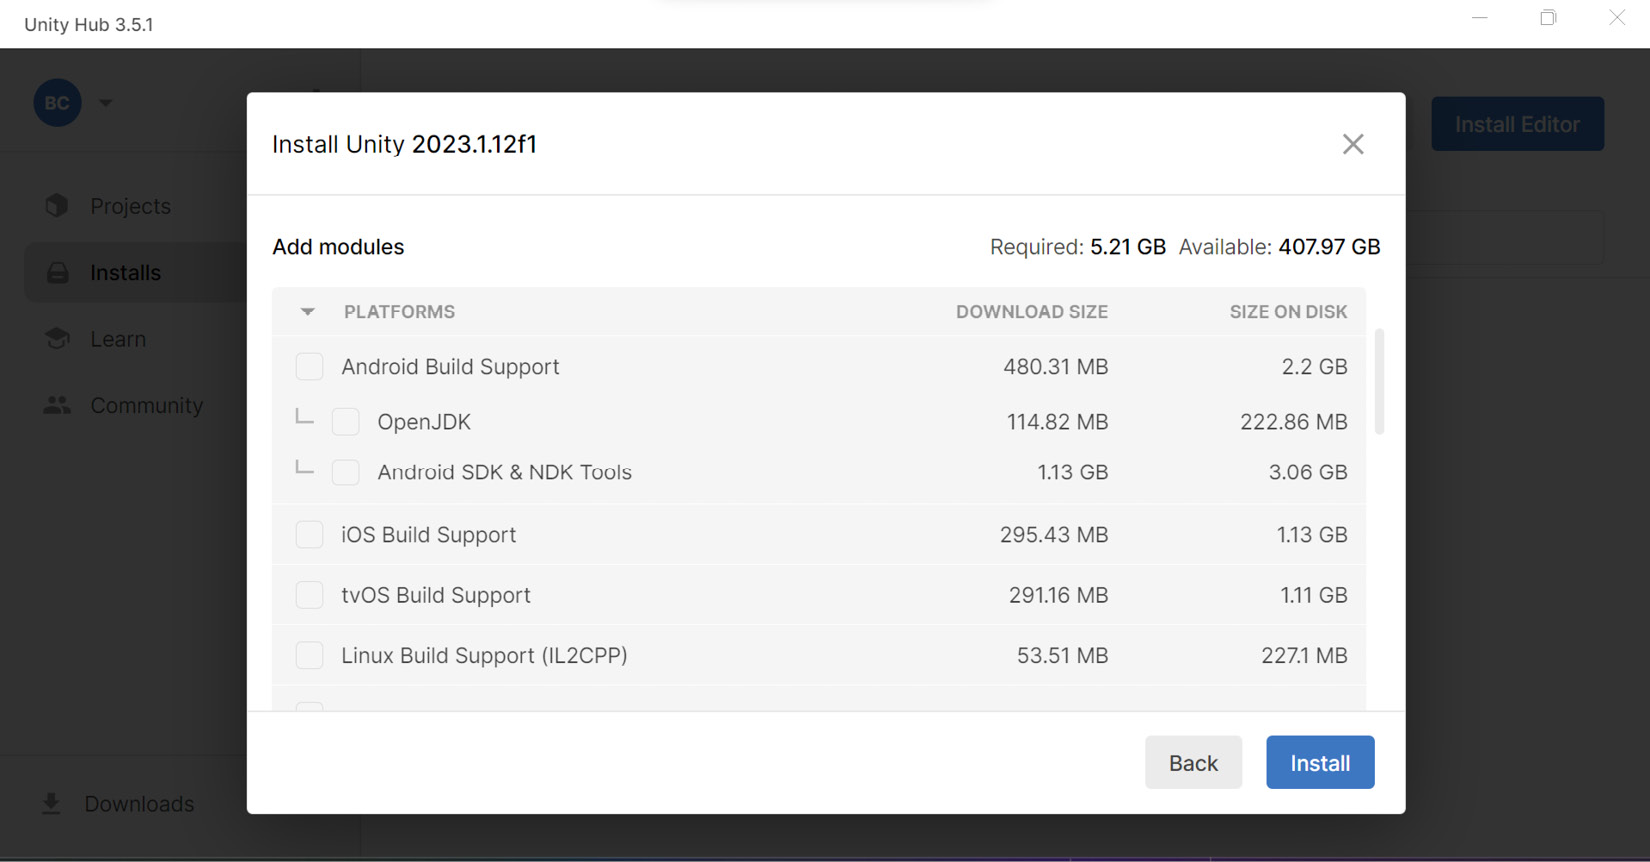
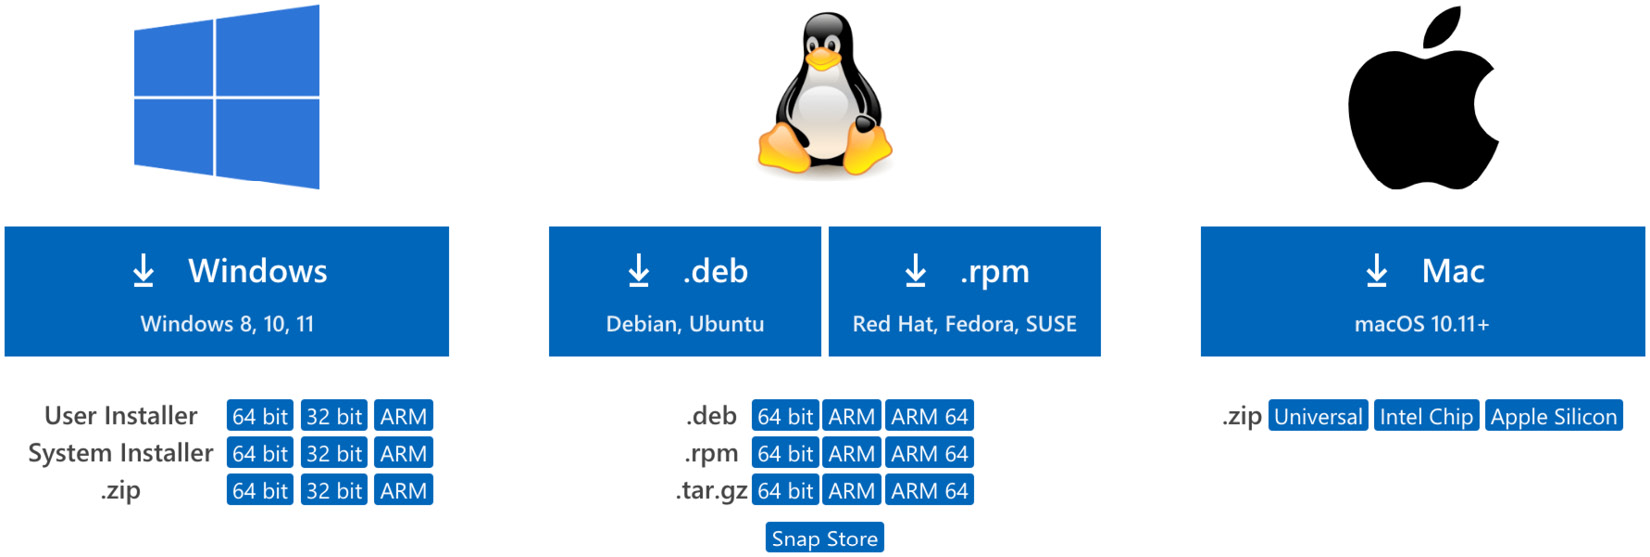
In this chapter, you will learn how to download and install the Unity game engine, including the recommended version and modules to install, as well as how to configure Visual Studio Code as the default integrated development environment (IDE) and install the required extensions. This chapter will also show you how to download and import all content required for building our RTS game, Dragoncraft, from the Unity Asset Store.

By the end of this chapter, you will have learned how to set up and organize...

Technical requirements

To complete this chapter and create Dragoncraft, here is the software you need to install:

  • Visual Studio Code for the C# programming
  • Unity Engine 2023.1 (or later)

The project setup for this chapter, along with the imported assets, can be found on GitHub at https://github.com/PacktPublishing/Creating-an-RTS-game-in-Unity-2023.

The assets from the Unity Asset Store that have been used in this project can be found at https://assetstore.unity.com/lists/creating-a-rts-game-5773122416647.

Downloading and configuring the Unity Editor

To get started, we will need to install Unity Hub, which is the entry point for installing the Unity Editor so that we can create and load projects. Head to https://unity.com/download and click on the Download for Windows button if you have a Windows setup or the Download other versions button for the macOS installer and Linux instructions.

Once downloaded, follow the installer’s instructions to add Unity Hub to your system. Next, click on the Installs tab and then click on the Install Editor button. From the following screen, select the latest version available for Unity, which is 2023.1 at the time of writing, or any later editions:

Figure 2.1 – Install Unity Editor

Figure 2.1 – Install Unity Editor

As soon as you click on the Install button, you will be presented with the following screen, where you can select the modules you would like to install:

Figure 2.2 – Unity modules

Figure 2.2 – Unity modules

By default...

Using Visual Studio Code as the default IDE

Visual Studio Code is a lightweight but powerful IDE that provides extensions to expand the supported programming languages and technologies you want to use. It is available for Windows, macOS, and Linux. Go to https://code.visualstudio.com/ and click on the Download button. Select the option that matches your operating system:

Figure 2.4 – Visual Studio Code download

Figure 2.4 – Visual Studio Code download

Once downloaded, unzip the file and double-click it to launch the IDE. On the left-hand side of the screen, select Extensions and search for C#, as shown in the following screenshot. Click Install to add C# support to Visual Studio Code:

Figure 2.5 – Visual Studio Code C# extension

Figure 2.5 – Visual Studio Code C# extension

Now that Visual Studio Code has been installed and configured, we can create a new Unity project and set it up as the default IDE.

Launch Unity Hub and click on the New Project button in the top-right corner. Then, select...

Importing and organizing assets from the Unity Asset Store

Now that all the configuration is done for both the Unity Editor and the IDE, we can use our empty project to get started with our RTS game development. This book will cover all the coding aspects of creating an RTS game, but since we are not going to create any art, the free assets from the Unity Asset Store will be used.

Go to the Unity Asset Store (https://assetstore.unity.com) and create a free account that will allow you to download and import the assets in the Unity Editor.

Next, access this public list, which contains all the assets needed to develop our RTS game in this book (https://assetstore.unity.com/lists/creating-a-rts-game-5773122416647) and click on the Add to My Assets button for each of the six assets. Every time you click that button, a pop-up message stating Unity Terms of Service will be displayed for you to accept the terms of service before the asset is added to your account.

Once added, you...

Summary

In this chapter, we learned how to download, install, and set up the Unity Editor using Unity Hub. We also downloaded and installed Visual Studio Code, imported the required extension, and configured it as the default IDE for the Unity Editor. In the end, we imported all the free assets required from the Unity Asset Store into our newly created project and organized it.

In Chapter 3, Getting Started with Our Level Design, we are going to start coding our map editor and create a few levels using this tool, ScriptableObjects, and the assets we imported from the Unity Asset Store. We will also configure the main scene, lights, camera movement, and mini-map navigation – one of the key gameplay features of our RTS game.

lock icon The rest of the chapter is locked
You have been reading a chapter from
Creating an RTS Game in Unity 2023
Published in: Oct 2023 Publisher: Packt ISBN-13: 9781804613245
Register for a free Packt account to unlock a world of extra content!
A free Packt account unlocks extra newsletters, articles, discounted offers, and much more. Start advancing your knowledge today.
Unlock this book and the full library FREE for 7 days
Get unlimited access to 7000+ expert-authored eBooks and videos courses covering every tech area you can think of
Renews at €14.99/month. Cancel anytime}