Search icon
Arrow left icon
All Products
Best Sellers
New Releases
Books
Videos
Audiobooks
Learning Hub
Newsletters
Free Learning
Arrow right icon
Swift Game Development - Third Edition

You're reading from  Swift Game Development - Third Edition

Product type Book
Published in Sep 2018
Publisher Packt
ISBN-13 9781788471152
Pages 434 pages
Edition 3rd Edition
Languages
Authors (2):
Siddharth Shekar Siddharth Shekar
Profile icon Siddharth Shekar
Stephen Haney Stephen Haney
Profile icon Stephen Haney
View More author details

Table of Contents (22) Chapters

Swift Game Development Third Edition
Contributors
Preface
Other Books You May Enjoy
1. Designing Games with Swift 2. Sprites, Camera, Action! 3. Mix in the Physics 4. Adding Controls 5. Spawning Enemies, Coins, and Power-Ups 6. Generating a Never-Ending World 7. Implementing Collision Events 8. Polishing to a Shine – HUD, Parallax Backgrounds, Particles, and More 9. Adding Menus and Sounds 10. Standing out in the Crowd with Advanced Features 11. Introduction to SceneKit 12. Choosing a Monetization Strategy 13. Integrating with Game Center 14. Introduction to Spritekit with ARKit 15. Introduction to Scenekit with ARKit 16. Publishing the Game on the App Store 17. Multipeer Augmented Reality Index

Chapter 5. Spawning Enemies, Coins, and Power-Ups

One of the most enjoyable and creative aspects of game development is building the game world for your players to explore. Our young project is starting to resemble a playable game after adding the controls; the next step is to build more content. We will create additional classes for new enemies, collectible coins, and special power-ups that give Pierre Penguin a boost as he navigates the perils of our world. We can then develop a system to spawn increasingly difficult patterns of these game objects as the player advances.

The topics in this chapter include the following:

  • Adding the Power-up Star

  • A new enemy—the Mad Fly

  • Another terror—Bats!

  • Guarding the ground with the Blade

  • Adding coins

  • Testing the new game objects

Introducing the cast


Strap on your hard hat, as we are going to be writing a lot of code in this chapter. Stick with it! The results are well worth the effort. Meet the new cast of characters we will be introducing in this chapter:

Locating and adding the art assets


Follow these steps to add these new art assets to the texture atlases in our Assets.xcassets file:

  1. In Xcode, open the Assets.xcassets file and locate the texture atlases you have created. You should already have folders for Enemies, Environment, and Pierre.

  2. Locate the Enemies folder in the downloadable asset bundle. You should see art for all of the enemies, including the Bat, the Blade, the Mad Fly, and the Bee.

  3. We can skip the Bee art since we already added it to our project. Excluding the Bee, drag the rest of the asset files into the Enemies texture atlas in Xcode. You should be dragging 12 files into Xcode (two animation images per enemy, each with two resolutions). When you are done, your Enemies texture atlas should look like this:

  4. Great work! Now, we just need to add the art for the two coins and the Power-up Star. Locate the Environment folder in the downloadable asset bundle and find the asset files for the Bronze Coin, the Gold Coin, and the Star...

Adding the Power-up Star


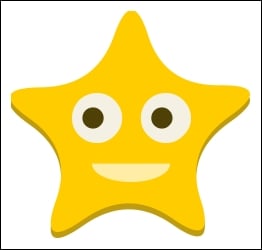
Many of my favorite games grant temporary invulnerability when the player picks up a Star. We will add a hyperactive Power-up Star to our game. Meet our Star:

Adding the Star class

Now that the art is in place, you can create a new Swift file named Star.swift in your project; we will continue to organize classes into distinct files. The Star class will be similar to the bee class we created earlier. It will inherit from SKSpriteNode and adhere to our GameSprite protocol. The Star will add a lot of power to the player, so we will also give it a special zany animation based on SKAction to make it stand out.

To create the Star class, add the following code in your Star.swift file:

import SpriteKit

class Star: SKSpriteNode, GameSprite { 
var initialSize = CGSize(width: 40, height: 38) 
var textureAtlas: SKTextureAtlas = 
SKTextureAtlas(named: "Environment") 
Var pulseAnimation = SKAction() 

init() { 
        let starTexture = 
textureAtlas.textureNamed("star") 
super.init...

A new enemy - the Mad Fly


Pierre Penguin will need to dodge more than just Bees to accomplish his goal. We will add a few new enemies in this chapter, starting with the MadFly class. The Mad Fly is quite grumpy, as you can see:

Adding the MadFly class

MadFly is another straightforward class; it looks a lot like the bee code. Create a new Swift file named MadFly.swift and enter this code:

import SpriteKit

class MadFly: SKSpriteNode, GameSprite { 
var initialSize = CGSize(width: 61, height: 29) 
var textureAtlas: SKTextureAtlas = 
SKTextureAtlas(named: "Enemies") 
var flyAnimation = SKAction() 
	
init() { 
super.init(texture: nil, color: .clear, 
            size: initialSize) 
self.physicsBody = SKPhysicsBody(circleOfRadius: 
size.width / 2) 
        self.physicsBody?.affectedByGravity = false 
createAnimations() 
self.run(flyAnimation) 
    } 

func createAnimations() { 
        let flyFrames:[SKTexture] = [ 
textureAtlas.textureNamed("madfly"), 
textureAtlas.textureNamed("madfly-fly") 
...

Another terror - Bats!


We are getting into quite a rhythm with creating new classes. Now, we will add a Bat to swarm with the Bees. The Bat is small, but has a very sharp fang:

Adding the Bat class

To add the Bat class, create a file named Bat.swift and add this code:

import SpriteKit

class Bat: SKSpriteNode, GameSprite { 
var initialSize = CGSize(width: 44, height: 24) 
var textureAtlas: SKTextureAtlas = 
SKTextureAtlas(named: "Enemies") 
Var flyAnimation = SKAction() 

init() { 
super.init(texture: nil, color: .clear, 
            size: initialSize) 
self.physicsBody = SKPhysicsBody(circleOfRadius: 
size.width / 2) 
        self.physicsBody?.affectedByGravity = false 
createAnimations() 
self.run(flyAnimation) 
    } 

func createAnimations() { 
        let flyFrames: [SKTexture] = [ 
textureAtlas.textureNamed("bat"), 
textureAtlas.textureNamed("bat-fly") 
        ] 
        let flyAction = SKAction.animate(with: flyFrames, 
timePerFrame: 0.12) 
flyAnimation = SKAction.repeatForever(flyAction...

Guarding the ground with the Blade


The Blade class will keep Pierre from flying too low. This enemy class will be similar to the others we have created, with one exception: we will generate a physics body based on the texture. The physics body circles that we have been using are very fast computationally and are usually sufficient to describe the shapes of our enemies; the Blade class requires a more complicated physics body, given its half-circle shape and bumpy edges:

Adding the Blade class

To add the Blade class, create a new file named Blade.swift and add the following code:

import SpriteKit

class Blade: SKSpriteNode, GameSprite { 
var initialSize = CGSize(width: 185, height: 92) 
var textureAtlas: SKTextureAtlas = 
SKTextureAtlas(named: "Enemies") 
var spinAnimation = SKAction() 

init() { 
super.init(texture: nil, color: .clear, 
            size: initialSize) 
        let startTexture = textureAtlas.textureNamed("blade") 
self.physicsBody = SKPhysicsBody(texture: startTexture, 
   ...

Adding coins


Coins are more fun if there are two value variations. We will create two coins:

  • A Bronze Coin, worth one coin

  • A Gold Coin, worth five coins

The two coins will be distinguishable by their color, as seen here:

Creating the coin classes

We only need a single Coin class to create both denominations. Everything in the Coin class should look very familiar at this point. To create the Coin class, add a new file named Coin.swift and then enter the following code:

import SpriteKit

class Coin: SKSpriteNode, GameSprite { 
var initialSize = CGSize(width: 26, height: 26) 
var textureAtlas: SKTextureAtlas = 
SKTextureAtlas(named: "Environment") 
var value = 1 

init() { 
        let bronzeTexture = 
textureAtlas.textureNamed("coin-bronze") 
super.init(texture: bronzeTexture, color: .clear, 
            size: initialSize) 
self.physicsBody = SKPhysicsBody(circleOfRadius: 
size.width / 2) 
        self.physicsBody?.affectedByGravity = false 
    } 

    // A function to transform this coin into...

Organizing the project navigator


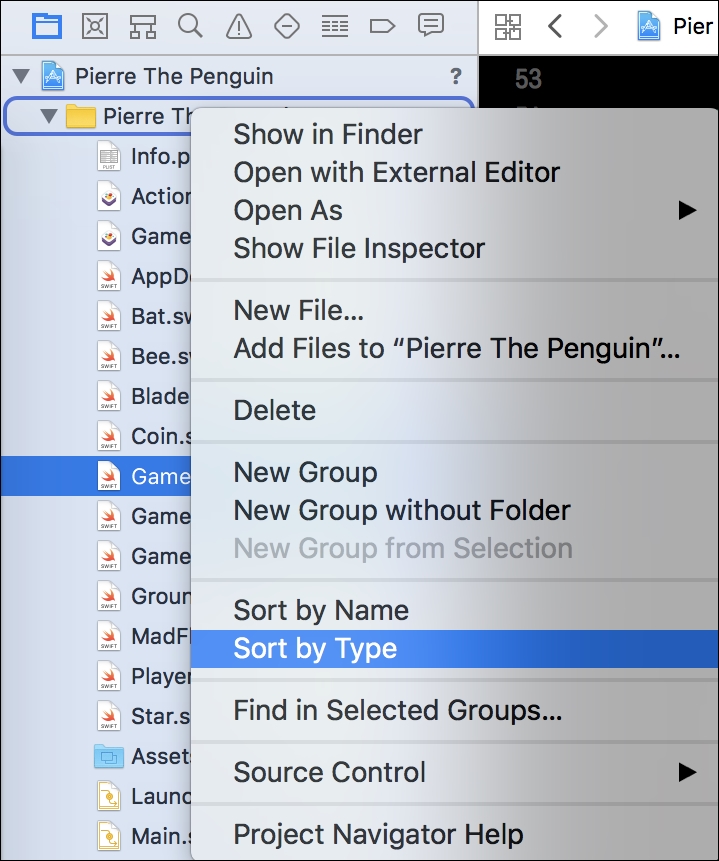
You may notice that these new classes have cluttered the project navigator. This is a good time to clean up the navigator. Right-click the project in the project navigator and select Sort by Type, as shown in this screenshot:

Your project navigator will segment itself by file type and sort everything into alphabetical order. This makes it much easier to find files as you need them.

Testing the new game objects


It is time to see our hard work in action. We will now add one instance of each of our new classes to the game. Note that we will remove this testing code after we are done; you may want to leave yourself a comment or extra space for easy removal. Open GameScene.swift and locate the six lines that spawn the existing bee. Add this code after the bee lines:

// Spawn a bat: 
let bat = Bat() 
bat.position = CGPoint(x: 400, y: 200) 
self.addChild(bat) 

// A blade: 
let blade = Blade() 
blade.position = CGPoint(x: 300, y: 76) 
self.addChild(blade) 

// A mad fly: 
let madFly = MadFly() 
madFly.position = CGPoint(x: 50, y: 50) 
self.addChild(madFly) 

// A bronze coin: 
let bronzeCoin = Coin() 
bronzeCoin.position = CGPoint(x: -50, y: 250) 
self.addChild(bronzeCoin) 

// A gold coin: 
let goldCoin = Coin() 
goldCoin.position = CGPoint(x: 25, y: 250) 
goldCoin.turnToGold() 
self.addChild(goldCoin) 

// The powerup star: 
let star = Star() 
star.position = CGPoint(x:...

Preparing for endless flight


In Chapter 6, Generating a Never-Ending World, we will build a never-ending level by spawning tactical obstacle courses full of these new game objects. We need to clear out all of our test objects to get ready for this new level-spawning system. Once you are ready, remove the new test code we just added to the GameScene class. Also, remove the six lines that we have been using to spawn the Bees from previous chapters. Finally, uncomment the line in Player.swift that sets Pierre's forward velocity (if you chose to comment it out when testing the new classes in the previous section).

When you are finished, your GameScene class' didMove function should look like this:

override func didMove(to view: SKView) { 
self.anchorPoint = .zero 
self.backgroundColor = UIColor(red: 0.4, green: 0.6, blue: 
        0.95, alpha: 1.0) 

    // Assign the camera to the scene 
self.camera = cam 

    // Add the ground to the scene: 
ground.position = CGPoint(x: -self.size.width * 2...

Summary


You added the complete cast of characters to our game in this chapter. Look back at all that you accomplished; you added the Power-up Star, the Bronze and Gold Coins, the Mad Fly, Bats, and the Blade. You tested all of the new classes and then removed the test code so that the project is ready for the level generation system we will put into place in the next chapter.

We put a lot of effort into building each new class. The world will come alive and reward our hard work in Chapter 6, Generating a Never-Ending World.

lock icon The rest of the chapter is locked
You have been reading a chapter from
Swift Game Development - Third Edition
Published in: Sep 2018 Publisher: Packt ISBN-13: 9781788471152
Register for a free Packt account to unlock a world of extra content!
A free Packt account unlocks extra newsletters, articles, discounted offers, and much more. Start advancing your knowledge today.
Unlock this book and the full library FREE for 7 days
Get unlimited access to 7000+ expert-authored eBooks and videos courses covering every tech area you can think of
Renews at $15.99/month. Cancel anytime}