

Technical requirements
- To follow along with the recipes in this chapter, you need your developing machine configured and connected to the internet.

When you write your code, you generally expect your instructions to run sequentially, one line after the other. For instance, let's say you write the following:
int x = 5;
int y = x * 2;
You expect the value of y to be equal to 10 because the instruction int x = 5 completes before the next line. In other words, the second line waits for the first instruction to complete before being executed.
In most cases, this pattern works perfectly, but in some cases, and specifically, when you need to run instructions that take longer to complete, this is not the recommended approach, as your app would be unresponsive until the task is completed. That's why in almost all modern programming languages, including Dart, you can perform asynchronous operations.
Asynchronous operations do not stop the main line of execution, and therefore they allow the execution of other tasks before completing.
Consider the following diagram:

In the diagram, you can see how the main execution...
Futures, with their then callbacks, allow developers to deal with asynchronous programming. There is an alternative pattern to deal with Futures that can help make your code cleaner and easier to read and maintain: the async/await pattern.
Several modern languages have this alternate syntax to simplify code, and at its core, it's based on two keywords: async and await:
async is used to mark a method as asynchronous, and it should be added before the function body.await is used to tell the framework to wait until the function has finished its execution and returns a value. While the then callback works in any method, await only works inside async methods.When you use await, the caller function must use the async modifier, and the function you call with await should also be marked as async.
What happens under the hood is that when you await the result of an asynchronous function, the line of execution is stopped until the async operation completes...
Using a Future with then, catchError, async, and await is probably enough for most use cases, but there is another way to deal with asynchronous programming in Dart and Flutter: the Completer class.
Completer creates Future objects that you can complete later with a value or an error. We will be using Completer in this recipe.
In order to follow along with this recipe, there are the following requirements:
In this recipe, you will see how to use the Completer class to perform a long-running task:
main.dart file, in the _FuturePageState class:late Completer completer;
Future getNumber() {
completer = Completer<int>();
calculate();
return completer.future;
}
calculate...When you need to run multiple Futures at the same time, there is a class that makes the process extremely easy: FutureGroup.
FutureGroup is available in the async package, which must imported into your dart file as shown in the following code block:
import 'package:async/async.dart';Please note that dart:async and async/async.dart are different libraries: in some cases, you need both to run your asynchronous code.
FutureGroup is a collection of Futures that can be run in parallel. As all the tasks run in parallel, the time of execution is generally faster than calling each asynchronous method one after another.
When all the Futures of the collection have finished executing, a FutureGroup returns its values as a List, in the same order they were added into the group.
You can add Futures to a FutureGroup using the add() method, and when all the Futures have been added, you call the close() method to signal that no more Futures will be...
There are several ways to handle errors in your asynchronous code. In this recipe, you will see a few examples of dealing with errors, both using the then() callback and the async/await pattern.
In order to follow along with this recipe:
We are going to divide this section into two sub-sections. In the first section, we will deal with the errors by using the then() callback function and in the second section, we will deal with those errors using the async/await pattern.
The most obvious way to catch errors in a then() callback is using the catchError callback. To do so, follow these steps:
As mentioned previously, while Stateless widgets do not keep any state information, Stateful widgets can keep track of variables and properties, and in order to update the app, you use the setState() method. State is information that can change during the life cycle of a widget.
There are four core lifecycle methods that you can leverage in order to use Stateful widgets:
initState() is only called once when the State is built. You should place the initial setup and starting values for your objects here. Whenever possible, you should prefer this to the build() method.build() gets called each time something changes. This will destroy the UI and rebuild it from scratch.deactivate() and dispose() are called when a widget is removed from the tree: use cases of these methods include closing a database connection or saving data before changing route.So let's see how to deal with Futures in the context of the lifecycle of a widget.
In...
The pattern of retrieving some data asynchronously and updating the user interface based on that data is quite common. So common in fact that in Flutter, there is a widget that helps you remove some of the boilerplate code you need to build the UI based on Futures: it's the FutureBuilder widget.
You can use a FutureBuilder to integrate Futures within a widget tree that automatically updates its content when the Future updates. As a FutureBuilder builds itself based on the status of a Future, you can skip the setState instruction, and Flutter will only rebuild the part of the user interface that needs updating.
FutureBuilder implements reactive programming, as it will take care of updating the user interface as soon as data is retrieved, and this is probably the main reason why you should use it in your code: it's an easy way for the UI to react to data in a Future.
FutureBuilder requires a future property, containing...
In this recipe, you will see how to leverage Futures using Navigator to transform a Route into an async function: you will push a new screen in the app and then await the route to return some data and update the original screen.
The steps we will follow are these:
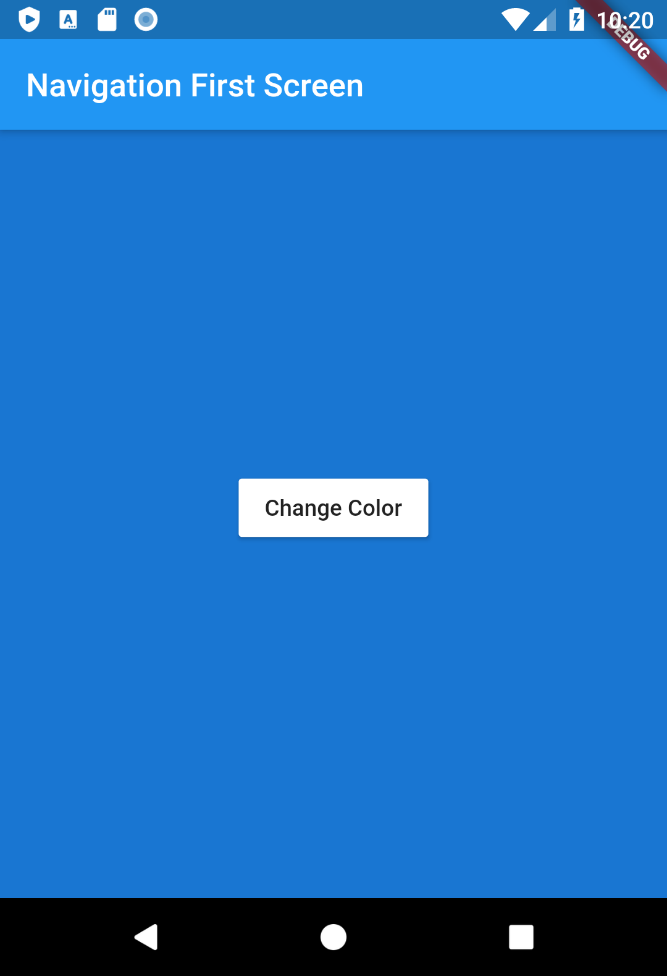
ElevatedButton that will launch the second screen.Here, you can see a screenshot of the first screen:
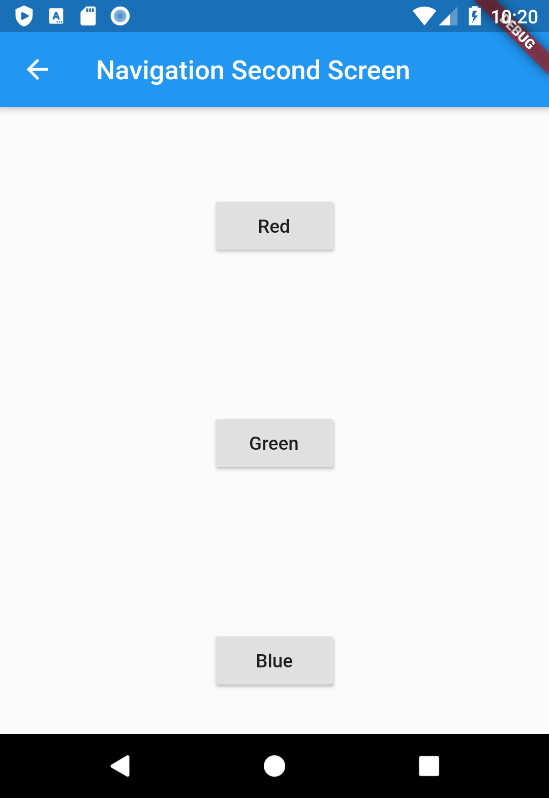
And here, the second screen, which allows choosing a color with three ElevatedButtons:
We will begin by...
This recipe shows an alternative way of await-ing some data from another screen, which was shown in the previous recipe, but this time, instead of using a full-sized page, we will use a dialog box: actually dialogs behave just like routes that can be await-ed.
An AlertDialog can be used to show pop-up screens that typically contain some text and buttons, but could also contain images or other widgets. AlertDialogs may contain a title, some content, and actions. The actions property is where you ask for the user’s feedback (think of “save,” “delete,” or “accept”).
There are also design properties such as elevation or background, shape or color, that help you make an AlertDialog well integrated into the design of your app.
In this recipe, we’ll perform the same actions that we implemented in the previous recipe, Turning navigation routes into asynchronous functions. We will ask the...
In this chapter, you have learned several techniques to work with asynchronous code in Flutter, using Future objects to handle tasks that may take some time to complete.
You have seen how to use the async/await pattern to avoid then callbacks, making your code more readable and easier to maintain.
You have learned how to fire multiple Futures at the same time and manage multiple asynchronous tasks, and seen how to deal with errors in your asynchronous code.
By using FutureBuilder objects, you have allowed Flutter to manage your Futures, providing a more efficient and responsive application.
You have turned navigation routes into asynchronous functions, optimizing the user experience.
Finally, you have seen how to get results from a dialog, ensuring a smooth interaction between different parts of your application.
Mastering asynchronous programming techniques can help you create responsive, efficient, and robust Flutter apps.