
To provide the level of polish necessary for commercial applications, Unity offers a variety of user interface systems to the game programmer. Understanding what each of these systems is designed to do, what each is good at, and how to combine them, will enable the programmer to build retail class menus, navigation buttons, and more.
In this chapter, we will investigate, analyze, and understand these systems. We will then apply this knowledge and build an extensible pop-up system using Prefabs for commonly used scenarios in our game. We will finish by integrating these into mission one with an eye on future missions and future extensibility. In this chapter, we will cover the following topics:
Getting familiar with the Unity UI classes
Developing the pop-up system
Exploring the
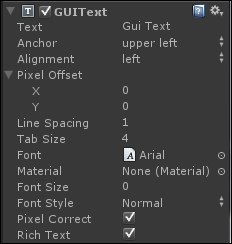
GUITextcomponentExploring the
GUITexturecomponentExploring the
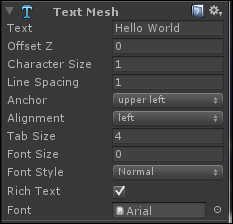
TextMeshcomponentCreating clickable text elements
UnityScript and the
GUI ButtonobjectBuilding the main menu pop up...