

In this section, we configure a typical workplace, which a user can access under the Access Panel UI (https://myapps.microsoft.com). We assign applications to users and groups to see the different capabilities. The steps don't contain all single sign-on or provisioning options. We will discuss these feature sets later in specific chapters.
Log in to https://portal.azure.com with your Global Administrator credentials and add several applications from the application gallery under the Enterprise applications section. After adding the applications, we assign the accounts, which are to be provided access.
Build a list of applications like the following, and assign all groups to access the applications, except the one with user provisioning:

Azure AD application management
Test your newly configured workplace and log in as don.hall@domain.onmicrosoft.com to https://myapps.microsoft.com:
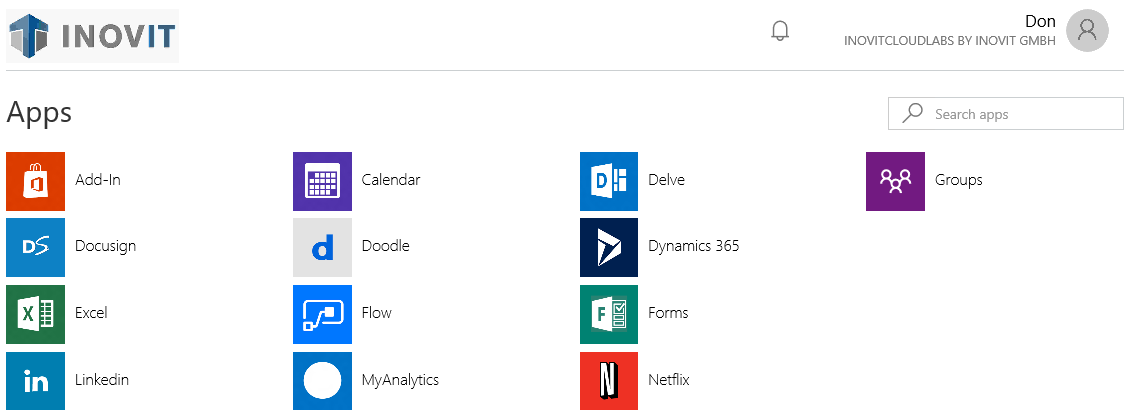
Azure AD access panel UI - application access
Also, test the user experience on Office 365 and log in as don.hall@domain.onmicrosoft.com to https://portal.office.com.
Next, we will assign applications to users.
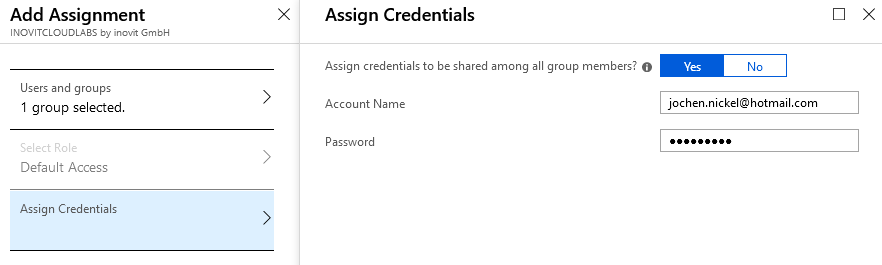
In the next step, we will assign the LinkedIn application to Don Hall, with the company credentials. Don Hall will not be able to see the credentials. So, if he leaves the company, the credentials are still protected.
Add the LinkedIn application from the application gallery and assign Don Hall to access this application:
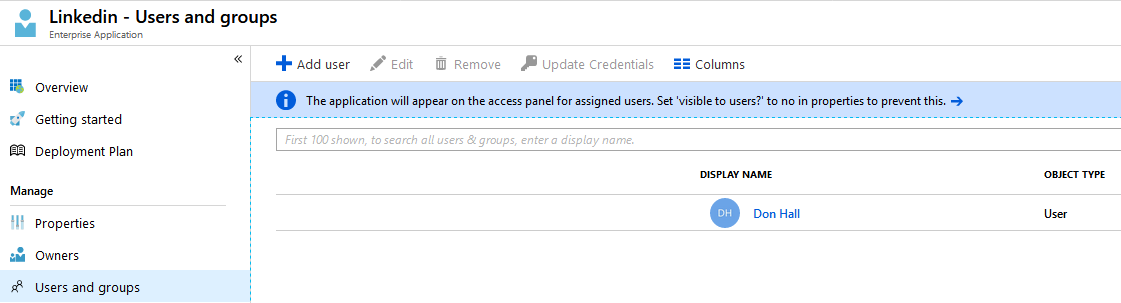
Application - Users and Groups assignment
Next, we provide valid LinkedIn credentials. If you don't have a LinkedIn account, register a demo one:
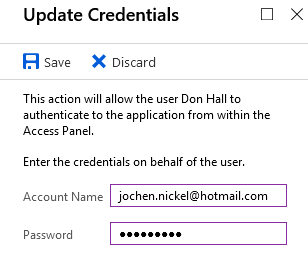
Azure AD Credentials store
The following options for working with credential sets are available:
Test this behavior with the user account, assign applications to groups, and define login information.
In the next steps, we do the same for groups, such as an HR group that uses these groups to get news from an individual Twitter channel:
Filling the Azure AD Credentials store for application access
Add the Twitter app from the application gallery. Assign the HR group and configure the credentials. Check the application at https://myapps.microsoft.com with a user of the HR group.
Now, we can configure the self-service application management.
In this section, we allow users to add their applications to their workplace under https://myapps.microsoft.com to enjoy the Single Sign-On feature. Under your Azure AD in the Configure section, navigate to Enterprise applications. Activate the function shown here:
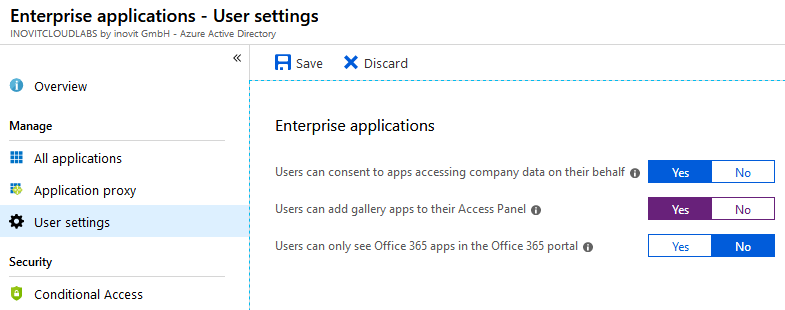
Enterprise applications management options
Log in as Ellen.Adams@domain.onmicrosoft.com to https://myapps.microsoft.com. Click Get more applications and add MailChimp. After you add MailChimp, click Manage applications and choose MailChimp.
As admin@domain.onmicrosoft.com on https://manage.windowsazure.com, you can see the newly added application under the Enterprise applications section of your Azure AD.
Configure the application, add some users, and test it!