


The Android OS is an ever-changing environment. The earliest Android devices (prior to Android 3.0), were required to have a hardware menu button. Though a hardware button is no longer required, menus are no less important. In fact, the Menu API has expanded to now support three different types of menus:
- Options menu and action bar: This is the standard menu, which is used for global options of your application. Use this for additional features such as search, settings, and so on.
- ContextualMode (Contextual Action Mode): This is generally activated by a long press. (Think of this as similar to a right-click on the desktop.) This is used to take an action on the pressed item, such as replying to an email or deleting a file.
- Pop-up menu: This provides a pop-up selection (like a spinner) for an additional action. The menu options are not meant to affect the item pressed; instead, use Contextual Mode as described previously. An example would be hitting the share button and getting...
Before we actually create and display a menu, let's look at a menu to see the end result. The following is a screenshot showing the menu section of the Chrome app:

The most obvious feature to note is that the menu will look different based on the screen size. By default, menu items will be added to the overflow menu—that's the menu you see when you press the three dots at the far right edge.
Menus are typically created in resource files using XML (like many other Android resources) stored in the res/menu directory, though they can also be created in code. To create a menu resource, use the <menu> element as shown:
<menu xmlns:android="http://schemas.android.com/apk/res/android">
</menu>
The <item> element defines each individual menu item and is enclosed in the <menu> element. A basic menu item looks as follows:
<item
    android:id="@+id/settings"
    android:title="@string/settings" />
The most common <item> attributes...
A context menu provides additional options related to a specific view—the same concept as a right-click on the desktop. Android currently supports two different approaches: the floating context menu and Contextual Mode. Contextual Action Mode was introduced in Android 3.0. The older floating context menu could lead to confusion since there was no indication of the currently selected item and it didn't support actions on multiple items—such as selecting multiple emails to delete in one action.
If you need to use the old-style context menu, for example to support pre-Android 3.0 devices, it's very similar to the Option Menu API, you just different method names. To create the menu, use onCreateContextMenu() instead of onCreateOptionsMenu(). To handle the menu item selection, use onContextItemSelected() instead of onOptionsItemSelected(). Finally, call registerForContextMenu() to let the system know you want context menu...
As discussed in the previous recipe, Contextual Mode supports two forms of use: single View mode (as demonstrated) and multiple selection (or batch) mode. Batch mode is where Contextual Mode outperforms the old-style context menu as multiple selections were not supported.
If you've ever used an email app such as Gmail or a file browser, you've probably seen Contextual Mode when selecting multiple items. Here is a screenshot from Solid Explorer, which shows an excellent implementation of Material Theme and Contextual Mode:
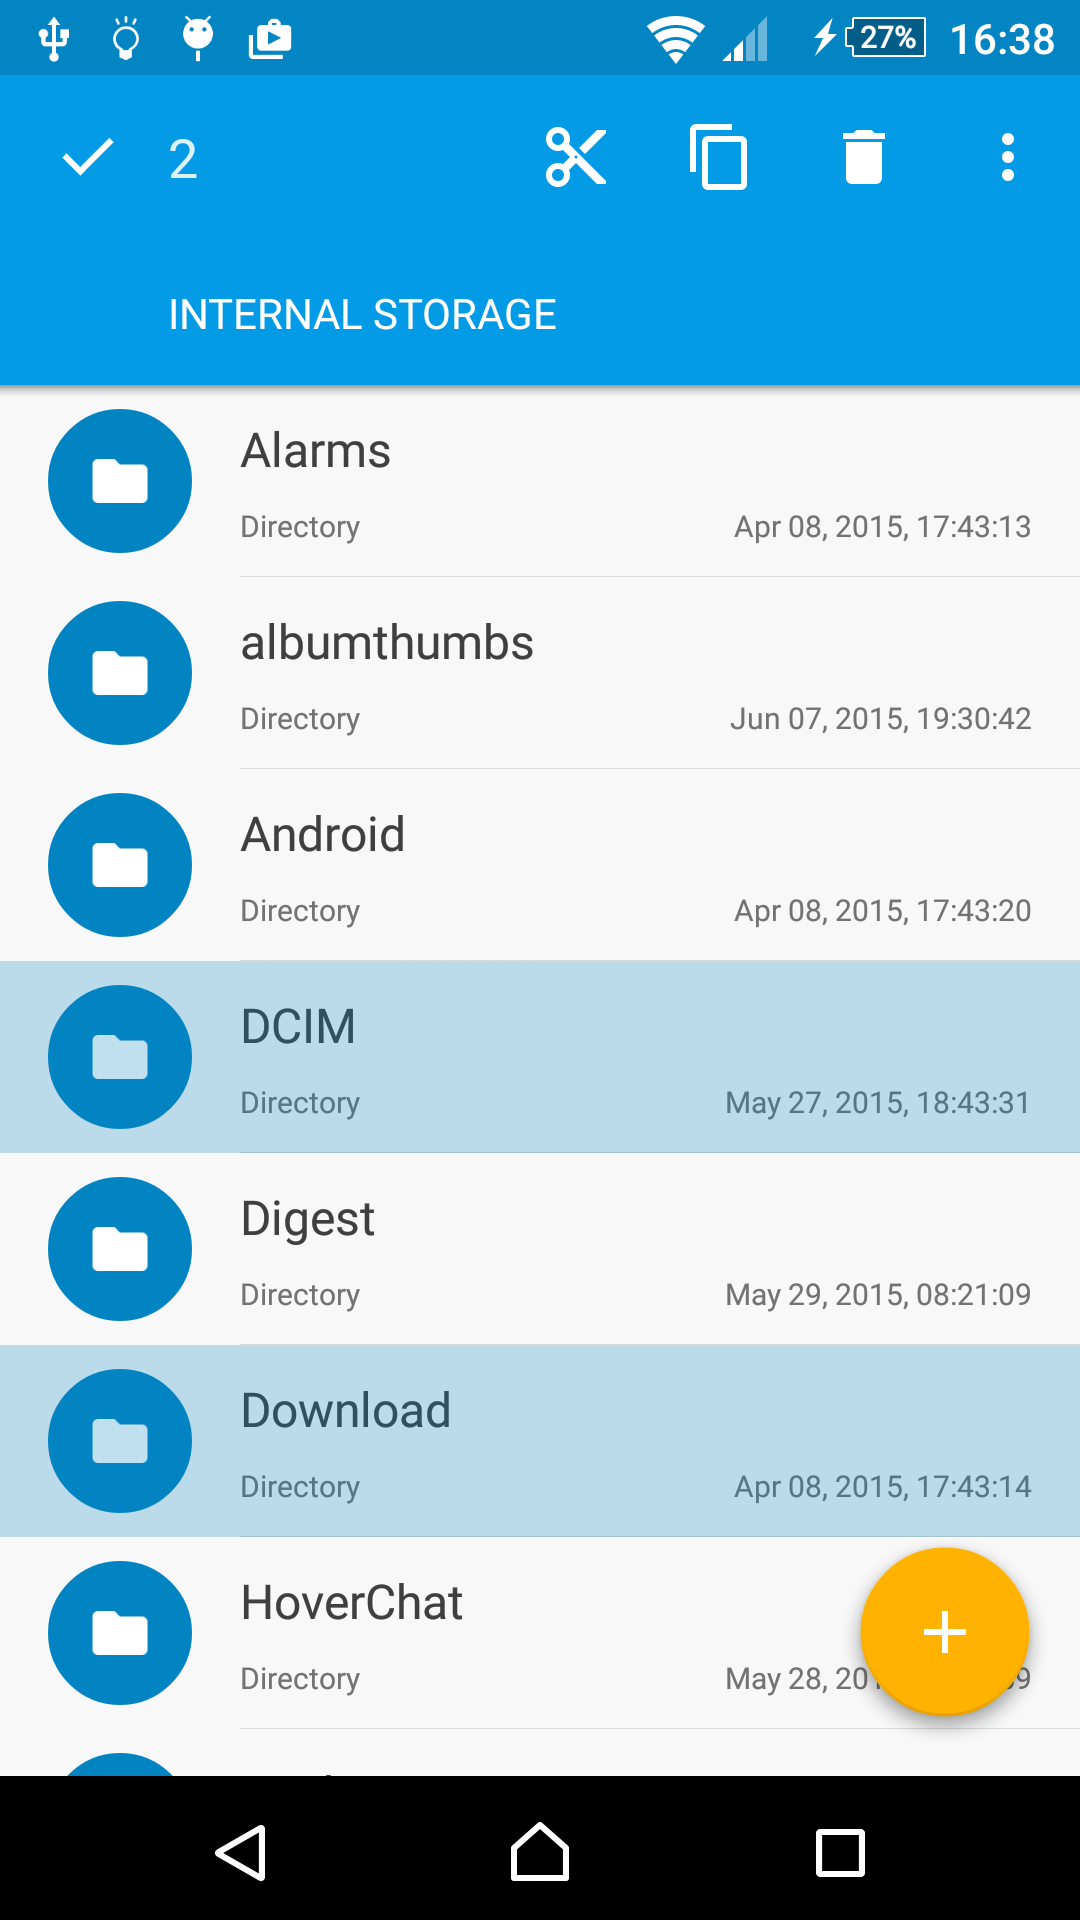
When we introduced RecyclerView in Chapter 2, Layouts, we discussed how many features from the old ListView were not already included in the new RecyclerView. Multiple item selection is one of the most missed features. In this recipe, we will demonstrate multiple item selection with the RecyclerView using Action Mode.
We will use the RecyclerView example created in Chapter 2, Layouts as the base for this recipe. If...
A pop-up menu is attached to a view similar to the drop-down menu on a spinner. The idea of a pop-up menu is to provide additional options to complete an action. A common example might be a Reply button in an email app. When pressed, several reply options are shown, such as: Reply, Reply All, and Forward.
Here is an example of the pop-up menu from the following recipe:
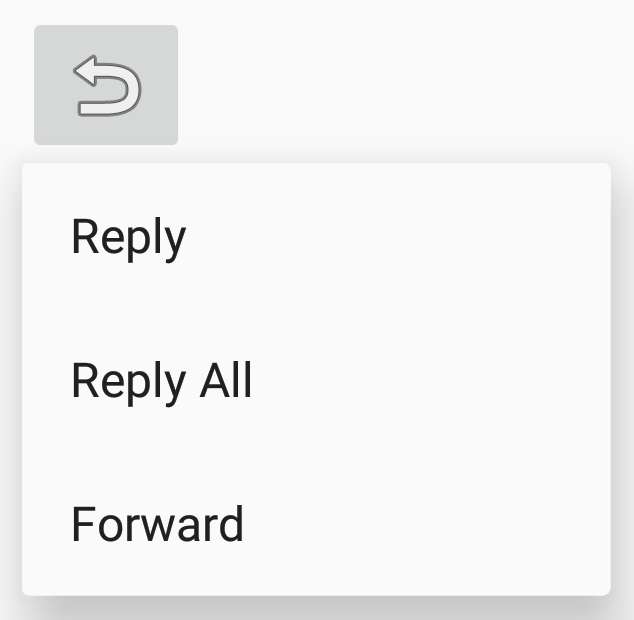
Android will show the menu options below the anchor view if there is room; otherwise, the menu will be shown above the view.
Note
A pop-up menu is not meant to affect the view itself. That is the purpose of a Context Menu. Instead refer to the Floating Menu/Context Mode described in the Enabling Contextual Action Mode for a view recipe.
In this recipe, we will create the pop-up menu shown previously, using ImageButton as the anchor view.