


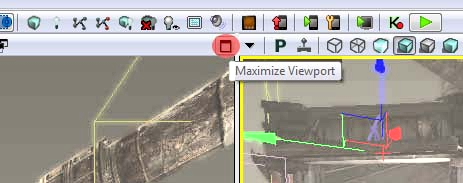
The most commonly used viewport is perspective. You will spend most of your time in the perspective viewport. This includes moving, placing, duplicating, and transformation of static meshes and most of your environment creation.
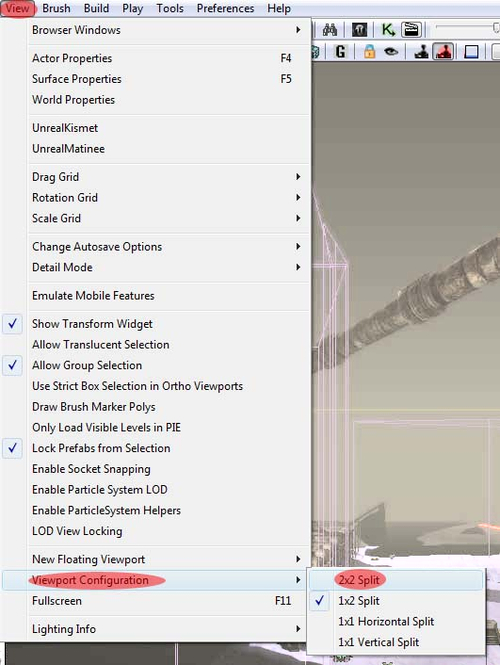
If you go up to View | Viewport Configuration, you have options of how you want to set up your views, which is shown in the following screenshot:
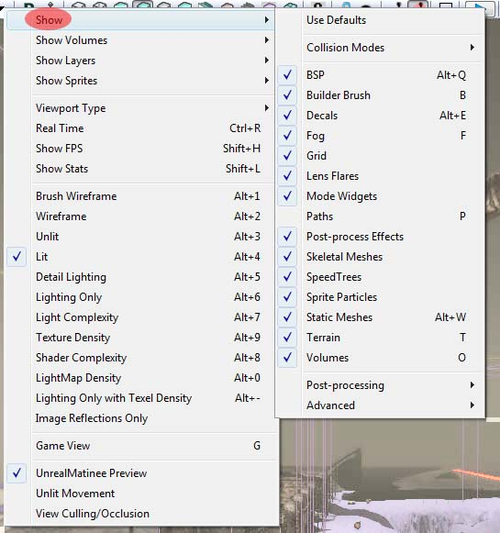
In the drop-down menu for the viewport, there are options of what you want to display. It allows you to hide/unhide specific elements in your perspective viewport, which is very useful when you are working on a specific element during your level creation:
Real Time Preview (RTP) shows the environment as it would look like in the game, complete with sound and particle effects. RTP works best when you have the Game Mode (G) enabled, which turns off the wireframe brush view. This offers the best and most accurate view of what your level will look like in the game.

Here is a list of the different viewport options you will be using when designing in UDK. Some of you will use one more than the others:
Brush wireframe (Alt+1): Shows wireframe brushes that will allow brush selection

Wireframe (Alt+2): Shows wireframe brushes that will not allow brush selection
Unlit (Alt+3): No lights; makes navigation inside your perspective viewport a bit faster
Lighting only (Alt+5): Lighting only

Lightmap density (Alt+9): Lightmap density only
Lighting only with texel density (Alt+0): Lighting only with texel density
So we know about using the BSP brushes and static meshes, the additive and subtractive tools, the unreal scale and proportions, the grid snapping, and the different types of viewport options that we will be using when designing in UDK.
So we have light in our small room, what's next? Let's see if you can move the wireframe brush and create another surface. It is important that you understand the different uses of the translation and scaling mode options available in this editor.


