

Creating a Synapse workspace
Synapse workspace provides an integrated console to manage, monitor, and administer all the components and services of Azure Synapse Analytics. In order to get started with Azure Synapse Analytics, we need to create an Azure Synapse workspace, which provides an experience to access different features related to Azure Synapse Analytics.
You can create a Synapse workspace in the Azure portal just by providing some basic details. Follow these steps to create your first Azure Synapse workspace:
- Go to https://portal.azure.com and provide your credentials.
- Click on Create a resource:

Figure 1.2 – A screenshot of the Azure portal
- Search for
Azure Synapseusing the search bar. - Select Azure Synapse Analytics (Workspaces preview) from the search drop-down and click on Create:

Figure 1.3 – A screenshot of the Azure Synapse Analytics page in Azure Marketplace
- You need to provide basic details to create your Synapse Analytics workspace:
- Subscription: You need to select your subscription. If you have many subscriptions in your Azure account, you need to select a specific one that you are going to use to create a Synapse workspace.
Important note
All resources in a subscription are billed together.
- Resource group: A Resource group is a container that holds all the resources for the solution, or only those resources that you want to manage under one group. Select a Resource group for the Synapse workspace. If you do not already have a Resource group created, click on Create new right below the text field for Resource group:
- Subscription: You need to select your subscription. If you have many subscriptions in your Azure account, you need to select a specific one that you are going to use to create a Synapse workspace.
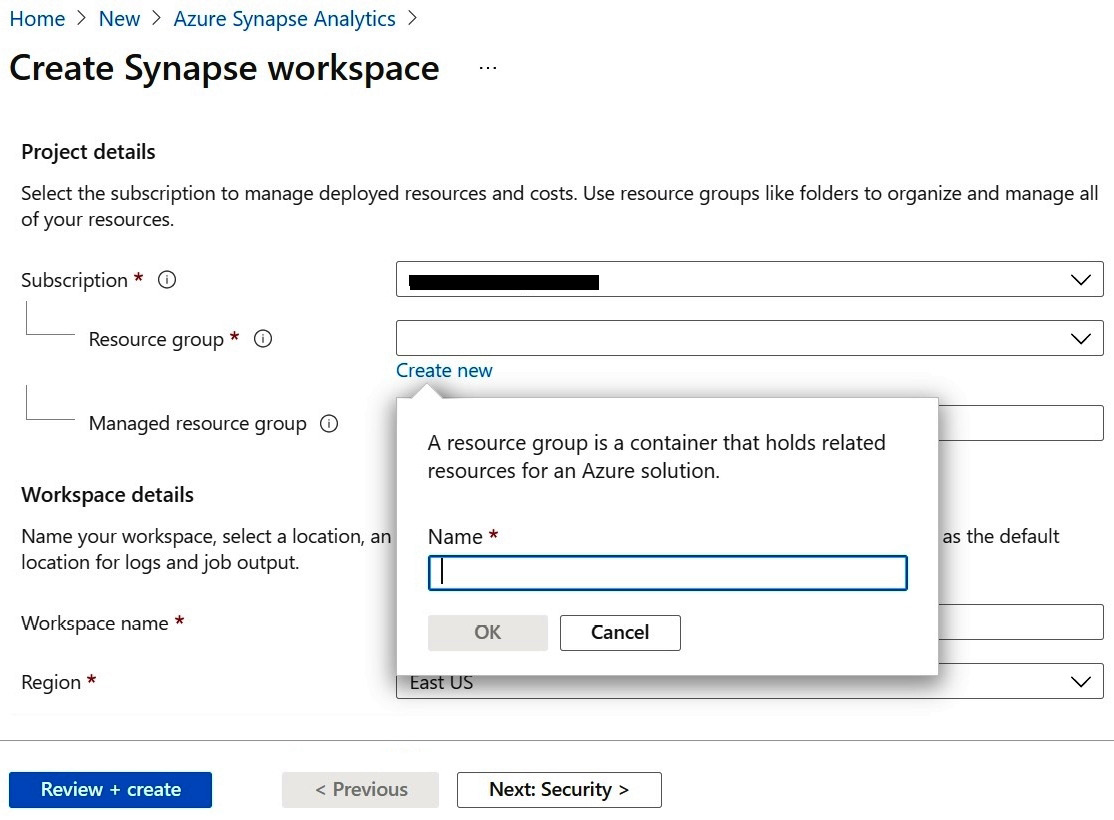
Figure 1.4 – A screenshot highlighting the field to provide a Resource group name
- Workspace name: Provide an appropriate name for the workspace that you are going to create.
Important note
This name must be unique, so it is better to keep it specific to your team/project.
- Region: You can see many options in the dropdown. Select the most appropriate region for your Synapse Analytics workspace:
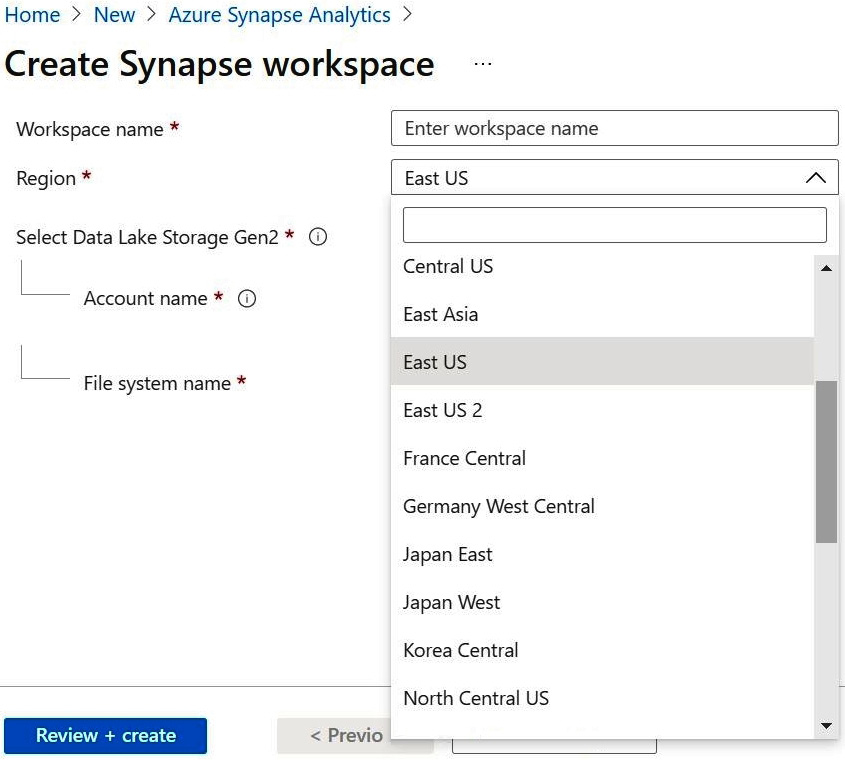
Figure 1.5 – A screenshot of regions appearing in a drop-down list
- Select Data Lake Storage Gen2: This will be the primary storage account for the workspace, holding catalog data and metadata associated with the workspace:
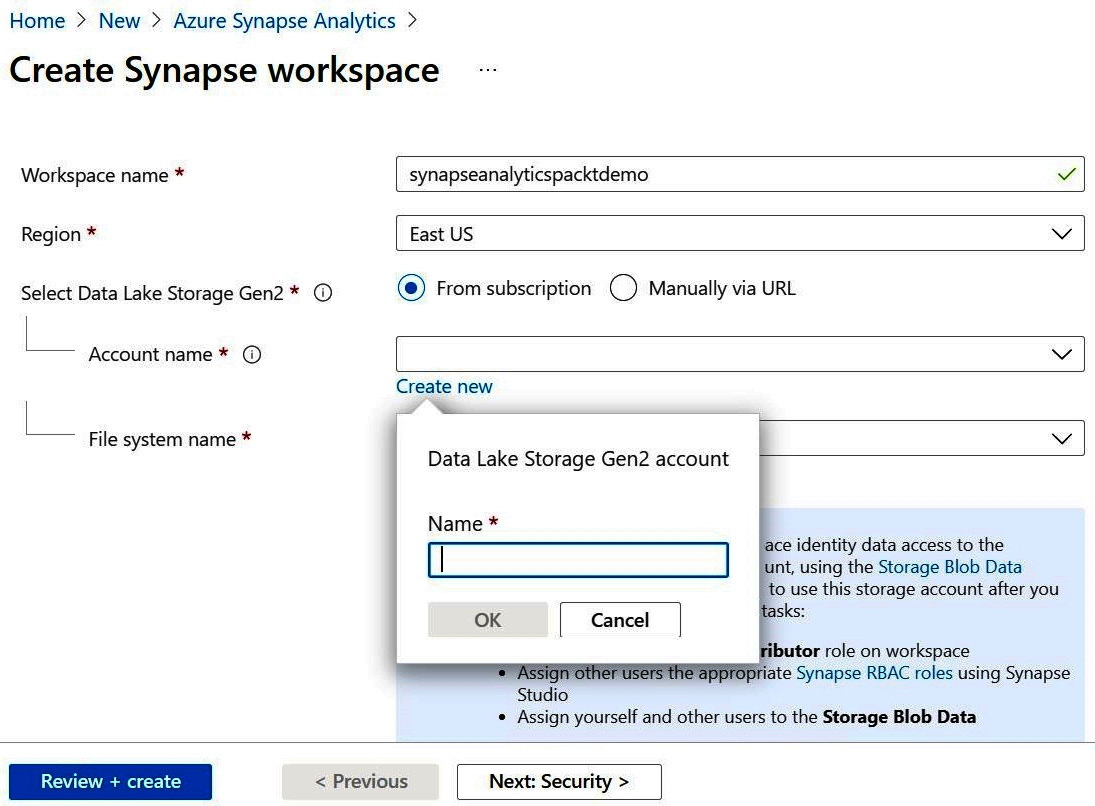
Figure 1.6 – A screenshot highlighting fields of Select Data Lake Storage Gen2
- Account name: You can select from the dropdown or you can create a new one. Only Data Lake Gen2 accounts with a hierarchical namespace enabled will appear in the dropdown. However, if you click on Create new, then it will create a Data Lake Gen2 account with hierarchical namespace enabled.
Important note
A storage account name must be between 3 and 24 characters in length and use numbers and lowercase letters only.
- File system name: Again, you can select from the dropdown or you can create a new one. To create a new file system name, click on Create new and provide an appropriate name for it. A file system name must contain only lowercase letters, numbers, or hyphens:
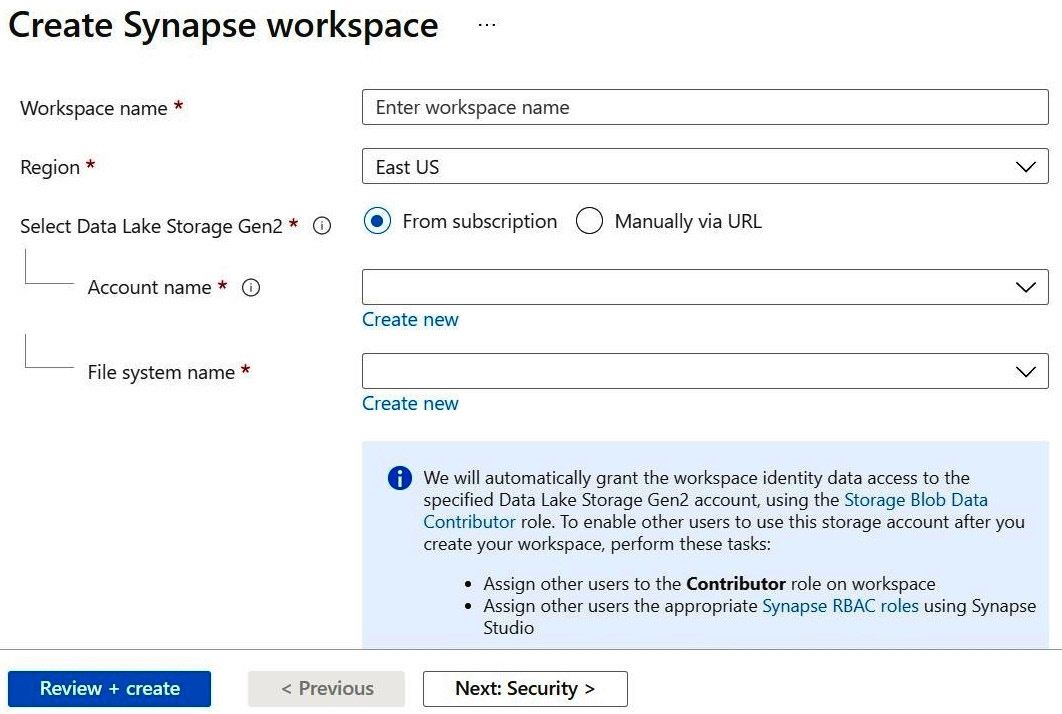
Figure 1.7 – A screenshot highlighting assignment of the Storage Blob Data Contributor role
- Click on Security + networking to configure security options and networking settings for your workspace, as seen in Figure 1.8.
Provide SQL administrator credentials that can be used for administrator access to the workspace's SQL pools. We will talk about SQL pools in future chapters:

Figure 1.8 – A screenshot of the Security + networking form for Azure Synapse
- Click on Tags to provide a name-value pair to this resource.
- Go to the next page to review the summary and click on Create after verifying all the details on the summary page.
- In your Azure Synapse workspace in the Azure portal, click Open Synapse Studio:

Figure 1.9 – A screenshot highlighting the link for launching Synapse Studio
This deployment takes just a couple of minutes and creates a workspace that bundles Synapse analytics, ETL, reporting, modeling, and analysis together under one umbrella. Now you are ready to build your enterprise-level solution!