


In the previous chapter, you learned how to open the script editor in Google Sheets. For this task, open the script editor in a newly created or any existing Google Sheet and follow these steps:
Select cell B3 or any other cell. Click on Insert and select Drawing..., as shown in the following screenshot:

A drawing editor window will open. Click on the Text box icon and then click anywhere within the canvas area. Type
Click Me. Resize the object to enclose the text only, as shown in the following screenshot:
Click on Save & Close to exit the drawing editor. Now, the Click Me image will be inserted into the active cell (B3), as shown in the following screenshot:

You can drag this image anywhere around the spreadsheet except in the menu bar.
Tip
In Google Sheets, images are not anchored to a particular cell, and they can be dragged or moved around.
If you click on the image, a drop-down arrow on the top-right corner will be visible:

Click on the Assign script… menu item. A script assignment window will open. Type
greetingor any other name you like, but remember the name as the same name will be used to create a function in the next steps. Click on OK: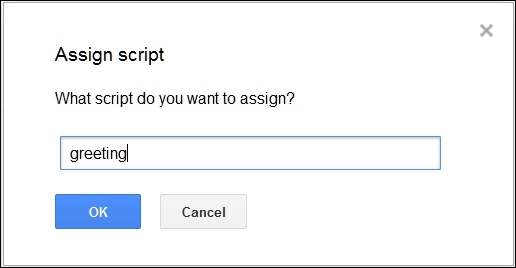
Now open the script editor in the same spreadsheet. When you open the script editor, a project selector dialog will open. You can close it or select Blank Project. A default function,
myFunction, will be there in the editor. Delete everything in the editor and insert the following code:function greeting() { Browser }When you type
.next toBrowser, the code completion hint will open as shown:
If you click on
msgBox(String title, String prompt, ButtonSet buttons):String, thenmsgBox(title, prompt, buttons)will be inserted automatically.Tip
In addition to the code hint feature, you can use the auto-indent feature. Ensure that the Indent icon, on the left side of the Save icon, is pressed. Select the few lines of code you would like to indent, then press the Tab key on your keyboard. Now you can see that these lines of code indented automatically.
In this code,
Browserdenotes that you are calling theBrowserclass from theBase(or basic) script services.msgBoxis theBrowserclass's method with three parameters. The names of the parameters are self-explanatory. Thetitleparameter denotes the title of the message box,promptdenotes your message to the user, andbuttonsdenotes what category or sets of buttons you would like to include in your message box.Now edit or replace the code with the following:
function greeting() {
  Browser.msgBox("Greeting", "Hello World!", Browser.Buttons.OK);
}
Click on the Save icon and enter a project name if asked. You have completed the coding of your
greetingfunction.Now, activate the spreadsheet tab/window and click on your Click Me button. An authorization window will open and you need to click Continue. In the successive Request for Permission window, click on Allow, as shown in the following screenshot:

You only need to do this once for this particular scope. The scopes will be shown in the concerned permission dialog/window. In this script, the scope is View and manage your spreadsheets in Google Drive. Above the scope, you can see the title Chapter 2 would like to:, which means your script project (project name Chapter 2) or application would like to get your permission for that particular scope.
As soon as you click Allow, the permission dialog will close, and your actual greeting message box will open as shown here:

Click Ok to close the message box. Whenever you click on your button, this message box will open.
Congratulations! You have created a clickable button and associated a GAS function with it.