

In the previous chapter, you learned about many of the features of GmailApp and ContactApp and you built lots of real-world applications. In this chapter, you will learn how to create Forms programmatically using FormApp and HtmlService. Also, you will learn about the doGet and doPost functions.

In Chapter 1, Introducing Google Apps Scripts, you created a Form manually, but this time we will create Forms programmatically by script. First of all, we will create a Form with four choices and an Other option choice. For simplicity, we add places as a multiple choice radio group. Each choice is exclusively selectable. Create the function createForm as shown here in a spreadsheet code file:
function createForm() {

  var places = ["Place 1","Place 2","Place 3","Place 4"];

  var form = FormApp.create("Vacation Form");

  form.addMultipleChoiceItem()
    .setTitle('Where will you go for vacation?')
    .setChoiceValues(places)
    .showOtherOption(true);

}
The places variable holds a few random places, and you can assign any place name and any number of places as an array of strings. The create method of FormApp class creates a form titled Vacation Form in your Drive's root folder (My Drive). On running the function, the created Form will look like this...
You can create awesome web pages/applications by publishing your script as a web application. In this section, you'll see how to publish a script. Start by creating a new Sheet and entering the following code in the script editor:
function doGet(){
  var str = "Hello world!";
  return ContentService.createTextOutput(str);
}
The doGet function will be executed whenever a HTTP/HTTPS request is sent to the script. In the preceding code, ContentService is used to return a string to the browser. Content service can be used to return any type of content including simple text, HTML, XML, JSON, CSV, and so on.
To publish the script, within the script editor, navigate to Publish | Deploy as web app…. A new Deploy as web app dialog will open as shown here:

Select any one of the existing project versions or select New to create a new project version. There will be two choices under the Execute the app as option, Me and User, accessing the web app. For this application...
At the beginning of this chapter, you created a Form using script codes. However, this Form is a static one, meaning you cannot add dynamic formatting or script on the client side. You can perform formatting and calculations, if there are any to be done, on the server side only.
HtmlService allows scripts to return HTML or web pages to clients. For security reasons the HTML content, including CSS and JavaScript, are compiled and sandboxed by Caja compiler before returning to the client browser. The returned web page(s) can interact with server-side GAS functions using the google.script.run API methods.
The advantages of using HtmlService are:
You can use CSS and client-side JavaScript
You can create dynamic HTML forms rather than static Forms
You can work on client-side HTML and server-side script codes separately
HtmlService can create HTML codes from templates. The templates are HTML files mixed with HTML markup and scripts (these are called scriptlets and are executed on the server...
Create a Form.html file, which we are going to use as an HTML template and enter the following code in it:
<!-- Form.html  -->
<!DOCTYPE html>
<html>

  <head>
    <base target="_top">
  </head>

  <body>
    <form>
      <h4>Where will you go for vacation?</h4>

      <input type="radio" name="places" value="Place 1" />Place 1

      <br />
      <input type="radio" name="places" value="Place 2" />Place 2

      <br />
      <input type="radio" name="places" value="Place 3" />Place 3

      <br />
      <input type="radio" name="places" value="Place 4" />Place 4

      <br />
      <br />
      <input type="submit" value="SUBMIT" />
    </form>
  </body>
</html>
Use the same name attribute value for radio type input fields so that they are all grouped together. This means they will work exclusively. Update the doGet...
To submit data using the google.script.run API methods, add onclick property to the Submit button:
<input type="submit" value="SUBMIT" onclick="google.script.run.postFormDataToSheet(this.parentNode);" />
<!-- this.parentNode is the 'form' element -->
Create the postFormDataToSheet function as shown here:
function postFormDataToSheet(e){
  // Replace with your spreadsheet's ID.
  var ss = SpreadsheetApp.openById("spreadsheet's id");

  var SheetResponses = ss.getSheetByName("Responses");

  // Create a 'Responses' sheet if it does not exist.
  if(!SheetResponses){
    SheetResponses = ss.insertSheet("Responses");
  }

  SheetResponses.appendRow([e.places]);
}
To show Form submission result or error message, insert the postData function in a separate <script> tag and add success and failure handlers with a callback function as shown here:
    <script>
      function postData(form){
        google.script.run
.withSuccessHandler...The same HTML code using the Google add-on CSS and jQuery libraries is as follows:
<!DOCTYPE html>
<html>
  <head>
    <base target="_top">

    <!-- Google's Add-ons stylesheet //-->
    <link rel="stylesheet" href="https://ssl.gstatic.com/docs/ script/css/add-ons1.css" />

    <script src="//ajax.googleapis.com/ajax/libs/ jquery/1.10.2/jquery.min.js"></script>

    <script>
      // on document load, assign postData function to submit // button's onclick property.
      $(function(){
        $("#btnSubmit").click(postData);
      });

      // Calls server side function 'postFormDataToSheet'
      // with form as the argument.
      function postData(){
        google.script.run
          .withSuccessHandler(showSuccess)
          .withFailureHandler(showError)
          .withUserObject(this)
          .postFormDataToSheet(this.parentNode);
      }

      /*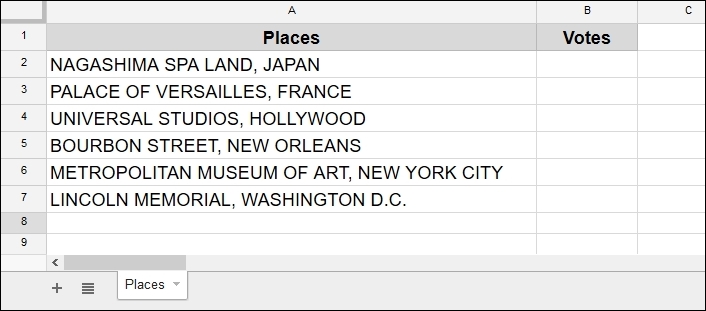
...The previous application appends each response to the Responses Sheet. But, we need to update the count against each choice. If we can make the selected choices increment by a counter then we can use the same application for e-voting purposes.
Edit the labels/headers for column A and B in the Places sheet as follows:
Update the HTML code in the Form.html file as shown here:
<!DOCTYPE html>
<html>
  <head>
    <base target="_top">

    <link rel="stylesheet" href="https://ssl.gstatic.com/docs/ script/css/add-ons1.css" />
    <script src="//ajax.googleapis.com/ajax/libs /jquery/1.10.2/jquery.min.js"></script>

    <script>
      $(function(){
        $("#btnSubmit").click(postData);
      });

      function postData(){
        // Remove previous messages if any
        $("#error,#success").remove();

        // Disable the submit button until server returns // anything.
this.disabled = true...This application serves as an HTML form to the user to let them submit values to the server. This could be to reserve a ticket for a show, book a seat in a venue, book a room in a hotel, and many more purposes.
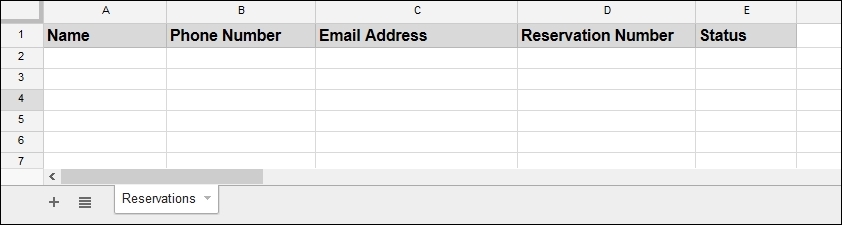
Create a spreadsheet and create column labels as shown in the following screenshot:
In the code file, create the doGet, doPost and cancelReservation functions:
function doGet(e) {
  // Maximum available
  const MAX_TICKETS = 25;

  // 'cancel' is a query string appended with the published URL.
  var cancel = e.parameter.cancel;

  if(cancel){
    var msg = cancelReservation(cancel);
    return ContentService.createTextOutput(msg);
  }

  // Replace with your spreadsheet's ID.
  var ss = SpreadsheetApp.openById("spreadsheet's id");
  var SheetReservations = ss.getSheetByName("Reservations");

  var data = SheetReservations.getDataRange().getValues();
  data.shift();

  var template = HtmlService.createTemplateFromFile("Form.html");
template...In this chapter, you learned how to create many useful real-life applications including a reservation system application. The next chapter will be focused on Google Calendar. You will learn how to create Calendar events and how to enable Google's advanced services. You will also learn to create Drive file routing and search applications.
The rest of the chapter is locked
You have been reading a chapter from
Learning Google Apps ScriptPublished in: Mar 2016Publisher: ISBN-13: 9781785882517
Register for a free Packt account to unlock a world of extra content!
A free Packt account unlocks extra newsletters, articles, discounted offers, and much more. Start advancing your knowledge today.
undefined
Unlock this book and the full library FREE for 7 days
Get unlimited access to 7000+ expert-authored eBooks and videos courses covering every tech area you can think of
Renews at $15.99/month. Cancel anytime