Reader small image

You're reading from  Edit without Tears with Final Cut Pro

Product typeBook
Published inMar 2024
PublisherPackt
ISBN-139781804614921
Edition1st Edition
Right arrow
Author (1)
Bruce G. Macbryde
Bruce G. Macbryde
author image
Bruce G. Macbryde

Bruce G. Macbryde, a Final Cut Pro trainer with 20+ years of experience, spanning from the original release in 1999 to the latest version. He served as a sales manager for Australian Authorized Apple distributors (1998-2004) and later as a training manager for Apple-developed software through 2009. He established Wedding Media Productions in 2004, a wedding video business in Sydney, Australia. Bruce is a YouTube creator for the VideoTutors channel, with 500+ video tutorials. He began teaching marketing at NSW TAFE in the early 1980s, specializing in technology and business software such as Microsoft Office, Adobe Pagemaker, and Photoshop during a 7-year stint in New Zealand.
Read more about Bruce G. Macbryde

Right arrow

Fixing and Enhancing the Audio

In the previous chapter, we completed the rough cut, reaching a fixed duration and moving to picture lock, ready for the final stages of color correction and audio sweetening. This chapter takes a look at the more advanced methods of audio correction, assuming that the basic volume level adjustments are already known.

Good audio is more important in a video than the images themselves. Viewers will stop watching a video with questionable audio much faster than one with acceptable audio but marginal video quality. To help improve the audio of imported media, Final Cut Pro ships with a myriad of audio filters, mostly borrowed from Apple’s own Logic Pro application. A deep understanding of all these filters and their options would take a lifetime of experience with audio, so this chapter will focus only on the most frequently needed filters with the thought in mind that the reader of this book will be unlikely to have the requisite knowledge of...

Understanding audio in the browser

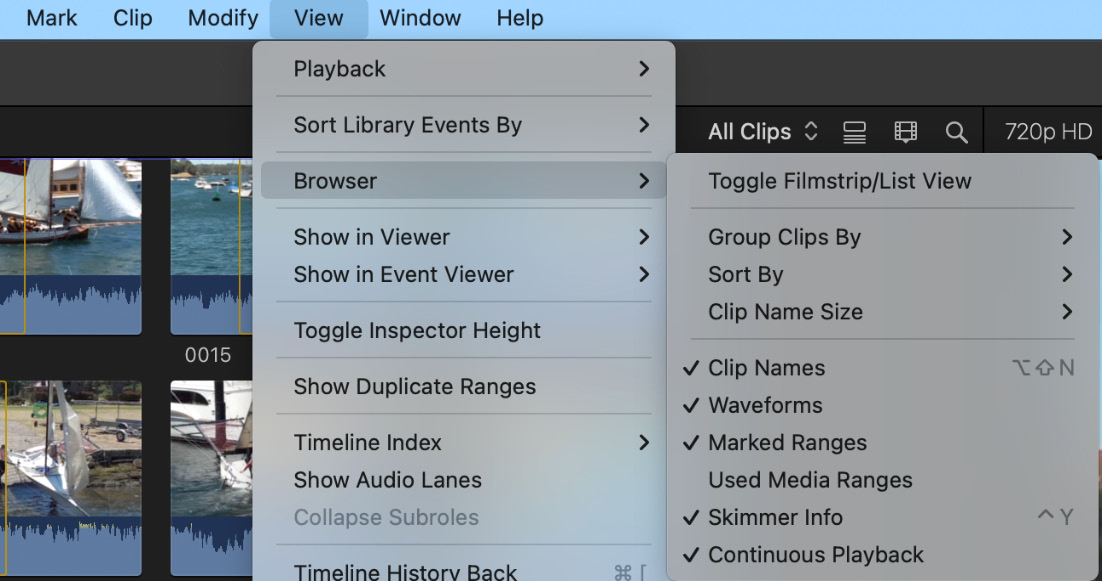
Audio levels can be adjusted in the browser, which is useful for dialogue and music videos when the levels are low. You should also be aware of the option to display waveforms as these give you a visual representation of the audio.

Figure 6.1 – Browser setting to display waveforms

Figure 6.1 – Browser setting to display waveforms

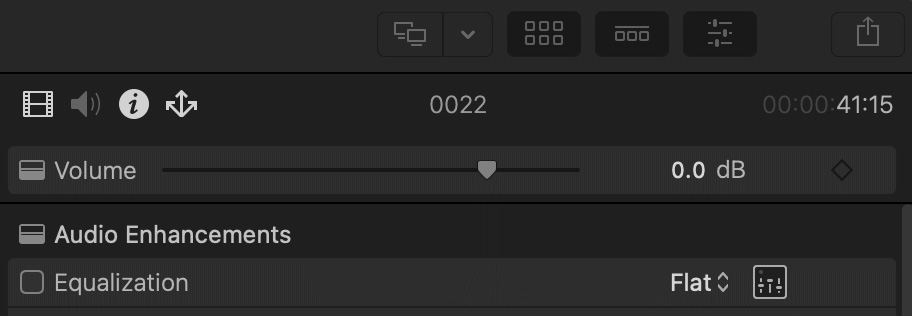
The default audio level in a Browser clip, as it is imported, is at the level set on the camera. This will show as 0.0 in the inspector when the clip is selected in the browser.

Figure 6.2 – Browser volume level adjustment in the inspector

Figure 6.2 – Browser volume level adjustment in the inspector

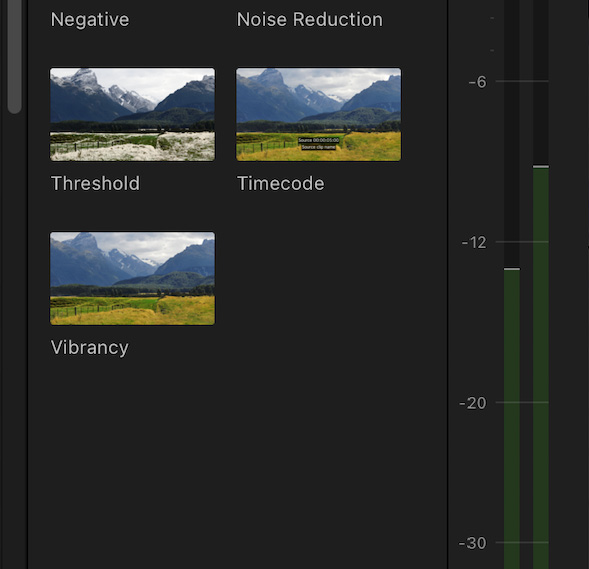
Even though the dB level shows in the inspector as 0.0, the audio meters will show a different level. The default meters are small and shown below the viewer to the right of the timecode. It is advised to click the default meters to display them in a larger form beside the Effects or Transition browsers, as shown in Figure 6.3:

Figure 6.3 – Larger form of meters showing output levels

Figure...

Audio in the timeline

As a current user of Final Cut Pro, you will be aware of how to drag the horizontal audio line to adjust the volume level within a clip, and how aggressively the volume changes when you drag. There is a simple way to control that by holding the Command key while you drag. The changes will be far more composed.

When you drag the line, volume levels are changed for the whole clip, from edit point to edit point; however, there are also ways to change the levels within the clip. The easiest method is to use the Range tool. Hold the R key down, hover over the point where you want to start the change in volume, then click and drag to the end of where you want to make the change. A yellow outline will enclose the area to be changed, as shown in the following screenshot:

Figure 6.8 – The Range tool for adjusting within a clip

Figure 6.8 – The Range tool for adjusting within a clip

Drag the horizontal line to the new volume level and you’ll see that auto-fade transitions are entered...

Fixing audio vocal problems

In this section, we will learn how to fix audio problems, particularly the following ones:

  • Ambient background noise
  • Voices with variable volume levels
  • Wind noise
  • Echoes
  • Distorted voices
  • Ums and ahs, coughs, and sniffs

Ambient background noise

You will get the best results by using audio filters to fix ambient background noise problems. In most cases, other than the worst types of noise problems, you will produce something that will feel like magic, and everyone else will just say, “Well done.”

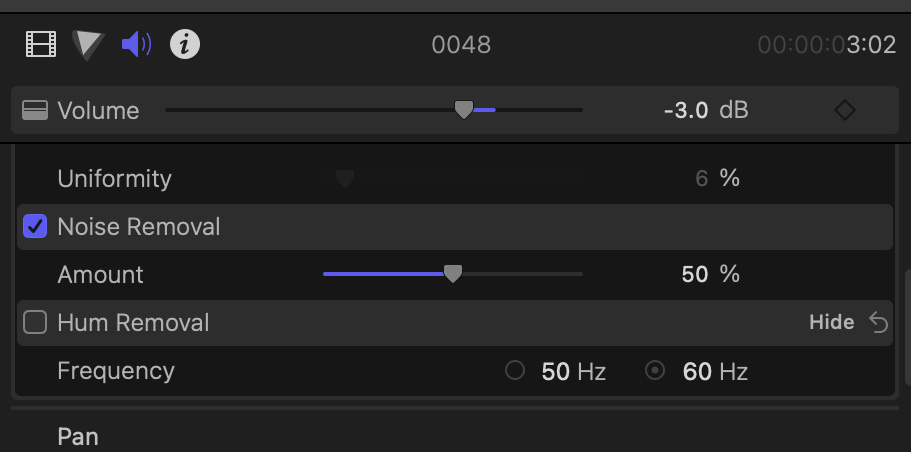
The first filter to try is the inspector’s Noise Removal filter. It’s built into the main body of the inspector so there’s no need to add it from the Effects browser.

Figure 6.19 – Noise Removal in the inspector

Figure 6.19 – Noise Removal in the inspector

When you activate the effect, it defaults to 50 %. I suggest that you reduce the slider to around 45 % as 50 % tends to give a bit of a helium...

Suggestions for correcting audio

There are a number of methods to correct audio, and in this section, we will look at some of them.

Settings for the audio meters

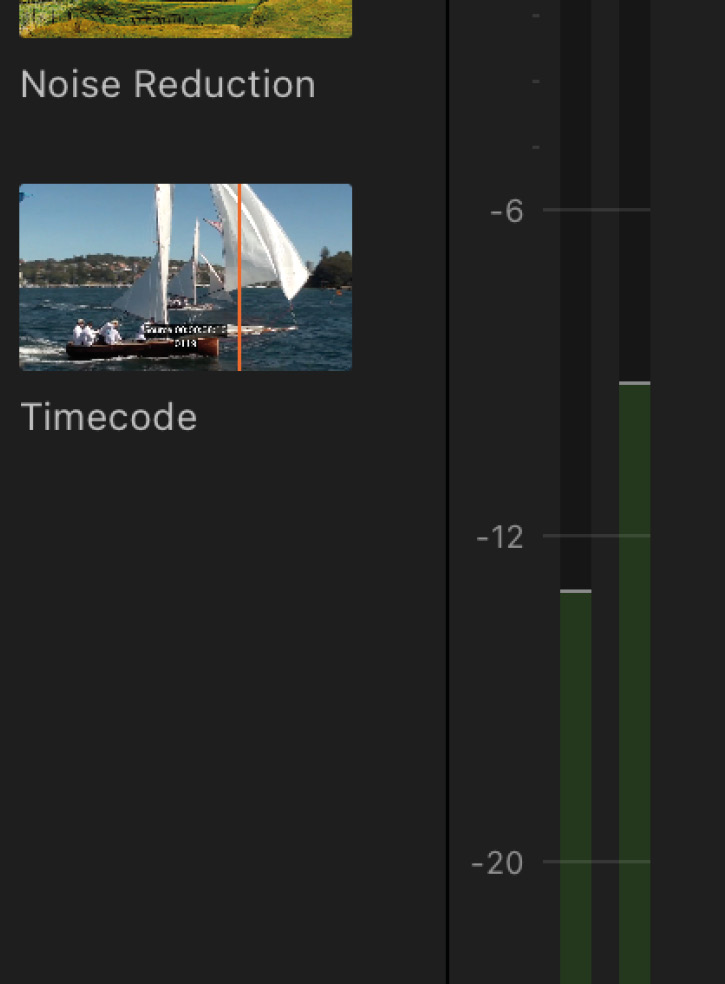
Always set the audio meters to their maximum display size to the right of the Effects/Transitions browsers (Figure 6.30). This is done by clicking on the default meters below the viewer, as in Figure 6.29:

Figure 6.29 – Default location of the small audio meters

Figure 6.29 – Default location of the small audio meters

Click on the small meters and they will move to the right of the Effects/Transitions browsers:

Figure 6.30 – Best location for the larger audio meters

Figure 6.30 – Best location for the larger audio meters

The following are some other suggestions to consider:

  • Keep the mix of dialogue audio between -8 and -15
  • Keep the maximum peaks at -6
  • Set the music to somewhere between -12 and -20
  • Make sure any background music behind dialogue is set between -20 and -30
  • Keep sound effects between -10 and -20; they can spike to -6
  • ...

Using XML files

XML files are industry-standard text files that contain all of the information about your edit and are exchanged between Final Cut Pro and third-party applications, such as Logic Pro. Follow these steps to export an XML file from your project:

  1. Select the project in the browser, and from the File menu, navigate to File | Export XML.
  2. Save the XML file to your preferred location on your computer.
Figure 6.37 – Export XML

Figure 6.37 – Export XML

  1. When the pop-up menu appears, select Audio in Metadata View, then select Current Version, unless advised differently. (Note that you may be asked to select another option by the audio professional you are sending the XML to.)
  2. If you are sending the XML file to Logic Pro, choose File | Import | Final Cut Pro XML, then choose the file in the Import dialog. When you import Final Cut Pro sequences into Logic Pro, volume and stereo pan automation are retained.

When sending audio as an XML...

Exporting with audio-only roles

Roles are located in the Index panel for the timeline and are a convenient method of sending a full Final Cut Pro file to be used in third-party applications that don’t support XML. Make sure that you have assigned the audio to separate audio roles. Here’s how to do it:

  1. Select the Share menu, and then select Export or Export Master File.

    You will be presented with three tabs across the top: Info, Settings, and Roles.

  2. Select the middle Settings tab and set Format to Audio Only.
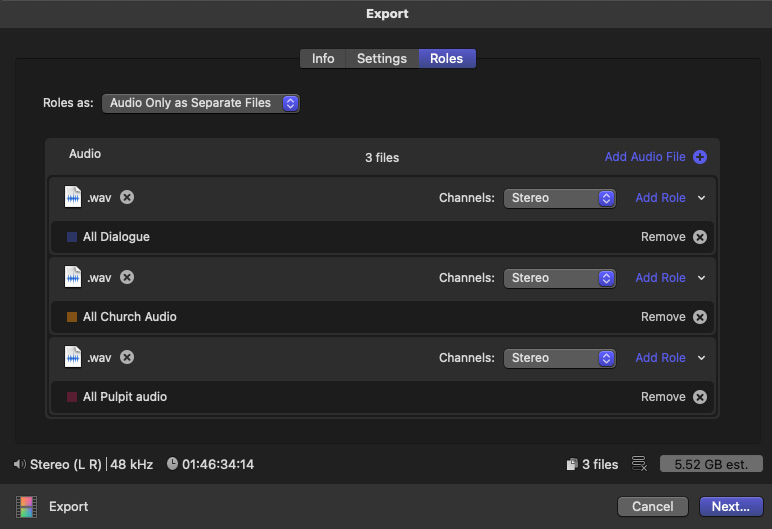
  3. Select the Roles tab on the right. It will default to QuickTime Movie. Set Roles as to Audio Only as Separate Files.
Figure 6.38 – Exporting audio-only roles

Figure 6.38 – Exporting audio-only roles

By following the preceding steps, individual .wav files can be produced and then imported into any audio editor. Chapter 17, Supporting Software Applications for Final Cut Pro, details how to do audio corrections in Audacity.

If you only have one track...

Audio tips and tricks

The following are some tips and tricks to modify and fix audio issues:

  • A shortcut for controlling volume levels in the timeline is Control + + and Control + - to raise and lower the volume level by 1 dB, respectively.
  • Hold the Command key to manually raise and lower the volume levels one dB at a time when dragging the horizontal volume line in a timeline clip.
  • To silence audio in a clip, go to Modify | Adjust Volume | Silence (-∞):
Figure 6.40 – Silencing a clip

Figure 6.40 – Silencing a clip

  • To reset the volume level to zero, go to Modify | Adjust Volume | Reset (0dB):
Figure 6.41 – Resetting volume to zero

Figure 6.41 – Resetting volume to zero

  • To adjust the auto-fades between multiple clips with audio, select the multiple clips and go to Modify | Adjust Audio Fades | Crossfade (shortcut Option + T):
Figure 6.42 – Crossfade multiple clips with audio

Figure 6.42 – Crossfade multiple clips with audio

  • The absolute volume...

Summary

In this chapter, you learned about many advanced features of audio editing in Final Cut Pro, and in future chapters, these skills will be expanded and used with workflows, particularly in Chapter 9, Project Workflows – Pace and Structure. The skills learned included how to modify audio in the browser, understanding the principles of the different levels in the audio meters, and how to evaluate the dB readings for various types of audio. You also learned how to correct various audio issues, including removing background noise, fixing distorted voices and voices with variable volume levels, reducing wind noise and echoes, and removing dialogue fillers. You were given a number of suggestions to make your audio editing easier, as well as being shown some simple filter settings to simplify common correction needs. Finally, you saw how to export specific audio-only files via XML and roles.

If you take just one lesson from this chapter, it is to be aware of the distinction...

lock icon
The rest of the chapter is locked
You have been reading a chapter from
Edit without Tears with Final Cut Pro
Published in: Mar 2024Publisher: PacktISBN-13: 9781804614921
Register for a free Packt account to unlock a world of extra content!
A free Packt account unlocks extra newsletters, articles, discounted offers, and much more. Start advancing your knowledge today.
undefined
Unlock this book and the full library FREE for 7 days
Get unlimited access to 7000+ expert-authored eBooks and videos courses covering every tech area you can think of
Renews at €14.99/month. Cancel anytime

Author (1)

author image
Bruce G. Macbryde

Bruce G. Macbryde, a Final Cut Pro trainer with 20+ years of experience, spanning from the original release in 1999 to the latest version. He served as a sales manager for Australian Authorized Apple distributors (1998-2004) and later as a training manager for Apple-developed software through 2009. He established Wedding Media Productions in 2004, a wedding video business in Sydney, Australia. Bruce is a YouTube creator for the VideoTutors channel, with 500+ video tutorials. He began teaching marketing at NSW TAFE in the early 1980s, specializing in technology and business software such as Microsoft Office, Adobe Pagemaker, and Photoshop during a 7-year stint in New Zealand.
Read more about Bruce G. Macbryde