


Keyframing in the viewer
You will start keyframing videos in the inspector and then adjust them directly in the viewer. Let’s use the example of the F16, including the dip and flip at the center, and add another keyframe.
Adding new keyframes
With the Option key held down, click on the red path in the viewer. Several things will happen. First, the playhead in the timeline will jump to a new position that represents where you clicked in the path. Then, a yellow diamond will appear on the red line where you clicked. The diamond can be dragged to a new position. On either side of the yellow diamond, you will see Bezier adjustment handles, as shown in Figure 13.19:
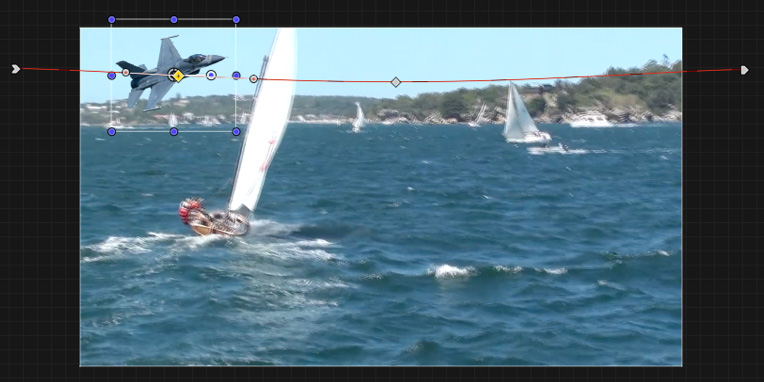
Figure 13.19: New keyframe added with the Option key held
With that, you have seen how to add keyframes. Now, let’s look at how to make them appear as more realistic movements.
Selecting linear or smooth curves
The Bezier adjustment handles can be used to rotate the image...


