Reader small image

You're reading from  3D Character Rigging in Blender

Product typeBook
Published inApr 2024
PublisherPackt
ISBN-139781803238807
Edition1st Edition
Concepts
Right arrow
Author (1)
Jaime Kelly
Jaime Kelly
author image
Jaime Kelly

Jaime Kelly is a freelance artist with over five years of experience with works in animation, rigging, and 3D design. He has worked within all manners of industries, including product promotion materials, animated media such as animated breakdowns of systems in training material, and, of course, 3D rigging for pre-rendered and real-time media.
Read more about Jaime Kelly

Right arrow

Using Weighting Tools to Give Life to a Mesh

In the previous chapter, we added objects, selected them, and edited them in Edit Mode while moving our view around in the 3D viewport.

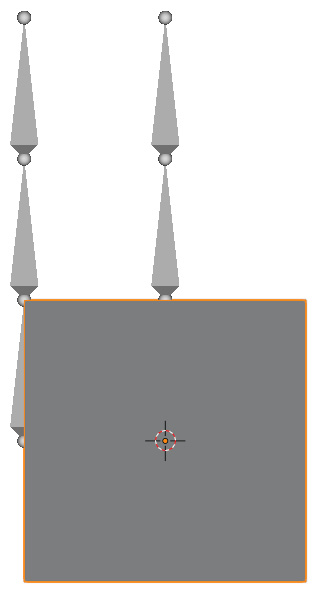
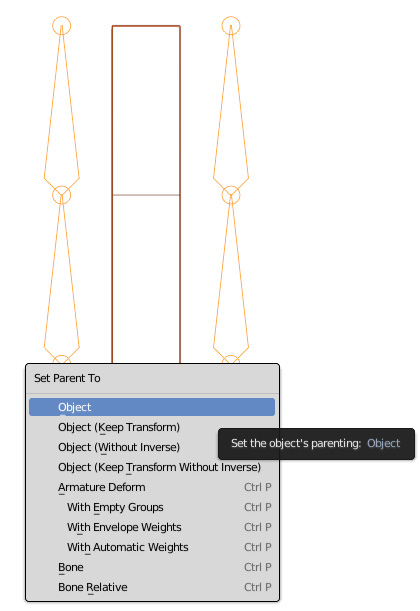
In this chapter, we will start by adding a mesh to the scene. We will enter Edit Mode, make loop cuts, extrude and scale, and cover basic transforms in Edit Mode. We will learn more about our view and the modes we can use to get more information and a clearer view of our work. Then, we will use the correct parent constraint to set us up for the most important topic in this book, weight painting.

In this chapter, we will cover the following:

  • Creating a mesh
  • Prelude to painting

By the end of this chapter, you will be prepared for weight painting correctly and be able to use its basic tools to assign weights to vertices with the correct bones selected.

Creating a mesh

We can’t do any weight painting without a mesh; that much should be clear to anyone. There are, however, some important steps to take that will prevent headaches in the future, such as placing vertices in optimal places to support quality deformation. If the mesh is constructed poorly, no matter how perfect your weight painting, it will be impossible to get a good result.

To start, we need to add some mesh to our scene. We will go over some terminology once we have done this. Follow these steps:

  1. To start, make sure you are in Object Mode (Tab, or dropdown), go ahead and bring up the Add object menu with Shift + A, then navigate to Mesh | Cube and add a cube. Your scene should look as follows:
Figure 3.1 – Cube added to our scene

Figure 3.1 – Cube added to our scene

  1. We want this cube to be a tower in between our bones. To do this, we’re going to go into Edit Mode and make sure we have selected Vertice mode. The blue icon next to the...

Prelude to painting

Now let’s get into the bulk of our work, weight painting.

Firstly, we need to parent the mesh to the armature, so that Blender knows that the mesh belongs to the bones. If we didn’t do this, we couldn’t assign our weights to the bones.

Here’s how we parent our object to the armature:

  1. Ensure you are in Object Mode.
  2. Select the Mesh first (order is important).
  3. Select the bones with Shift + RMB.
  4. Press Ctrl + P.

    In Figure 3.9, we can see the Set Parent To menu:

Figure 3.9 – Set Parent To menu

Figure 3.9 – Set Parent To menu

There are multiple entries here in the menu, all of which do something different. The first set of options are related to simple object parent relations and are of no concern to us right now, but in case you are wondering, here’s a brief description of each:

  • Object: The child objects will inherit the transformations of the parent.
  • Object (Keep Transform): The child objects...

Summary

We started the chapter by learning about the basic terminology for Blender, that is, bones, meshes, and weights:

  • The head is the joint placed at the wider part of the bone; the tail is the thinner part
  • Weights range from 0 to 1.0, or from cold to hot
  • We can bring up the Add Object menu with Shift + A
  • We can scale (S), rotate (R), and transform (G) any selected item

We added both a cube and an armature to the scene with the Add objects pop-up menu and entered Edit Mode (Tab), or we could have used the dropdown pictured in Figure 2.3 in Chapter 2.

Once in Edit Mode, for both the mesh and armature, we cut, scaled, transformed, and extruded (E) to form two towers of bones with mesh in between.

We then learned how to get set up for weight painting by pressing Ctrl + P after selecting the mesh before the bone. Finally, we weight-painted a mesh by selecting the correct bones and used the ability to pose bones in Weight Paint mode to verify that our...

lock icon
The rest of the chapter is locked
You have been reading a chapter from
3D Character Rigging in Blender
Published in: Apr 2024Publisher: PacktISBN-13: 9781803238807
Register for a free Packt account to unlock a world of extra content!
A free Packt account unlocks extra newsletters, articles, discounted offers, and much more. Start advancing your knowledge today.
undefined
Unlock this book and the full library FREE for 7 days
Get unlimited access to 7000+ expert-authored eBooks and videos courses covering every tech area you can think of
Renews at AU $19.99/month. Cancel anytime

Author (1)

author image
Jaime Kelly

Jaime Kelly is a freelance artist with over five years of experience with works in animation, rigging, and 3D design. He has worked within all manners of industries, including product promotion materials, animated media such as animated breakdowns of systems in training material, and, of course, 3D rigging for pre-rendered and real-time media.
Read more about Jaime Kelly