


Creating your first flow
The best way to see Power Automate in action is to start creating a flow. In this example, we’re going to create a flow that monitors Twitter for a certain hashtag and then posts a notification to a Teams channel. Such a flow might be useful if you’re trying to gauge or capture customer sentiment for a product or service, track trending public health topics related to certain keywords, monitor engagement activity, or other topic-based alerts on a social media platform.
Understanding the flow components
This particular flow is going to rely upon a few components:
- An identity for Twitter (username and password)
- A trigger that monitors Twitter for certain words or phrases
- An identity for Office 365 (username and password)
- A Microsoft Teams team
- An action that posts to Microsoft Teams
To complete this flow, you’ll need your existing Microsoft 365 identity (or the identity you’re using in a test environment), as well as an identity for Twitter (https://www.twitter.com). You’ll also need access to a Microsoft Teams team where messages will be posted.
About Microsoft Teams
If you’re not familiar with Microsoft Teams, it’s a modern collaboration software platform that brings several Microsoft technologies under a single, unified user interface. You can learn how to create teams here: https://docs.microsoft.com/en-us/microsoftteams/get-started-with-teams-create-your-first-teams-and-channels. You can also learn more about Microsoft Teams in another Packt book, Expert Microsoft Teams Solutions (ISBN: 978-1801075558).
Once you have the required identities configured, we’ll start creating the flow!
Creating and executing the flow
Once we have the prerequisite components for the flow (that is, the aforementioned identities and a team), we can begin the configuration. To build this sample flow, follow these steps:
- Log in to the Power Automate web interface (https://flow.microsoft.com).
- On the left-hand side of the page, click Create.
- On the Manage your flows page, under Start from blank, click Automated cloud flow:
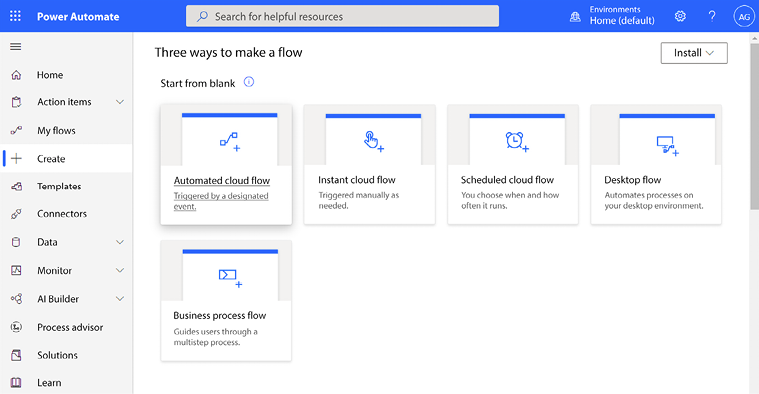
Figure 2.5: Creating an automated cloud flow
- Enter a Flow name.
- In the Choose your flow’s trigger box, start typing
Twitterto filter triggers related to Twitter. Select When a new tweet is posted and click Create:
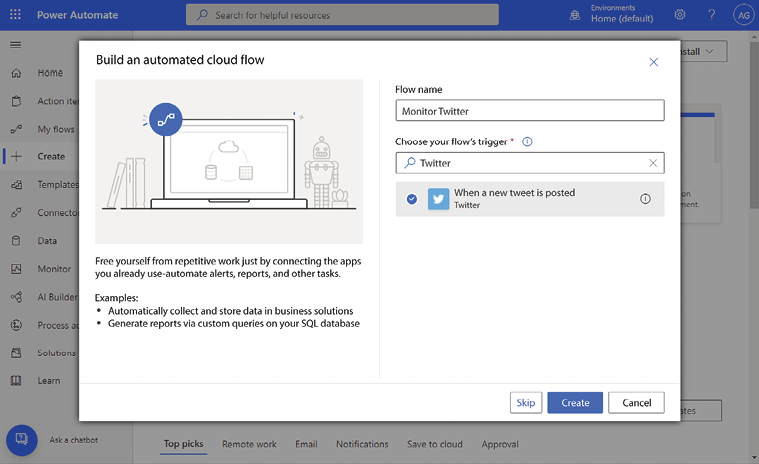
Figure 2.6: Creating a new cloud flow
- Next, click Sign in to provide the necessary Twitter credentials to access the Twitter API. You can use the Use default shared application authentication type for this basic flow:
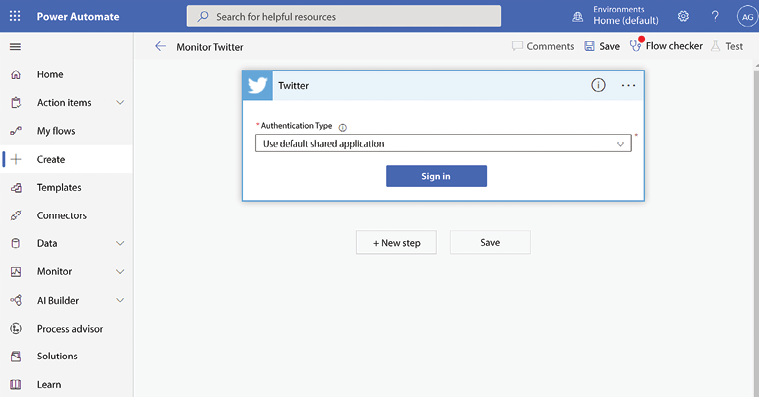
Figure 2.7: Entering Twitter credentials
- Enter the credentials of a Twitter account and then select Authorize app:

Figure 2.8: Authorizing the Twitter application
- In the Search text box, enter the text that you want to search for. In this case, the flow will be configured to monitor new instances of
#learningpowerautomate:All Twitter interactions with the hashtag will be queried using the Twitter API, not just tweets posted by the account whose credentials were provided.

Figure 2.9: Entering search text
- Click New step.
- Under Actions, search for the Microsoft Teams Post message in a chat or channel action and select it:
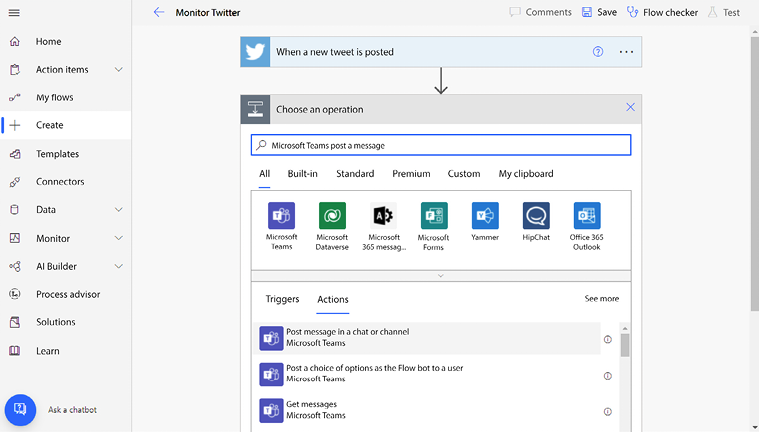
Figure 2.10: Selecting the Post message action
- Under Post as, select Flow bot.
- Under Post in, select Channel. This will allow you to select a team and a channel to post the message. Alternatively, you could also select Chat with Flow bot (some of the screens will be different). Select a Team and Channel where you have access to post messages.
- Populate the Message field. In this example, the dynamic content values Tweeted by and Tweet text have been selected to surface data provided by Twitter:

Figure 2.11: Filling out the Post message action
About Dynamic Content
Many actions will give you access to dynamic content (data that is automatically populated, calculated, or retrieved) based on the context and parameters of the flow’s connected data sources and actions. Dynamic content values are automatically generated variables with content based on the result of previously completed actions or triggers.
- Scroll to the bottom of the page and select Save.
Now that the flow has been created and saved, you can test it by generating content and then checking to see whether the content gets posted to the Microsoft Teams channel as you’d expect:
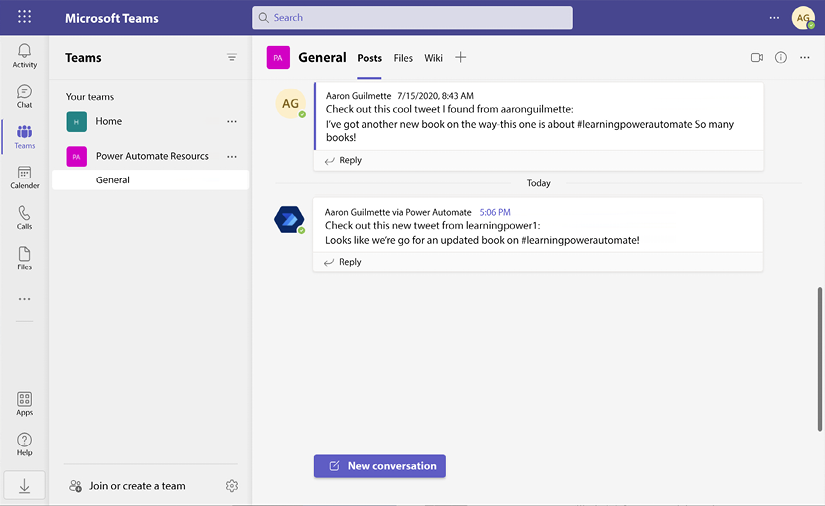
Figure 2.12: Checking Microsoft Teams after tweeting
If it doesn’t look the way you expect, you can try adding different dynamic content variables or investigating the data retrieved during the run. We’ll examine some of the troubleshooting processes in Chapter 19, Monitoring and Troubleshooting Flows.
Examining the flow
At any time, you can use a feature called Peek code that allows you to look at the underlying JavaScript Object Notation (JSON) code that controls how a step functions.
To access the JSON view for a step, click the ellipsis (...) for the step and then select Peek code:
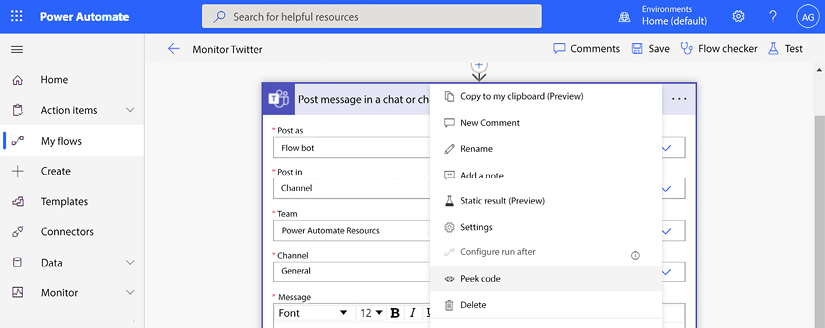
Figure 2.13: Launching Peek code
You can then navigate the detailed code for the step.
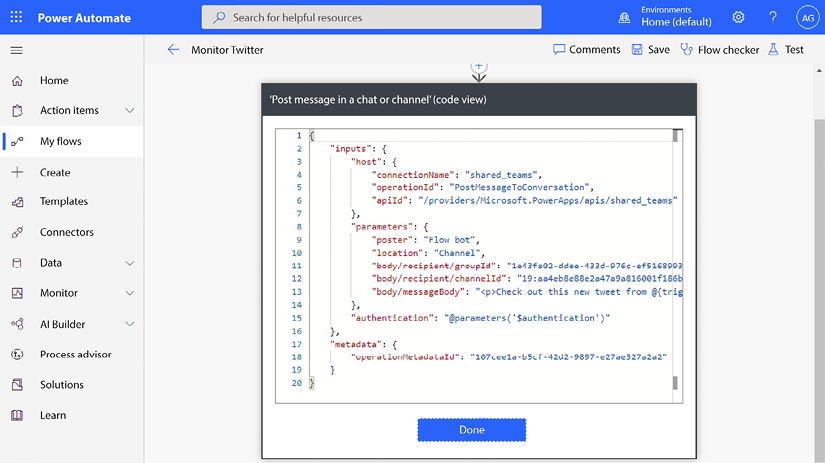
Figure 2.14: Viewing the JSON for a step
You can’t directly edit the JSON code in Power Automate’s user interface, but you can export it and edit it in an editor such as Visual Studio.
This flow built on your basic knowledge of flow components by adding dynamic content. We’ll use a lot more dynamic content in later chapters. As you can see, being able to use dynamic content placeholders and references will increase the richness of the flows you create.
When finished, you can click Done to leave the JSON code view.