


Audio in the timeline
As a current user of Final Cut Pro, you will be aware of how to drag the horizontal audio line to adjust the volume level within a clip, and how aggressively the volume changes when you drag. There is a simple way to control that by holding the Command key while you drag. The changes will be far more composed.
When you drag the line, volume levels are changed for the whole clip, from edit point to edit point; however, there are also ways to change the levels within the clip. The easiest method is to use the Range tool. Hold the R key down, hover over the point where you want to start the change in volume, then click and drag to the end of where you want to make the change. A yellow outline will enclose the area to be changed, as shown in the following screenshot:
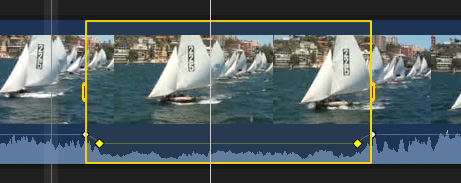
Figure 6.8 – The Range tool for adjusting within a clip
Drag the horizontal line to the new volume level and you’ll see that auto-fade transitions are entered...


