Reader small image

You're reading from  3D Printing Blueprints

Product typeBook
Published inAug 2013
PublisherPackt
ISBN-139781849697088
Edition1st Edition
Tools
Concepts
Right arrow
Author (1)
Joe Larson
Joe Larson
author image
Joe Larson

Joe Larson, known online as "the 3D Printing Professor," is one part artist, one part mathematician, one part teacher, and one part technologist. It all started in his youth, doing BASIC programming and low-resolution digital art on a Commodore 64. As technology progressed, so did Joe's dabbling, eventually taking him to 3D modeling while in high school and college, and he momentarily pursued a degree in computer animation. He abandoned that and instead became a math teacher, and then moved to software development for 10 years before returning to education, teaching technology in college. When Joe first heard about 3D printing, it took root in his mind, and he went back to dust off his 3D modeling skills. In 2012, he won a Makerbot Replicator 3D printer in the Tinkercad/Makerbot Chess Challenge, with a chess set that assembles into a robot. Since then, his designs on Thingiverse have been featured on Thingiverse, Gizmodo, Shapeways, Makezine, and other places. He currently produces weekly videos about design for 3D printing on his YouTube channel, http://www.youtube.com/user/mrjoesays.
Read more about Joe Larson

Right arrow

Chapter 8. Repairing Bad Models

There are many sources for 3D models on the internet, but not all of them were made for 3D printing. Even if their tolerances are good for 3D printing, the meshes may have holes, flipped normal, or just general bad geometry that will need to be fixed before it can be printed. Being able to find and fix bad geometry will ensure good prints.

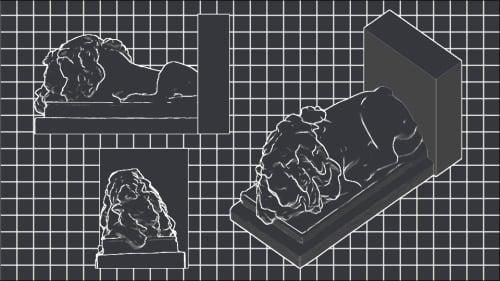
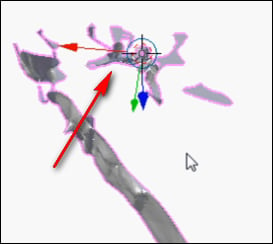
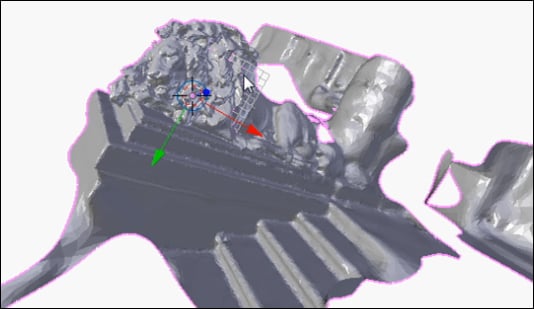
One of the coolest sources for 3D models is from captures of real life objects. There are programs and even online services that can convert a series of photographs into a 3D model. However, it is highly unlikely that those scans will be comprehensive. Sometimes certain angles are difficult to capture and usually the subject being captured is on a surface that cannot be photographed through, such as the ground. Consequently, there will be holes in the scan that will need to be fixed.

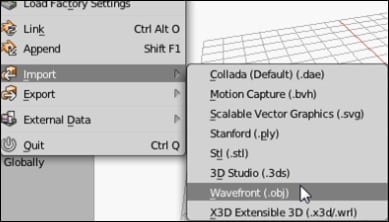
In this chapter, a model captured from photographic data and processed by a desktop application will be cleaned up for print using some new techniques...

Downloading a 3D scanned file


Go to http://www.thingiverse.com/thing:90754 and click on the Download This Thing! button. Download the CH8_LionCapture.obj file and choose to save it in a new folder in the MakerbotBlueprints directory named as Ch. In Windows this is accomplished, same as in previous chapters, by right-clicking on the link and choosing Save link as..., navigating to Libraries | Documents | MakerbotBlueprints, clicking on the New folder button, and naming the new folder Ch 8 Scan Repair. Then double-clicking on the new directory and saving the file.

Trimming the fat


After the file is saved, open Blender, clear the scene, and save the scene in Documents\MakerbotBlueprints\Ch 8 Scan Repair and name the file Lion Cleanup.blend:

Import the file to be cleaned up by clicking on the menu options File | Import | Wavefront (.obj):

Double-click on the CH8_LionCapture.obj file. The file is very large and may take even a high-end machine a few seconds to process. When imported, it may be difficult to find the subject of the scan in all the extra data. The subject will be near the middle. Zoom in and adjust the view until the lion in the middle is framed in the view.

When zoomed in, it becomes clear that the lion is at a strange angle to the work plane.

3D scans often capture more than the focus of the scan. All that extra, loose geometry needs to be separated and eliminated, which will make the model much easier to manage. To do this the Separate command will be used:

  1. Select (right-click) the scanned object.

  2. Press Tab to enter Edit Mode.

  3. In the menu at...

Orienting the scan


The lion is still oriented wrong. By changing the camera view, it becomes apparent that this model is oriented to the y axis up and down. This is simple enough to fix by rotating (R) the object -90 degrees around the x axis (X).

Trimming more fat


There are extra parts of the model that won't be needed. The easiest thing to do will probably be to just trim away the excess.

  1. Enter Edit Mode (Tab).

  2. From the Front (Numpad 1) or Right view (Numpad 3), the Ortho view (Numpad 5) in the Wireframe view (Z), Border Select (B) all the points under the pedestal the lion is sitting on.

  3. Take special care to get all the points under the line. Zoom out if necessary.

  4. Delete (X) the selected Vertices.

    Cleaning up the back will be much easier if the model is lined up with the gridline of the XY plane, so line the model up using Rotate (R).

  5. Exit Edit Mode (Tab).

  6. View the model from the Top (Numpad 7).

  7. Rotate (R) the model until the pedestal lines up better with the gridlines.

  8. Now to do a little more trimming, switch back to Edit Mode (Tab).

  9. In the Wireframe view (Z), Border Select (B) the extra geometry behind the lion.

  10. Delete (X) those Vertices.

If there are any loose vertices left, clean them up by selecting (right-click) and deleting (X) them...

Making a flat base


While inspecting the lion it becomes clear that all it is right now is a thin shell with huge gaps in it which is not very printable. What needs to be done is to clean up the mesh so it is closed, manifold, and has a flat bottom suitable for printing.

Note

A solid, printable mesh is closed, or watertight, and manifold.

Closed or watertight is an easy enough concept to get. In cartoons, the characters can blow bubbles of any size or shape they want, but if that bubble gets a single hole it pops. In the same way, the mesh should be one continuous surface no matter the twists and turns it takes.

Manifold is a mathematical term that in general terms can be confusing, but in specific turns for our purposes means that every edge sits between no more than two faces and no face intersects any other face. (If it's watertight as well, each edge will border exactly two faces.) If an edge is bordering three faces, then there is an unnecessary face in the model. Non-manifold meshes can...

Detail work on the back


The back of the lion will be extruded and sealed in much the same way, but before it can be there is some extra geometry from the scan that needs to be identified and cleaned up first.

Zoom in on the posterior of the lion and locate the plate of points that are just dangling there, barely attached to anything shown in the following screenshot. Because more or less vertices may have been deleted when the part was trimmed what is left may differ, but the spurious geometry should be there.

Select these points using any desired method:

  1. Border Select (B), Circle Select (C), or select (right-click) the points in the middle and expand the selection (Ctrl + Numpad +) until the desired points are selected.

  2. Deselect (middle-click) the point at the very tip (indicated in the following screenshot) since that point is shared with the main body of the lion and should probably be left.

  3. Then Delete (X) the selected points.

  4. When those points are deleted, select the spur sticking out of...

Cleaning up bad geometry


Now, the model should be watertight, but it is hardly clean and non-manifold. Now is the time to locate, identify, and fix the non-manifold points:

  1. Clear the selected points (A).

  2. Select all non-manifold points (Shift + Ctrl + Alt + M).

Unfortunately in sealing the edges, non-manifold geometry was accidently introduced into the model. All of the currently selected points represent a problem in the model that should be fixed.

The first step is to remove any points that are occupying the exact same spot:

  1. Select all the points (A).

  2. Click on the Remove Doubles button in the left-side bar.

  3. When that is done clear the selection (A).

  4. Select the non-manifold points again (Shift + Ctrl + Alt + M).

  5. Choose one of the selected points and zoom in on it.

Deleting an extra edge

The previous screenshot is zoomed in on one such place. The darker grey areas indicate that there are multiple surfaces overlapping each other in that area, two faces on top of each other. There is some edge on the...

Making it a book end


As-is the back of this model is hardly presentable. One option would be to use the sculpt tools from Chapter 7, Teddy Bear Figurine to sculpt the missing parts of the lion. An easier option is to throw a cube behind it to hide the blemishes and call this project a book end:

  1. Add (Shift + A) a Cube.

  2. Scale (S) and Move (G) the cube until it is slightly taller and wider than the statue, and thick enough to hide the back of the lion. Try to be as precise as possible when positioning the bottom of the cube to the bottom of the statue, but don't stress too much about it. The bottom will be re-flattened.

  3. Add a Boolean modifier to the cube.

  4. Union the Lion_Capture object to the cube.

  5. Apply the modification.

  6. Enter Edit Mode (Tab).

  7. In Right side (NumPad 3) view in the Wireframe view (Z), Border Select (B) all the points that make up the bottom of the lion.

  8. Scale (S) along the z axis (Z) by 0 units to assure the bottom is perfectly flat.

  9. Exit Edit Mode (Tab).

Before exporting the model, Scale...

Summary


When 3D modeling is focused on the render for a video or image, "if it looks good" that's all the criteria the modelers need. However, 3D printing needs to have its geometry well defined, or it can't bring something from the virtual to the real world.

Fixing bad geometry may not be the most entertaining part of 3D modeling for everyone. But being able to identify the unnecessary edges or vertices, create faces to patch holes, and rotate edges when they're in the way, and build a watertight, manifold model are valuable skills. And if you think about it like a puzzle to solve, it can be quite satisfying. Being able to take a model that wasn't made for 3D printing and fixing it, means that entire libraries of ready-made models open up online, so you don't have to make everything you want to print from scratch.

There are tools such as netfabb (http://netfabb.com) and meshlab (http://meshlab.sourceforge.net/) that can do a lot of these sorts of things semi-automatically. They're not complete...

lock icon
The rest of the chapter is locked
You have been reading a chapter from
3D Printing Blueprints
Published in: Aug 2013Publisher: PacktISBN-13: 9781849697088
Register for a free Packt account to unlock a world of extra content!
A free Packt account unlocks extra newsletters, articles, discounted offers, and much more. Start advancing your knowledge today.
undefined
Unlock this book and the full library FREE for 7 days
Get unlimited access to 7000+ expert-authored eBooks and videos courses covering every tech area you can think of
Renews at $15.99/month. Cancel anytime

Author (1)

author image
Joe Larson

Joe Larson, known online as "the 3D Printing Professor," is one part artist, one part mathematician, one part teacher, and one part technologist. It all started in his youth, doing BASIC programming and low-resolution digital art on a Commodore 64. As technology progressed, so did Joe's dabbling, eventually taking him to 3D modeling while in high school and college, and he momentarily pursued a degree in computer animation. He abandoned that and instead became a math teacher, and then moved to software development for 10 years before returning to education, teaching technology in college. When Joe first heard about 3D printing, it took root in his mind, and he went back to dust off his 3D modeling skills. In 2012, he won a Makerbot Replicator 3D printer in the Tinkercad/Makerbot Chess Challenge, with a chess set that assembles into a robot. Since then, his designs on Thingiverse have been featured on Thingiverse, Gizmodo, Shapeways, Makezine, and other places. He currently produces weekly videos about design for 3D printing on his YouTube channel, http://www.youtube.com/user/mrjoesays.
Read more about Joe Larson