Reader small image

You're reading from  JIRA 7 Essentials - Fourth Edition

Product typeBook
Published inNov 2016
Reading LevelBeginner
PublisherPackt
ISBN-139781786462510
Edition4th Edition
Languages
Tools
Right arrow
Author (1)
Patrick Li
Patrick Li
author image
Patrick Li

Patrick Li is the cofounder of AppFusions and works as a senior engineer there, specializing in integration solutions with many enterprise applications and platforms, including IBM Connections, Jive, Google Apps, and more. He has worked in the Atlassian ecosystem for over 10 years, developing products and solutions for the Atlassian platform and providing expert consulting services. He has authored many books and video courses covering Jira. He has extensive experience in designing and deploying Atlassian solutions from the ground up and customizing existing deployments for clients across verticals such as healthcare, software engineering, financial services, and government agencies.
Read more about Patrick Li

Right arrow

Chapter 2. Using JIRA for Business Projects

JIRA initially started off as a bug-tracking system, helping software development teams to better track and manage the problems/issues in their projects. Over the years, JIRA has expanded on the concept and capabilities of projects by adding support for agile and later letting you run projects as a public facing service desk, each with its own features and user interface. With all these new additions, it became a bit confusing, especially to newcomers. So starting with JIRA 7, Atlassian has made improvements to help streamline how a project is used and help users to get started quickly.

In this chapter, we will focus on the most basic project type, the business project, which is available to all three JIRA applications, Core, Software, and Service Desk. We will then take a look at the various user interfaces that JIRA has for working with projects, both as an administrator and an everyday user. We will also introduce permissions for the first time...

Understanding project types


Starting with JIRA 7, a new concept called project type is introduced. Project types define the features available for your projects as well as the user interface that will be used to present information within the projects. Each project type also comes with one or more templates, with a set of predefined configurations to help you get started quickly. The following screenshot shows you the project types and their templates from an out-of-the-box JIRA Software installation.

Note

Templates under Software are included in JIRA Software. If you are running JIRA Core instead, you will only have templates under Business.

If you create a project using the Scrum software development template under the Software project type, your project will come with a scrum board and a set of configurations designed to work with the scrum methodology. On the other hand, if you choose the Task management template under the Business project type, your project will have a different user...

JIRA permissions


Before we start working with projects in JIRA, we need to first understand a little bit about permissions. Permissions are a big topic, and we will cover it in detail in Chapter 9Securing JIRA. For now, we will briefly talk about permissions related to creating and deleting, administering, and browsing projects.

In JIRA, users with the JIRA administrator permission will be able to create and delete projects. By default, users in the jira-administrators group have this permission, so the administrator user we created during the installation process in Chapter 1Getting Started with JIRA, will be able to create new projects. We will refer to this user and any other users with this permission as a JIRA Administrator.

For any given project, users with the Administer Project permission for that project will be able to administer the project's configuration settings. As we will see in the later sections of this chapter, this means that users with this permission will have access...

Creating projects


To create a new project, the easiest way is to select the Create Project menu option from the Projects drop-down menu from the top navigation bar. This will bring up the Create project dialog. Note that, as we explained, you need to be a JIRA Administrator (such as the user we created during installation) to create projects. This option is only available if you have the permission.

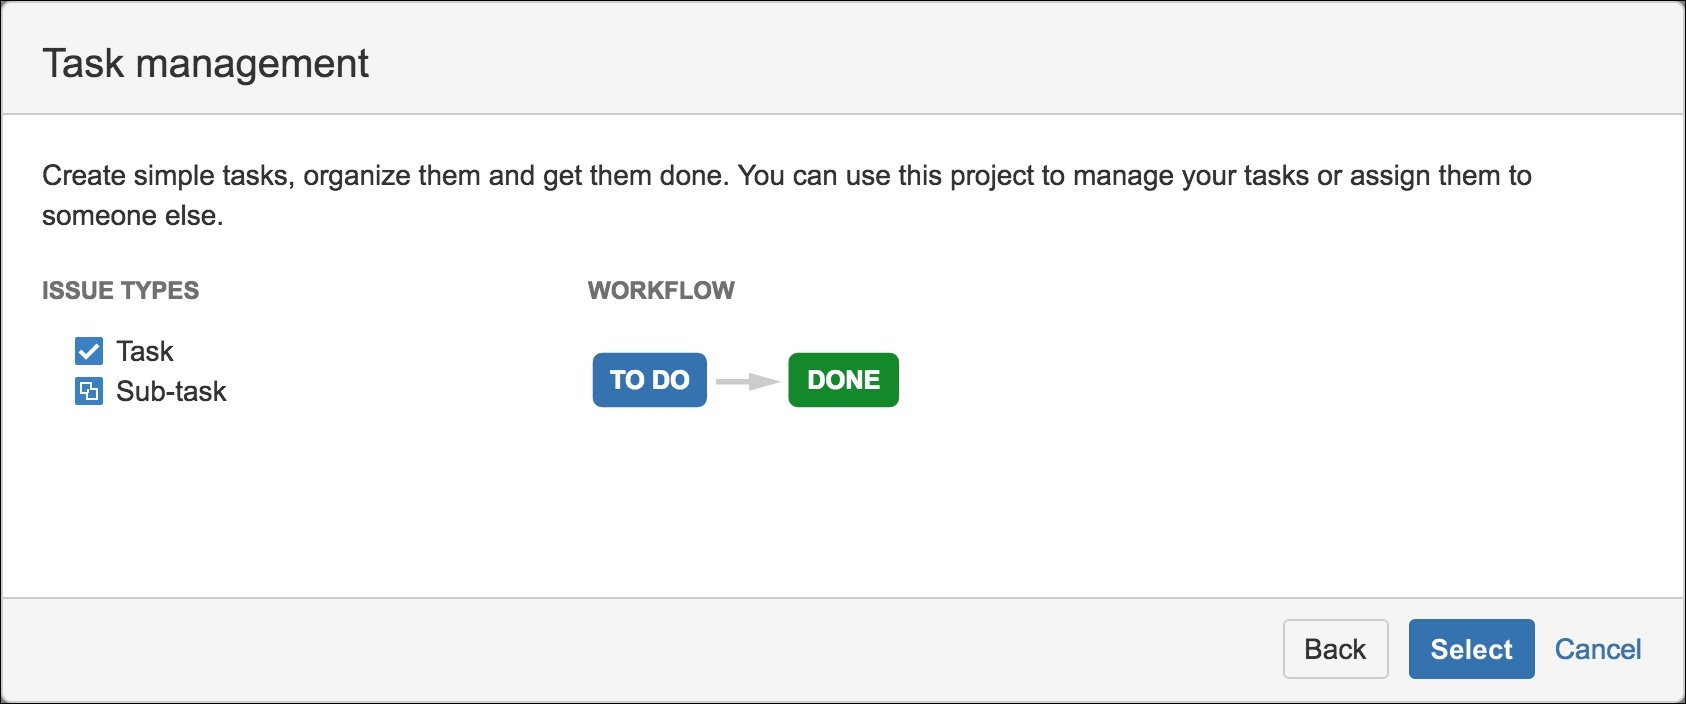
From the Create project dialog, select the template you want to use under the Business heading and click on Next. On the next page, JIRA will display pre-defined configurations for the template you have selected. In our example, we have selected the Task management template, so JIRA provides us with two issue types, and a very simple workflow with two steps. Click on the Select button to continue.

Note

JIRA will create new configuration schemes based on the selected template once the new project is created.

Note

You can change these configurations once the project is created.

For the third and last...

Project user interfaces


There are two distinctive interfaces for projects in JIRA. The first interface is designed for everyday users, providing useful information on how the project is going with reports and statistics, called project browser.

The second interface is designed for project administrators to control project configuration settings, such as permissions and workflows, and called Project Administration.

After creating a project, the first interface you see will be project browser. We will start our discussion around this interface and then move on to the Project Administration interface.

Project browser


Project browser is the interface that most users will use with JIRA. It acts as the home page of the project, providing useful information, such as recent activities in the project, reports, and information from other connected systems, such as source control and continuous integration. The actual project browser interface depends on the project type, so it will vary from project to project. For example, the scrum software development project will display an agile board as its default view, as shown in the following screenshot:

For business projects such as general task management, project browser will display an activity stream showing the latest updates in the project, as shown in the following screenshot:

To access the Project Browser interface, simply select the project from the Projects drop-down or the project list via the View All Projects option. Note that you will also need to have the Browse Project permission. The project browser is made up of several tabs, which...

The Project Administration interface


The Project Administration interface is where project administrators can manage the settings and configurations of their projects. For example, you can change the project's name, select what issue types will be available for the project, and manage a list of components within the project. Only users with the Administer Projects permission for a given project will be able to access this interface.

To access the Project Administration interface, use the following steps:

  1. Go to the project browser for the project you want to administer.

  2. Select the Project Administration option in the bottom-left corner. If you do not see the option, then you do not have the necessary permission.

From the Project Administration interface, if you are a JIRA Administrator (such as the user created during installation), you will be able to perform the following key operations:

  • Update project details, such as project name, description, avatar, and type

  • Manage what users see when working...

Importing data into JIRA


JIRA supports importing data directly from many popular issue-tracking systems, such as Bugzilla, GitHub, and Trac. All the importers have a wizard-driven interface, guiding you through a series of steps. These steps are mostly identical but have a few differences. Generally speaking, there are four steps when importing data into JIRA as follows:

  1. Select your source data. For example, if you are importing from CSV, it will select a CSV file. If you are importing from Bugzilla, it will provide Bugzilla database details.

  2. Select a destination project where the imported issues will go. This can be an existing project or a new project created on-the-fly.

  3. Map old system fields to JIRA fields.

  4. Map old system field values to JIRA field values. This is usually required for select-based fields, such as the priority field, or select list custom fields.

Importing data through CSV

JIRA comes with a CSV importer, which lets you import data in the comma-separated value format. This is...

The HR project


Now that we have seen all the key aspects that make up a project, let's revisit what you learned so far and put it to practice. In this exercise, we will set up a project for our Human Resource (HR) team to better track and manage employees joining and leaving the company as well as tasks related to the recruitment process.

Creating a new project

We will first start by creating a new project for the HR team. To create the project, perform the following steps:

  1. Bring up the Create project dialog by selecting the Create project option from the Projects drop-down menu.

  2. Select the Task management project template. We can use other templates in the Business project type; the task management template is the simplest option and will make future customization easier.

  3. Name our new project as Human Resource and accept the other default values for Key and Project Lead.

  4. Click on the Submit button to create the new project.

You should now be taken to the project browser interface for the new project...

Summary


In this chapter, we looked at one of the most important concepts in JIRA, projects, and how to create and manage them. Permissions were introduced for the first time, and we looked at three permissions that are related to creating and deleting, administering, and browsing projects.

We were introduced to the two interfaces JIRA provides for project administrators and everyday users; the Project Administration interface and Project Browser interface, respectively. In the next chapter, we will look at projects created using the Software project type, namely for Scrum and Kanban to run agile projects.

lock icon
The rest of the chapter is locked
You have been reading a chapter from
JIRA 7 Essentials - Fourth Edition
Published in: Nov 2016Publisher: PacktISBN-13: 9781786462510
Register for a free Packt account to unlock a world of extra content!
A free Packt account unlocks extra newsletters, articles, discounted offers, and much more. Start advancing your knowledge today.
undefined
Unlock this book and the full library FREE for 7 days
Get unlimited access to 7000+ expert-authored eBooks and videos courses covering every tech area you can think of
Renews at $15.99/month. Cancel anytime

Author (1)

author image
Patrick Li

Patrick Li is the cofounder of AppFusions and works as a senior engineer there, specializing in integration solutions with many enterprise applications and platforms, including IBM Connections, Jive, Google Apps, and more. He has worked in the Atlassian ecosystem for over 10 years, developing products and solutions for the Atlassian platform and providing expert consulting services. He has authored many books and video courses covering Jira. He has extensive experience in designing and deploying Atlassian solutions from the ground up and customizing existing deployments for clients across verticals such as healthcare, software engineering, financial services, and government agencies.
Read more about Patrick Li