
Using Presenter View
I often hear from presenters that they want to have all their text on slides because they fear forgetting what to say. Lack of practice is often a problem, but some presenters fear public speaking so much that they need to have more support when using mostly visual slides.
That is why speakers need to learn how to leverage technology to help them ease their fears. PowerPoint has been providing Presenter View for some time now, helping presenters see their notes while the audience sees only their slides. Now is the time to learn how to leverage all its power with the help of the topics discussed in this chapter:
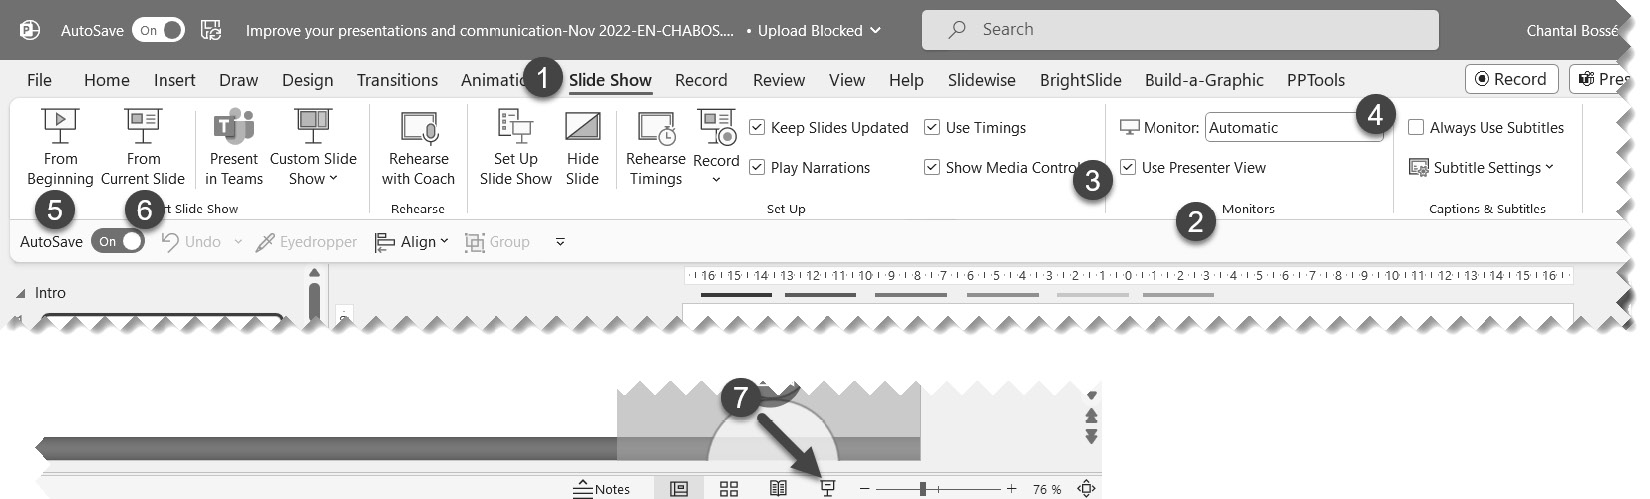
- Defining and starting Presenter View
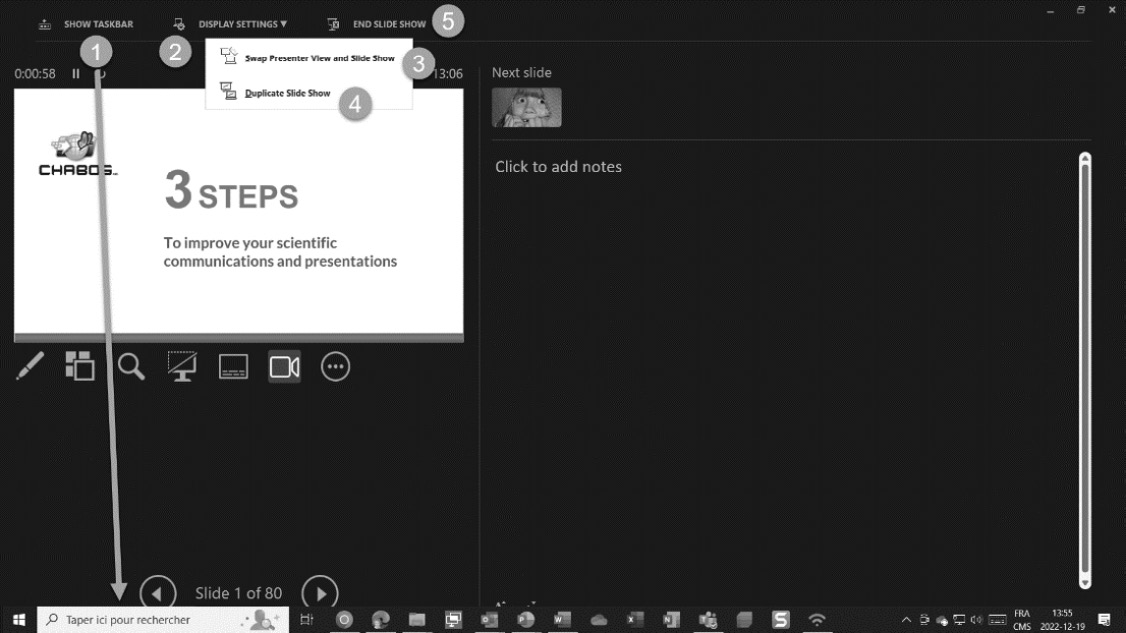
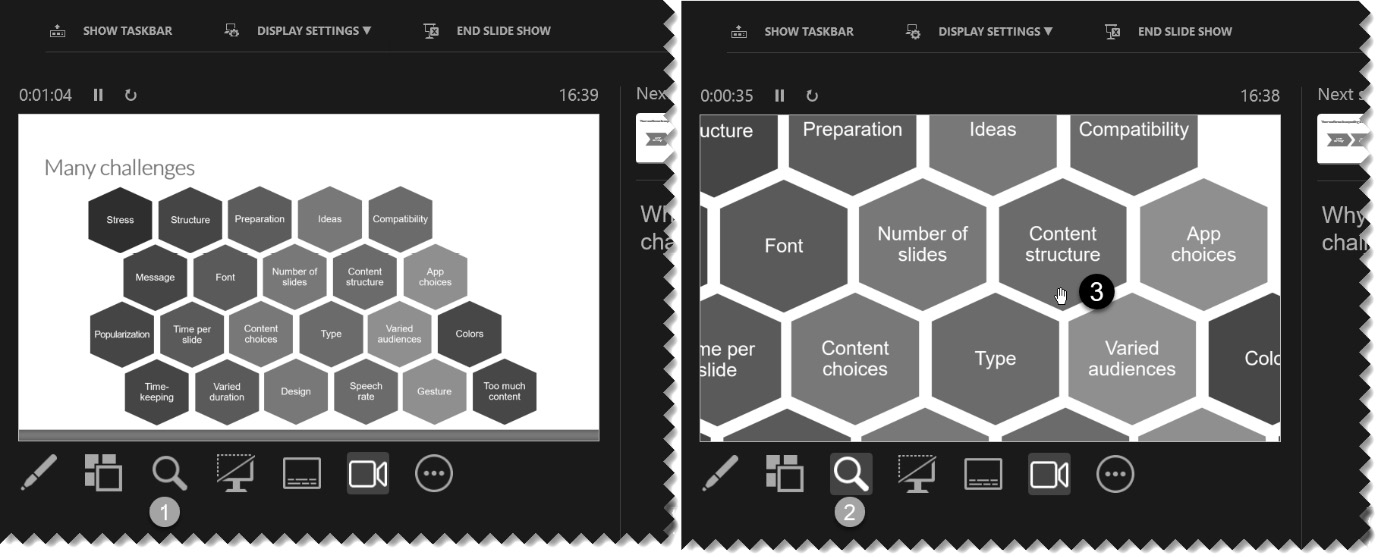
- Using the display and navigation tools
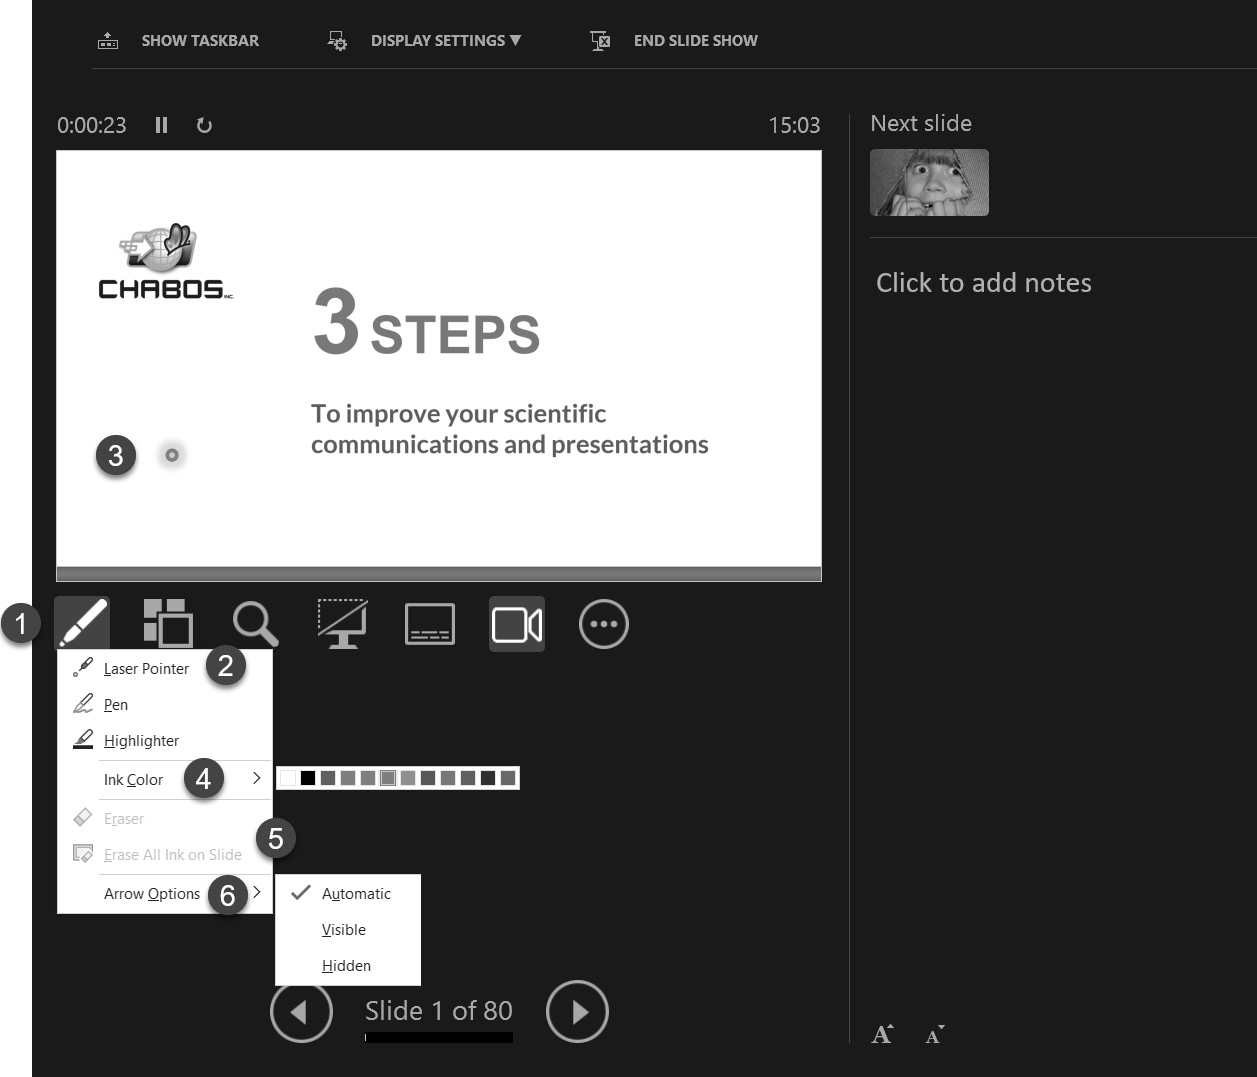
- Using the annotation tools
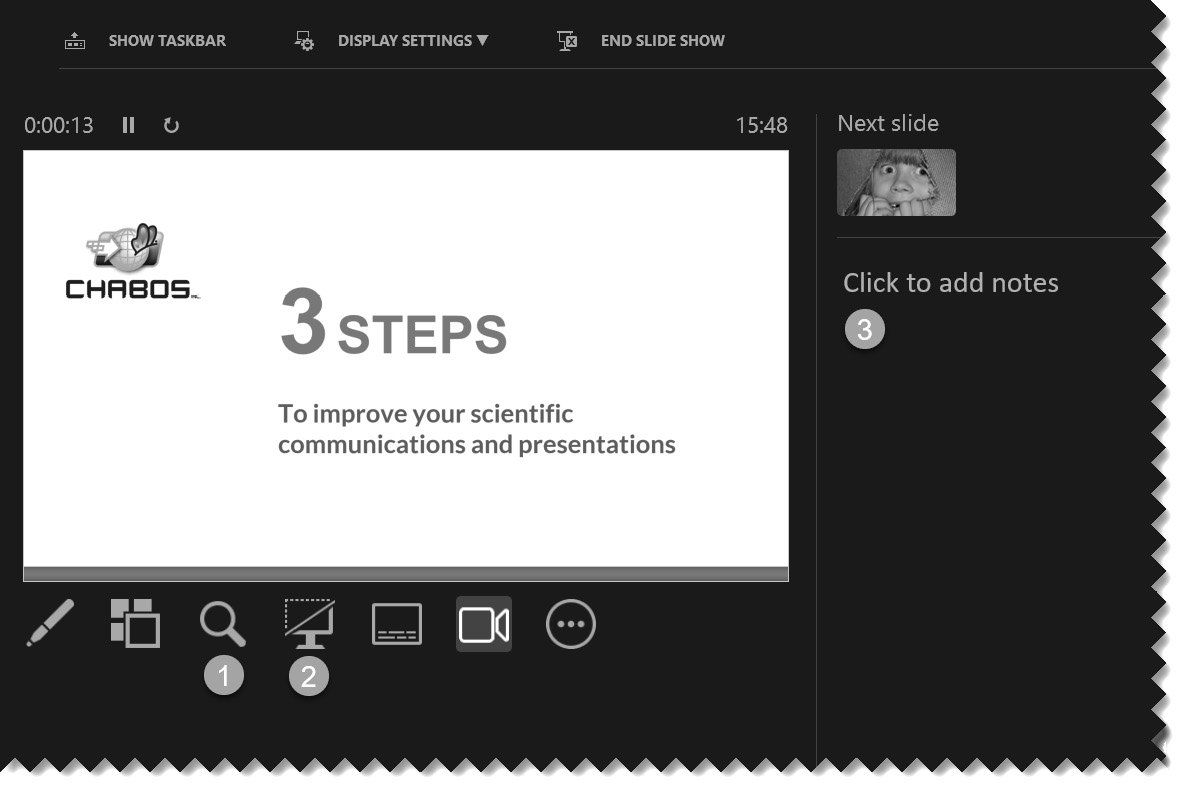
- Using other tools
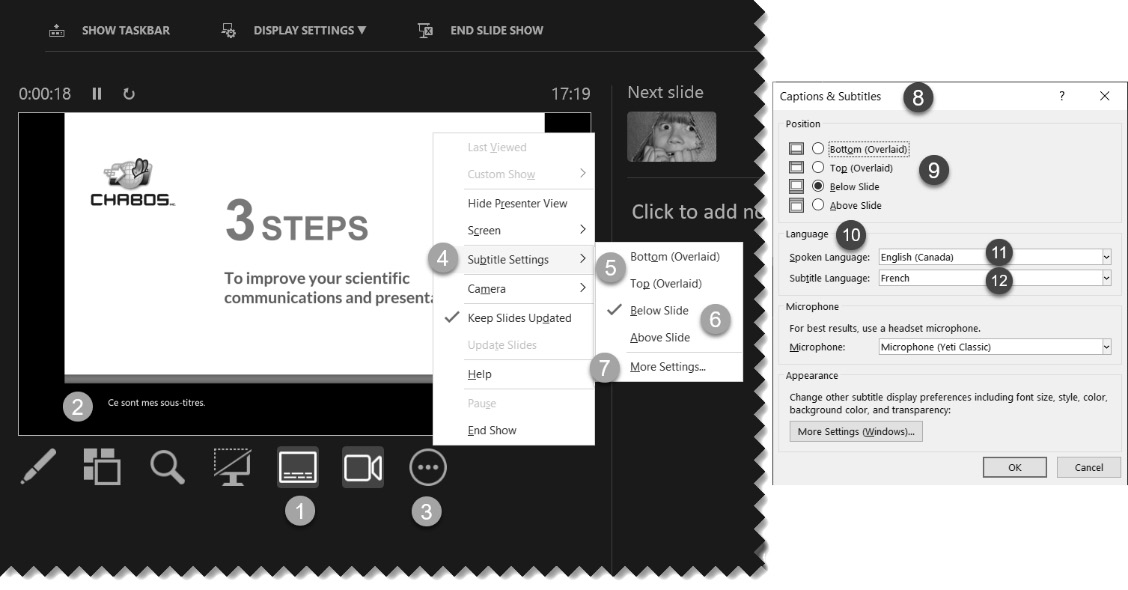
- Making your presentation more accessible with live subtitles