Reader small image

You're reading from  Arduino Home Automation Projects

Product typeBook
Published inJul 2014
Publisher
ISBN-139781783986064
Edition1st Edition
Tools
Right arrow
Author (1)
Marco Schwartz
Marco Schwartz
author image
Marco Schwartz

Marco Schwartz is an electrical engineer, entrepreneur, and blogger. He has a master's degree in electrical engineering and computer science from Supélec, France, and a master's degree in micro engineering from the Ecole Polytechnique Fédérale de Lausanne (EPFL), Switzerland. He has more than five years' experience working in the domain of electrical engineering. Marco's interests center around electronics, home automation, the Arduino and Raspberry Pi platforms, open source hardware projects, and 3D printing. He has several websites about the Arduino, including the Open Home Automation website, which is dedicated to building home automation systems using open source hardware. Marco has written another book on home automation and the Arduino, called Home Automation With Arduino: Automate Your Home Using Open-source Hardware. He has also written a book on how to build Internet of Things projects with the Arduino, called Internet of Things with the Arduino Yun, by Packt Publishing.
Read more about Marco Schwartz

Right arrow

Hardware configuration


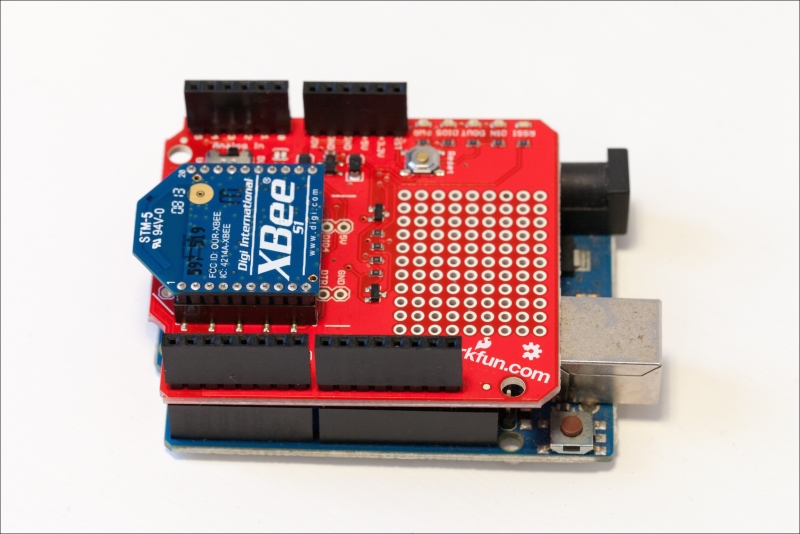
The hardware configuration of this project is not really complex. For each motion sensor module you want to build, you'll need to do the following steps. The first one is to plug an XBee module on the XBee shield. Then, you need to plug the shield into your Arduino board, as shown in the following image:

Now, you can connect the motion sensor. It has three pins: VCC (for the positive power supply), GND (which corresponds to the reference voltage level), and SIG (which will turn to a digital HIGH state in case any motion is detected). Connect VCC to the Arduino 5V pin, GND to Arduino GND, and SIG to Arduino pin number 8 (the example code uses pin 8, but you could also use any digital pin). You should end up with something similar to this image:

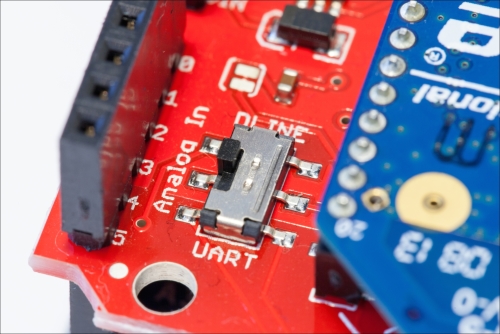
You will also need to set a jumper correctly on the board so we can upload a sketch. On the XBee shield, you have a little switch close to the XBee module to choose between the XBee module being connected directly to the Arduino board serial interface (which means you can't upload any sketches anymore) or leaving it disconnected. As we need to upload the Arduino sketch first, you need to put this switch to DLINE, as shown in this image:

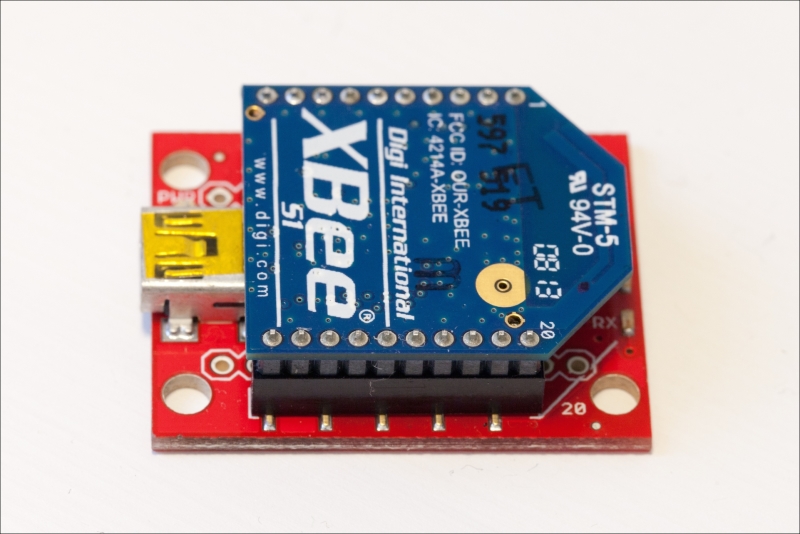
You will also need to connect the XBee explorer board to your computer at this point. Simply insert one XBee module to the board as shown in the following image:

Now that this is done, you can power up everything by connecting the Arduino board and explorer module to your computer via USB cables.

Note

If you want to use several XBee motion sensors, you will need to repeat the beginning of the procedure for each of them: assemble one Arduino board with an XBee shield, one XBee module, and one motion sensor. However, you only need one USB XBee module connected to your computer if you have many sensors.

Previous PageNext Page
You have been reading a chapter from
Arduino Home Automation Projects
Published in: Jul 2014Publisher: ISBN-13: 9781783986064
Register for a free Packt account to unlock a world of extra content!
A free Packt account unlocks extra newsletters, articles, discounted offers, and much more. Start advancing your knowledge today.
undefined
Unlock this book and the full library FREE for 7 days
Get unlimited access to 7000+ expert-authored eBooks and videos courses covering every tech area you can think of
Renews at $15.99/month. Cancel anytime

Author (1)

author image
Marco Schwartz

Marco Schwartz is an electrical engineer, entrepreneur, and blogger. He has a master's degree in electrical engineering and computer science from Supélec, France, and a master's degree in micro engineering from the Ecole Polytechnique Fédérale de Lausanne (EPFL), Switzerland. He has more than five years' experience working in the domain of electrical engineering. Marco's interests center around electronics, home automation, the Arduino and Raspberry Pi platforms, open source hardware projects, and 3D printing. He has several websites about the Arduino, including the Open Home Automation website, which is dedicated to building home automation systems using open source hardware. Marco has written another book on home automation and the Arduino, called Home Automation With Arduino: Automate Your Home Using Open-source Hardware. He has also written a book on how to build Internet of Things projects with the Arduino, called Internet of Things with the Arduino Yun, by Packt Publishing.
Read more about Marco Schwartz