


No-code machine learning with SageMaker Canvas
Before we proceed with using the more comprehensive set of SageMaker capabilities to perform ML experiments and deployments, let’s start by building a model using SageMaker Canvas. One of the great things about SageMaker Canvas is that no coding work is needed to build models and use them to perform predictions. Of course, SageMaker Autopilot would have a more powerful and flexible set of features, but SageMaker Canvas should help business analysts, data scientists, and junior ML engineers understand the ML process and get started building models right away.
Since our dataset has already been uploaded to the S3 bucket, we can start building and training our first SageMaker Canvas model:
- On the SageMaker Domain/Control Panel page, locate the row of the user we just created and click Launch app. Choose Canvas from the list of options available in the drop-down menu, as shown in the following screenshot:
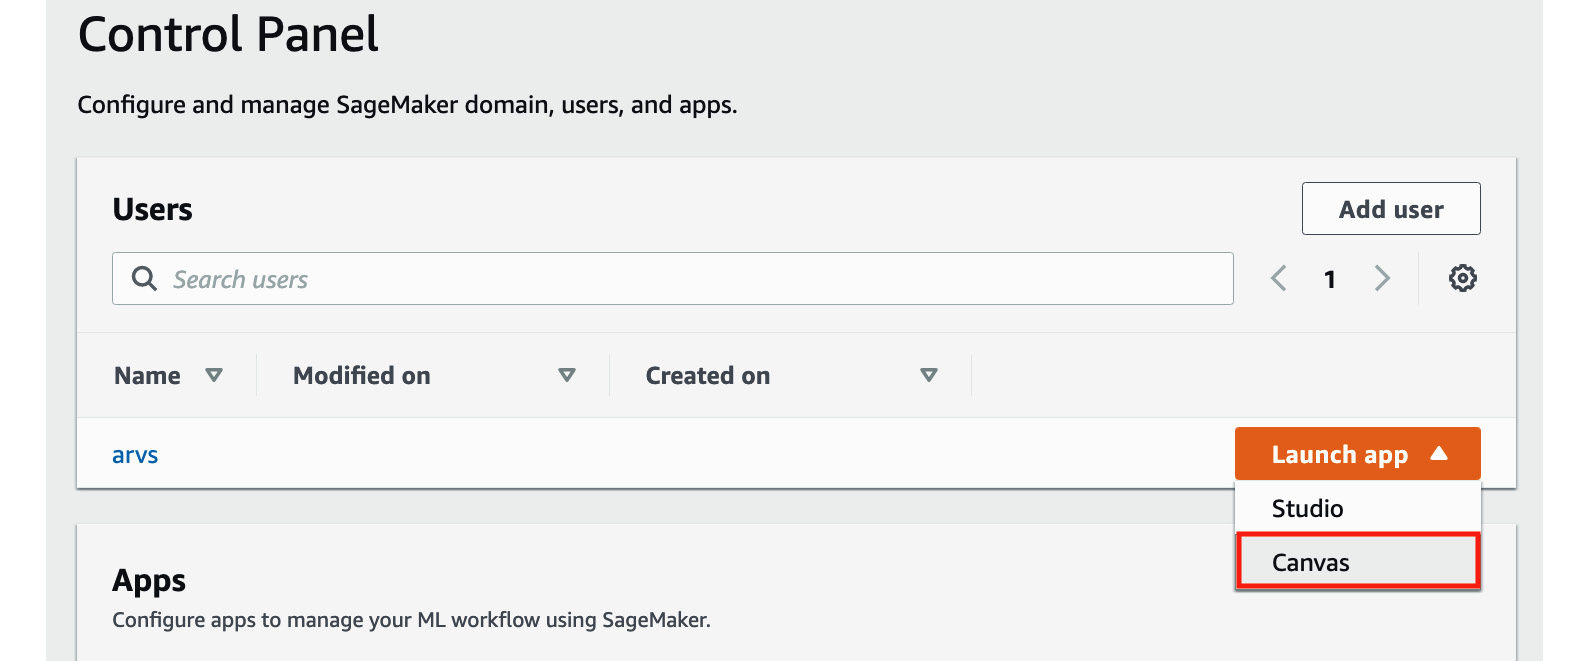
Figure 1.15 – Launching SageMaker Canvas
As we can see, we can launch SageMaker Canvas from the SageMaker Domain/Control Panel page. We can launch SageMaker Studio here as well, which we’ll do later in this chapter.
- Click New model:
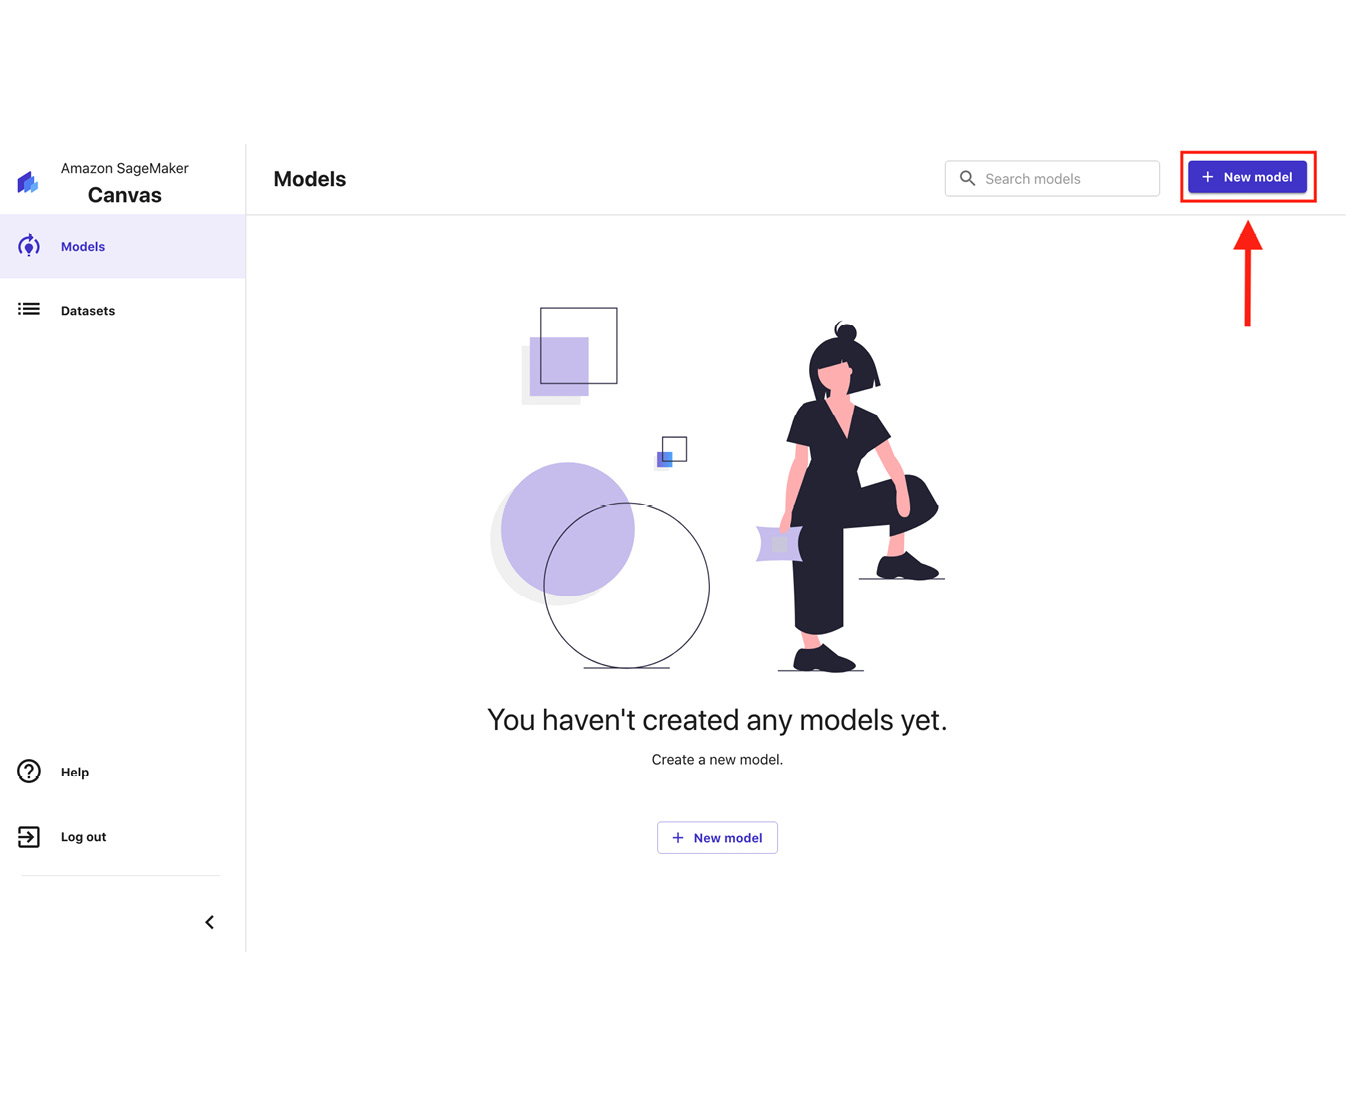
Figure 1.16 – The SageMaker Canvas Models page
Here, we have the SageMaker Canvas Models page, which should list the models we have trained. Since we have not trained anything yet, we should see the You haven’t created any models yet message.
- In the Create new model popup window, specify the name of the model (for example,
first-model) and click Create. - When you see the Getting Started guide window, click Skip intro.
- Click Import data to canvas. Locate the S3 bucket we created earlier in the Uploading the dataset to S3 section. After that, locate the
booking.train.csvandbooking.test.csvfiles inside theAmazon S3/<S3 BUCKET>/datasets/bookingsfolder of the S3 bucket.
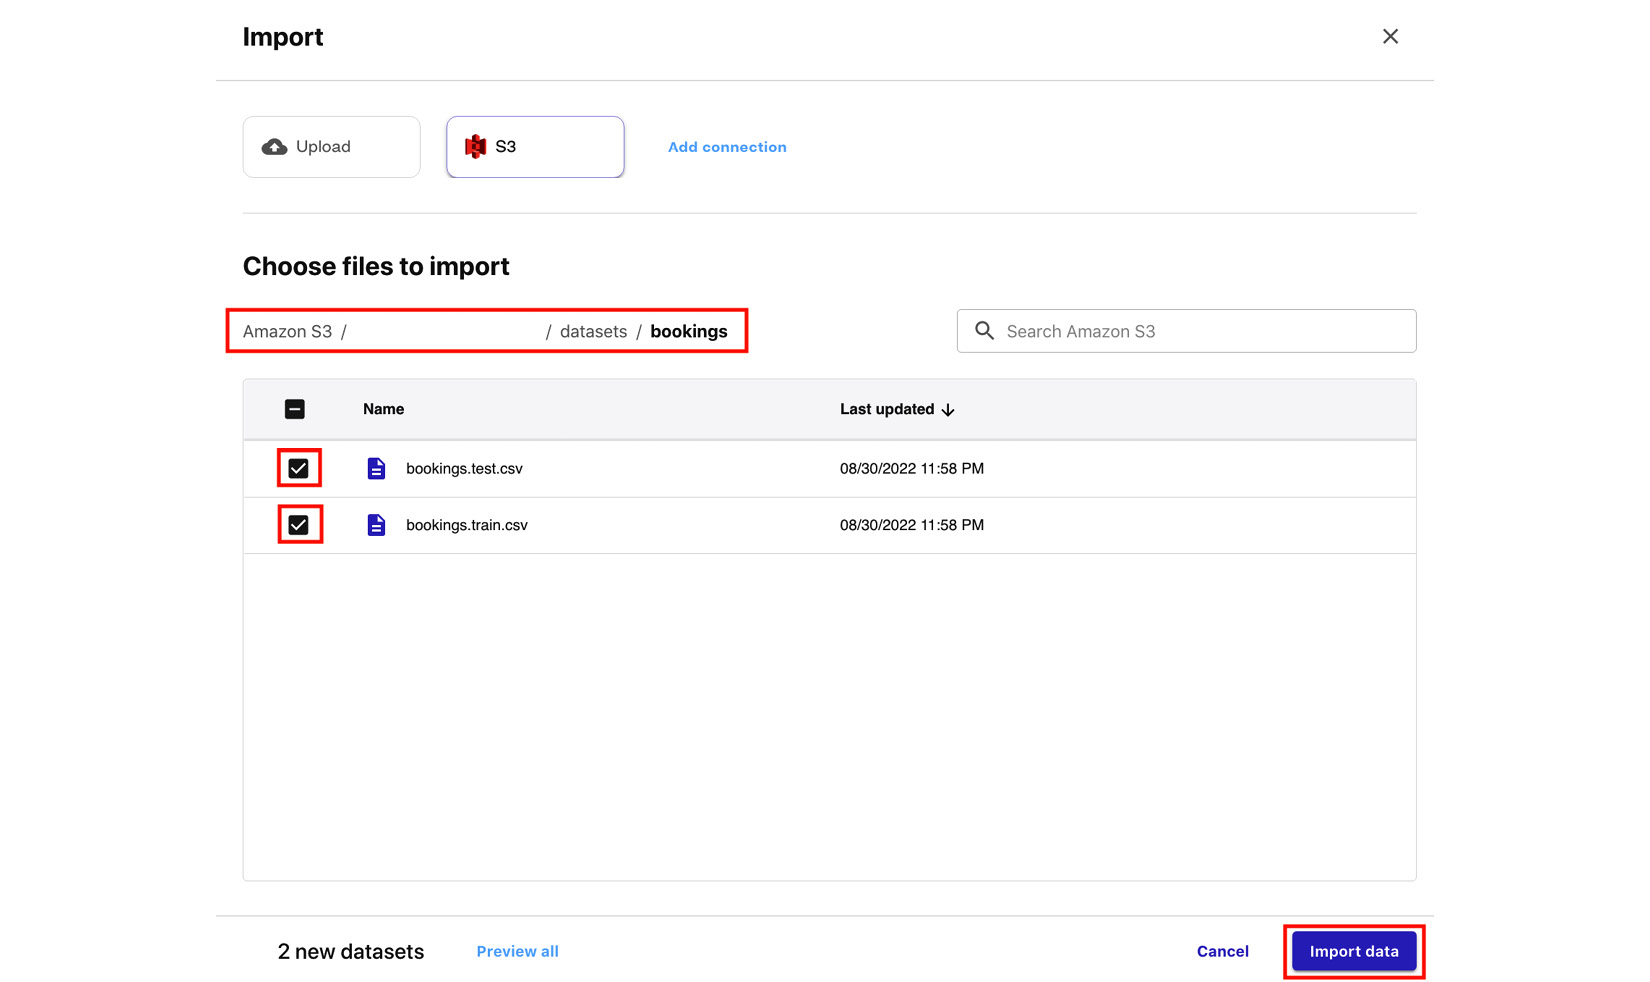
Figure 1.17 – Choose files to import
Select the necessary CSV files, as shown in the preceding screenshot, and click Import data.
Important note
Note that you may have a hard time locating the S3 bucket we created in the Uploading the dataset to S3 section if you have a significant number of S3 buckets in your account. Feel free to use the search box (with the Search Amazon S3 placeholder) located on the right-hand side, just above the table that lists the different S3 buckets and resources.
- Once the files have been imported, click the radio button of the row that contains
bookings.train.csv. Click Select dataset. - In the Build tab, click and open the Target column drop-down under Select a column to predict. Select
is_cancelledfrom the list of drop-down options for the Target column field. - Next, click Preview model (under the Quick build button), as highlighted in the following screenshot:
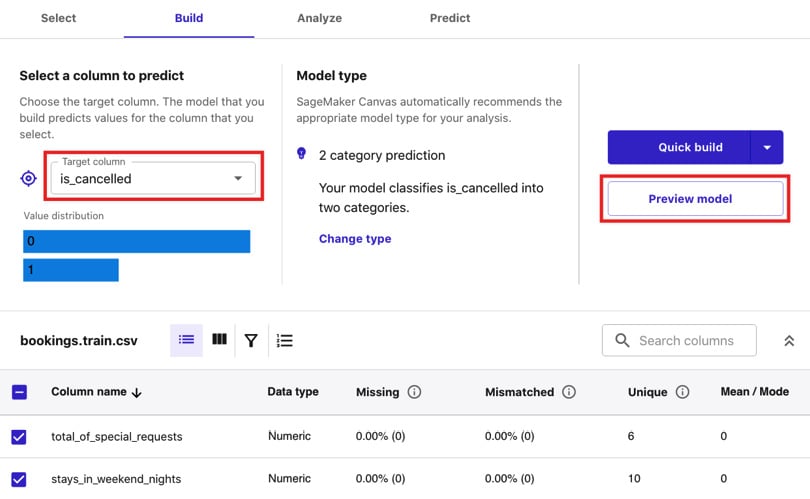
Figure 1.18 – The Build tab
After a few minutes, we should get an estimated accuracy of around 70%. Note that you might get a different set of numbers in this step.
- Click Quick build and wait for the model to be ready.
Important note
This step may take up to 15 minutes to complete. While waiting, let’s quickly discuss the difference between Quick build and Standard build. Quick build uses fewer records for training and generally lasts around 2 to 15 minutes, while Standard build lasts much longer – generally around 2 to 4 hours. It is important to note that models that are trained using Quick build can’t be shared with other data scientists or ML engineers in SageMaker Studio. On the other hand, models trained using Standard build can be shared after the build has been completed.
- Once the results are available, you may open the Scoring tab by clicking the tab highlighted in the following screenshot:
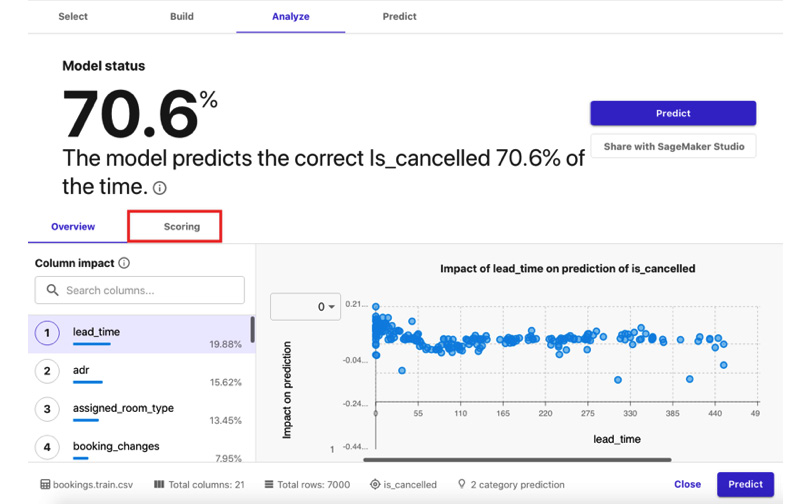
Figure 1.19 – The Analyze tab
We should see a quick chart showing the number of records that were used to analyze the model, along with the number of correct versus incorrect predictions the model has made.
Important note
At this point, we have built an ML model that we can use to predict whether a booking will be cancelled or not. Since the accuracy score in this example is only around 70%, we’re expecting the model to get about 7 correct answers every 10 tries. In Chapter 11, Machine Learning Pipelines with SageMaker Pipelines, we will train an improved version of this model with an accuracy score of around 88%.
- Once we are done checking the different numbers and charts in the Analyze tab, we can proceed by clicking the Predict button.
- Click Select dataset. Under Select dataset for predictions, choose
bookings.test.csvand click Generate predictions. - Once the Status column value is set to Ready, hover over the Status column of the row, click the 3 dots (which will appear after hovering over the row), and then select Preview from the list of options:
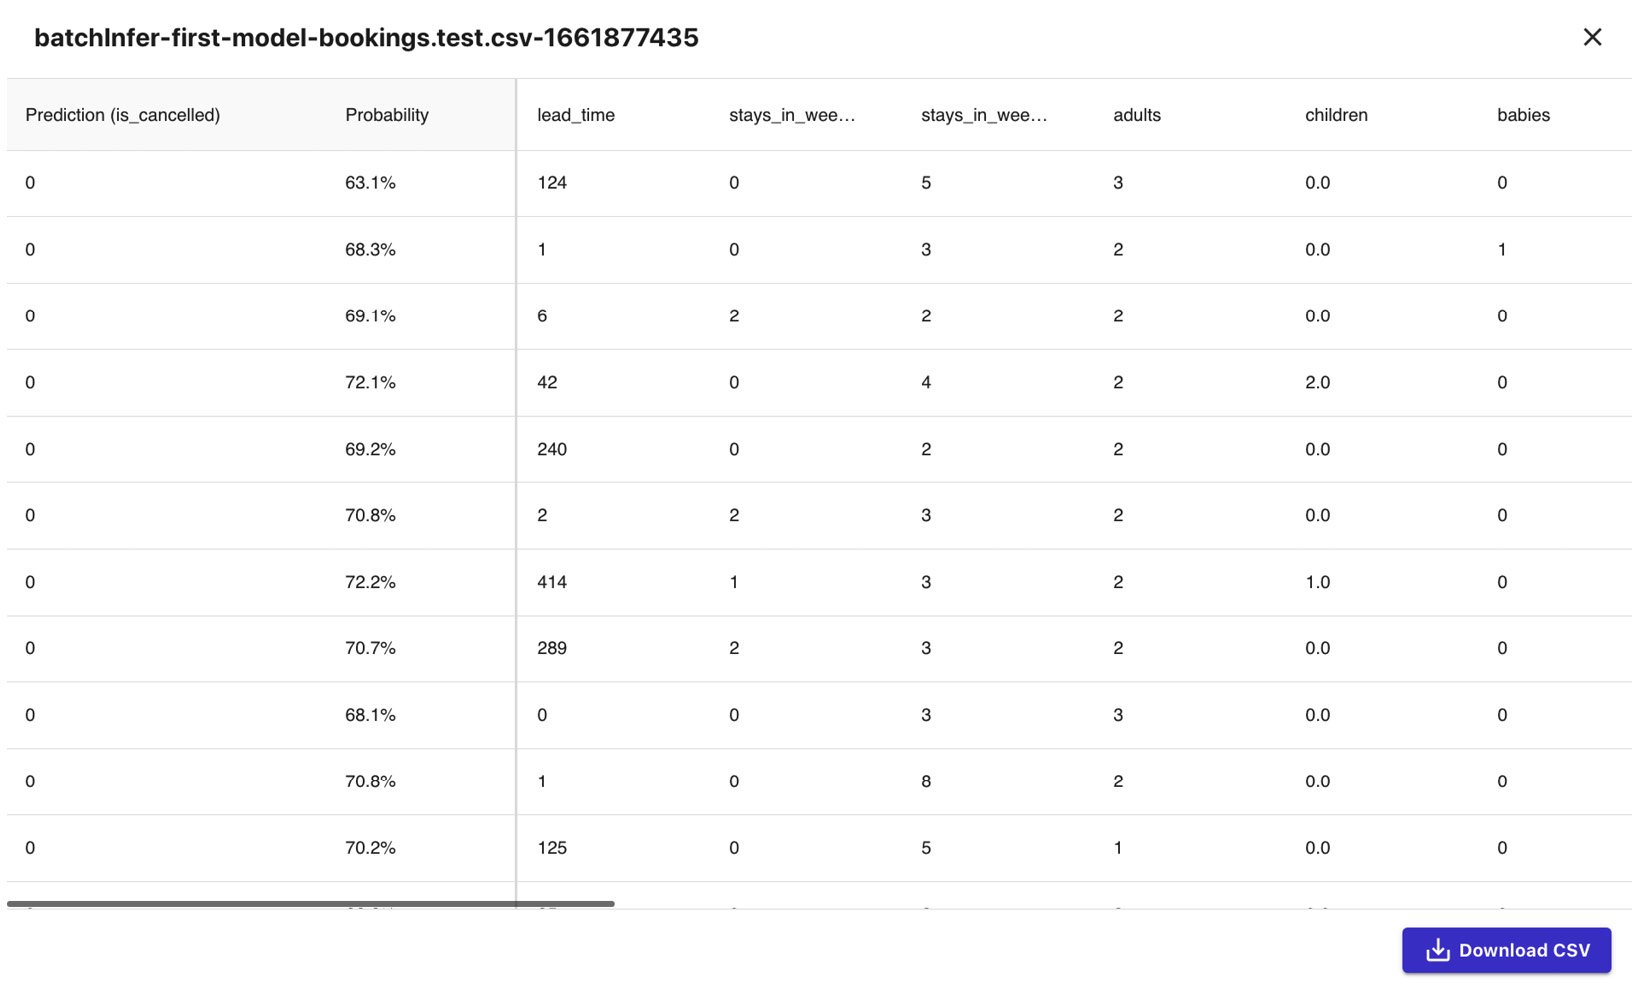
Figure 1.20 – Batch prediction results
We should see a table of values, similar to what is shown in the preceding screenshot. In the first column, we should have the predicted values for the is_cancelled field for each of the rows of our test dataset. In the second column, we should find the probability of the prediction being correct.
Important note
Note that we can also perform a single prediction by using the interface provided after clicking Single prediction under Predict target values.
- Finally, let’s log out of our session. Click the Account icon in the left sidebar and select the Log out option.
Important note
Make sure that you always log out of the current session after using SageMaker Canvas to avoid any unexpected charges. For more information, go to https://docs.aws.amazon.com/sagemaker/latest/dg/canvas-log-out.html.
Wasn’t that easy? Now that we have a good idea of how to use SageMaker Canvas, let’s run an AutoML experiment using SageMaker Autopilot.