


Getting started with SageMaker and SageMaker Studio
When performing ML and ML engineering on AWS, professionals should consider using one or more of the capabilities and features of Amazon SageMaker. If this is your first time learning about SageMaker, it is a fully managed ML service that helps significantly speed up the process of preparing, training, evaluating, and deploying ML models.
If you are wondering what these capabilities are, check out some of the capabilities tagged under ML SERVICES in Figure 1.2 from the How ML engineers can get the most out of AWS section. We will tackle several capabilities of SageMaker as we go through the different chapters of this book. In the meantime, we will start with SageMaker Studio as we will need to set it up first before we work on the SageMaker Canvas and SageMaker Autopilot examples.
Onboarding with SageMaker Studio
SageMaker Studio provides a feature-rich IDE for ML practitioners. One of the great things about SageMaker Studio is its tight integration with the other capabilities of SageMaker, which allows us to manage different SageMaker resources by just using the interface.
For us to have a good idea of what it looks like and how it works, let’s proceed with setting up and configuring SageMaker Studio:
- In the search bar of the AWS console, type
sagemaker studio. Select SageMaker Studio under Features. - Choose Standard setup, as shown in the following screenshot:
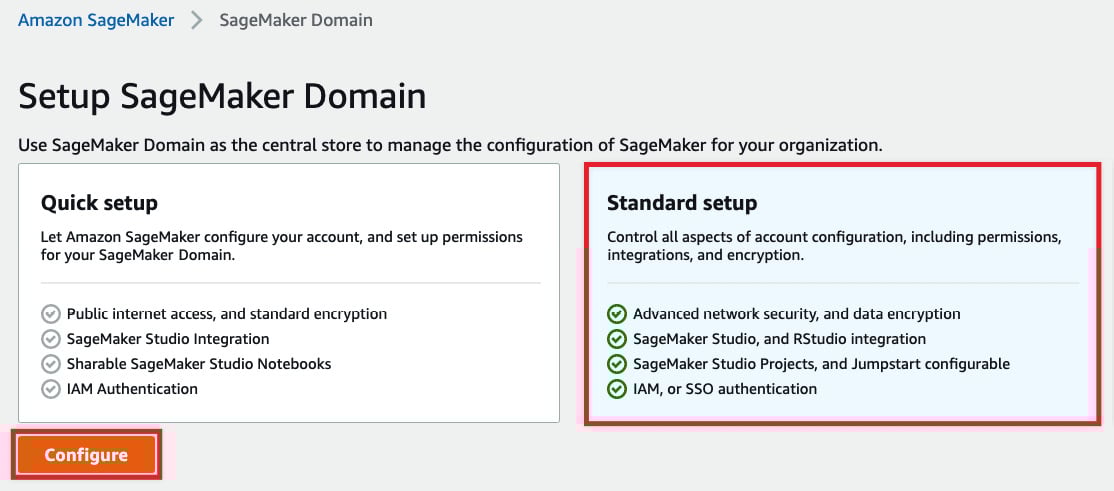
Figure 1.13 – Setup SageMaker Domain
As we can see, Standard setup should give us more configuration options to tweak over Quick setup. Before clicking the Configure button, make sure that you are using the same region where the S3 bucket and training and test datasets are located.
- Under Authentication, select AWS Identity and Access Management (IAM). For the default execution role under Permission, choose Create a new role. Choose Any S3 bucket. Then, click Create role.
- Under Network and Storage Section, select the default VPC and choose a subnet (for example,
us-west-2a), similar to what is shown in the following screenshot:
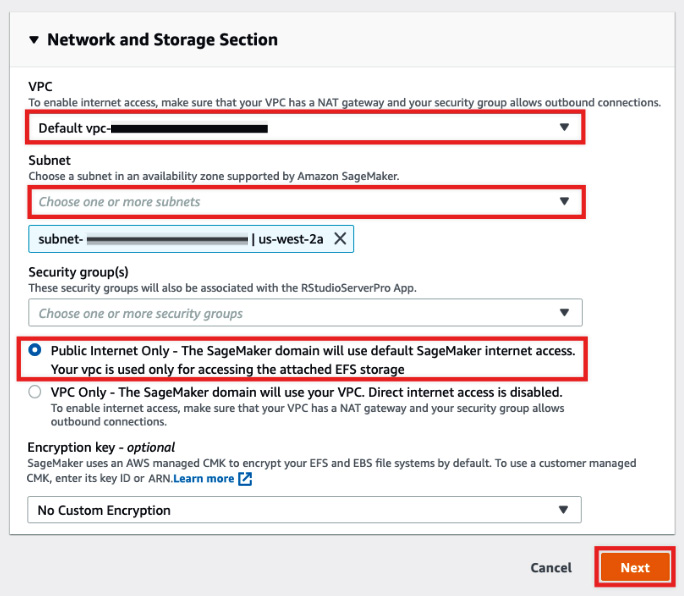
Figure 1.14 – Network and Storage Section
Here, we have also configured the SageMaker Domain to use the default SageMaker internet access by selecting Public Internet Only. Under Encryption key, we leave this unchanged by choosing No Custom Encryption. Review the configuration and then click Next.
Important note
Note that for production environments, the security configuration specified in the last few steps needs to be reviewed and upgraded further. In the meantime, this should do the trick since we’re dealing with a sample dataset. We will discuss how to secure environments in detail in Chapter 9, Security, Governance, and Compliance Strategies.
- Under Studio settings, leave everything as-is and click Next.
- Similarly, under General settings | RStudio Workbench, click Submit.
Once you have completed these steps, you should see the Preparing SageMaker Domain loading message. This step should take around 3 to 5 minutes to complete. Once complete, you should see a notification stating The SageMaker Domain is ready.
Adding a user to an existing SageMaker Domain
Now that our SageMaker Domain is ready, let’s create a user. Creating a user is straightforward. So, let’s begin:
- On the SageMaker Domain/Control Panel page, click Add user.
- Specify the name of the user under Name. Under Default execution role, select the execution role that you created in the previous step. Click Next.
- Under Studio settings | SageMaker Projects and JumpStart, click Next.
- Under RStudio settings | Rstudio Workbench, click Submit.
This should do the trick for now. In Chapter 9, Security, Governance, and Compliance Strategies, we will review how we can improve the configuration here to improve the security of our environment.