Your flow may process a significant amount of data whenever it runs, taking up system resources, impacting database performance, and taking time to run. Much of your input data may be processed repeatedly as you run your flow. For example, your flow may process data from an order system. Running the flow daily might process all data just to capture the most recently placed orders.
In order to make your flow more efficient, reduce the burden on input databases, and minimize flow runtime, Tableau Prep allows you to set up an incremental refresh. In the example described, an incremental refresh would only process orders that have not previously been processed by Tableau Prep. To achieve this, Tableau Prep compares the data in the flow output to the flow input.
In this recipe, we'll configure a flow to achieve this.
Getting ready
To follow along, open up Tableau Prep Builder and, from the home screen, select the Superstore sample flow.
How to do it…
To get started, select the orders (USCA) input step, and then follow these steps:
- From the bottom pane, select the Settings tab, then scroll to the bottom to reveal the Incremental Refresh setting and check the Enable incremental refresh box. This will result in an error message, which will disappear as we configure the incremental refresh in the next steps:
Figure 2.42 – Incremental Refresh settings
Tableau Prep needs to know three bits of information in the input step to configure a incremental refresh.
- Firstly, which field indicates whether or not a row in the data is new. In this example, we want to identify new Superstore rows by Order Date. Select this from the Input field dropdown to reveal the additional settings:
Figure 2.43 – Incremental Refresh field settings
Next, we need to tell Tableau Prep in which output it can find a field to compare the selected input field with, to determine whether a row is new or not. In this case, the fields are named identically, and so Tableau Prep has automatically selected Order Date as the output field in the Superstore Sales output, which is exactly what we want. No further changes are needed; your incremental refresh for this input is now configured. If you have multiple inputs, an incremental refresh must be configured for each input separately.
Important note
Replacing Output with Incremental Data Only: When you select the Create 'Superstore Sales.hyper', output step notice the Incremental Refresh dropdown in the settings area. There are two options here. By default, Tableau Prep will append data, meaning only the newly processed rows are added. However, you can change this to Create Table to replace any existing output with new output containing only those newly processed rows.
How it works…
Tableau has achieved a marvelously easy method to process data incrementally by comparing the existing output to the input for a particular field only. This method can save you hours of unnecessarily processing data that's already been processed previously.
 Argentina
 Australia
 Austria
 Belgium
 Brazil
 Bulgaria
 Canada
 Chile
Chile
 Colombia
 Cyprus
 Czechia
 Denmark
 Ecuador
 Egypt
Egypt
 Estonia
 Finland
 France
 Germany
 Great Britain
 Greece
 Hungary
 India
India
 Indonesia
 Ireland
 Italy
Italy
 Japan
Japan
 Latvia
 Lithuania
 Luxembourg
 Malaysia
 Malta
Malta
 Mexico
 Netherlands
 New Zealand
 Norway
 Philippines
 Poland
 Portugal
 Romania
 Russia
 Singapore
 Slovakia
 Slovenia
 South Africa
 South Korea
 Spain
Spain
 Sweden
 Switzerland
 Taiwan
 Thailand
 Turkey
 Ukraine
 United States


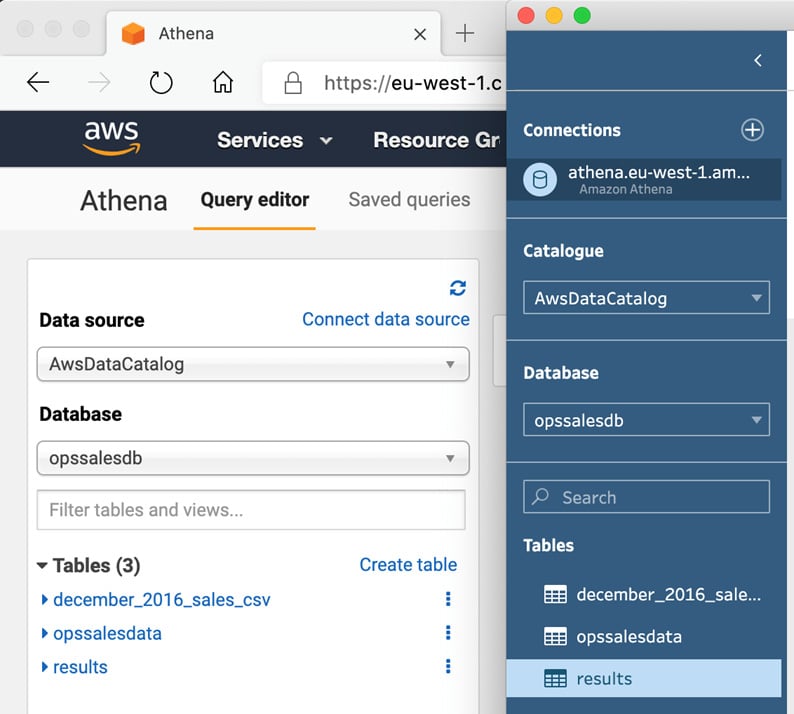


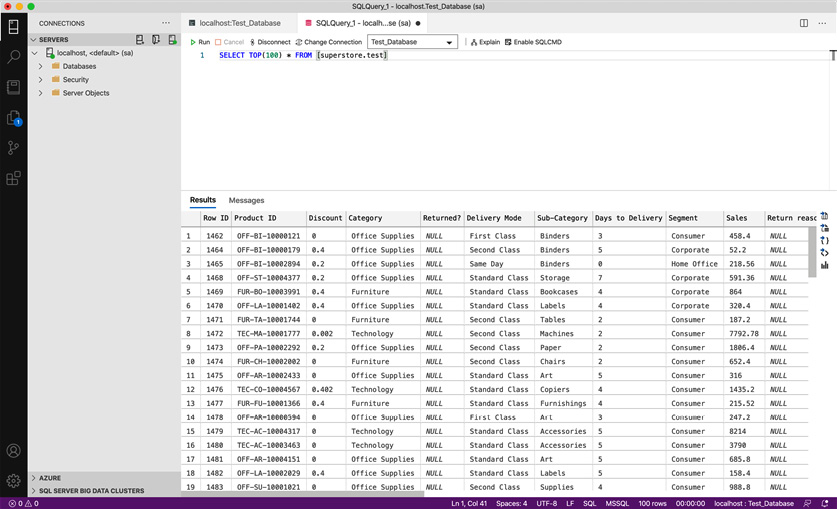
![Figure 2.38 – Use [schema].[table] format to create a new table](https://static.packt-cdn.com/products/9781800563766/graphics/image/B16782_02_038.jpg)