


Adding support for OpenGL or Vulkan to the window
Having a simple window is cool, but we need to go a bit further to draw our models using OpenGL or Vulkan. These changes will add the bare minimum of code to initialize the window for 3D rendering. It is a “smoke test” to see whether you have all the libraries and headers for Chapters 2 and 3, where we will create two triangle renderers, one for OpenGL and one for Vulkan.
GLFW and OpenGL
GLFW includes basic support for OpenGL; you only need a bunch of calls and a link to the OpenGL library. You can find the code in the 02_opengl_window folder.
Add the following lines to the Window.cpp file:
bool Window::init(unsigned int width, unsigned int height, std::string title) {
  if (!glfwInit()) {
  ...
  glfwMakeContextCurrent(mWindow);
  Logger::log(1, "%s: Window successfully initialized\n",
    __FUNCTION__);
  return true;
}
The first call is glfwMakeContextCurrent() – it gets the OpenGL context, which contains the global state of the rendering, and makes it the context of the current thread. This needs to be added to the end of the init() call.
Having the context in place, we can use some simple OpenGL calls inside the main loop of the window. Without an extension loader, this is fairly basic (Windows may be down for OpenGL version 1.x), but for pure initialization, the following is sufficient:
void Window::mainLoop() {
  glfwSwapInterval(1);
  float color = 0.0f;
Before going into the loop, we will activate the wait for the vertical sync with a call to the GLFW function, glfwSwapInterval(). Without waiting for it, the window might flicker, or tearing might occur, as the update and buffer switch will be done as fast as possible. Also, we add a color float variable, which holds our background color.
Inside the while loop, which is, again, waiting for the window to close, the color variable is incremented in small amounts and reset to zero if it reaches a value of one. The value is set using a call to the glClearColor() function as the new color to be used when clearing the draw buffer – setting the red, green, and blue results in a gray color. The call to the glClear() function, with the value set to clear only the color buffer, gives the window a simple gray background:
  while (!glfwWindowShouldClose(mWindow)) {
    color >= 1.0f ? color = 0.0f : color += 0.01f;
    glClearColor(color, color, color, 1.0f);
    glClear(GL_COLOR_BUFFER_BIT);
By default, GLFW activates double buffering for the OpenGL window. This means we have two separate graphics buffers of the same size, a front buffer and a back buffer. All the changes to the final picture occur in the back buffer while showing the front buffer, which contains the image created by the previous rendering calls. This hides the creation process from the user. After the drawing of the back buffer has finished, glfwSwapBuffers() swaps the two buffers and displays the content of the back buffer, making the previous front buffer the new back buffer for the hidden drawing:
    /* swap buffers */
    glfwSwapBuffers(mWindow);
The event polling stays at the end of the loop, enabling it to move and close the window:
    /* poll events in a loop */
    glfwPollEvents();
  }
}
Note that CMakeLists.txt also needs to be extended for proper usage of OpenGL:
set(OpenGL_GL_PREFERENCE GLVND)
find_package(OpenGL REQUIRED)
target_link_libraries(Main ${GLFW3_LIBRARY} OpenGL::GL)
We have to set a variable to define the type of OpenGL; here, we are using the “vendor neutral dispatch” implementation (hence the name GLVND), and we use the find_package command to locate the OpenGL library. In addition, we have to add the OpenGL library to the command to link the final executable to it.
After compiling and starting the program, you should see a slowly flashing window. This means that your system has all the required libraries for the OpenGL renderer, which will be discussed in Chapter 2:
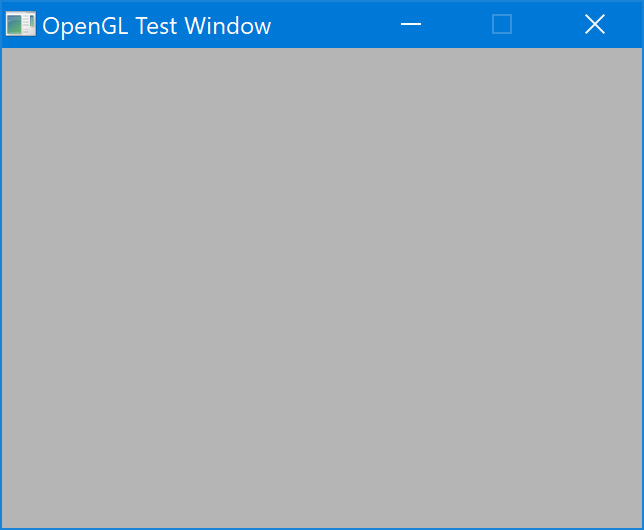
Figure 1.21: The filled OpenGL window
After checking the OS for OpenGL support to draw our characters, next, we will test whether the Vulkan-rendering API is also available.
GLFW and Vulkan
GLFW also supports the newer Vulkan API, and compared to OpenGL, this is much closer to the GPU. You can get a lot more power out of your graphics card, but with great power comes great responsibility. As you will learn, the first basic steps to initialize the Vulkan system already require a lot of work. And even with this amount of code, we are far, far away from drawing a triangle or just clearing the screen like in the OpenGL code.
The code for this example can be found in the 03_vulkan_window folder.
First, the Window.h file needs to be extended:
#include <string>
/* include Vulkan header BEFORE GLFW */
#include <vulkan/vulkan.h>
#include <GLFW/glfw3.h>
We need to include the Vulkan header, <vulkan/vulkan.h>. This has to be done before the GLFW, as the GLFW switches on specific features if it detects Vulkan.
To encapsulate all of the new Vulkan-specific code, create an initVulkan() function:
  public:
    bool initVulkan();
Two new member variables must be added in the private section of the class. We need a handle for the Vulkan instance and another handle for the Vulkan surface:
  private:
    GLFWwindow *mWindow = nullptr;
    std::string mApplicationName;
    VkInstance mInstance{};
    VkSurfaceKHR mSurface{};
Here, VkInstance stores information about the Vulkan settings in the current application, and VkSurfaceKHR is a drawable “surface” in Vulkan. This will be enhanced in Chapter 3 when we create a Vulkan renderer.
The application name has been stored as std::string since we need it in two positions.
The init() function in the Window.cpp file will be extended by two additional calls:
  if (!glfwVulkanSupported()) {
    glfwTerminate();
    Logger::log(1, "%s: Vulkan is not supported\n",
      __FUNCTION__);
    return false;
  }
The first call, glfwVulkanSupported(), checks whether Vulkan is available at all. If this fails, the machine might be missing the software or hardware capabilities in which to use Vulkan.
The second call is the new initVulkan() function; the program run will also fail if something goes wrong during the initialization process:
  if (!initVulkan()) {
    Logger::log(1, "%s: Could not init Vulkan\n",
      __FUNCTION__);
    glfwTerminate();
    return false;
  }
The new initVulkan() function starts with a data structure called VkApplicationInfo:
  VkApplicationInfo mAppInfo{};
  mAppInfo.sType = VK_STRUCTURE_TYPE_APPLICATION_INFO;
  mAppInfo.pNext = nullptr;
  ….
  mAppInfo.apiVersion = VK_MAKE_API_VERSION(0, 1, 1, 0);
This contains basic information about the application, such as the name and the version. Most of the fields are optional, but we need at least three of them:
- You will see
.sTypein many of the Vulkan data structures. This is required for Vulkan to know what kind of struct you pass to it. The naming is alwaysVK_STRUCTURE_TYPE_*. - Here,
.pNextwill always benullptr. It could be used to link different Vulkan structures. .apiVersionmust be set to the minimum Vulkan API version that we want to use. Here, we generate version 1.1.0.
With a call to glfwGetRequiredInstanceExtensions(), we check whether we have the required extensions to run a Vulkan application:
  uint32_t extensionCount = 0;
  const char** extensions =
      glfwGetRequiredInstanceExtensions(&extensionCount);
  if (extensionCount == 0) {
    Logger::log(1, "%s error: no Vulkan extensions
      found\n", __FUNCTION__);
    return false;
  }
The preceding code block returns the number of extensions and the extension names as a C-style array. We need extension names for the Vulkan initialization, but if we get no extensions at all, then again, there is no proper support for Vulkan, and we terminate the program by returning false from the Vulkan init function.
The next structure is VkInstanceCreateInfo:
  VkInstanceCreateInfo mCreateInfo{};
  mCreateInfo.sType =
    VK_STRUCTURE_TYPE_INSTANCE_CREATE_INFO;
  mCreateInfo.pNext = nullptr;
  mCreateInfo.pApplicationInfo = &mAppInfo;
  mCreateInfo.enabledExtensionCount = extensionCount;
  mCreateInfo.ppEnabledExtensionNames = extensions;
  mCreateInfo.enabledLayerCount = 0;
  result = vkCreateInstance(&mCreateInfo, nullptr,
    &mInstance);
  if (result != VK_SUCCESS) {
    Logger::log(1, "%s: Could not create Instance
      (%i)\n", __FUNCTION__, result);
    return false;
  }
The VkInstanceCreateInfo struct also contains the .sType and .pNext fields, along with a link to the application info structure and the extensions we found. Having this information collected, we can call vkCreateInstance() to create a Vulkan instance. The instance includes the storage for the Vulkan state on the application level, and there is no longer a system global state (“context”) like in OpenGL.
Now, let’s see how many graphics cards we can find in the system:
  uint32_t physicalDeviceCount = 0;
  vkEnumeratePhysicalDevices(mInstance,
    &physicalDeviceCount, nullptr);
  if (physicalDeviceCount == 0) {
    Logger::log(1, "%s: No Vulkan capable GPU found\n",
      __FUNCTION__);
    return false;
  }
  std::vector<VkPhysicalDevice> devices;
  vkEnumeratePhysicalDevices(mInstance,
    &physicalDeviceCount, devices.data());
The call to vkEnumeratePhysicalDevices() has to be done twice. The first time, we will only get the number of GPUs, and if we find one or more GPUs, the second call will be used to fill the corresponding array with data about the GPUs.
For the last step, we will create the Vulkan surface using glfwCreateWindowSurface():
  result = glfwCreateWindowSurface(mInstance, mWindow,
    nullptr, &mSurface);
  if (result != VK_SUCCESS) {
    Logger::log(1, "%s: Could not create Vulkan
      surface\n", __FUNCTION__);
    return false;
  }
If this call is successful, full support for Vulkan will become available on your machine.
The Vulkan surface and the instance need to be deleted in the cleanup() function, along with the GLFW window:
void Window::cleanup() {
  Logger::log(1, "%s: Terminating Window\n",
    __FUNCTION__);
  vkDestroySurfaceKHR(mInstance, mSurface, nullptr);
  vkDestroyInstance(mInstance, nullptr);
  glfwDestroyWindow(mWindow);
  glfwTerminate();
}
Additionally, the configuration of CMake needs to be changed, and we have to find Vulkan. Add the respective change specified in the following lines to the CmakeLists.txt file:
find_package(Vulkan REQUIRED)
target_link_libraries(Main ${GLFW3_LIBRARY} Vulkan::Vulkan)
Note that find_package is used to locate the Vulkan SDK, which contains the header and libraries. Also, we have to link the final executable to the Vulkan library to be able to use the Vulkan calls.
The output window that is created when you run the code is similar to Figure 1.1. Again, you will get a simple window, but this time, it will be filled with a static color or with fragments of your current screen. The code from this example does not clear the screen, but in this chapter, we want to check only for the general availability of the Vulkan API. So, we need to rely on the log output. If you see a line saying Found physical device(s) and that the window was successfully initialized after running the code, you are ready to go for the Vulkan renderer in Chapter 3:
initVulkan: Found 2 Vulkan extensions
initVulkan: VK_KHR_surface
initVulkan: VK_KHR_xcb_surface
initVulkan: Found 1 physical device(s)
init: Window successfully initialized
At the very least, you need the VK_KHR_surface extension that is listed in the output. Other extensions might appear too, depending on your OS and the graphics drivers.
After we have checked the OS for support of one or both rendering APIs, we will add some code to the Window class. This code will ensure our application behaves like every other application window on the system.