
Troubleshooting and Additional Techniques
Nothing ever goes entirely as planned when shooting pictures, which is why we use Photoshop Elements to help fine-tune things such as composition, color, and image clarity. But even then, things can still go wrong when wrangling any software.
Adobe does a great job of updating the security and stability of Photoshop Elements on a regular basis, but even though almost everything in this industry is updated or replaced every few months, it's not surprising that problems can arise from time to time.
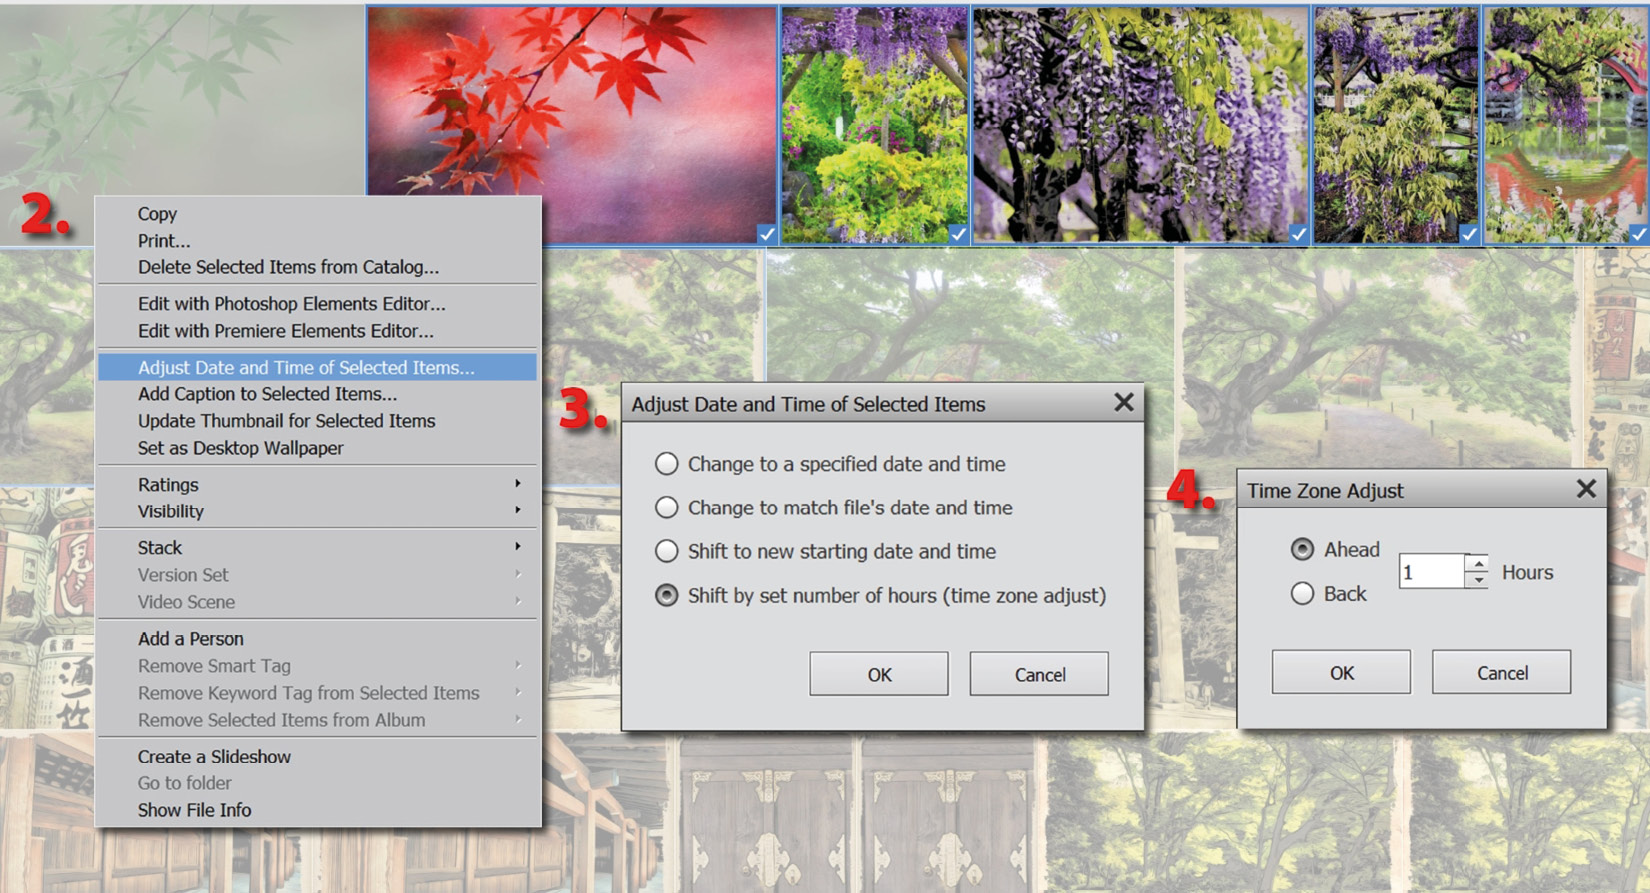
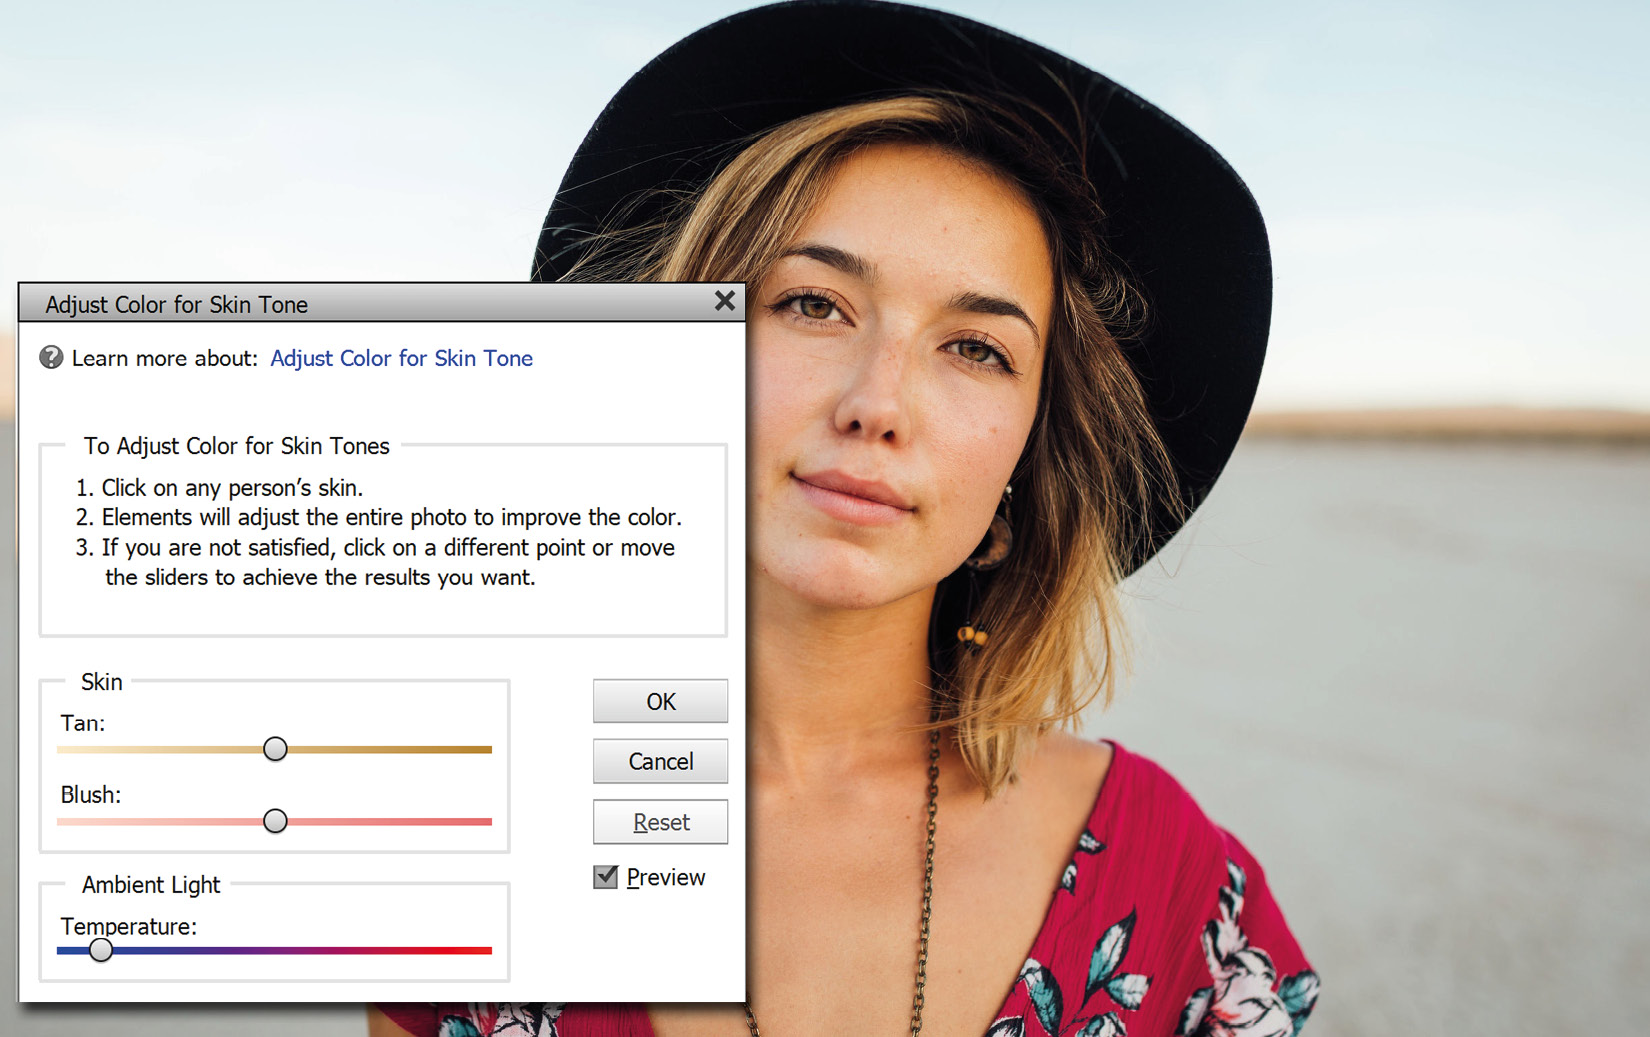
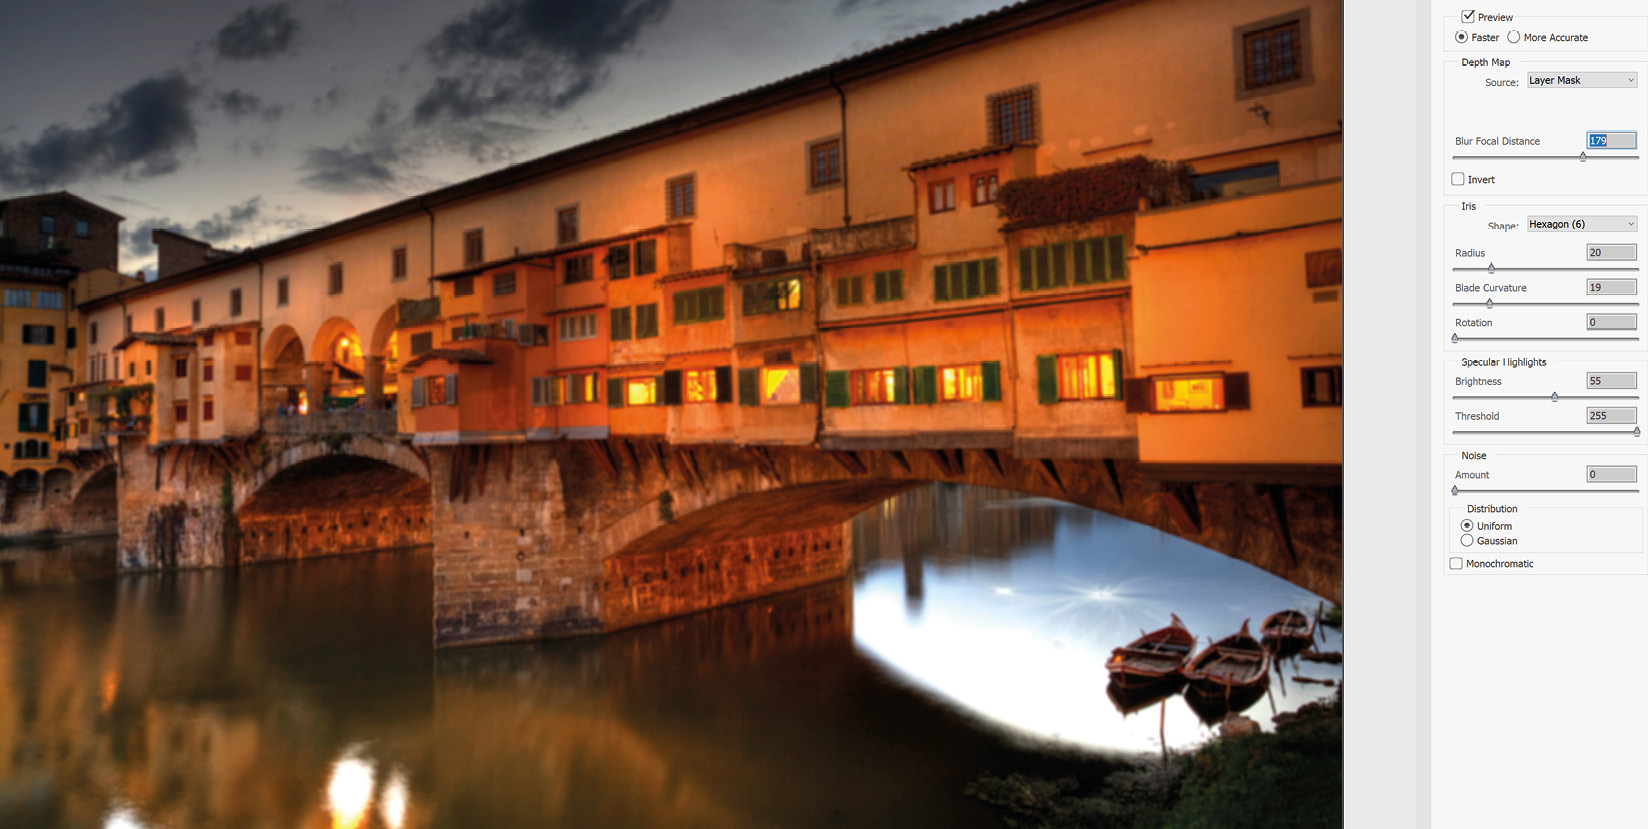
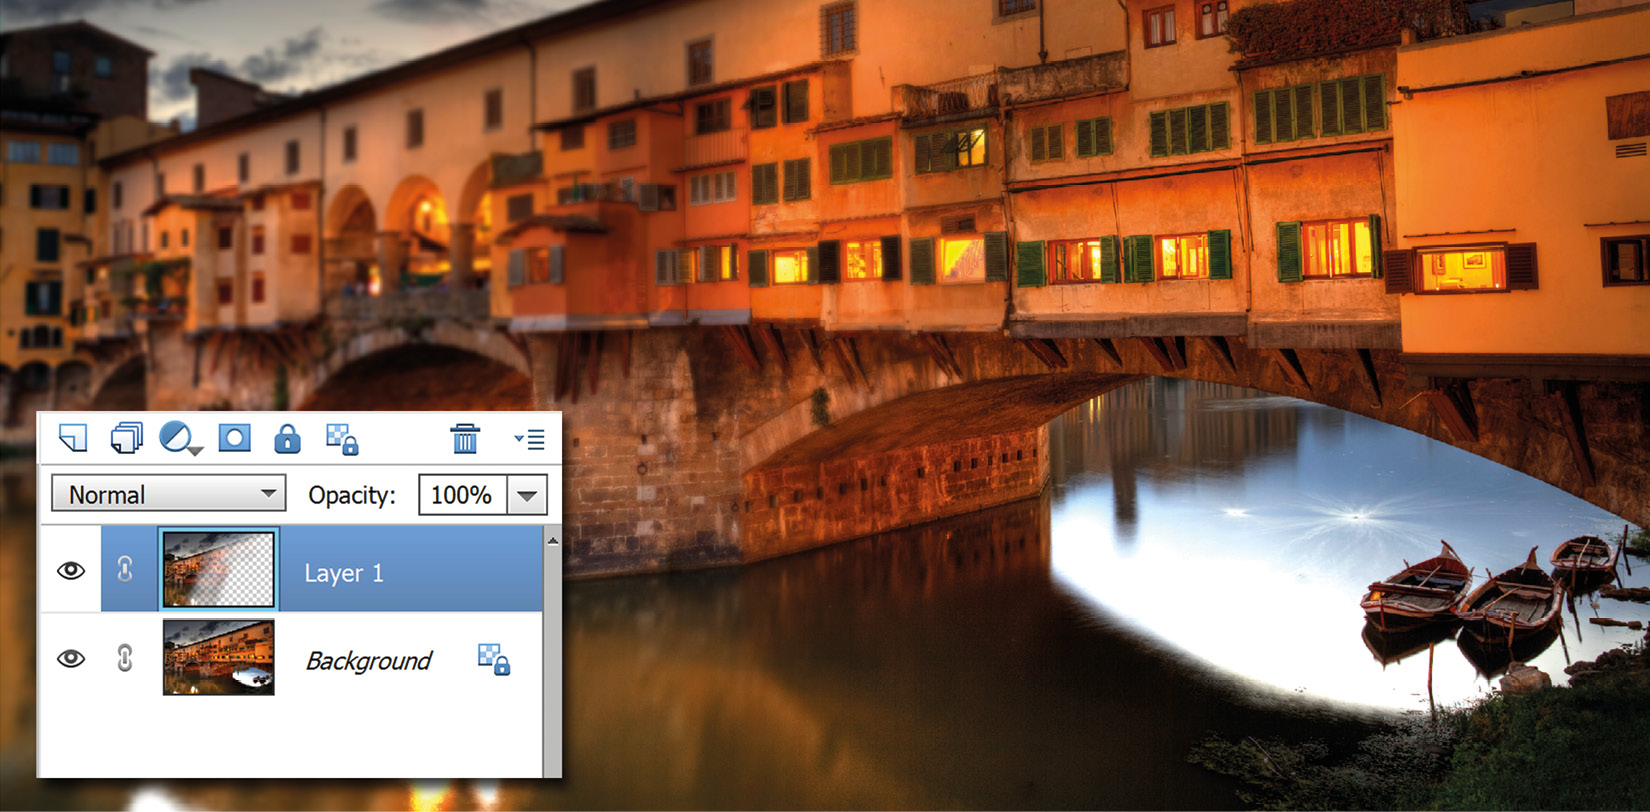
In this chapter, you will find the solutions to some of the most common image editing problems, including catalog issues, lost files, and poor color results. The last section profiles a bunch of really great additional techniques - correcting lens distortion, depth of field effects, adding lens flare and having fun with the fantastic Liquify filter.
What you'll learn from this chapter:
- File-saving issues
- Finding lost...