Advanced Techniques: Retouching, Selections, and Text
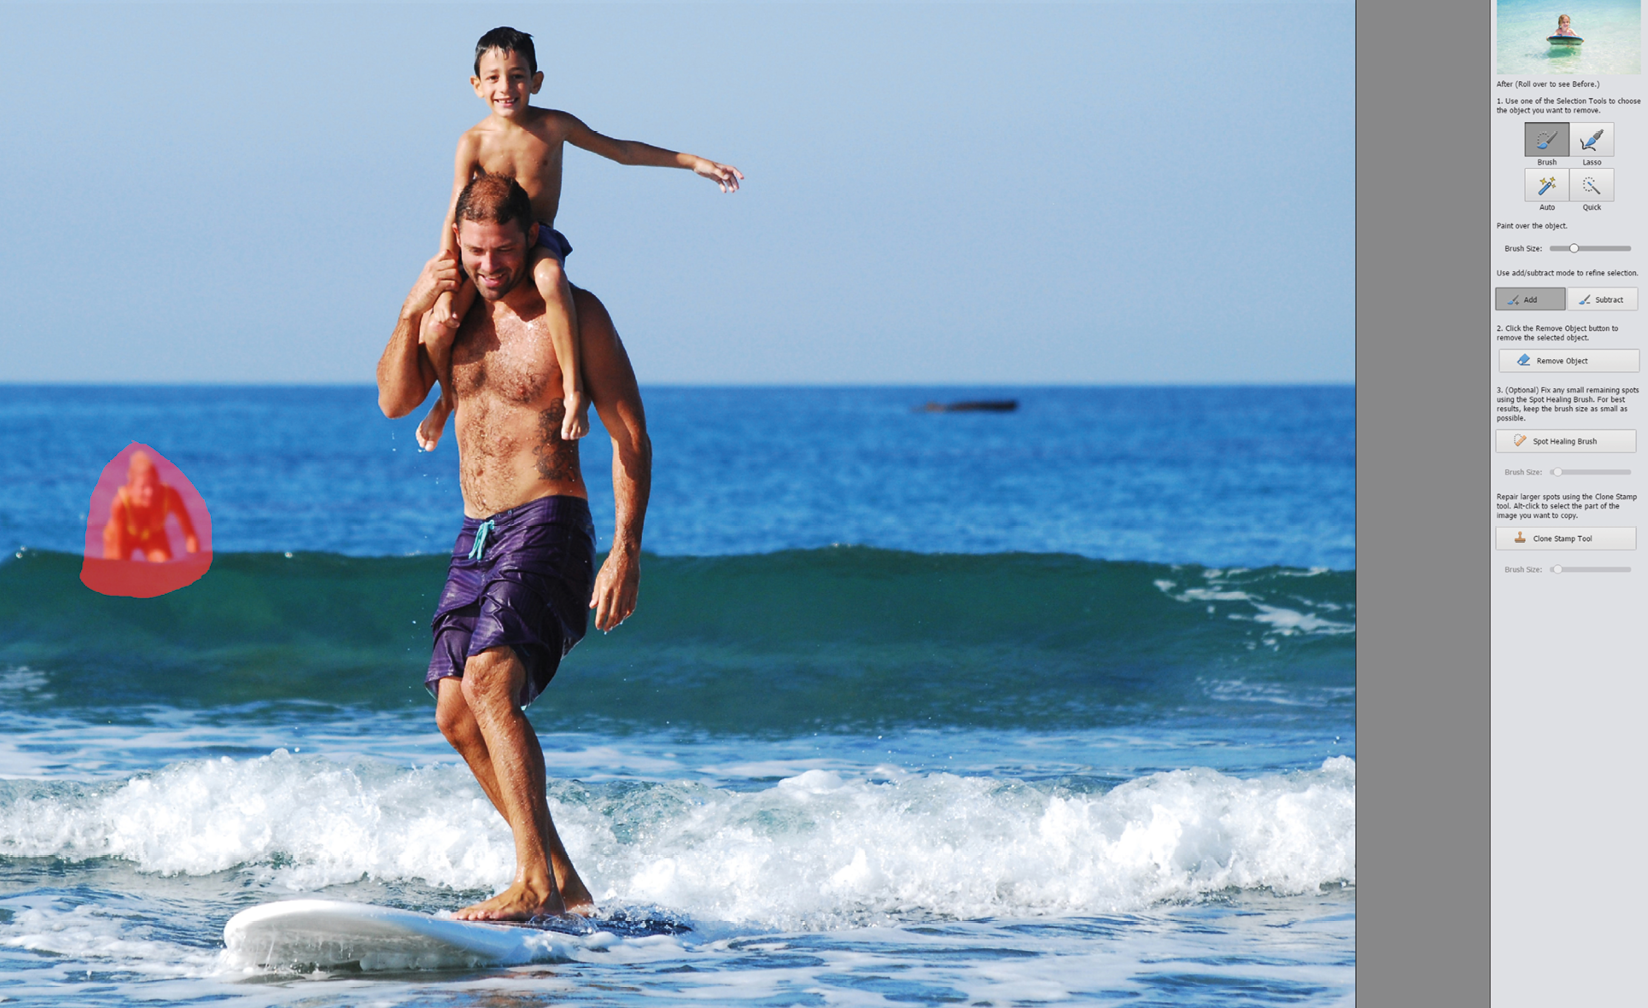
With the experience of working with Layers now safely saved to your repertoire of editing skills, it's time to tackle the often confusing world of retouching. This chapter introduces you to the power of the Spot Healing Brush and Clone Stamp tool - you will have seen examples of how this is used to 'perfect' images earlier in this book but here we shift the emphasis from beauty retouching to complex repair jobs that need multiple tools to create the perfect result.
You'll also find a section on what I regard as two of the best image modifiers: the Burn and Dodge Brush Tools - simple brushes that can transform a tired looking image into a dynamic picture - just with the stroke of a brush!
But this chapter is also about simplifying selections - highlighting excellent tools like the Subject Selection and Object Removal features.
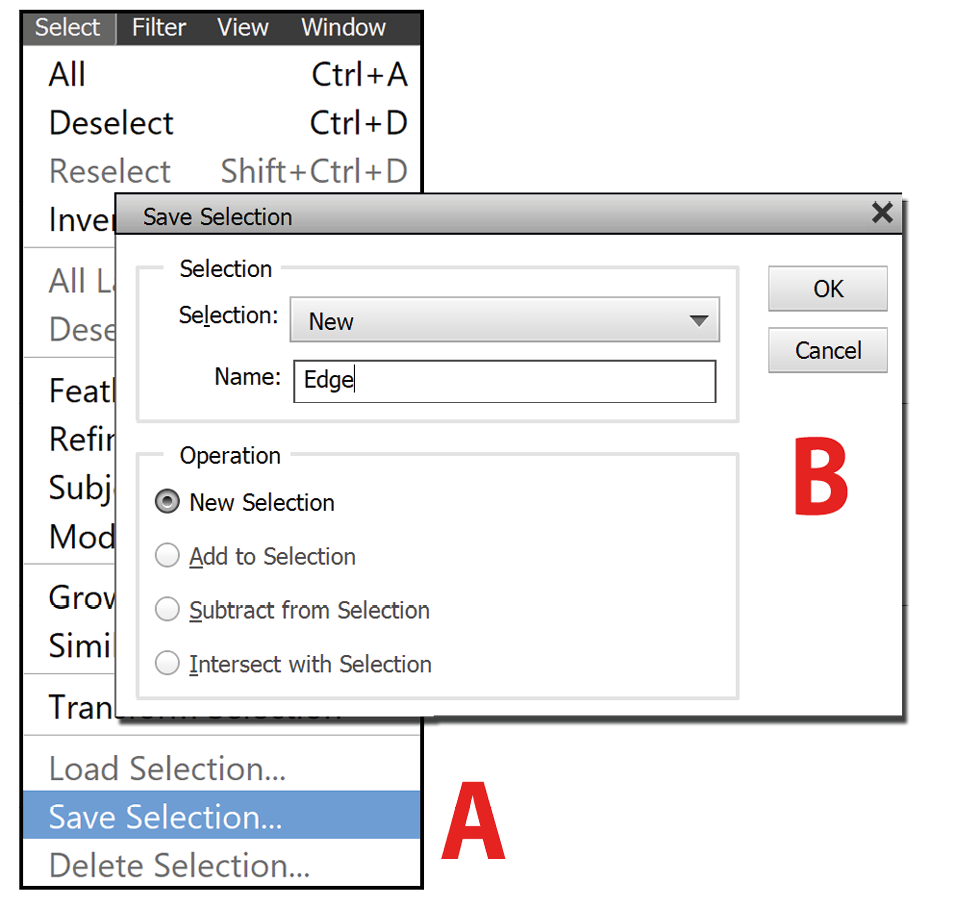
And then we focus on the power of selections, describing all of Elements&apos...