Search icon
Arrow left icon
All Products
Best Sellers
New Releases
Books
Videos
Audiobooks
Learning Hub
Newsletters
Free Learning
Arrow right icon
Build Your Own Metaverse with Unity

You're reading from  Build Your Own Metaverse with Unity

Product type Book
Published in Sep 2023
Publisher Packt
ISBN-13 9781837631735
Pages 586 pages
Edition 1st Edition
Languages
Concepts
Author (1):
David Cantón Nadales David Cantón Nadales
Profile icon David Cantón Nadales

Table of Contents (20) Chapters

Preface 1. Part 1: Getting Started
2. Chapter 1: Getting Started with Unity and Firebase 3. Chapter 2: Preparing Our Player 4. Chapter 3: Preparing Our Home Sweet Home: Part 1 5. Chapter 4: Preparing Our Home Sweet Home: Part 2 6. Chapter 5: Preparing a New World for Travel 7. Part 2: And Now, Make It Metaverse!
8. Chapter 6: Adding a Registration and Login Form for Our Users 9. Chapter 7: Building an NPC That Allows Us to Travel 10. Chapter 8: Acquiring a House 11. Chapter 9: Turning Our World into a Multiplayer Room 12. Chapter 10: Adding Text and a Voice Chat to the Room 13. Part 3: Adding Fun Features Before Compiling
14. Chapter 11: Creating an NPC That Allows Us to Change Our Appearance 15. Chapter 12: Streaming Video Like a Cinema 16. Chapter 13: Adding Compatibility for the Meta Quest 2 17. Chapter 14: Distributing 18. Index 19. Other Books You May Enjoy

Transmitting your voice to the network

Transmitting our voice to the multiplayer server of our metaverse is really easy with Photon. The SDK has ready-to-use components that will make all the hard work easier.

To start, we need to find the Prefab we’ve used for our character. Find the PlayerInstance Prefab, which is located in the Assets | _App | Photon | PhotonUnityNetworking | Resources path, and double-click to edit it.

With the PlayerInstance Prefab in Edit Mode, we will follow these steps to add voice functionality:

  1. Select the PlayerArmature GameObject and display its Inspector panel.
  2. Add a new component called Audio Source.
  3. Add another component, called Photon Voice View.
  4. We will also need another component, called Recorder.
  5. Finally, add the Speaker component.

Great, now the Inspector panel of the PlayerArmature GameObject will look as in the following screenshot:

Figure 10.15 – PlayerArmature Inspector panel

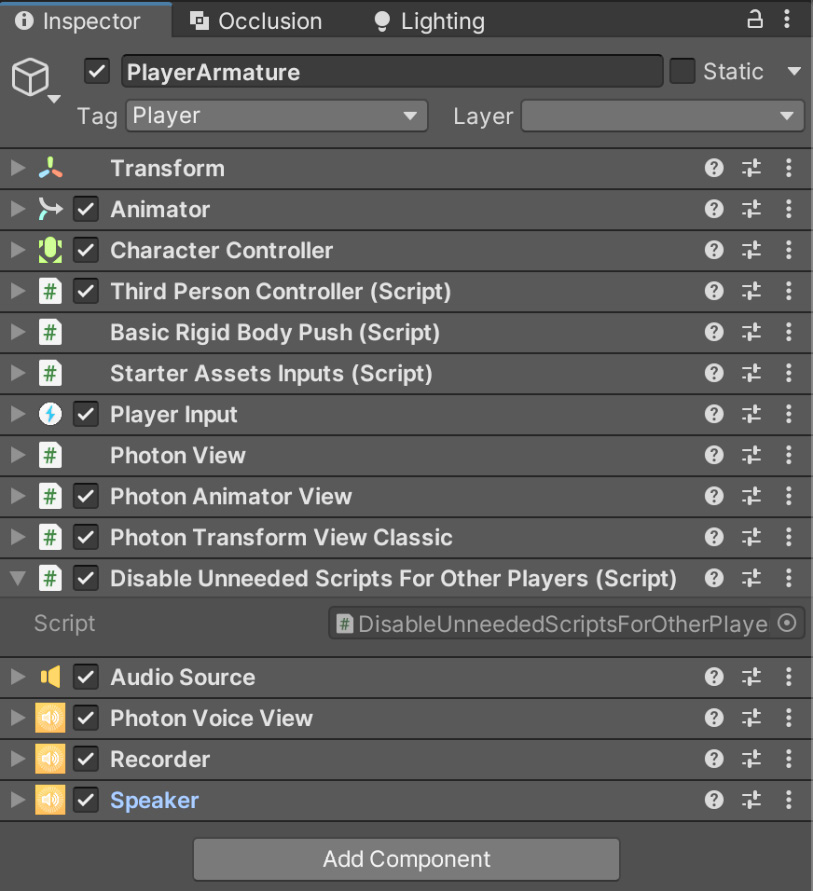
Figure 10.15 – PlayerArmature Inspector...

lock icon The rest of the chapter is locked
Register for a free Packt account to unlock a world of extra content!
A free Packt account unlocks extra newsletters, articles, discounted offers, and much more. Start advancing your knowledge today.
Unlock this book and the full library FREE for 7 days
Get unlimited access to 7000+ expert-authored eBooks and videos courses covering every tech area you can think of
Renews at $15.99/month. Cancel anytime}