

Kotlin syntax, types, functions and classes
In this section, we’ll be looking at Kotlin syntax and familiarize ourselves with the language. Kotlin is a strongly typed language. The type of a variable is determined at the time of compilation. Kotlin has a rich type system that has the following types:
- Nullable types: Every type in Kotlin can either be nullable or non-nullable. Nullable types are denoted with a question mark operator – for example,
String?. Non-nullable types are normal types without any operator at the end – for example,String. - Basic types: These types are similar to Java. Examples include Int, Long, Boolean, Double, and Char.
- Class types: As Kotlin is an object-oriented programming language, it provides support for classes, sealed classes, interfaces, and so on. You define a class using the
classkeyword and you can add methods, properties, and constructors. - Arrays: There is support for both primitive and object arrays. To declare a primitive array, you specify the type and size, as follows:
val shortArray = ShortArray(10)
The following shows how you define object arrays:
val recipes = arrayOf("Chicken Soup", "Beef Stew", "Tuna Casserole")Kotlin automatically infers the type when you don’t specify it.
- Collections: Kotlin has a rich collection of APIs providing types such as sets, maps, and lists. They’re designed to be concise and expressive, and the language offers a wide range of operations for sorting, filtering, mapping, and many more.
- Enum types: These are used to define a fixed set of options. Kotlin has the
Enumkeyword for you to declare enumerations. - Functional types: Kotlin is a functional language as well, meaning functions are treated as first-class citizens. You can be able to assign functions to variables, return functions as values from functions, and pass functions as arguments to other functions. To define a function as a type, you use the
(Boolean) -> Unitshorthand notation. This example takes aBooleanargument and returns aUnitvalue.
We’ve learned the different types available in Kotlin, and we’ll use this knowledge in the next section to define some of these types.
Creating a Kotlin project
Follow these steps to create your first Kotlin project:
- Open IntelliJ IDEA. On the welcome screen, click on New Project. You’ll be presented with a dialog to create your new project as shown in the following figure:
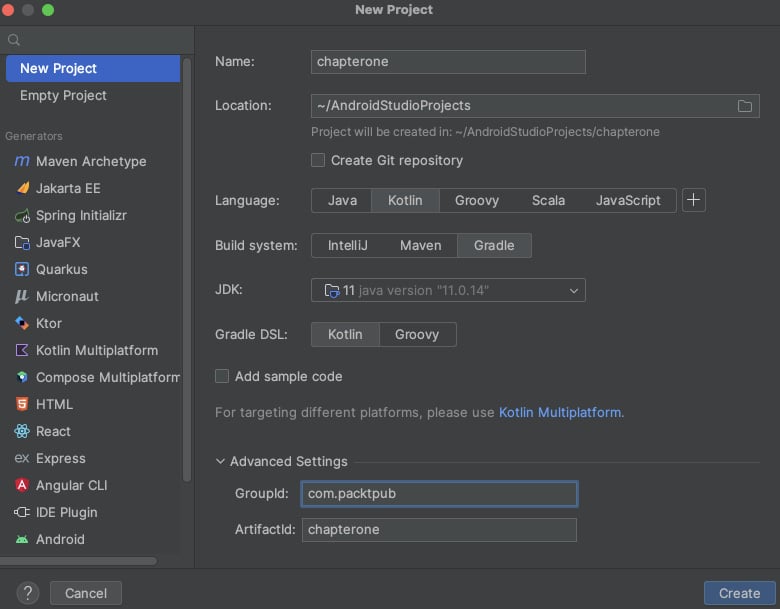
Figure 1.1 – New Project dialog
Let’s work through the options in the dialog shown in Figure 1.1 as follows:
- You start by giving the project a name. In this case, it’s
chapterone. - You also specify the location of your project. This is normally where you store your working projects. Change the directory to your preferred one.
- Next, specify your target language from the options provided. In this case, we opt for Kotlin.
- In the next step, specify your build system. We specify Gradle.
- We also need to specify the Java version that our project is going to use. In this case, it’s Java 11.
- Next, you specify the Gradle DSL to use. For this project, we’ve chosen to use Kotlin.
- Lastly, you specify the group and artifact IDs that, when combined, form a unique identifier for your project.
- Click on Create to finalize creating your new project. The IDE will create your project, which might take a few minutes. Once done, you’ll see your project as follows:
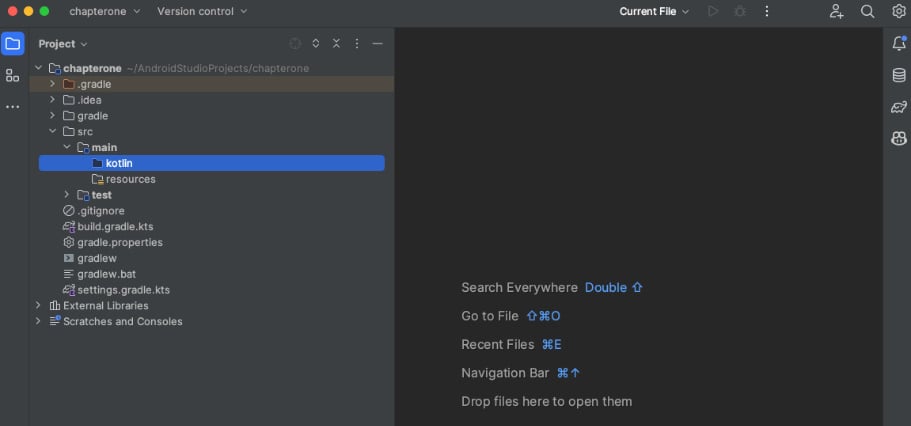
Figure 1.2 – Project structure
The IDE creates the project with the project structure seen in Figure 1.2. We are mostly interested in the src/main/kotlin package, which is where we’ll add our Kotlin files.
- Start by right-clicking the
src/main/kotlinpackage. - Select New and then New Kotlin Class/File. Select the File option from the list that appears and name the file
Main. The IDE will generate aMain.ktfile.
Now that we’ve created our first Kotlin project and added a Kotlin file, in the next section, we will create functions in this file.
Creating functions
In Kotlin, a function is a block of code that does a specific task. We use the fun keyword to define functions. Function names should be in camel case and descriptive to indicate what the function is doing. Functions can take arguments and return values.
Create the main() function in your Main.kt file as follows:
fun main() {
    println("Hello World!")
}
In the preceding code, we’ve used the fun keyword to define a function with the name main. Inside the function, we have a println statement that prints the message "Hello Word!".
You can run the function by pressing the green run icon to the right of the function. You’ll see the console window pop up, displaying the message "Hello World!".
We’ve learned how to create functions and print output to the console. In the next section, we’ll learn how to create classes in Kotlin.
Creating classes
To declare a class in Kotlin, we have the class keyword. We’re going to create a Recipe class as follows:
class Recipe {
    private val ingredients = mutableListOf<String>()
    fun addIngredient(name: String) {
        ingredients.add(name)
    }
    fun getIngredients(): List<String> {
        return ingredients
    }
}
Let’s break down the preceding class:
- We’ve called the class
Recipeand it has no constructor. - Inside the class, we have a member variable,
ingredients, which is aMutableListof Strings. It’s mutable to allow us to add more items to the list. Defining variables in a class like this allows us to be able to access the variable anywhere in the class. - We have
addIngredient(name: String), which takes in a name as an argument. Inside the function, we add the argument to our ingredients list. - Lastly, we have the
getIngredients()function, which returns an immutable list of strings. It simply returns the value of our ingredients list.
To be able to use the class, we have to modify our main function as follows:
fun main() {
    val recipe = Recipe()
    recipe.addIngredient("Rice")
    recipe.addIngredient("Chicken")
    println(recipe.getIngredients())
}
The changes can be explained as follows:
- First, we create a new instance of the
Recipeclass and assign it to therecipevariable - Then, we call the
addIngredientmethod on therecipevariable and pass in the stringRice - Again, we call the
addIngredientmethod on therecipevariable and pass in the stringChicken - Lastly, we call the
getIngredientsmethod on therecipevariable and print the result to the console
Run the main function again and your output should be as follows:
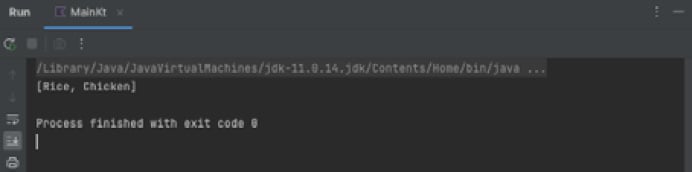
Figure 1.3 – Recipes
As you can see from the preceding screenshot, the output is a list of ingredients that you added! Now you can prepare a nice rice and chicken meal, but in Kotlin!
Kotlin has tons of features and we’ve barely scratched the surface. You can check out the official Kotlin documentation (https://kotlinlang.org/docs/home.html) as well to learn more. You’ll also learn more features as you go deeper into this book.
We’ve learned how to create classes, define top-level variables, and add functions to our class. This helps us understand how classes in Kotlin work. In the next section, we will learn how to migrate a Java class to Kotlin and some of the tools available to use in the migration.