Reader small image

You're reading from  Raspberry Pi Android Projects

Product typeBook
Published inSep 2015
Reading LevelBeginner
Publisher
ISBN-139781785887024
Edition1st Edition
Languages
Right arrow
Author (1)
Gökhan Kurt
Gökhan Kurt
author image
Gökhan Kurt

Gkhan Kurt has been trying to keep up with the the latest developments in technology and IT in his 15-year-long development career. For the past 4 years, he has been working at IFS Labs, one of the top innovation departments of the Swedish software industry. Currently, he is involved in the Internet of Things and has been developing prototype IoT implementations using Raspberry Pi. He has a master's of science degree from Chalmers University of Technology and a bachelors degree from the Middle East Technical University. You can connect with him on Twitter and on LinkedIn.
Read more about Gökhan Kurt

Right arrow

Installing necessary components in the Pi and Android


As the following screenshot shows the LXDE desktop manager comes with an initial setup and a few preinstalled programs:
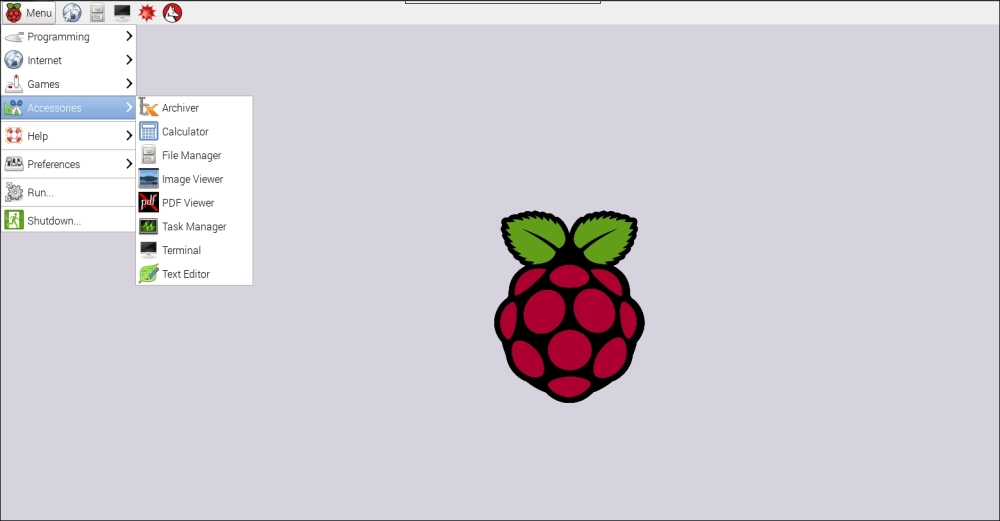
The LXDE desktop management environment

By clicking on the screen image on the tab bar located at the top, you will be able to open a terminal screen that we will use to send commands to the Pi.

The next step is to install a component called x11vnc. This is a VNC server for X, the window management component of Linux. Issue the following command on the terminal:

sudo apt-get install x11vnc

This will download and install x11vnc to the Pi. We can even set a password to be used by VNC clients that will remote desktop to this Pi using the following command and provide a password to be used later on:

x11vnc –storepasswd

Next, we can get the x11vnc server running whenever the Pi is rebooted and the LXDE desktop manager starts. This can be done through the following steps:

  1. Go into the .config directory on the Pi user's home directory located at /home/pi:

    cd /home/pi/.config
    
  2. Make a subdirectory here named autostart:

    mkdir autostart
    
  3. Go into the autostart directory:

    cd autostart
    
  4. Start editing a file named x11vnc.desktop. As a terminal editor, I am using nano, which is the easiest one to use on the Pi for novice users, but there are more exciting alternatives, such as vi:

    nano x11vnc.desktop
    

    Add the following content into this file:

    [Desktop Entry]
    Encoding=UTF-8
    Type=Application
    Name=X11VNC
    Comment=
    Exec=x11vnc -forever -usepw -display :0 -ultrafilexfer
    StartupNotify=false
    Terminal=false
    Hidden=false
  5. Save and exit using (Ctrl+X, Y, Enter) in order if you are using nano as the editor of your choice.

  6. Now you should reboot the Pi to get the server running using the following command:

    sudo reboot
    

    After rebooting using the sudo reboot command, we can now find out what IP address our Pi has been given in the terminal window by issuing the ifconfig command. The IP address assigned to your Pi is to be found under the eth0 entry and is given after the inet addr keyword. Write this address down:

    Example output from the ifconfig command

  7. The next step is to download a VNC client to your Android device.

    In this project, we will use a freely available client for Android, namely androidVNC or as it is named in the Play Store—VNC Viewer for Android by androidVNC team + antlersoft. The latest version in use at the writing of this book was 0.5.0.

    Note

    Note that in order to be able to connect your Android VNC client to the Pi, both the Pi and the Android device should be connected to the same network—Android through Wi-Fi, and Pi through its Ethernet port.

Previous PageNext Page
You have been reading a chapter from
Raspberry Pi Android Projects
Published in: Sep 2015Publisher: ISBN-13: 9781785887024
Register for a free Packt account to unlock a world of extra content!
A free Packt account unlocks extra newsletters, articles, discounted offers, and much more. Start advancing your knowledge today.
undefined
Unlock this book and the full library FREE for 7 days
Get unlimited access to 7000+ expert-authored eBooks and videos courses covering every tech area you can think of
Renews at $15.99/month. Cancel anytime

Author (1)

author image
Gökhan Kurt

Gkhan Kurt has been trying to keep up with the the latest developments in technology and IT in his 15-year-long development career. For the past 4 years, he has been working at IFS Labs, one of the top innovation departments of the Swedish software industry. Currently, he is involved in the Internet of Things and has been developing prototype IoT implementations using Raspberry Pi. He has a master's of science degree from Chalmers University of Technology and a bachelors degree from the Middle East Technical University. You can connect with him on Twitter and on LinkedIn.
Read more about Gökhan Kurt