


Understanding the main areas of the editor and key features
In the previous section, you learned about the main areas available inside the Bubble editor. In this section, you are going to learn more about the main tabs and other internal areas inside Bubble in more depth so you understand what they are and how you can use them to configure extra settings and manage your own applications. Knowing each individual tab and what you can do inside them is an essential step because this will help you navigate inside Bubble and know exactly where you should go during your application building and development process. Let’s dive right in.
Design
The Design area is the first tab on your Bubble editor. It is automatically pre-selected by default when entering a Bubble project. As the name suggests, this area is where you design your application – it is your visual canvas. Inside the Design tab, you visually construct your app’s user interface by dragging and dropping components, resizing, positioning, arranging, and customizing elements such as buttons, text, images, inputs, and more to build your app’s pages and layouts. If you are new to the platform, you are probably starting your journey here, playing with the visual components. Take some time to get familiar with this area as you will interact with it during your entire building process.
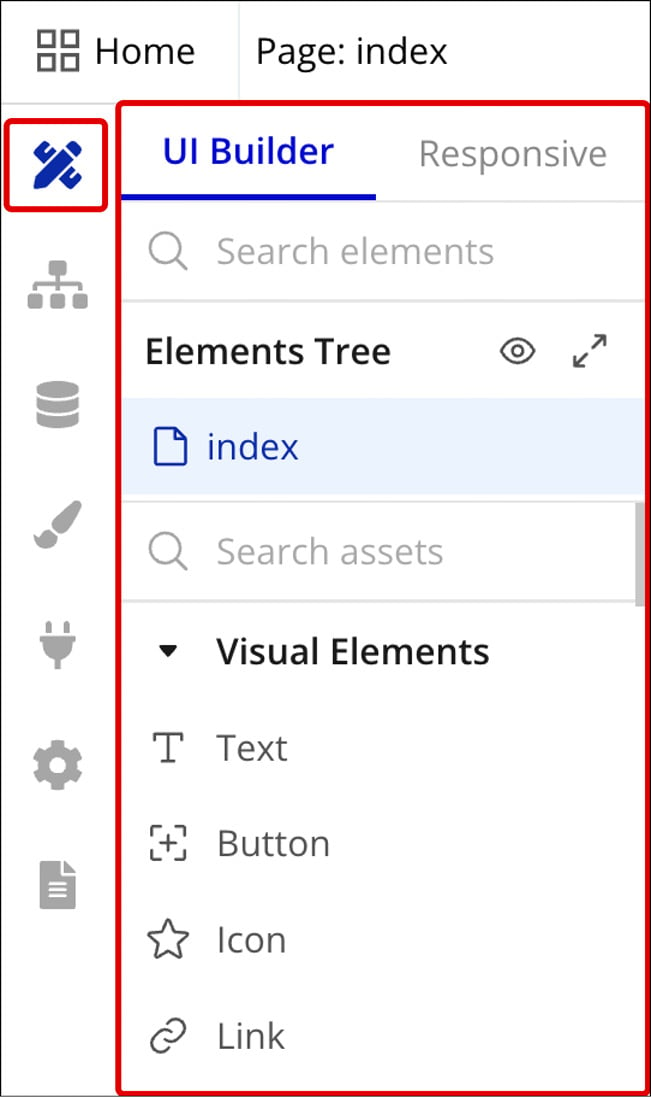
Figure 1.21: Bubble.io – Design tab
To get started, add a new fresh element to the canvas, so you can learn how it works. It is very simple. Click on a specific component in the sidebar located on the left, such as a button or text. Once you click the desired component, it indicates it is selected by changing the name of the component to another color. Now you can drag the chosen element onto the canvas (page). Or, you can move your mouse to the canvas and either click to add the item or even click and drag to draw the size of the component you want to add to the canvas. Thus, you have three options:
- Click and drag
- Click and click
- Click and drag while clicking
Now, to interact with the newly added component, you can double-click on the element to reveal the property editor. This will allow you to change this element’s appearance and features. If you right-click on an element it will unveil a contextual menu offering supplementary editing possibilities.
So, to do a quick recap, in the Design tab, you can add components, define the layout of your app, change the settings of components and styles, and play with the responsiveness of these components to craft a polished and user-friendly design, all without the need for complex coding.
Workflow
The Workflow tab is where you build the logic of your application. This is the brain of your application. In this section, you can specify how your app behaves when users do things such as clicking on a button, viewing a page, or submitting a form. For these actions that users take on the frontend (the pages), you can create a set of rules and actions that react to what users did and perform changes on the pages they are visiting. These responses can change data, communicate with external services via APIs, or change how the page looks, for instance, by changing the text on a page or the color of a button.
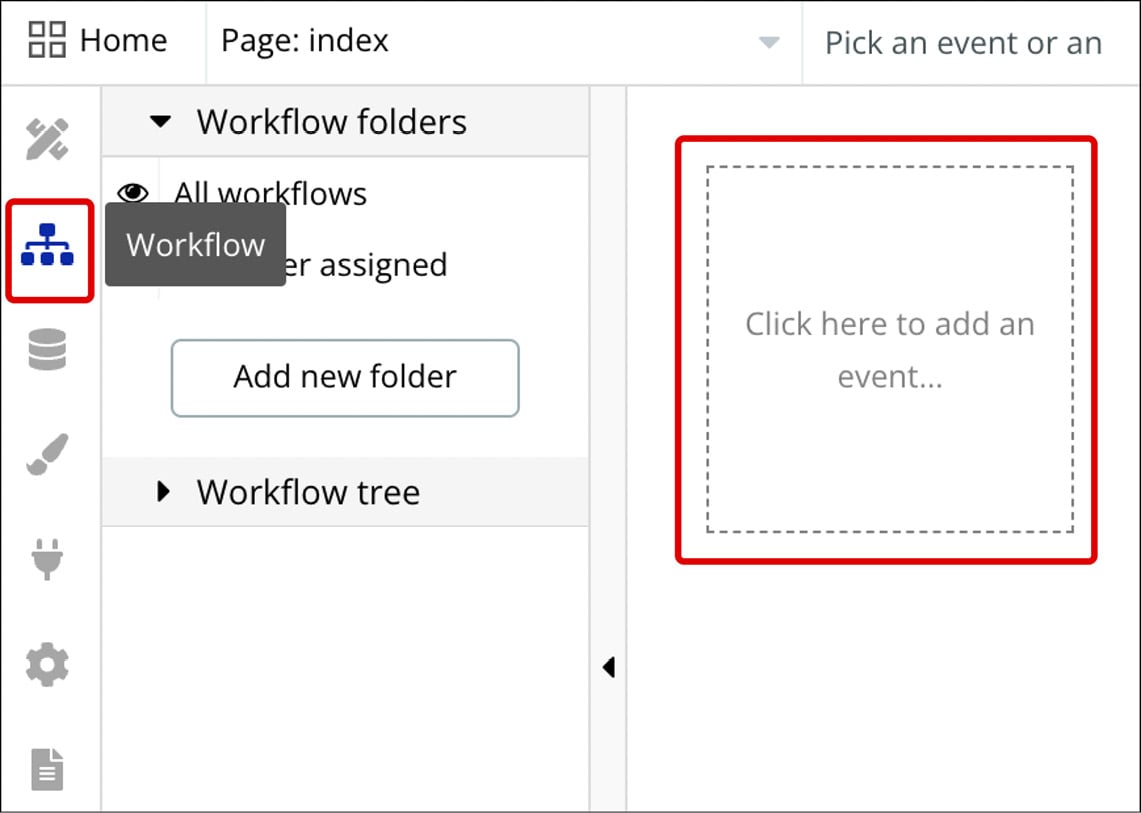
Figure 1.22: Bubble.io – Workflow tab
Workflows can seem a little complex at first, but this is one of the coolest parts when building with no code. Once you get familiar with it, it will be very exciting to play with workflows and create amazing functionalities for your web app. Don’t worry, we will talk more about workflows in future chapters.
Data
The Data tab is where your database is. Bubble is an all-in-one no-code platform, meaning you can create a database and store information inside it. Of course, you can also choose to integrate Bubble with an external database, but if you are using the native database, then the Data tab is where you will find it.
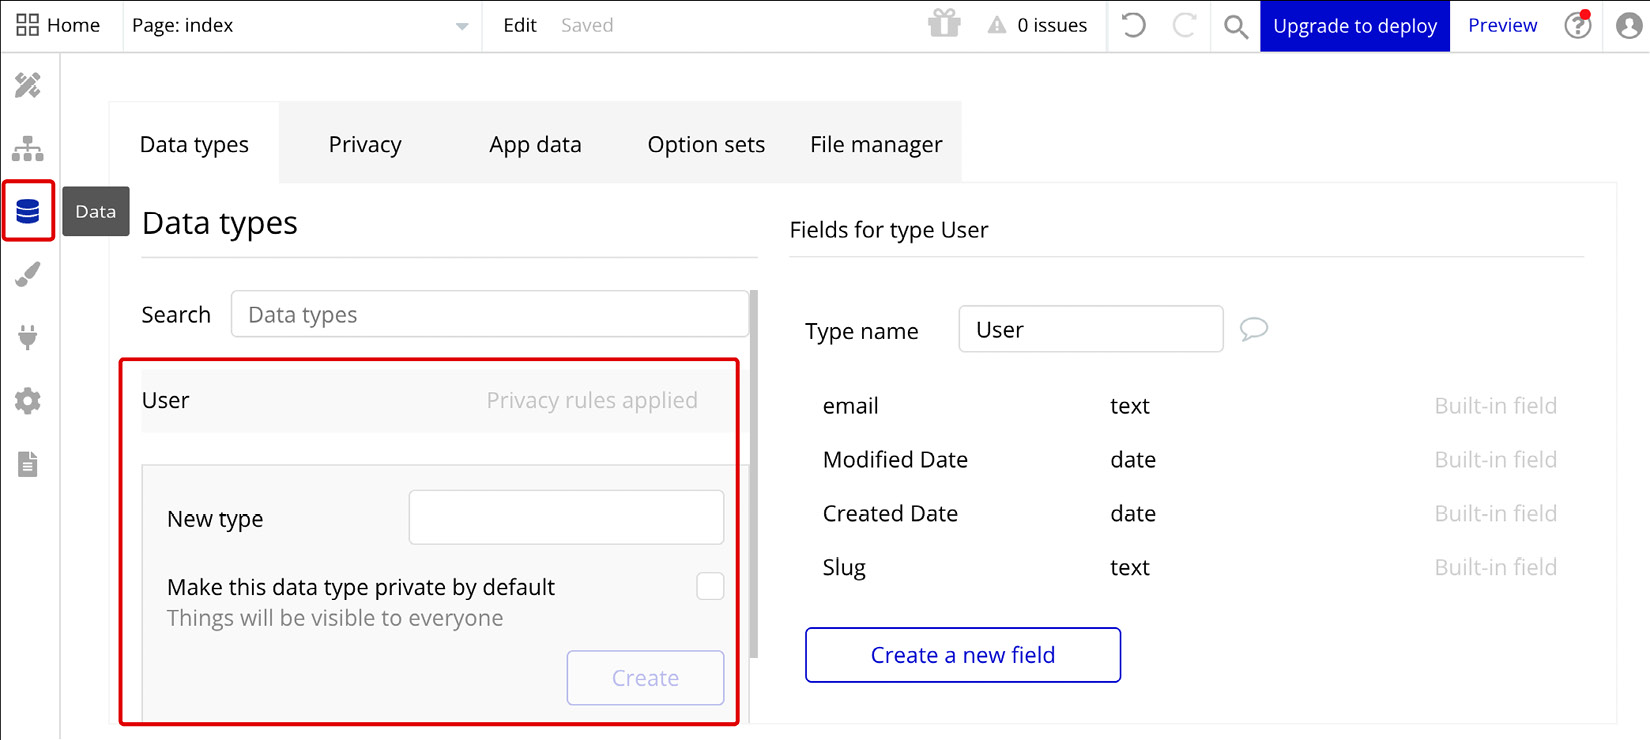
Figure 1.23: Bubble.io – Data tab
This section lets you establish and manage the foundation of your app by defining data structures using data types and fields. It’s where you create the tables and columns of your database, and fill them with real-world data. Inside the Data tab, you can set your database structure, create relationships, define and view all the items available inside your tables, and change and add fields and types. You can also visualize an existing database and what information is stored, create different views to visualize your database items, add data manually to your database to run some tests, and much more. Inside the Data tab, you will find other tabs to control privacy settings by determining who can access and modify this data. The File manager and Option sets tabs offer alternatives to store static options in a database-like structure that doesn’t use the database, meaning it can be faster for some specific use cases.
The database of your app is a very important part of your application. If the workflows are the brain, the database is the heart, and they interact with each other very often.
Styles
In the Styles tab, you will find a list of all the components available inside Bubble, including buttons, texts, and inputs. If you are a designer, this is where you will customize the look and feel of each component inside your application, as if you were defining the visual foundation of your app. This concept is similar to a design system if you know the term.
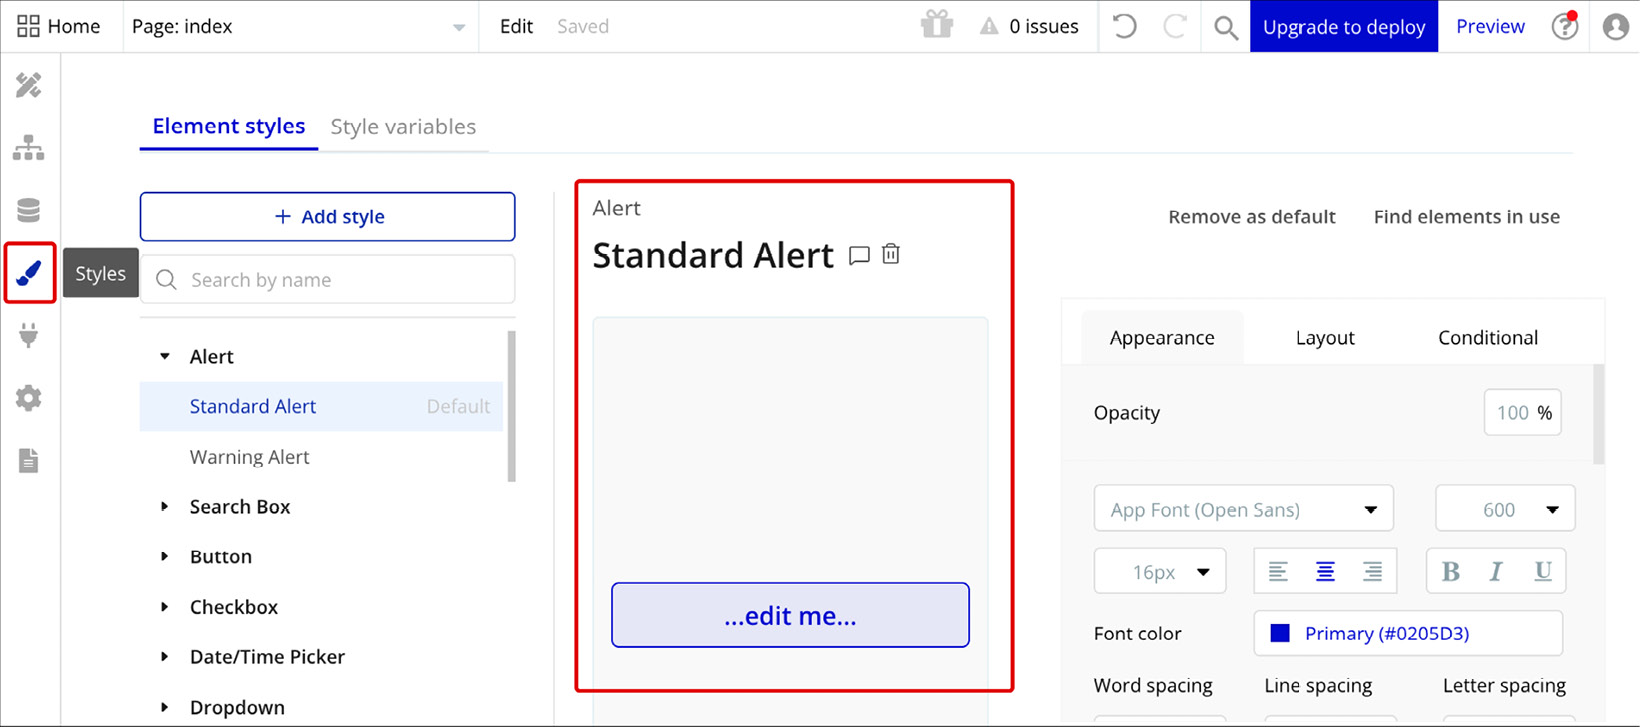
Figure 1.24: Bubble.io – Styles tab
Different from the Design tab, the Styles tab lets you define the visual characteristics of each element on a global level, meaning you can define specific styles for specific components and add a name to that style. This allows you to create a set of pre-defined styles for each component and select these styles while building your app’s interface. The cool thing about using styles is that you can create multiple variants and organize, search, and manage your styles, all from the Styles tab. If you decide to change a style, it will alter every component attached to that same style name, meaning you don’t have to go through each individual page and change all the styles one by one. This saves a lot of time when designing. Of course, you can also decide to change specific components and have them not follow a global style, which can be done in the Properties panel when using the Design tab.
Styles also allow you to add variables and conditionals for components, and these are also defined on a global level. As a designer myself, I really recommend using styles and taking some time to define the basic components of your Bubble app, even before the building phase, so you have everything set to get started and save time in the future.
So, to do a quick recap, you use styles to maintain visual consistency throughout your app by defining global properties such as colors, fonts, and sizes. By creating and applying styles, you ensure a unified design language across different elements, providing a cohesive and professional appearance for your application.
Plugins
Plugins are your superpowers, your magic tricks! The Plugins tab is the place where you add and manage your plugins. This tab displays all the plugins you have installed in your application and allows you to configure them. With plugins, you can enhance your app’s capabilities by introducing extra functionalities built by other developers to your app. You can access the marketplace from the Plugins tab, where you can search and filter to find tools and resources that can help you build inside Bubble. There are thousands of options available, both free and paid for, that allow you to add extra functionalities to your projects, including payment gateways, API connections, new components, integrations with third-party services, and much more.
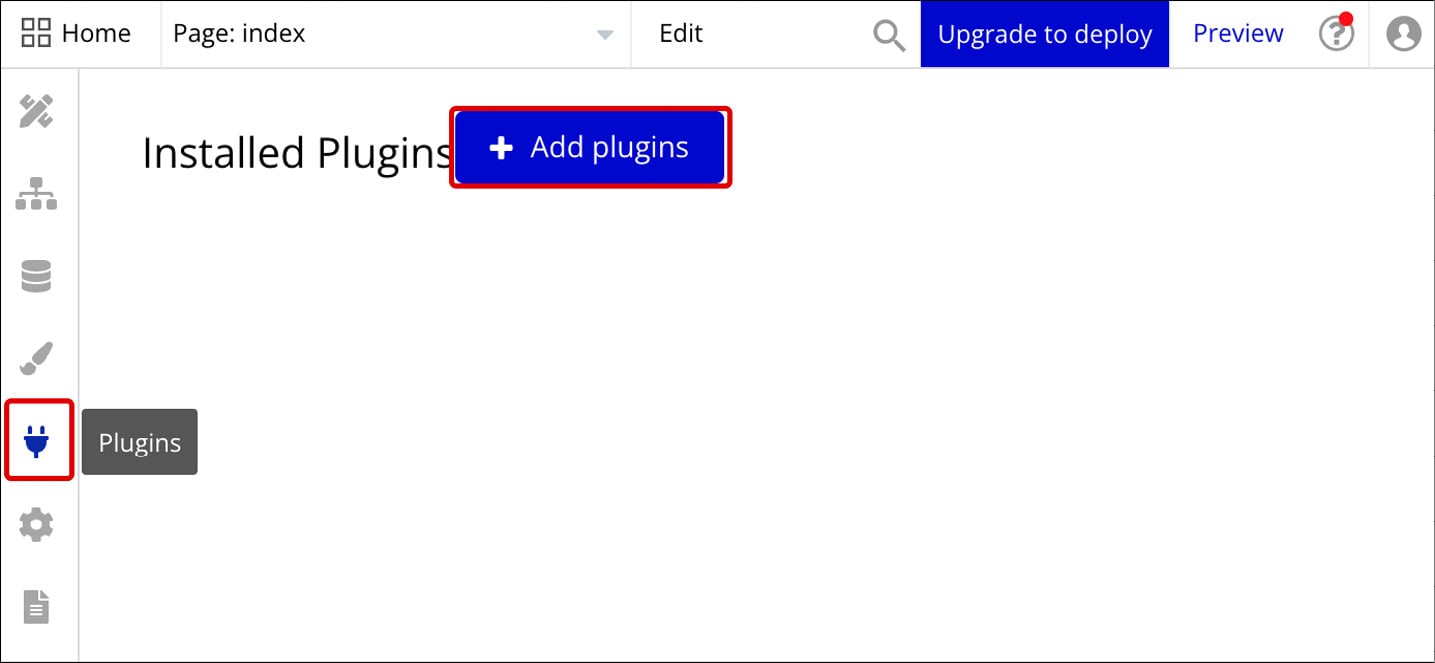
Figure 1.25: Bubble.io – Plugins tab
Now, if you want to go even further, you can. Know that you can also create your own custom plugins if needed, and add your own plugin to the Bubble marketplace. It can be built and used just by you (privately), but it could also be published publicly for other people to use, for free or paid for. Building plugins can also be a way to make money with no-code tools, but that is another topic. Let’s continue.
Settings
The Settings area provides a central hub to configure your app’s global properties. It allows you to set and visualize fundamental information about your Bubble web app.
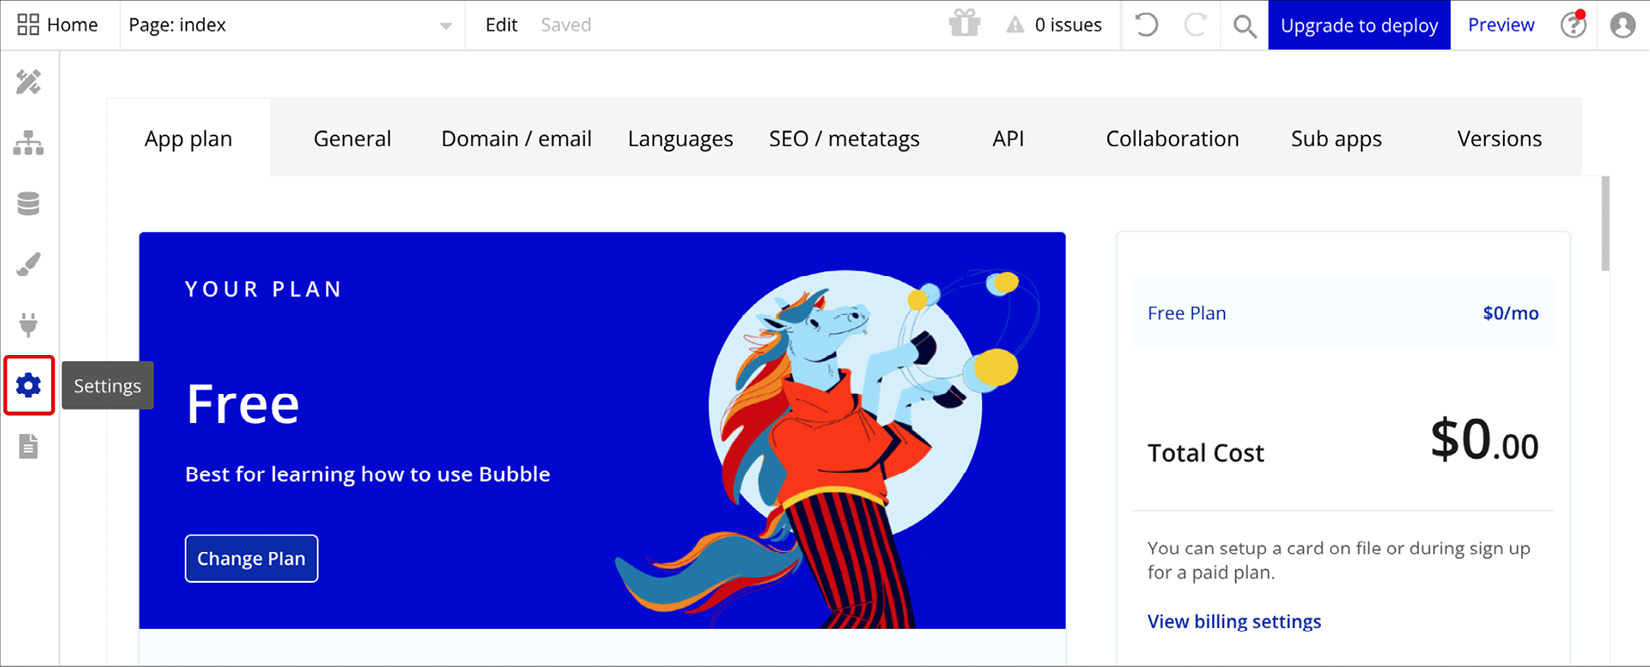
Figure 1.26: Bubble.io – Settings tab
Under Settings, you can manage your app plan and visualize the workload units used and your general privacy and security rules. You can also configure your custom domain and email settings, define your app’s languages, configure SEO and meta tags, configure API rules and collaboration options, set up sub-apps, and see information about your Bubble app version.
This is where you can find important information and settings for your Bubble app and make sure everything is properly configured before launching, adjusting various parameters that influence your app’s behavior to ensure that your application aligns with your intended goals.
Logs
The Logs section offers charts to help you identify how your application is performing. It is also where you can visualize and monitor your Workload Units (WUs) consumption. WUs are closely tied to the pricing plan selected by the app owner, and monitoring the consumption is very important as your application grows and experiences higher user engagement levels, as this is closely related to how much your app will cost to run. We will talk about that more in future chapters. For now, it is just important to know that you can track your workload usage visually, view app metrics and activity access server logs, and refer to the scheduler that works with backend workflows. The Logs tab can help during the identification and resolution of issues. By tracking errors, warnings, and app activities, you gain insights into how your app is functioning, facilitating effective debugging and optimization processes.

Figure 1.27: Bubble.io – Logs tab
At this point, you have a full picture of the main areas inside your Bubble editor and where you can find key features that will allow you to build and manage your web application. This is a great foundation to get started as you can now easily locate things and know where to go for specific actions and settings. Let’s next dive into your account, which is the area outside of your editor, so you can continue exploring Bubble and how it works.