Reader small image

You're reading from  Democratizing No-Code Application Development with Bubble

Product typeBook
Published inApr 2024
PublisherPackt
ISBN-139781804610947
Edition1st Edition
Right arrow
Author (1)
Caio Calderari
Caio Calderari
author image
Caio Calderari

Caio Calderari is a No-Code Expert, Startup Founder and Senior Product Designer with 17+ years of experience. Starting as a designer in 2005, he worked for advertising, digital agencies, corporate companies and startups worldwide. He learned no-code tools to be able to build his own startups and side projects and later decided to teach others too. In 2020, he created a YouTube channel about no-code tools offering courses and tutorials. By 2021, he became the Chief No-Code Officer at a U.S.-based company, helping entrepreneurs from various countries launch their startup ideas. Caio is a creative individual, passionate about sharing his knowledge. His goal is to bring no-code to more creators, helping them unlock this new world of possibilities.
Read more about Caio Calderari

Right arrow

Getting Started with Bubble.io – Exploring Bubble’s Features

Welcome to the No-Code Revolution! This is an exciting change in the software development industry that will empower and allow more individuals to be able to build software, without having to learn how to code and without becoming traditional developers. Bubble is one of the most powerful no-code platforms available on the market, and one of the most popular as well, with millions of users already using it.

In this book, you are going to learn the fundamentals of this amazing tool, and with the power of no-code, I am sure you will also be able to build web apps visually, without learning how to code.

In this chapter, you will start by learning what Bubble is and how to set up your first account. You are also going to learn Bubble’s main features and how to navigate inside the visual editor. With this essential knowledge, you will be ready to dive into the following chapters and learn how to apply the powerful features available inside Bubble.

This chapter consists of the following knowledge:

  • What Bubble is and important information about the tool
  • What you can build with Bubble – examples
  • How to practically set up an account and your project workspace
  • Understand the Bubble editor and how to navigate the interface

Introduction to the Bubble.io platform

Bubble is a powerful, robust, and flexible platform that enables anyone to build web applications visually, meaning you can learn how to use it and build software without learning how to code or spending years trying to become a developer.

The no-code revolution is empowering people around the globe and democratizing software development by giving its users the ability to quickly learn and build digital applications in a simplified way.

Start-up founders, entrepreneurs, employees, individuals, and organizations can utilize the power of no-code tools such as Bubble to save time and money while developing powerful web applications visually, without having to learn code, and that is a meaningful change in the software industry.

Founded in 2012, Bubble is an all-in-one, multi-purpose tool that acts as a visual programming tool and a cloud platform. This means you can use it not only to build your application visually, but can also put it to work hosting and deploying your application to the web, so you don’t have to deal with hosting and infrastructure to run your application somewhere else. You can use Bubble for creating applications, while the cloud platform hosts and operates them. You design, construct, manage, and expand your app through the application editor, accessible directly in your browser without any downloads. Bubble runs on the web, and you use it in your browser window. It automatically saves your work as you build – all you have to do to use it is to be online. Once an app is built on Bubble, it resides in Bubble’s cloud infrastructure, accessible from anywhere.

Bubble empowers you to craft web applications accessible via browsers on computers, tablets, and phones. These applications feature a database, enabling users to register, store, retrieve, and modify data. Bubble’s versatile editor is open-ended, akin to traditional programming languages—there’s no predefined limit to what you can achieve. By combining diverse data and logic operations, you can create applications ranging from basic to intricate. The key capabilities of Bubble are as follows:

  • Establishing user accounts
  • Managing data (saving, editing, deleting, and retrieving it)
  • Real-time updates
  • Integration with various external services through APIs (such as payments, data sources, and authentication providers)
  • Crafting responsive apps that adapt to screen sizes

Here are some examples of what you can build with Bubble:

  • Web apps: Create interactive and dynamic web applications for a wide range of purposes
  • Social networks: Build your own social networking platform with features such as user profiles, posts, comments, and connections
  • Marketplaces: Develop online marketplaces where users can buy and sell products or services
  • CRM systems: Design custom customer relationship management (CRM) systems to manage contacts, sales, and interactions
  • Project management tools: Craft tools for organizing tasks, projects, and teams, with features including task lists, timelines, and collaboration
  • E-commerce platforms: Build online stores with product listings, shopping carts, payment gateways, and order management
  • Booking and scheduling apps: Create appointment booking systems, event calendars, and scheduling tools
  • Educational platforms: Develop e-learning platforms with courses, quizzes, progress tracking, and user engagement features
  • Content sharing platforms: Build platforms for sharing articles, videos, images, and other multimedia content
  • Job boards: Create platforms for posting job listings, connecting job seekers with employers, and managing applications
  • Real estate websites: Develop property listing websites with search filters, property details, and contact forms
  • Healthcare applications: Build apps for managing patient records, scheduling appointments, and medical information sharing
  • Financial tools: Design budgeting apps, expense trackers, investment calculators, and financial management tools
  • Community forums: Develop online discussion forums with threads, replies, user profiles, and moderation features
  • Membership sites: Create platforms for offering exclusive content, courses, and resources to members
  • Crowdfunding platforms: Build websites for crowdfunding campaigns, donations, and fundraising projects
  • Travel and booking websites: Develop platforms for booking flights, hotels, tours, and travel packages
  • Event management apps: Create tools for planning, promoting, and managing events, conferences, and seminars
  • Analytics dashboards: Design data visualization dashboards to display and analyze metrics and insights
  • Custom business tools: Develop tailor-made solutions for specific business needs, such as inventory management, employee tracking, and more

For the healthcare sector and other types of applications that require a HIPPA-compliant database or might store user’s sensitive information, it is important to note that Bubble’s internal database isn’t recommended. If you plan to build such apps, it is advised to use an external database service that follows the guidelines and data protection laws of the countries that your app will serve.

There are several compelling reasons to invest your time and effort in learning Bubble. Firstly, it eliminates the need for coding expertise, allowing you to create sophisticated web applications through a visual interface. This accelerates your learning curve and democratizes app development, making it accessible to a broader audience.

Secondly, Bubble’s rapid prototyping capabilities enable you to swiftly test and refine your app concepts, saving valuable time during the development process. Moreover, Bubble’s cost-efficiency is noteworthy, particularly for startups and small businesses with limited budgets, as it reduces the need for expensive development resources. Beyond financial benefits, mastering Bubble empowers you with autonomy over your app’s creation, modification, and maintenance. This independence fosters innovation and empowers you to explore creative and entrepreneurial pursuits. The versatility of Bubble stands out, allowing you to craft a diverse range of applications tailored to your goals.

With a supportive community and regular updates, Bubble ensures you’re equipped with the latest tools and practices in app development. Whether you’re aiming to prototype MVPs, launch startups, or explore new career avenues, learning Bubble equips you with a unique skill set that holds significant potential in today’s digital landscape.

Setting up an account and project workspace

To start leveraging the power of no-code, all you have to do is create your first account for free on Bubble’s website:

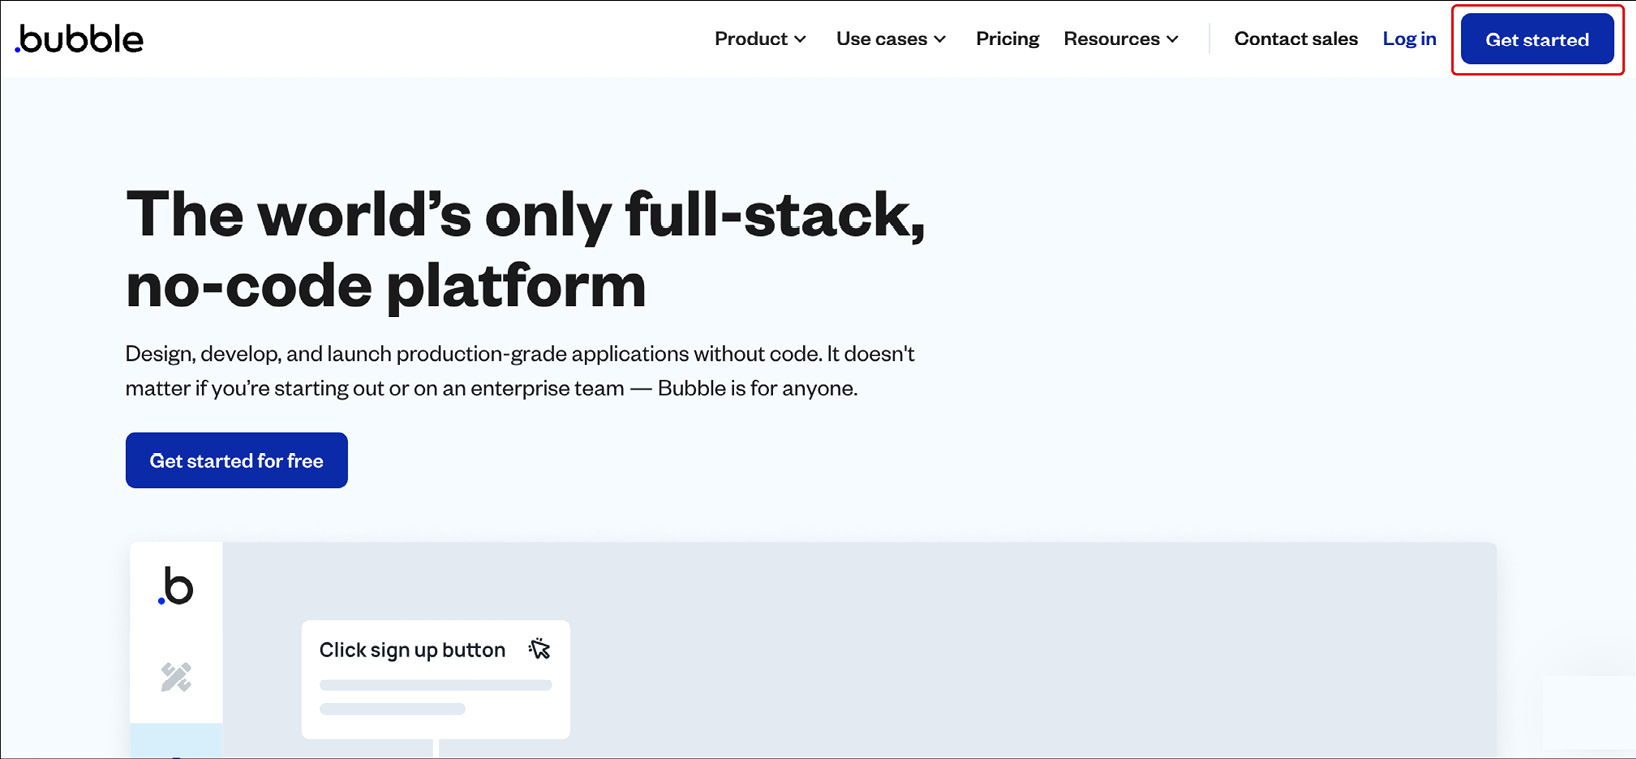
  1. Your first step is to access the website (https://www.bubble.io) and click the Get started button.
Figure 1.1: Bubble.io home page – the Get started button

Figure 1.1: Bubble.io home page – the Get started button

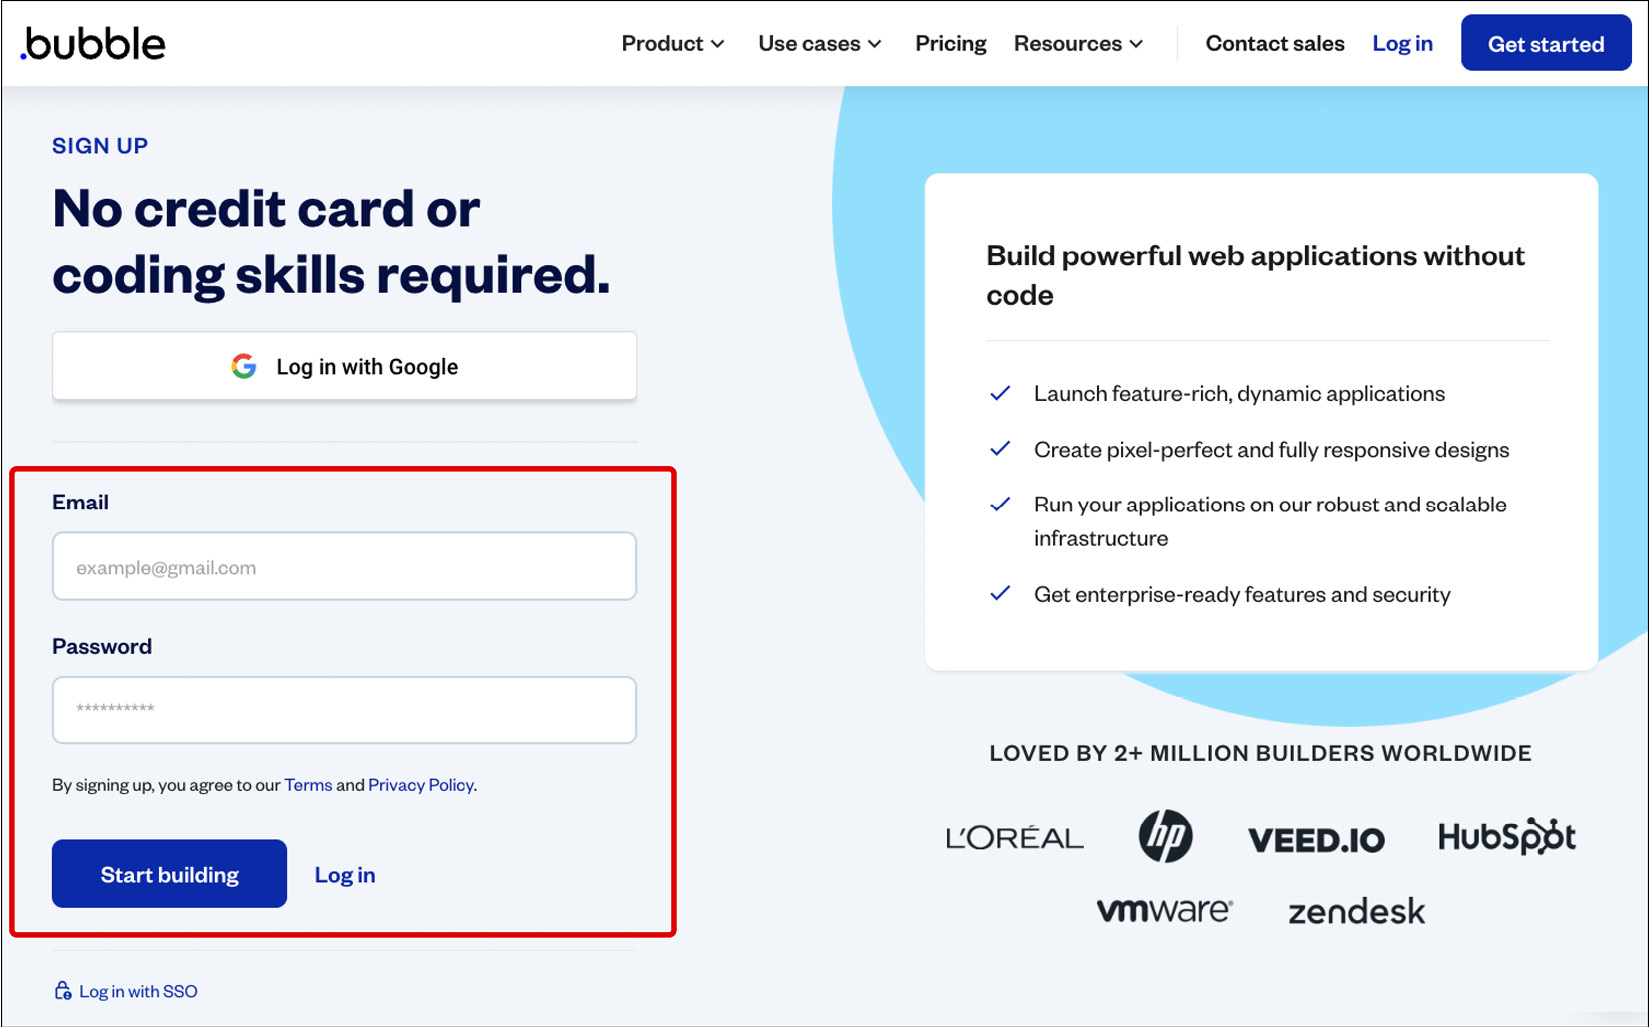
  1. To create your account, just fill out the form by adding your email and password. If you prefer, you can also sign up using your Google account (Gmail) if you have one.
Figure 1.2: Bubble.io sign-up page

Figure 1.2: Bubble.io sign-up page

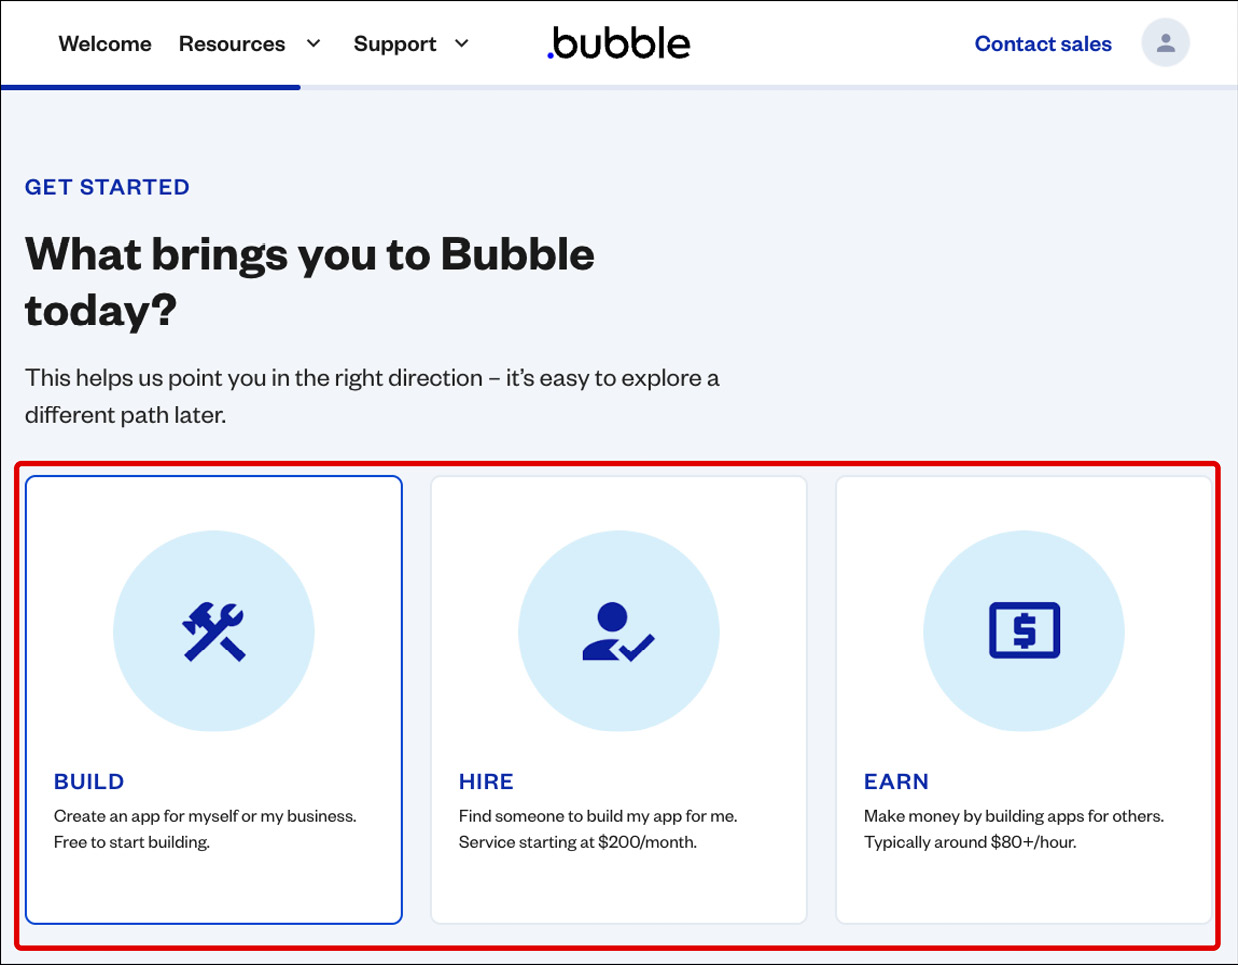
Follow the onboarding steps to complete your account profile information. These steps include a little survey to help Bubble understand more about you and your goals. The answers you choose here won’t impact anything in your account.Just keep clicking until the entire onboarding is done.

Note:

These steps might change overtime, and it is expected, if the interface you see is different from the book, just continue the onboarding process until you get to the end and access your account. This part won't be difficult.

Figure 1.3: Bubble.io sign-up onboarding – step 1

Figure 1.3: Bubble.io sign-up onboarding – step 1

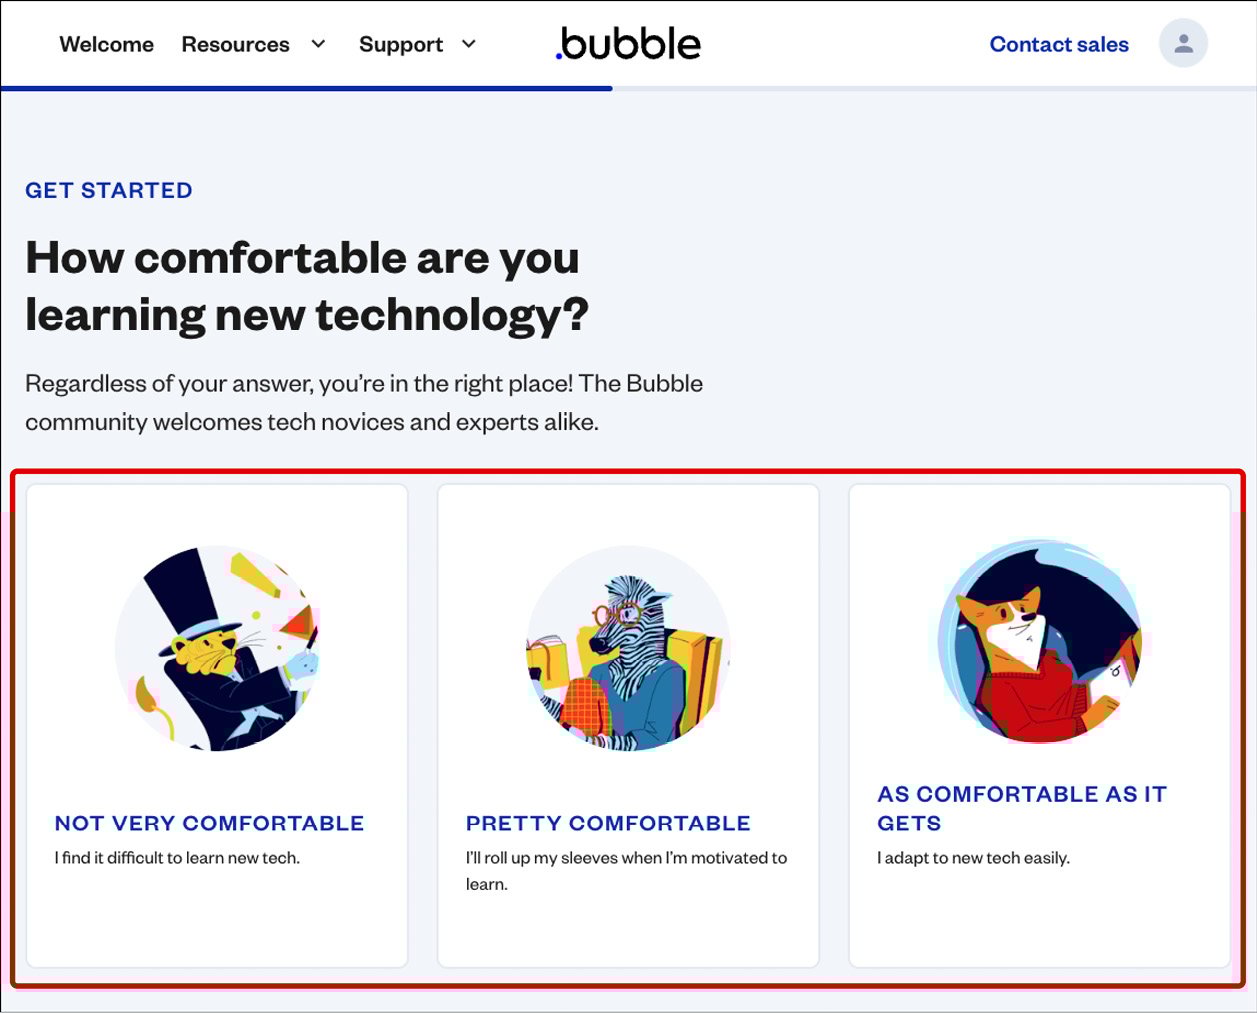
  1. Simply keep answering the questions to continue.
Figure 1.4: Bubble.io sign-up onboarding – step 2

Figure 1.4: Bubble.io sign-up onboarding – step 2

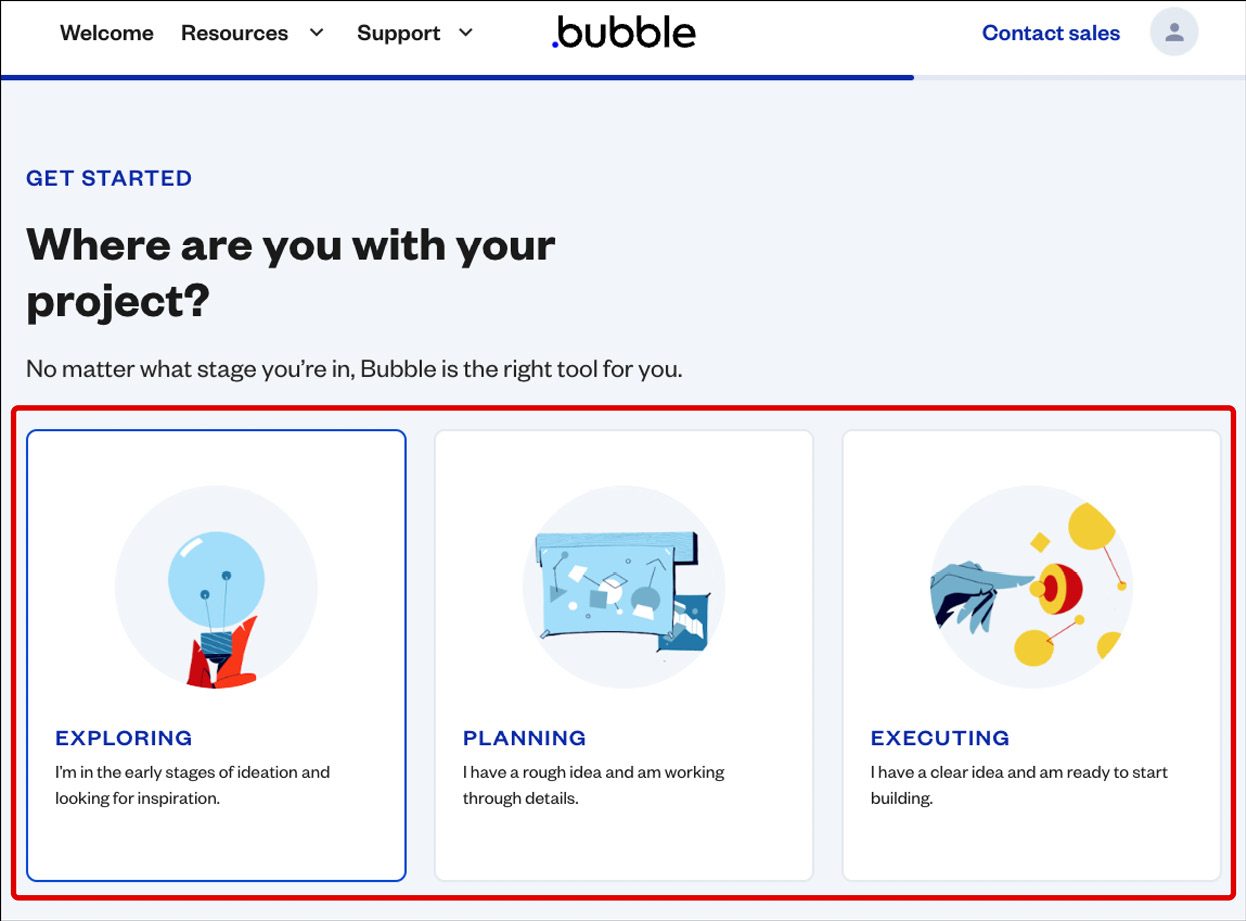
  1. Continue clicking the options that fit your profile the best.
Figure 1.5: Bubble.io sign-up onboarding – step 3

Figure 1.5: Bubble.io sign-up onboarding – step 3

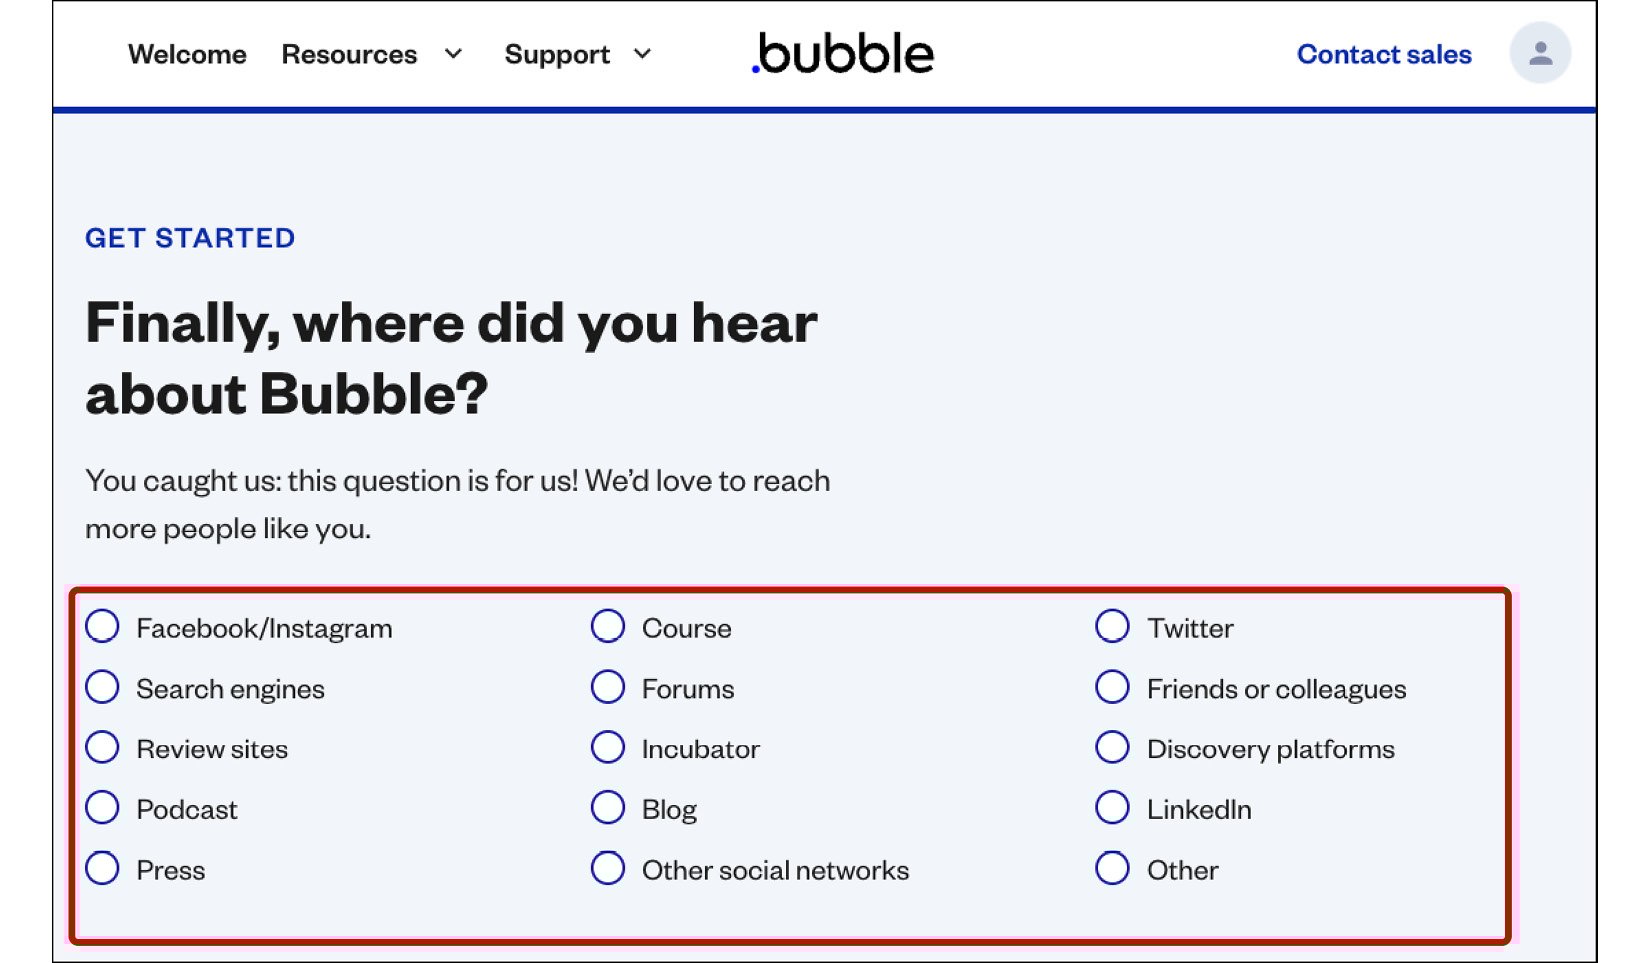
  1. Choose an option shown in the following screenshot and continue.
Figure 1.6: Bubble.io sign-up onboarding – step 4

Figure 1.6: Bubble.io sign-up onboarding – step 4

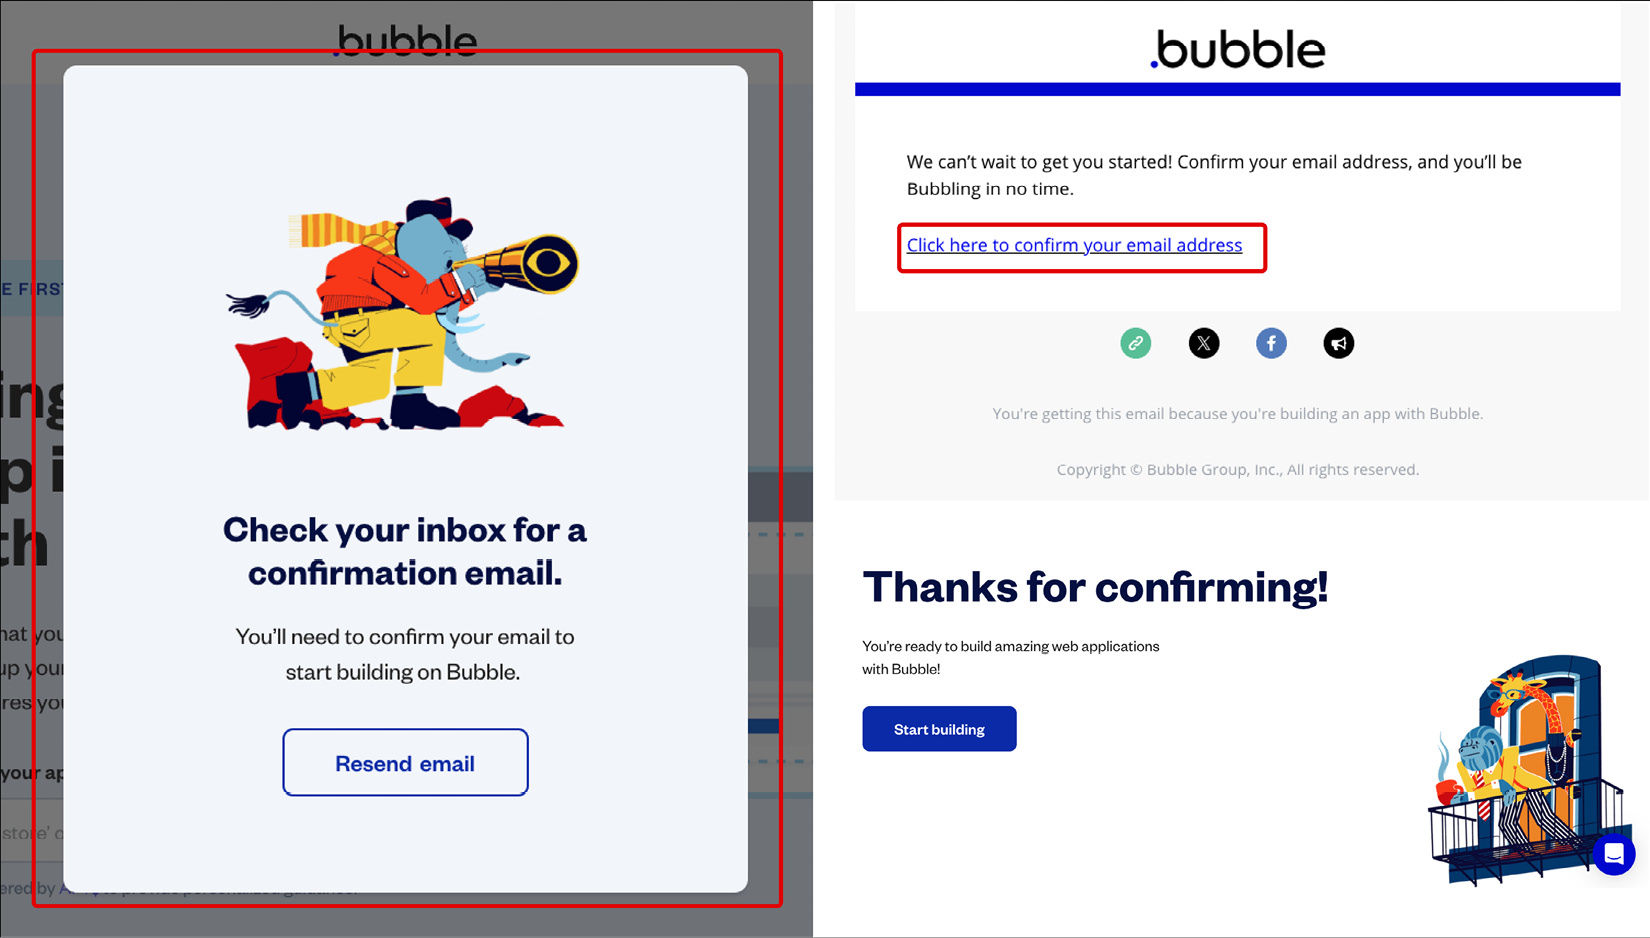
  1. After completing the onboarding process, it is important to check your email inbox, as you should have received a confirmation email. If you can’t see it, you can wait a couple more minutes (sometimes there is a delay) or check your promotional and spam folders to see if the email is there. If you still can’t find it, you can click on the button to resend this confirmation email. If this still doesn’t work, check that you entered the correct email or contact support for help.

    You must open this email and click to confirm your account because this will unlock the next steps so you can start using Bubble. Once you click the email link, you will be sent to a Thank You page. You can close it and go back to the initial tab you were before you entered your email. You will notice the confirmation message will go away, unlocking you to continue with the next step.

Figure 1.7: Bubble.io onboarding – email confirmation

Figure 1.7: Bubble.io onboarding – email confirmation

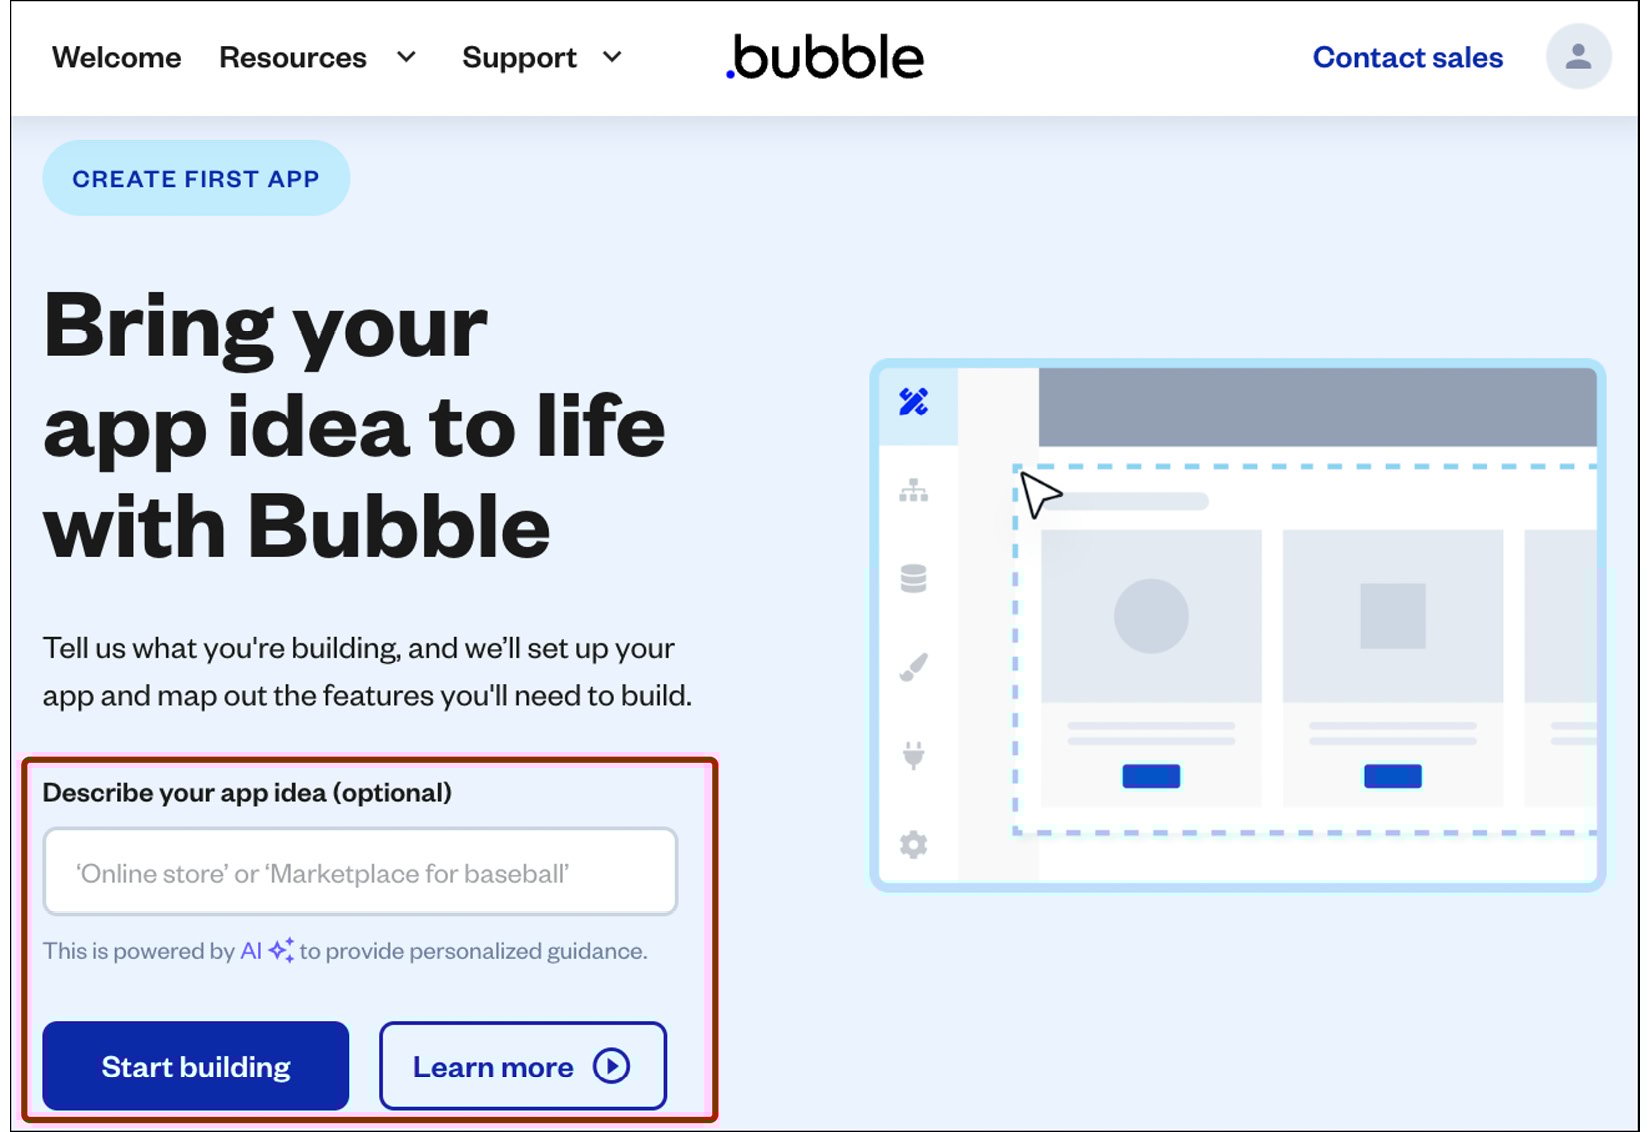
  1. Once your email is confirmed Bubble will allow you to create your first project. To create a new project you can simply click the Start building button. But there is also an option that helps you build your project for the first time, with help of AI. You can type in the field a simple description of your app idea, which is optional, if you do fill out the field, it will generate your app and send you to a page with a few guidelines and tutorials on how to create your desired project.

    Note that this feature might change overtime. For now I would recommend starting with an empty project, you can explore these AI features later while creating new projects. For the first one just click the Start building button and move forward.

Figure 1.8: Bubble.io – Create the first project

Figure 1.8: Bubble.io – Create the first project

Another way to start a project is by choosing a template, but we will cover more on that later.

Congratulations! At this point, you have successfully created your account. You also completed the onboarding process and started creating your very first application from scratch. Now it is time to dive deeper into how Bubble works and start configuring your app visually. In the next section you are going to learn about the application setup helper called application assistant. Let's go!

New project setup – application assistant

Every time you create a new project inside Bubble, you will be asked to set up this project for the very first time. This is the application assistant. Bubble will show the get started steps and ask you a few questions to make sure you have your initial settings ready to go. This process is helpful but can also be skipped. All the little details and settings you will be asked to define during these steps can also be found inside Bubble later, so if you skip them, you can always go back and change them later. Let’s take a look at how the getting started steps appear.

Step 1 – favicon and application name

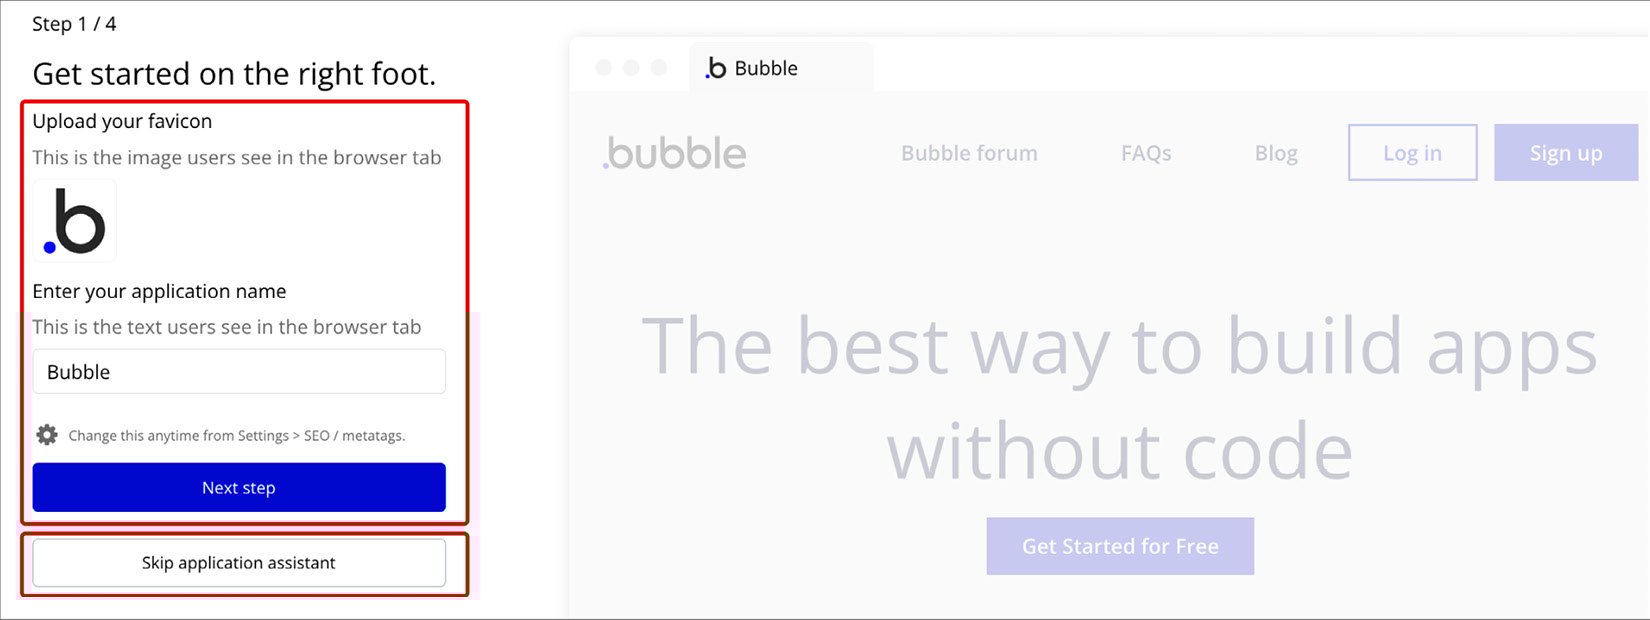
The first step will ask you to upload a favicon for your application. A favicon is a little icon, an image, that shows at the top of your browser window. Each page on your browser has a tab and each tab has an icon – this is the favicon. The image you upload here to Bubble will be used as a favicon for your application and users will associate this image with navigating your web app. My recommendation is that you upload an image of 16x16 pixels in size and in .png format to be used as your favicon. The second thing Bubble will ask for is your application name. If you don’t have one yet, just add something and change it later.

Note that on the right side, Bubble is going to show an example of how your favicon and your app name will look on the browser tab.

Figure 1.9: Bubble.io – application assistant – step 1

Figure 1.9: Bubble.io – application assistant – step 1

Now, of course, if you don’t want to continue answering these questions and want to just jump straight into the project, you can click the Skip application assistant button. Feel free to do so.

Step 2 – default font

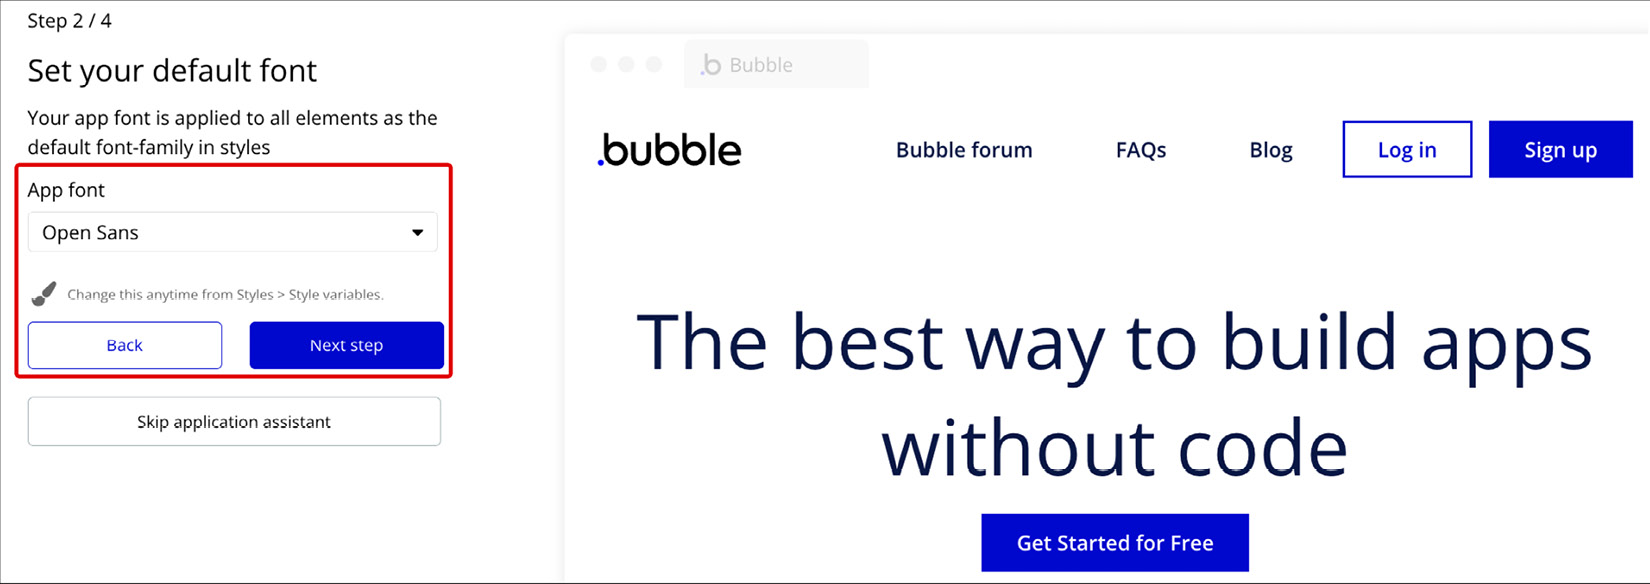
Now Bubble will ask you to pick your project’s default font. This is the primary font of your application, meaning it will be visible in texts, buttons, and so on. You can also use more fonts in the future and change the primary font as well. At this point, you can choose one option from the list provided by clicking the dropdown or just pick the default and continue to the next step.

Figure 1.10: Bubble.io – application assistant – step 2

Figure 1.10: Bubble.io – application assistant – step 2

Once you pick an option Bubble will show an example layout on the right side with the selected font so you can have an idea of how it will look.

Step 3 – default colors

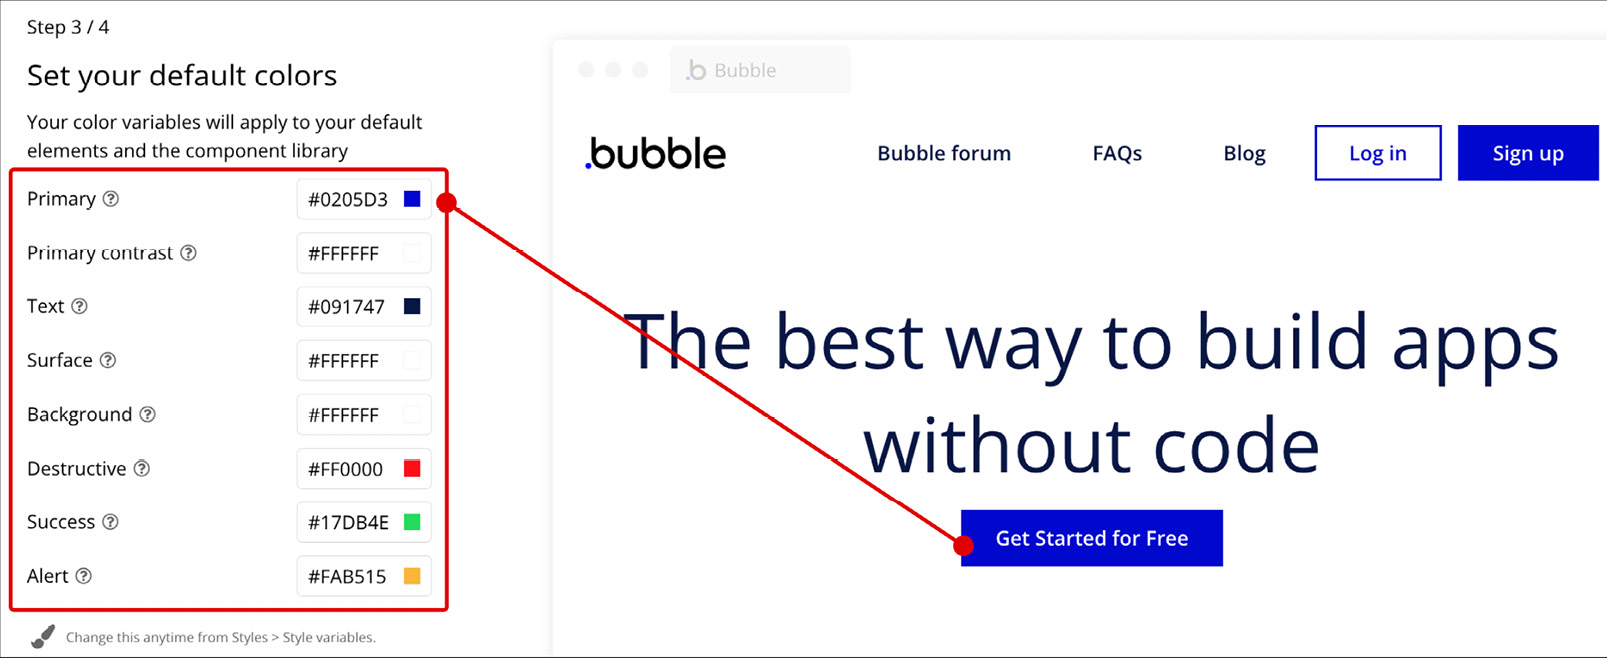
During this step, you can define a few colors that will be used on your application including the Primary color, Primary contrast, Text color, Surface, Background, Destructive, Success, and Alert. Again, you can change the colors and see how they appear on the right side. Use the color picker by clicking an existing color or specify your own hex codes if you already have your own specific brand colors. If you don’t know much about design, just use the default colors and change these later.

Figure 1.11: Bubble.io – application assistant – step 3

Figure 1.11: Bubble.io – application assistant – step 3

Once you are done configuring your colors, you can preview how it looks on the right side. If you are happy with your colors just click the Next step button to continue.

Step 4 – choosing plugins

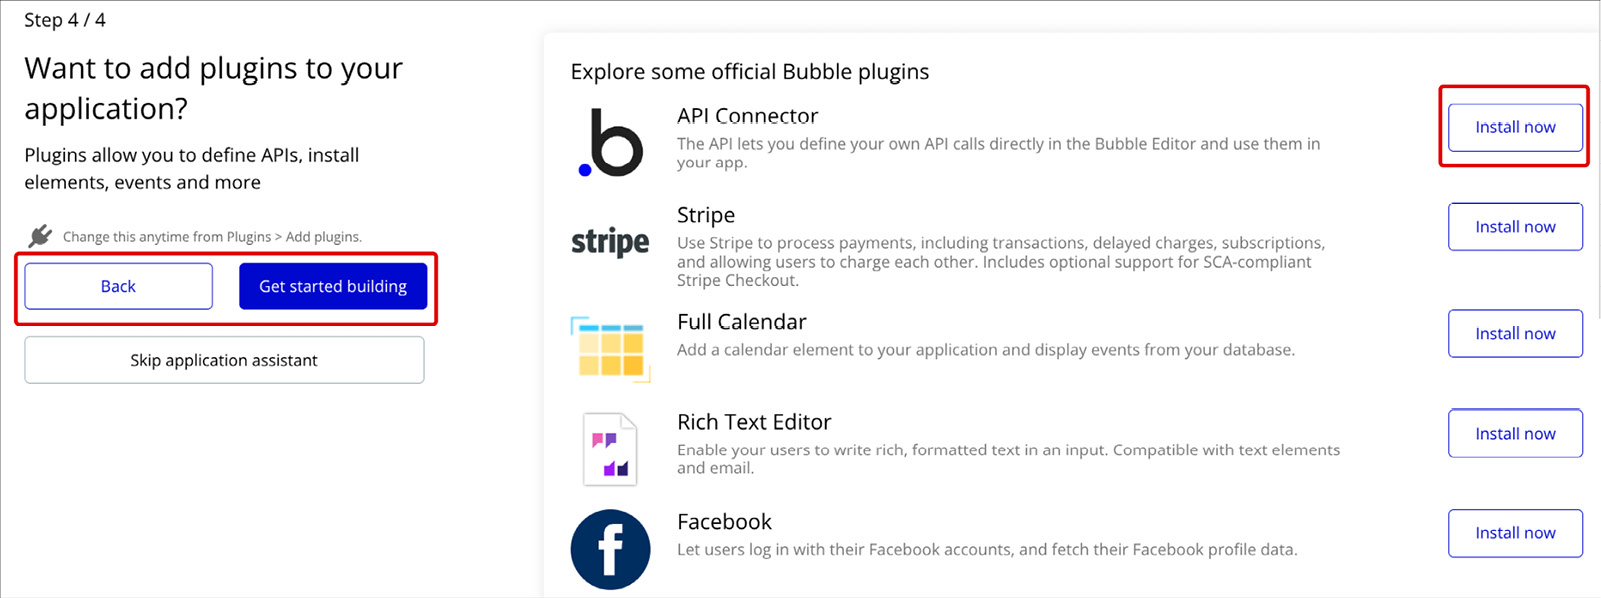
Bubble has a lot of plugins you can install in your application to have extra features available for building amazing projects. These are like superpowers that let you build beyond what Bubble is capable of by itself. This step lets you pick plugins from a list visible on the right side, so you can save time by adding some plugins at the very beginning. If you wish to install a plugin, just click the Install now button. If you don’t see a plugin you need on this list, you can click the Browse all plugins button, find the one you need, and install it that way.

If you know a specific plugin and know you are going to need it, this can be the perfect moment to install it. If you don’t have any idea of what plugins you will use, I recommend you just skip this step and install plugins later as required. Remember, you can always go back to the plugins page to install or remove plugins.

Figure 1.12: Bubble.io – application assistant – step 4

Figure 1.12: Bubble.io – application assistant – step 4

Once you are done with this step, click the Get started building button to finish the application assistant process.

Finishing the application assistant

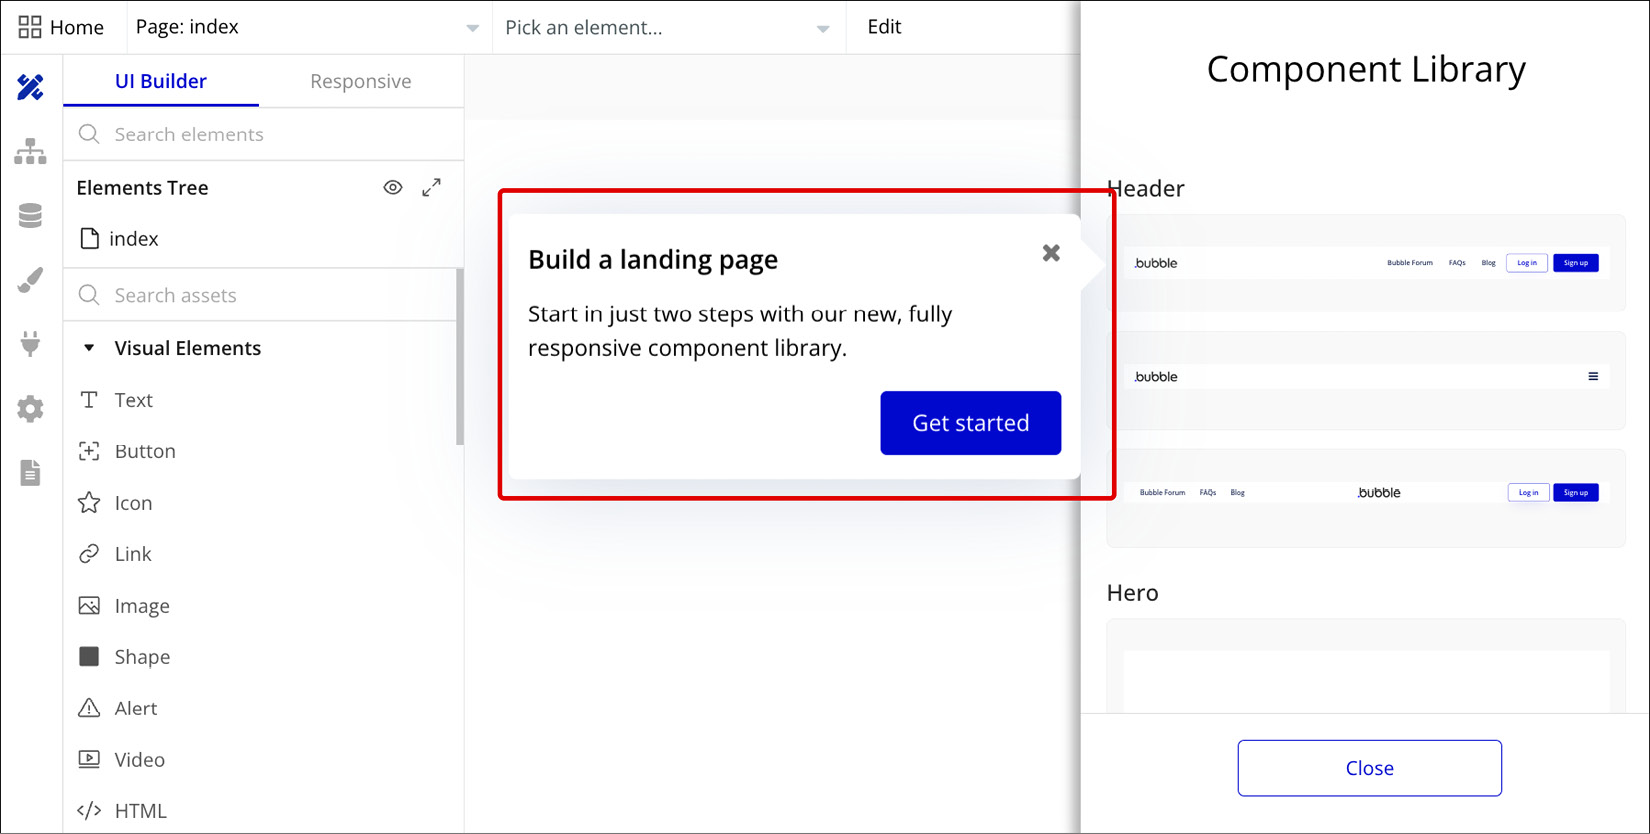
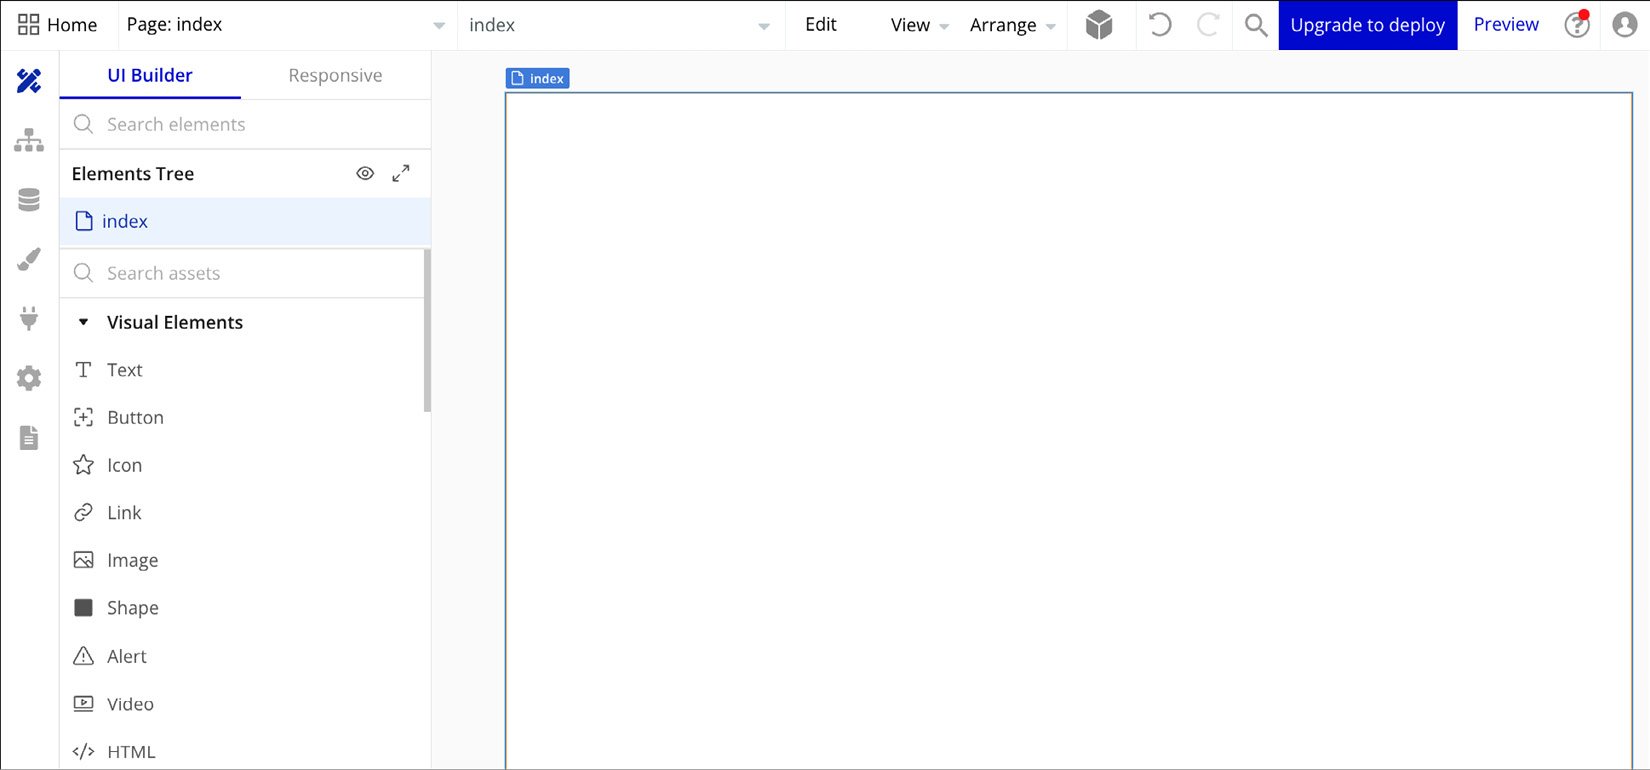
At this point, you have created your very first project and configured the initial settings using the application assistant. Next, Bubble will take you to your project and show you the Bubble editor.

Figure 1.13: Bubble.io – the Bubble editor with a guided tour

Figure 1.13: Bubble.io – the Bubble editor with a guided tour

Note that Bubble will continue to help you understand how the tool works by giving you a guided tour showing you around, what is what, and where things are. Following the tour is optional by clicking the blue buttons or you can choose to skip it. Your project has now been created and is ready to go, so you can start building! In the next sections, you will learn the essentials of the Bubble editor so you know where things are and how to navigate the tool.

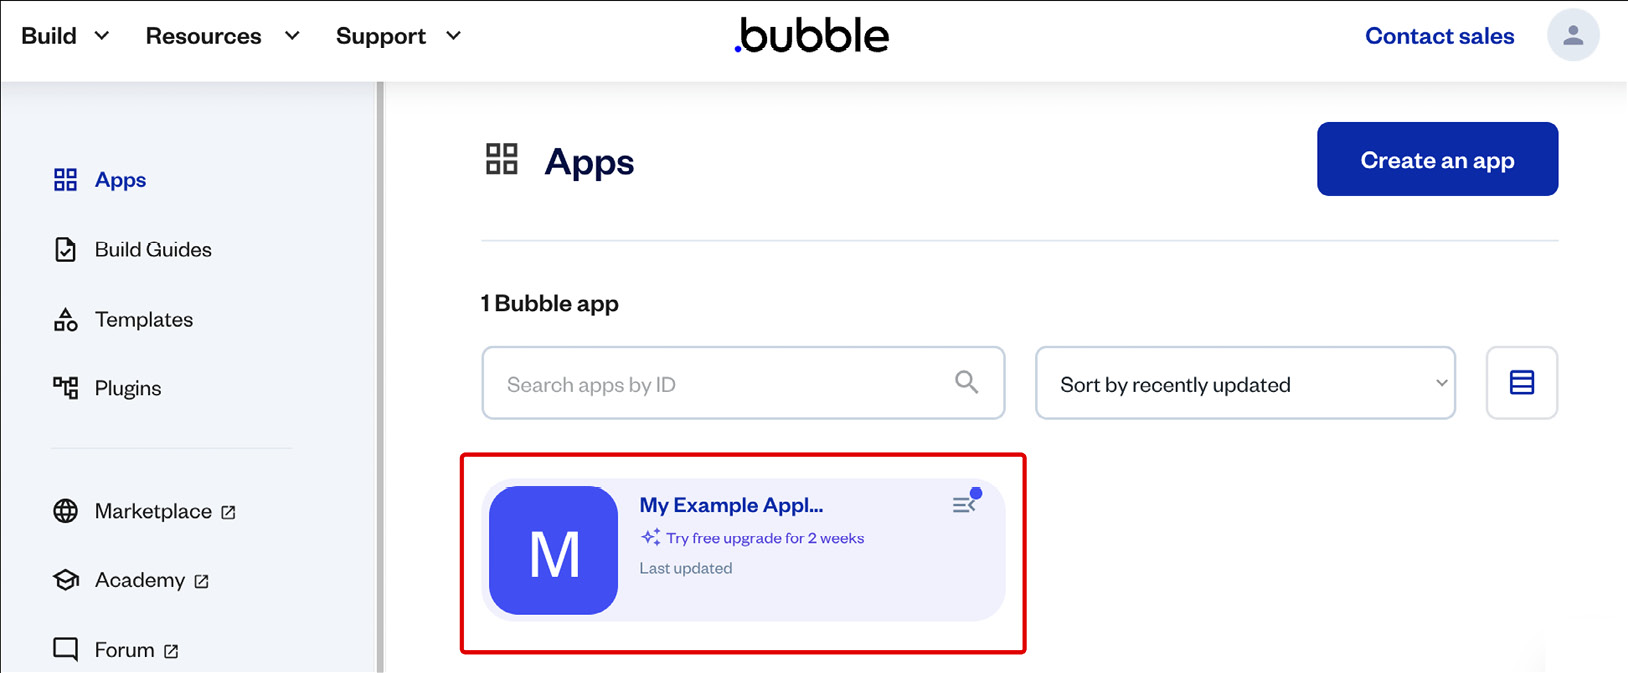
With your account and project created, you now have the foundation to start building with Bubble. If you exit the project you just created, you will see your account workspace (dashboard) with all your projects side by side. To do that, just click the Bubble logo on the left-top corner of the page.

Here is an example of what your account and projects list looks like:

Figure 1.14: Bubble.io – your account and projects

Figure 1.14: Bubble.io – your account and projects

This area is where you can visualize all the projects created under your account. We will cover it in greater detail in the next sections.

Understanding the main areas of the editor and key features

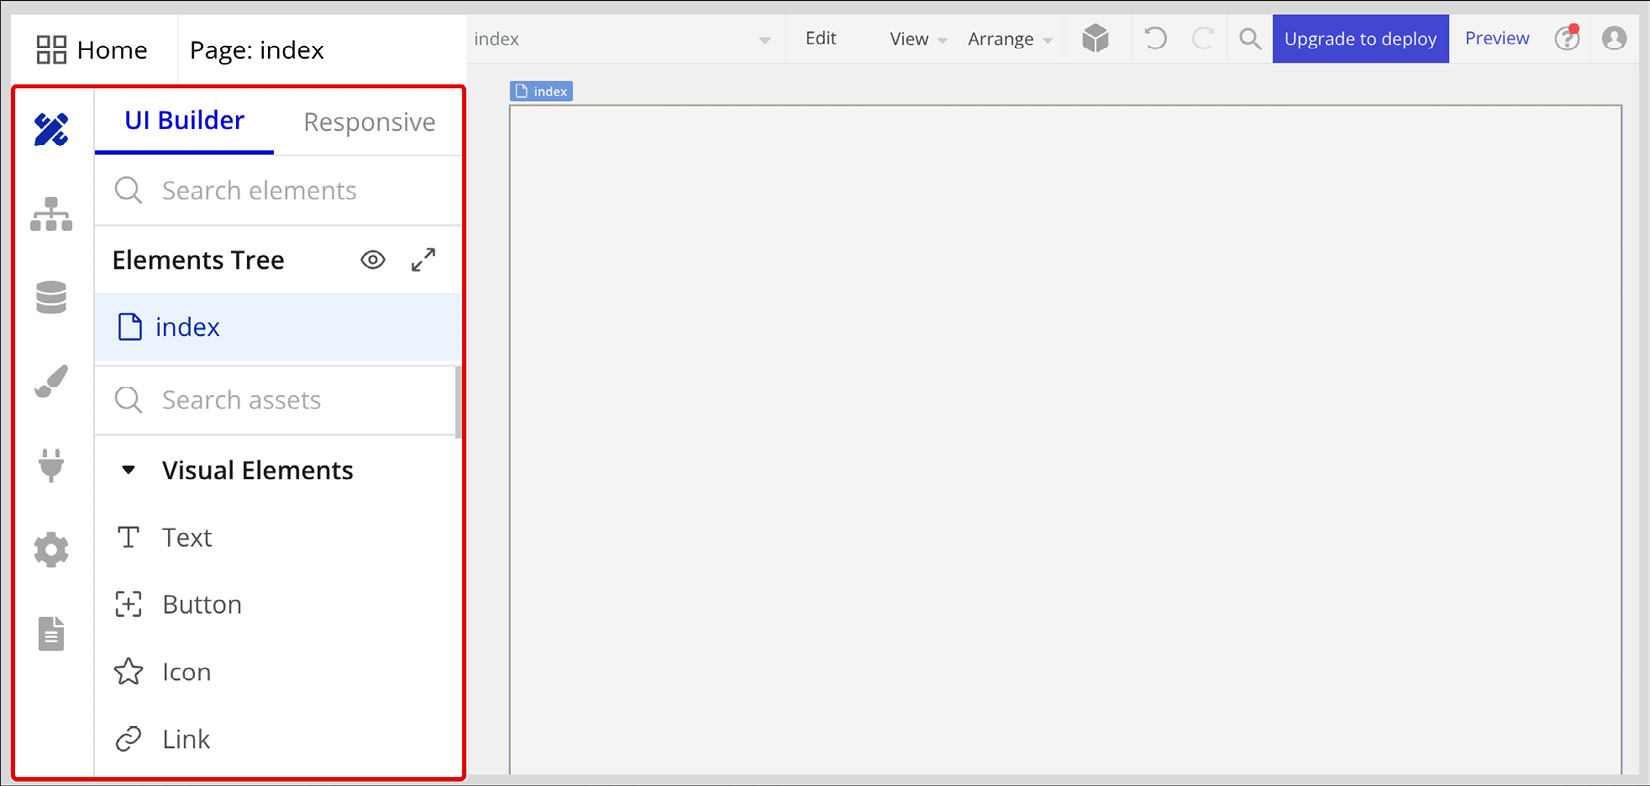
In the previous section, you learned about the main areas available inside the Bubble editor. In this section, you are going to learn more about the main tabs and other internal areas inside Bubble in more depth so you understand what they are and how you can use them to configure extra settings and manage your own applications. Knowing each individual tab and what you can do inside them is an essential step because this will help you navigate inside Bubble and know exactly where you should go during your application building and development process. Let’s dive right in.

Design

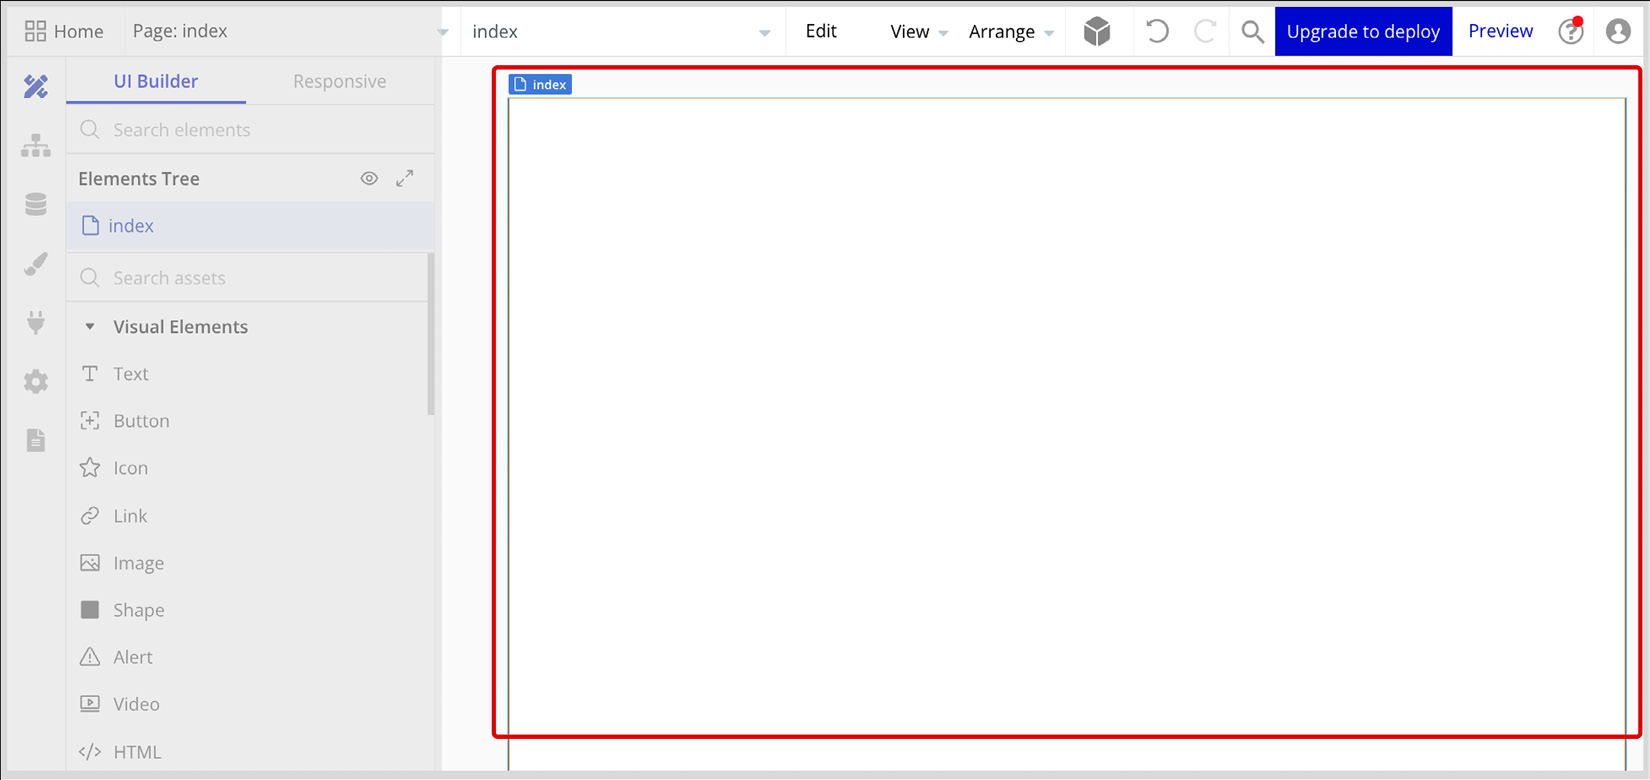
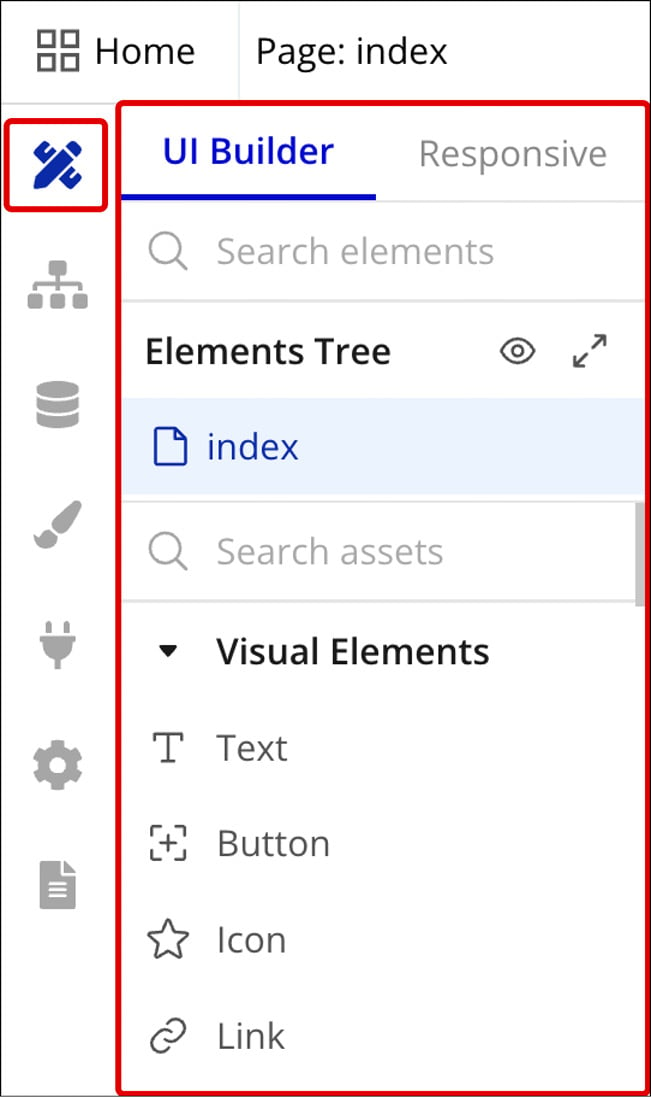
The Design area is the first tab on your Bubble editor. It is automatically pre-selected by default when entering a Bubble project. As the name suggests, this area is where you design your application – it is your visual canvas. Inside the Design tab, you visually construct your app’s user interface by dragging and dropping components, resizing, positioning, arranging, and customizing elements such as buttons, text, images, inputs, and more to build your app’s pages and layouts. If you are new to the platform, you are probably starting your journey here, playing with the visual components. Take some time to get familiar with this area as you will interact with it during your entire building process.

Figure 1.21: Bubble.io – Design tab

Figure 1.21: Bubble.io – Design tab

To get started, add a new fresh element to the canvas, so you can learn how it works. It is very simple. Click on a specific component in the sidebar located on the left, such as a button or text. Once you click the desired component, it indicates it is selected by changing the name of the component to another color. Now you can drag the chosen element onto the canvas (page). Or, you can move your mouse to the canvas and either click to add the item or even click and drag to draw the size of the component you want to add to the canvas. Thus, you have three options:

  • Click and drag
  • Click and click
  • Click and drag while clicking

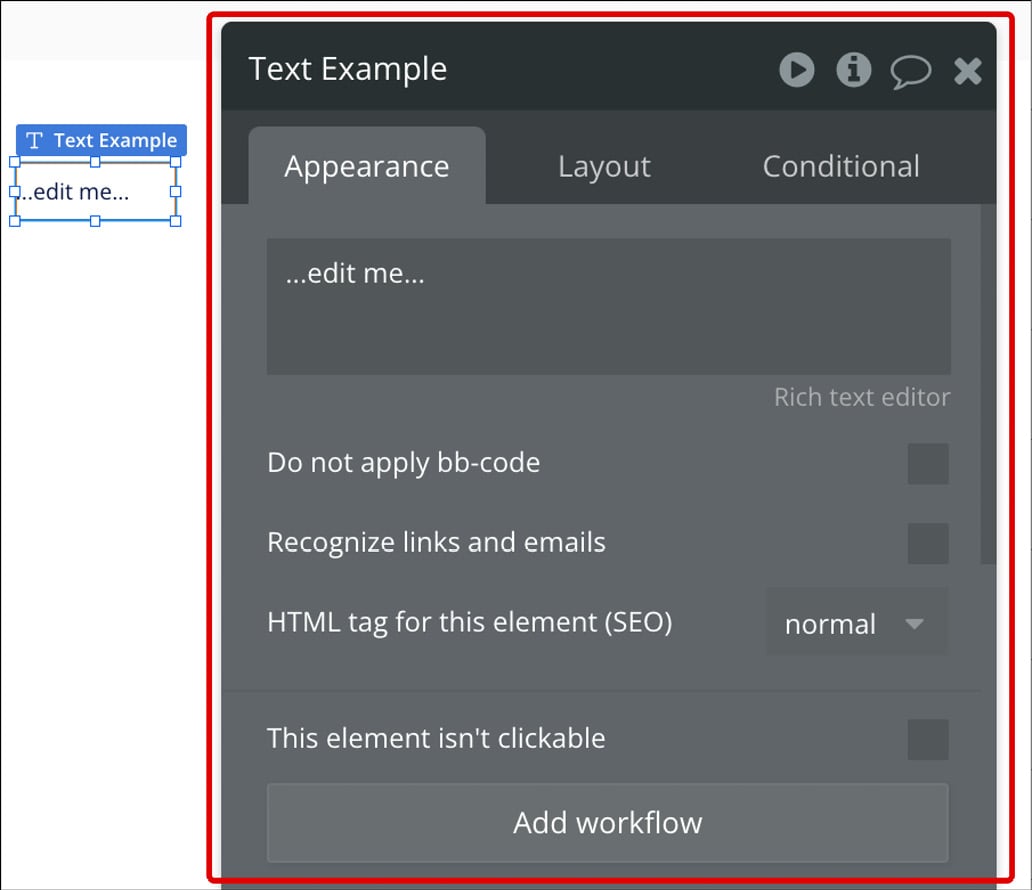
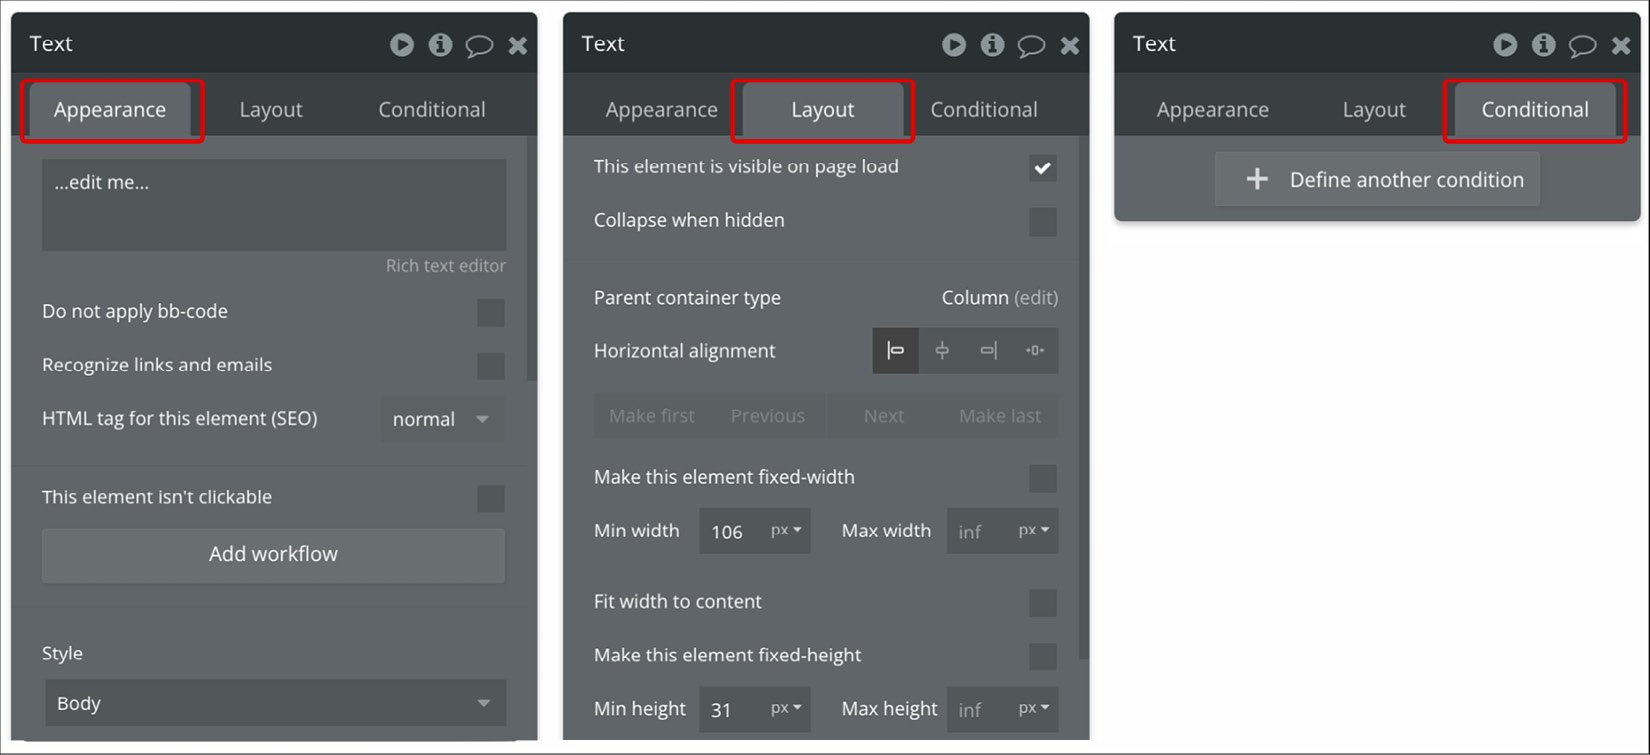
Now, to interact with the newly added component, you can double-click on the element to reveal the property editor. This will allow you to change this element’s appearance and features. If you right-click on an element it will unveil a contextual menu offering supplementary editing possibilities.

So, to do a quick recap, in the Design tab, you can add components, define the layout of your app, change the settings of components and styles, and play with the responsiveness of these components to craft a polished and user-friendly design, all without the need for complex coding.

Workflow

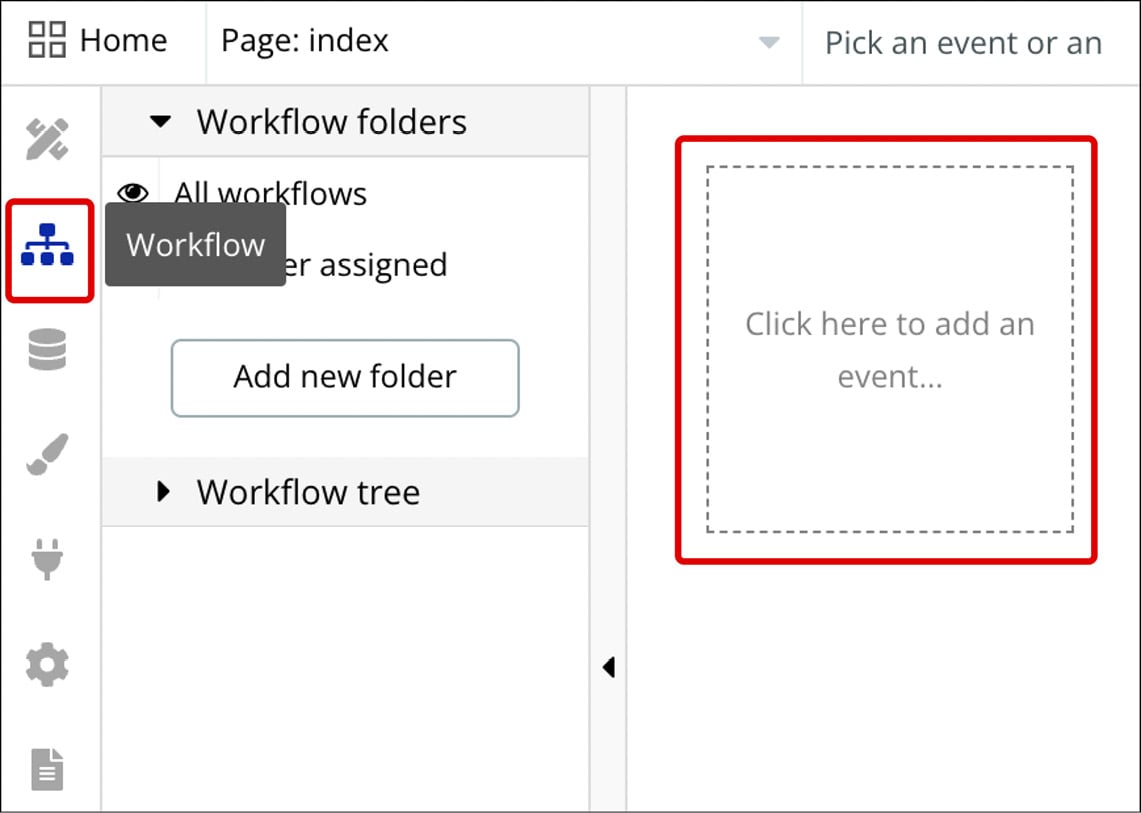
The Workflow tab is where you build the logic of your application. This is the brain of your application. In this section, you can specify how your app behaves when users do things such as clicking on a button, viewing a page, or submitting a form. For these actions that users take on the frontend (the pages), you can create a set of rules and actions that react to what users did and perform changes on the pages they are visiting. These responses can change data, communicate with external services via APIs, or change how the page looks, for instance, by changing the text on a page or the color of a button.

Figure 1.22: Bubble.io – Workflow tab

Figure 1.22: Bubble.io – Workflow tab

Workflows can seem a little complex at first, but this is one of the coolest parts when building with no code. Once you get familiar with it, it will be very exciting to play with workflows and create amazing functionalities for your web app. Don’t worry, we will talk more about workflows in future chapters.

Data

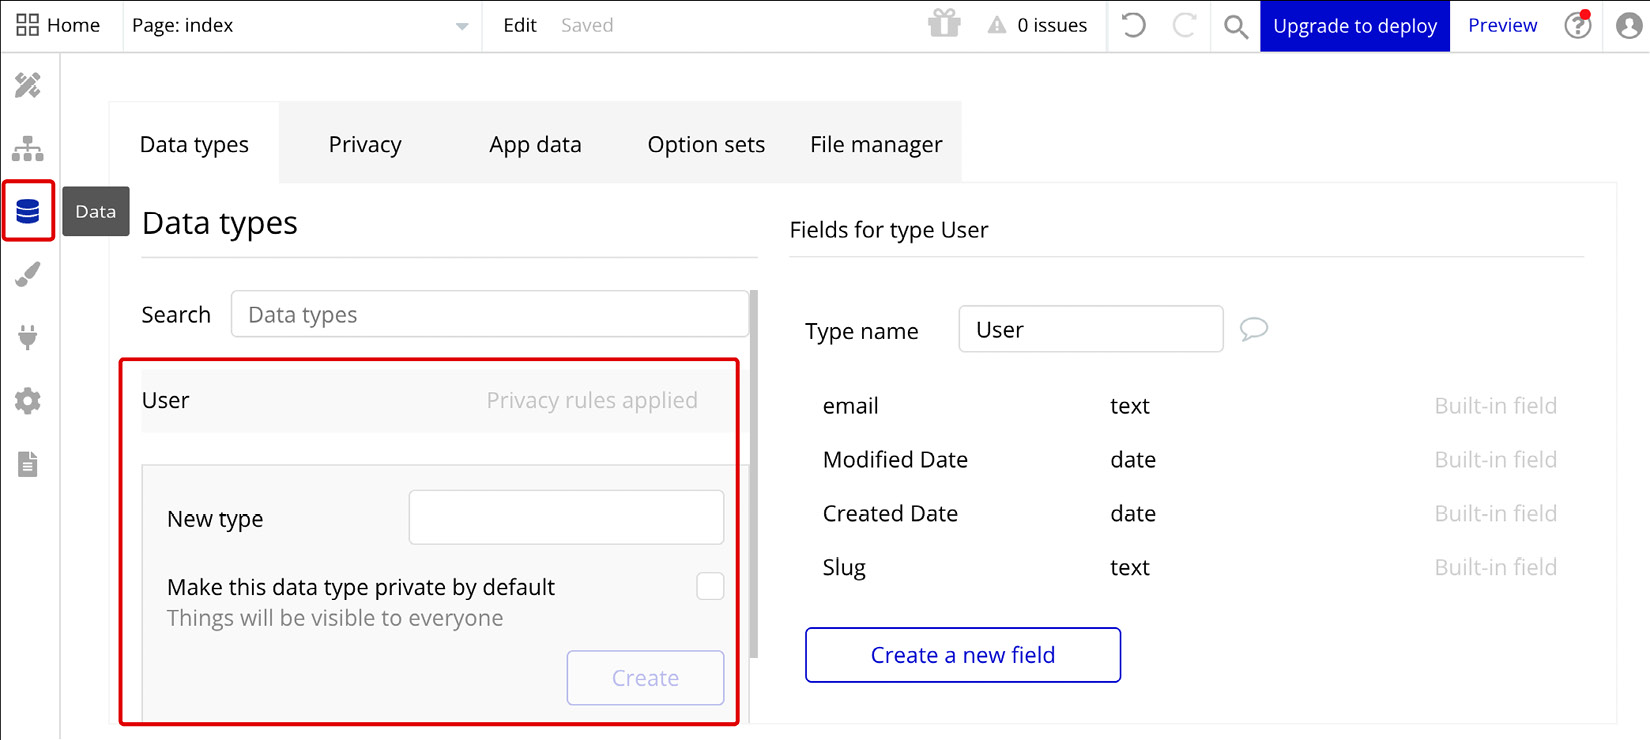
The Data tab is where your database is. Bubble is an all-in-one no-code platform, meaning you can create a database and store information inside it. Of course, you can also choose to integrate Bubble with an external database, but if you are using the native database, then the Data tab is where you will find it.

Figure 1.23: Bubble.io – Data tab

Figure 1.23: Bubble.io – Data tab

This section lets you establish and manage the foundation of your app by defining data structures using data types and fields. It’s where you create the tables and columns of your database, and fill them with real-world data. Inside the Data tab, you can set your database structure, create relationships, define and view all the items available inside your tables, and change and add fields and types. You can also visualize an existing database and what information is stored, create different views to visualize your database items, add data manually to your database to run some tests, and much more. Inside the Data tab, you will find other tabs to control privacy settings by determining who can access and modify this data. The File manager and Option sets tabs offer alternatives to store static options in a database-like structure that doesn’t use the database, meaning it can be faster for some specific use cases.

The database of your app is a very important part of your application. If the workflows are the brain, the database is the heart, and they interact with each other very often.

Styles

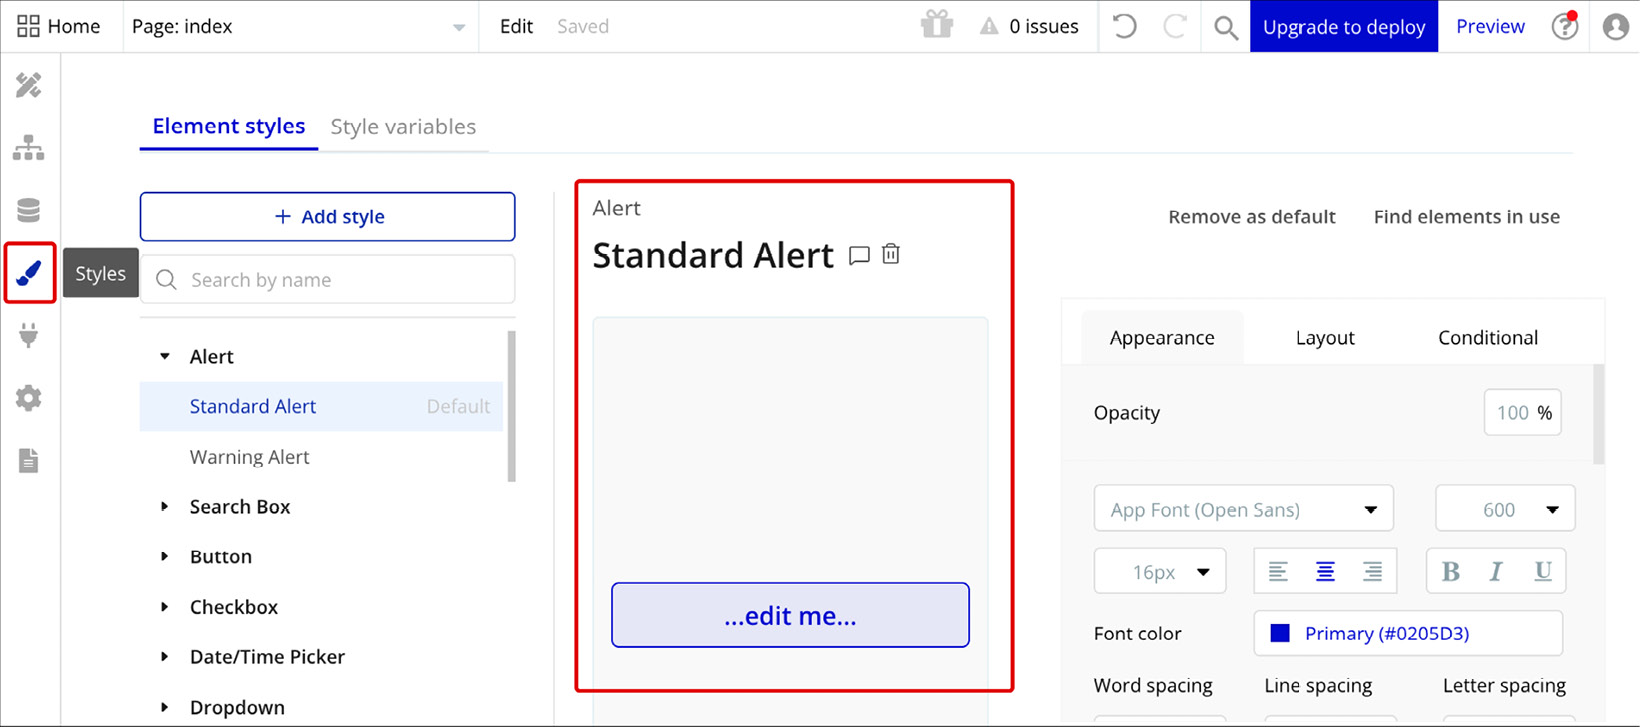
In the Styles tab, you will find a list of all the components available inside Bubble, including buttons, texts, and inputs. If you are a designer, this is where you will customize the look and feel of each component inside your application, as if you were defining the visual foundation of your app. This concept is similar to a design system if you know the term.

Figure 1.24: Bubble.io – Styles tab

Figure 1.24: Bubble.io – Styles tab

Different from the Design tab, the Styles tab lets you define the visual characteristics of each element on a global level, meaning you can define specific styles for specific components and add a name to that style. This allows you to create a set of pre-defined styles for each component and select these styles while building your app’s interface. The cool thing about using styles is that you can create multiple variants and organize, search, and manage your styles, all from the Styles tab. If you decide to change a style, it will alter every component attached to that same style name, meaning you don’t have to go through each individual page and change all the styles one by one. This saves a lot of time when designing. Of course, you can also decide to change specific components and have them not follow a global style, which can be done in the Properties panel when using the Design tab.

Styles also allow you to add variables and conditionals for components, and these are also defined on a global level. As a designer myself, I really recommend using styles and taking some time to define the basic components of your Bubble app, even before the building phase, so you have everything set to get started and save time in the future.

So, to do a quick recap, you use styles to maintain visual consistency throughout your app by defining global properties such as colors, fonts, and sizes. By creating and applying styles, you ensure a unified design language across different elements, providing a cohesive and professional appearance for your application.

Plugins

Plugins are your superpowers, your magic tricks! The Plugins tab is the place where you add and manage your plugins. This tab displays all the plugins you have installed in your application and allows you to configure them. With plugins, you can enhance your app’s capabilities by introducing extra functionalities built by other developers to your app. You can access the marketplace from the Plugins tab, where you can search and filter to find tools and resources that can help you build inside Bubble. There are thousands of options available, both free and paid for, that allow you to add extra functionalities to your projects, including payment gateways, API connections, new components, integrations with third-party services, and much more.

Figure 1.25: Bubble.io – Plugins tab

Figure 1.25: Bubble.io – Plugins tab

Now, if you want to go even further, you can. Know that you can also create your own custom plugins if needed, and add your own plugin to the Bubble marketplace. It can be built and used just by you (privately), but it could also be published publicly for other people to use, for free or paid for. Building plugins can also be a way to make money with no-code tools, but that is another topic. Let’s continue.

Settings

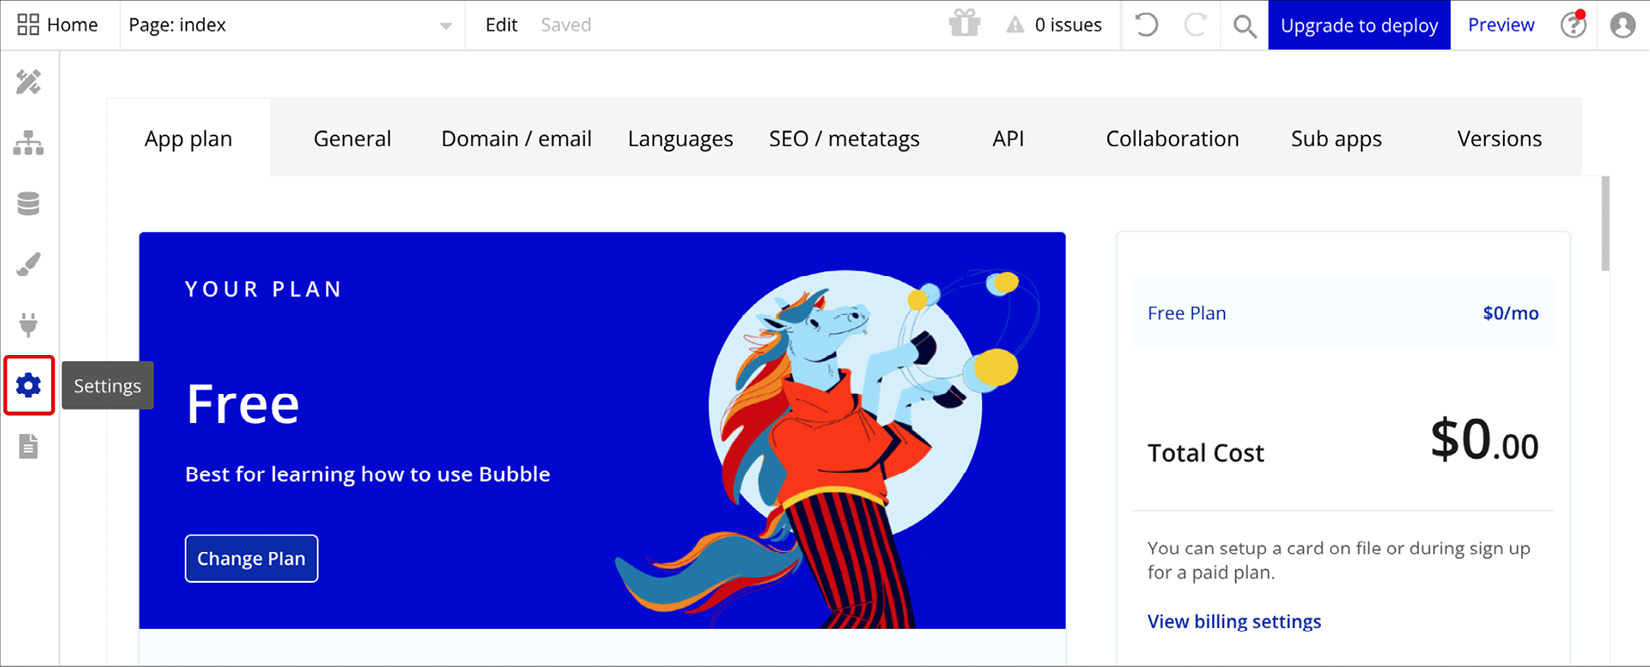
The Settings area provides a central hub to configure your app’s global properties. It allows you to set and visualize fundamental information about your Bubble web app.

Figure 1.26: Bubble.io – Settings tab

Figure 1.26: Bubble.io – Settings tab

Under Settings, you can manage your app plan and visualize the workload units used and your general privacy and security rules. You can also configure your custom domain and email settings, define your app’s languages, configure SEO and meta tags, configure API rules and collaboration options, set up sub-apps, and see information about your Bubble app version.

This is where you can find important information and settings for your Bubble app and make sure everything is properly configured before launching, adjusting various parameters that influence your app’s behavior to ensure that your application aligns with your intended goals.

Logs

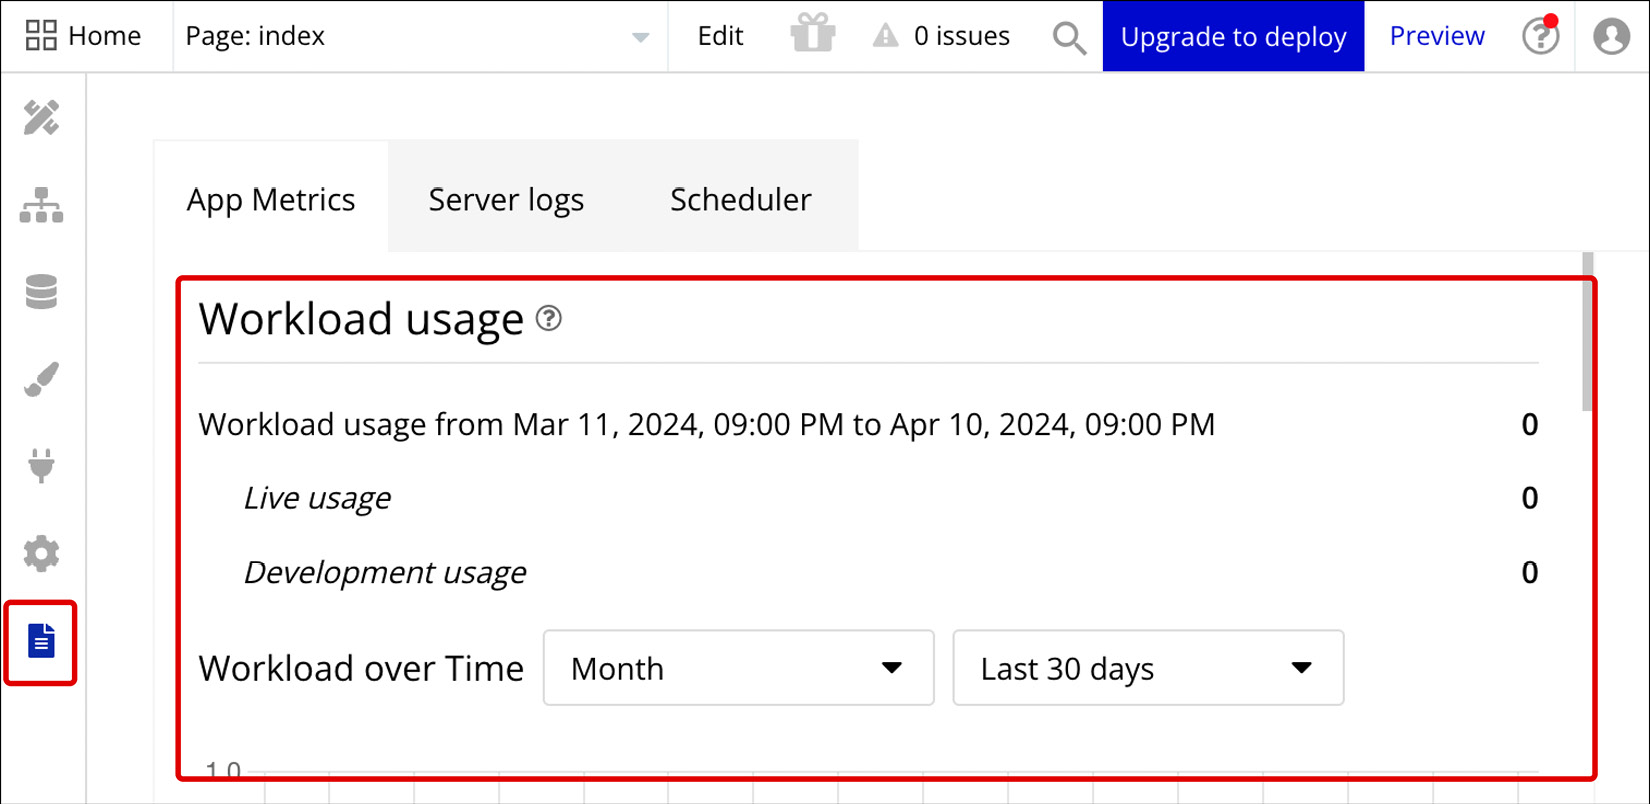
The Logs section offers charts to help you identify how your application is performing. It is also where you can visualize and monitor your Workload Units (WUs) consumption. WUs are closely tied to the pricing plan selected by the app owner, and monitoring the consumption is very important as your application grows and experiences higher user engagement levels, as this is closely related to how much your app will cost to run. We will talk about that more in future chapters. For now, it is just important to know that you can track your workload usage visually, view app metrics and activity access server logs, and refer to the scheduler that works with backend workflows. The Logs tab can help during the identification and resolution of issues. By tracking errors, warnings, and app activities, you gain insights into how your app is functioning, facilitating effective debugging and optimization processes.

Figure 1.27: Bubble.io – Logs tab

Figure 1.27: Bubble.io – Logs tab

At this point, you have a full picture of the main areas inside your Bubble editor and where you can find key features that will allow you to build and manage your web application. This is a great foundation to get started as you can now easily locate things and know where to go for specific actions and settings. Let’s next dive into your account, which is the area outside of your editor, so you can continue exploring Bubble and how it works.

A quick tour of the main areas of your account

In the previous section, you learned about the Bubble editor and the main areas of each tab available inside the tool. All of that lives inside the Builder and will be used while you are working on your web app. Bubble also has a dedicated part to manage your projects and handle your account. In this section, you will learn more about the other side of Bubble, which is not related to your project specifically but to your account. Let’s dive into the sections and areas you will use while not building with no code.

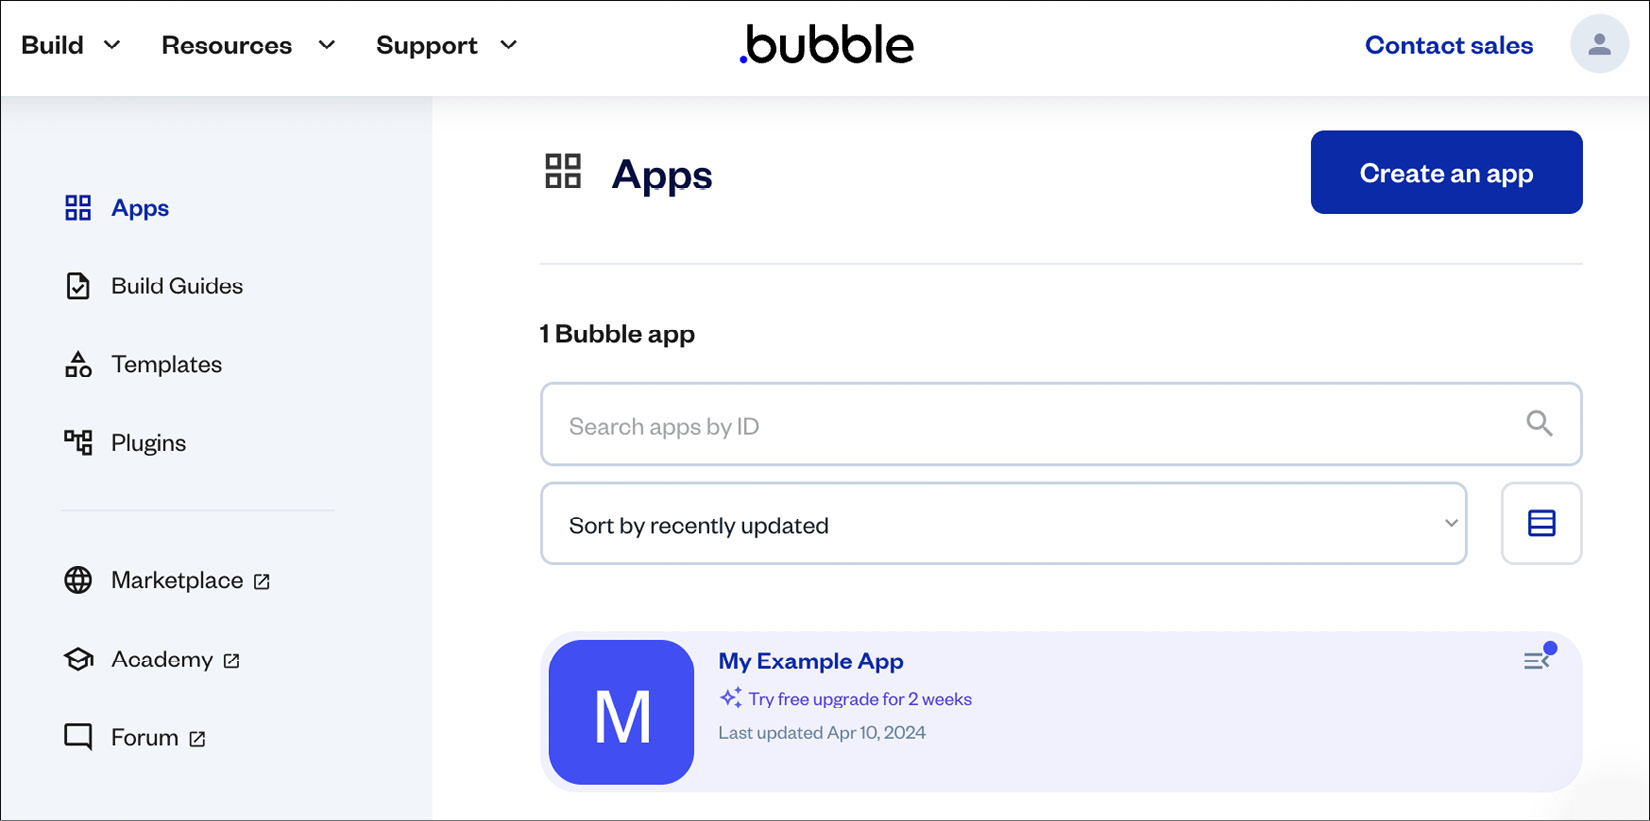
Apps

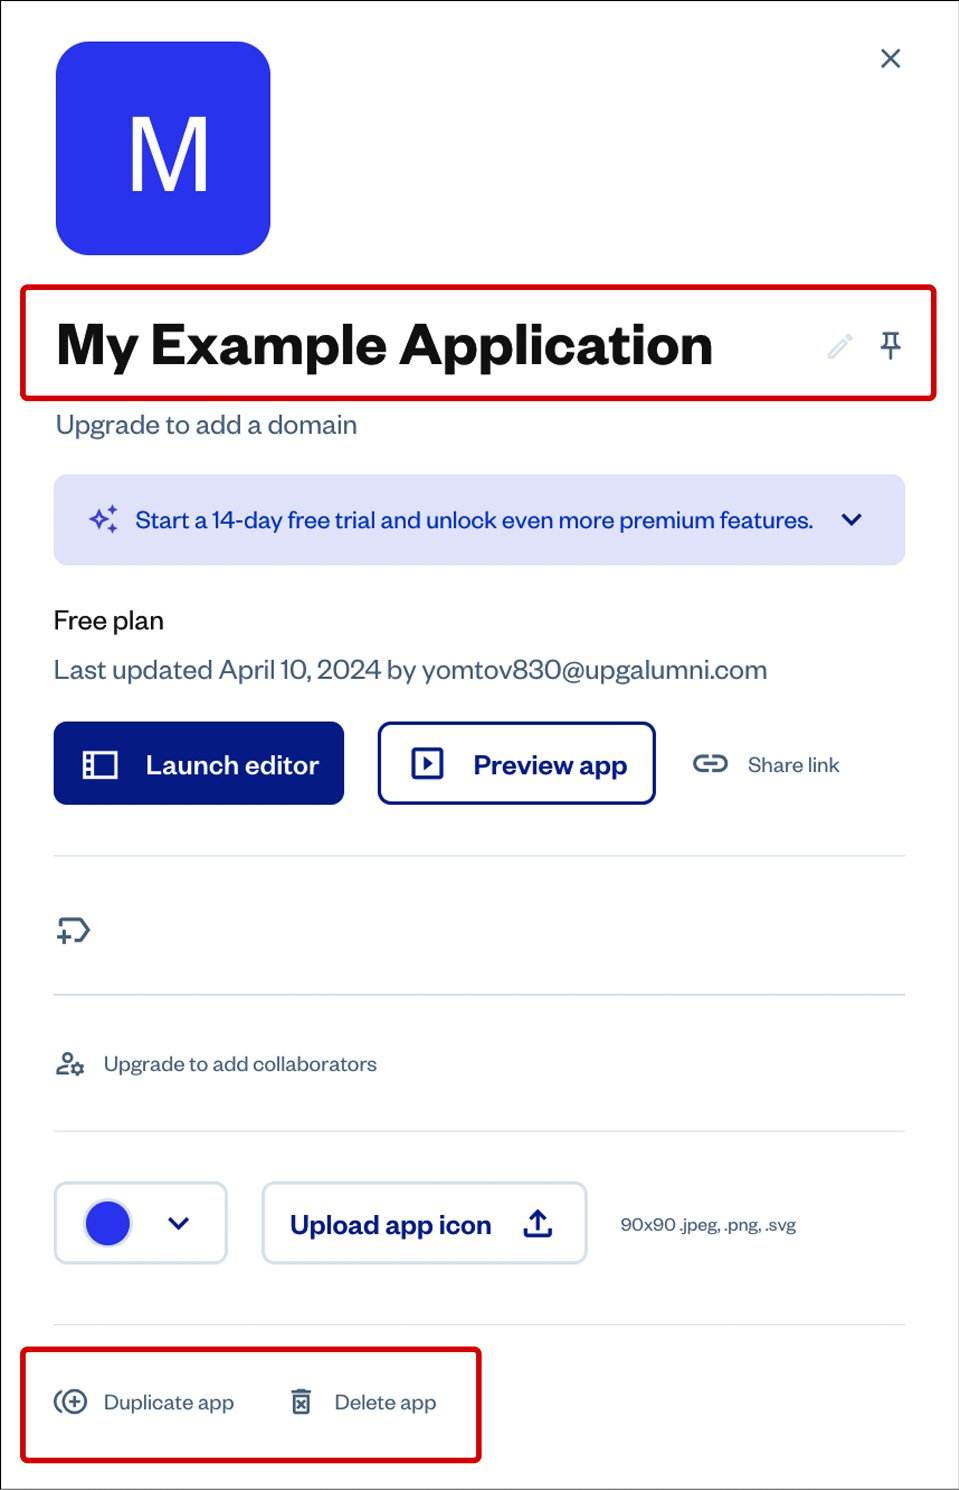
Under Apps, you can visualize all the apps you have created under your Bubble account. You can search and filter apps if you have a lot of them. By clicking an app card, you can view more information about the app and choose to preview it or go to the editor to continue building. Additionally, you can also add an icon, change its color and name, and even pin it to the top to help you find and identify the app better. You can also check this app’s current plan, when it was last updated, and by whom, add tags, share the link with others, duplicate the app, delete the app, and even add collaborators to work with you on this project.

Figure 1.28: Bubble.io – account apps

Figure 1.28: Bubble.io – account apps

If you click on the application item, you can view more information about it and choose to launch the editor, preview the app, share the link, and much more.

Figure 1.29: Bubble.io – app details

Figure 1.29: Bubble.io – app details

You can also customize your app name and color and upload an icon so it is easier to identify which app is which. This is particularly helpful when you have multiple applications created under the same account. If you have too many apps, you can also choose to pin this app so it will be displayed at the top of your apps list, meaning it will be easier to find it. You also have access to a search bar and filters in case you need to find an app that is not visible on the first page of the apps section.

If you need to store information about an app for your team members or yourself in the future, you can also add notes to it. It is also possible to work with other people on the same project and invite collaborators to work with you on a particular project. In this section, you also have options to duplicate the app, creating an exact copy for various reasons, and if you don’t need the project anymore, you can also delete it forever and clean up your account a little bit.

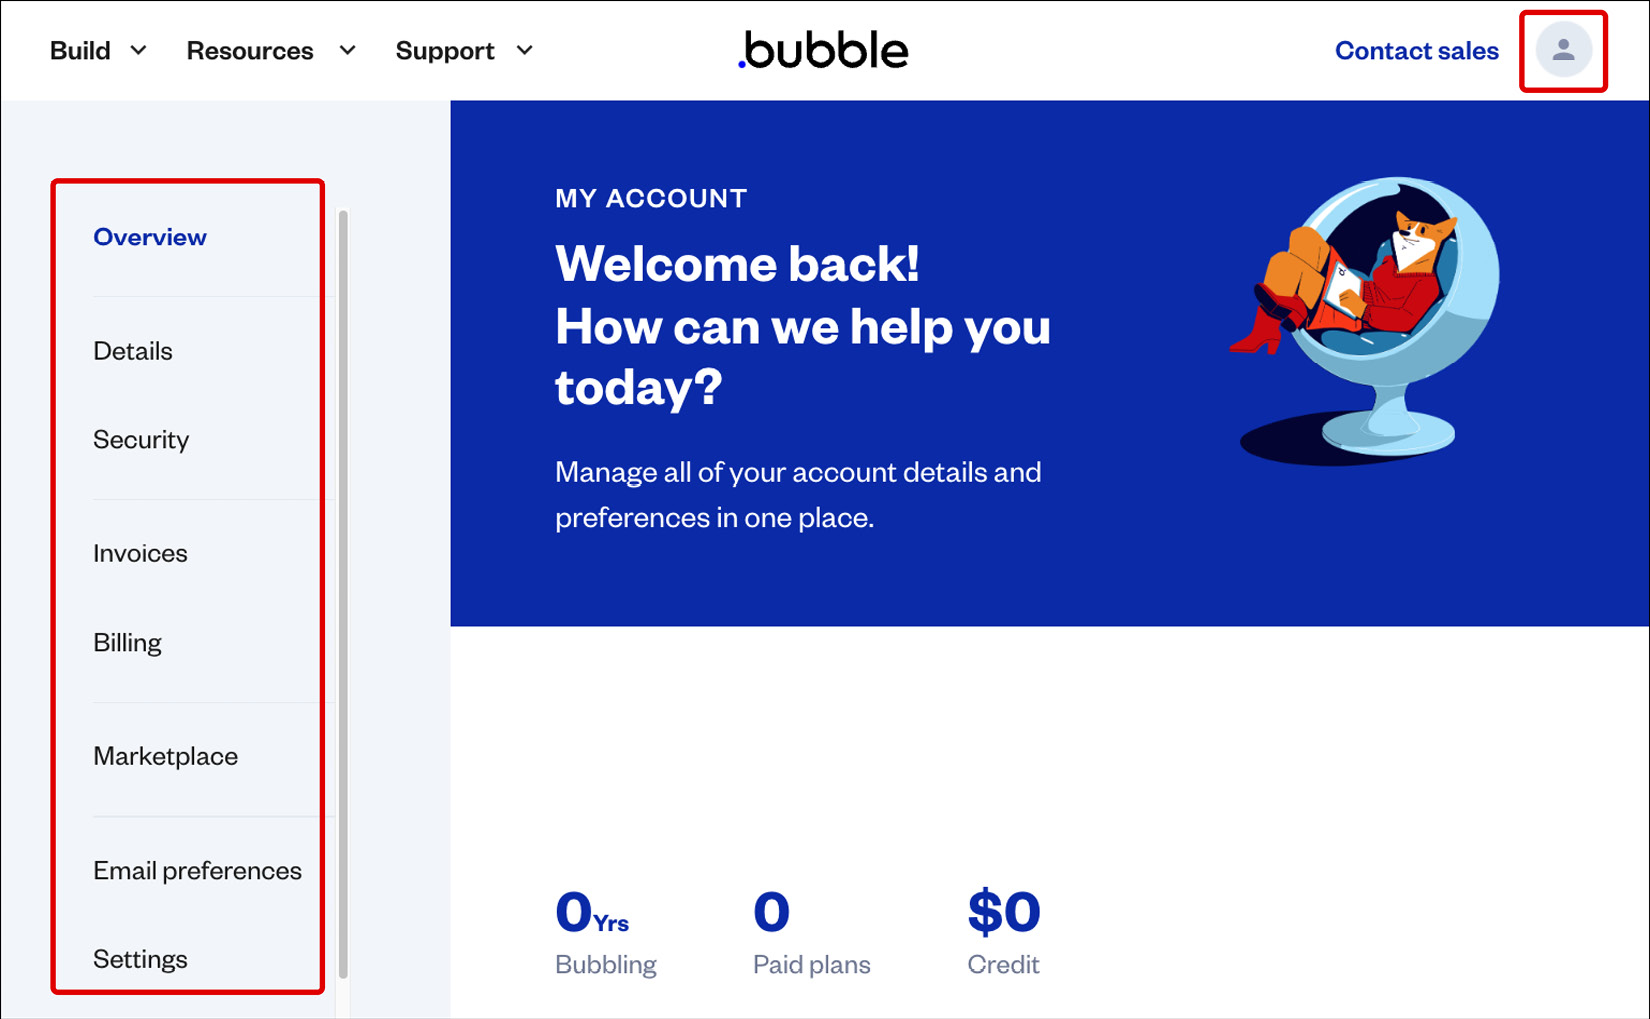
Account

You can access your account at the top-right corner of your window by clicking your avatar image. Under your account, you can change and check your billing information, change your account password or email, log out, reset your password, and check your security options to make your account more secure by adding 2FA, for instance. You can add your own custom avatar image, your first and last name, and even apply to become a Bubble developer. You can visualize credits and for how long you have been bubbling. Under Billing, you can see your current plan, add or remove your card and billing information, and enter coupon codes. Under Invoices, you can visualize your plans and invoices.

Figure 1.30: Bubble.io – account overview

Figure 1.30: Bubble.io – account overview

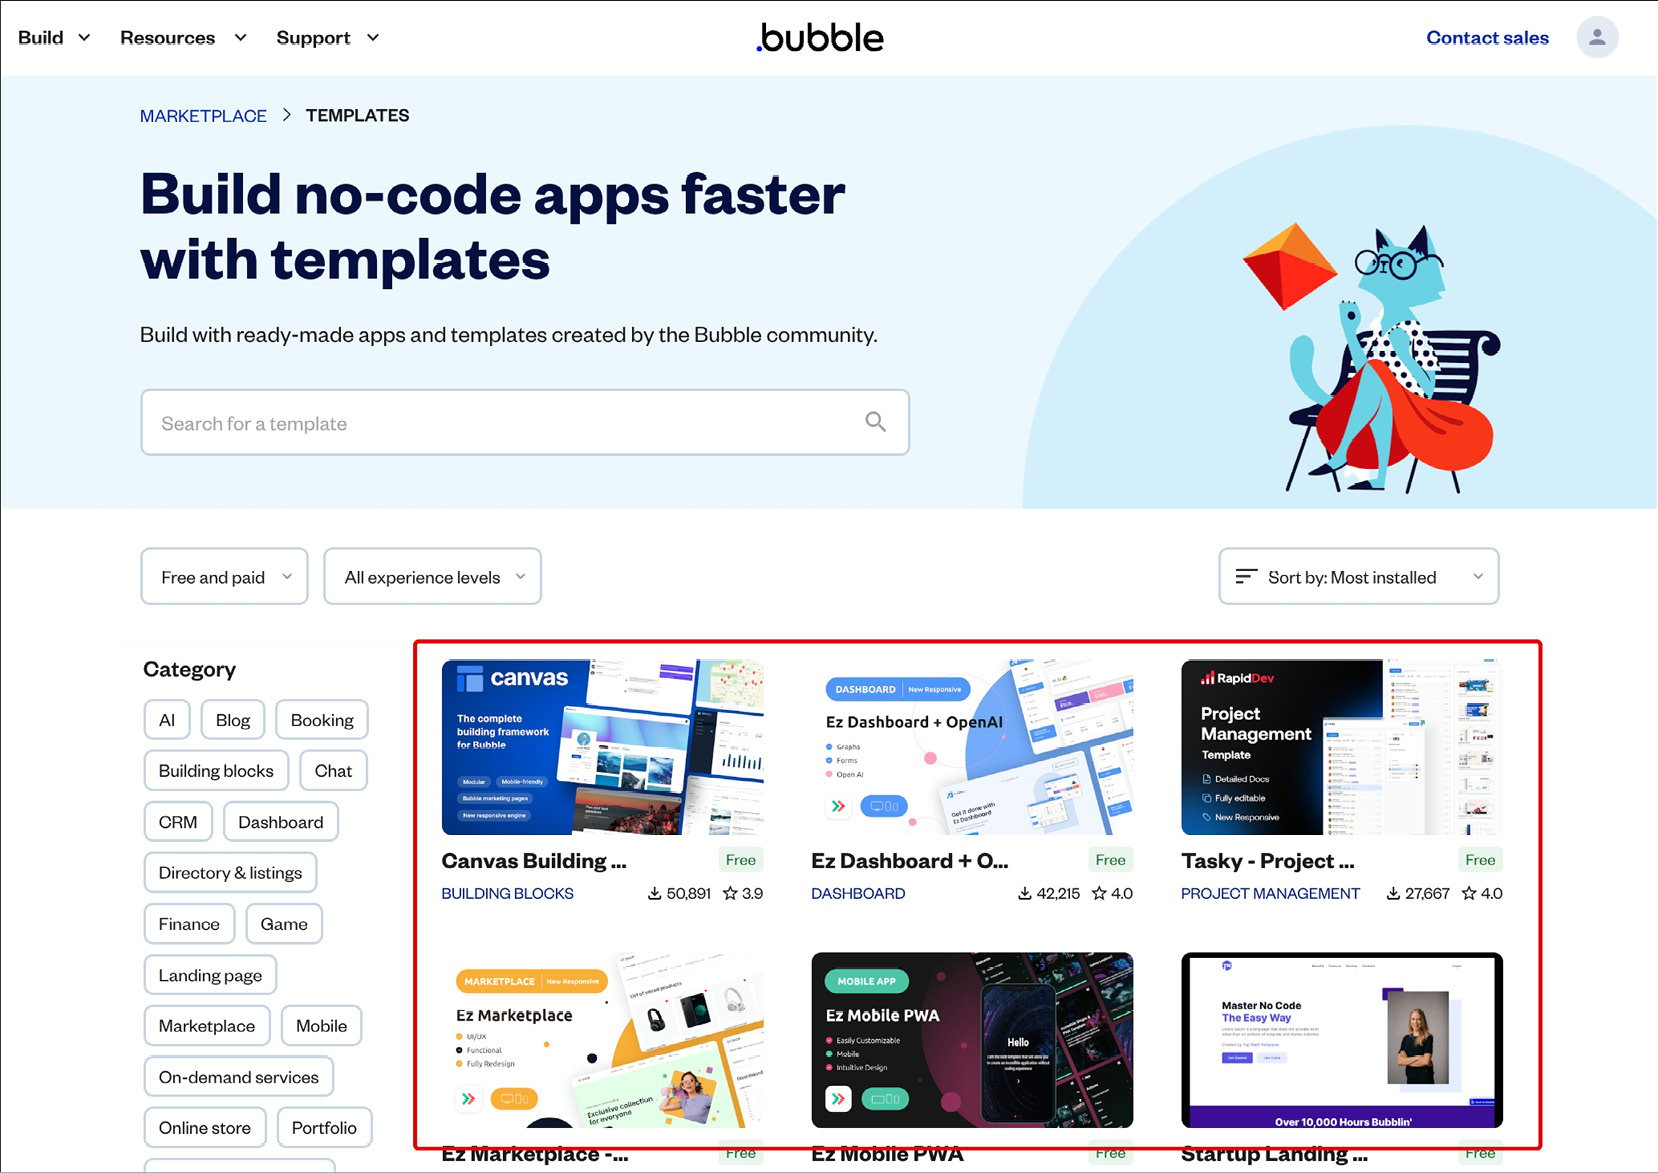
Templates marketplace

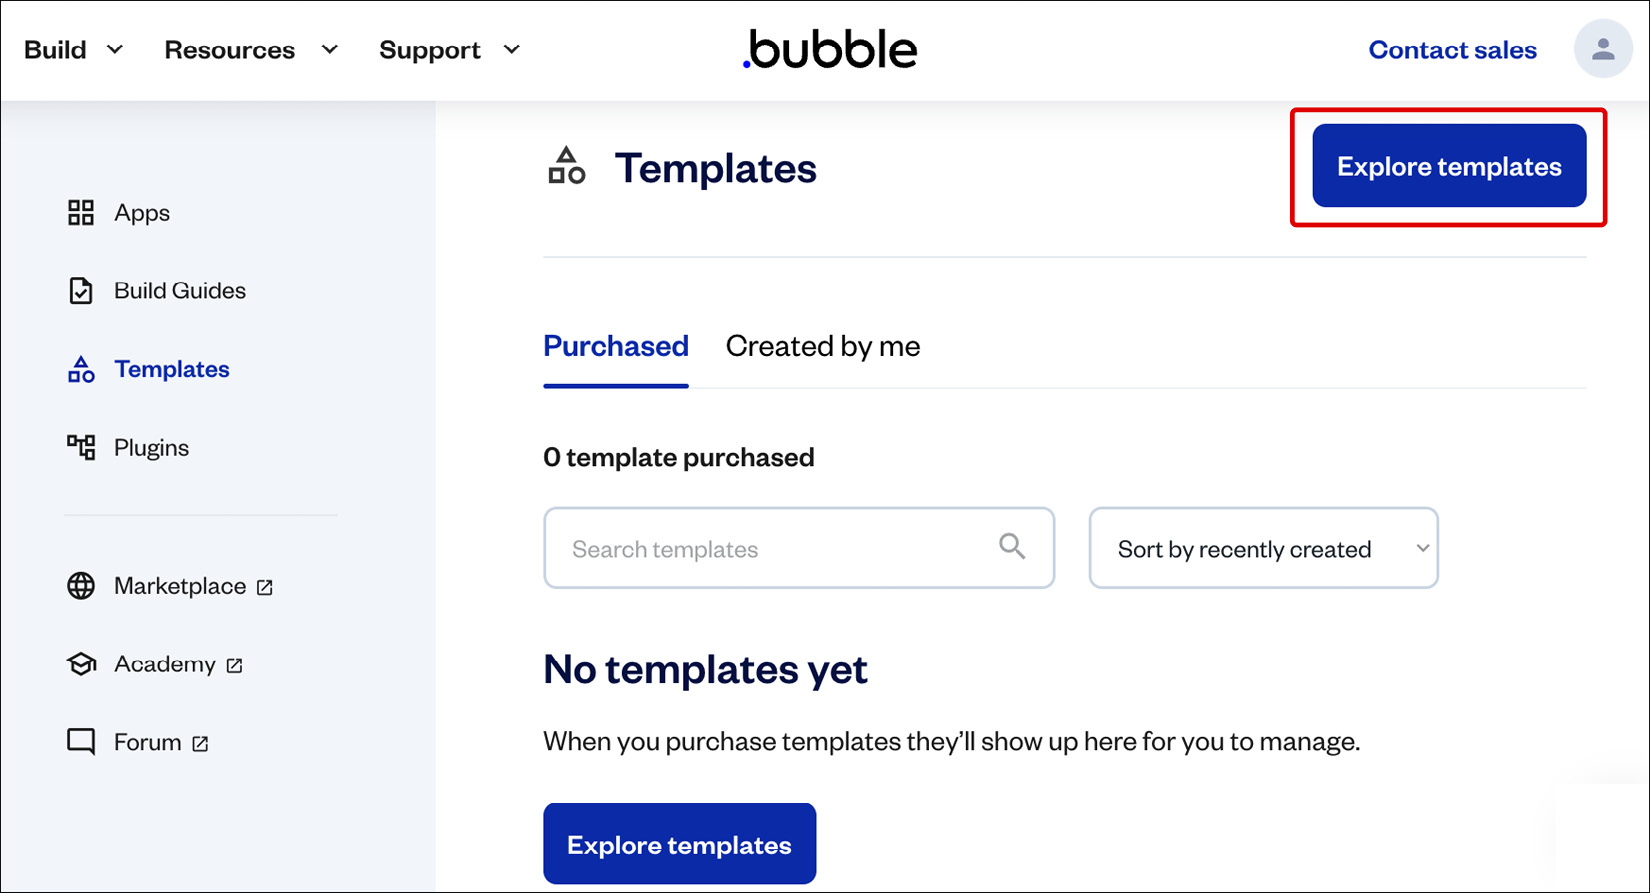
Bubble has a templates marketplace, where you can search for and filter amazing templates and design components, both free and paid-for, built by other bubble developers to help you build faster. You can choose to preview and interact with a template to test and see how it works. If you decide to use it, you can click a button to start a new project and clone that exact template. Sometimes, templates are simple, single pages or specific design components that help you build faster. Other times, they’re entire working projects that can go from beginner to advanced level. You can also choose to create your own templates and either add them to the marketplace for free or sell them. If you wish to sell a template, Bubble will take a commission for every sale. To add a new template, create a project and then turn it into a template. You can also check the My Templates item under your account.
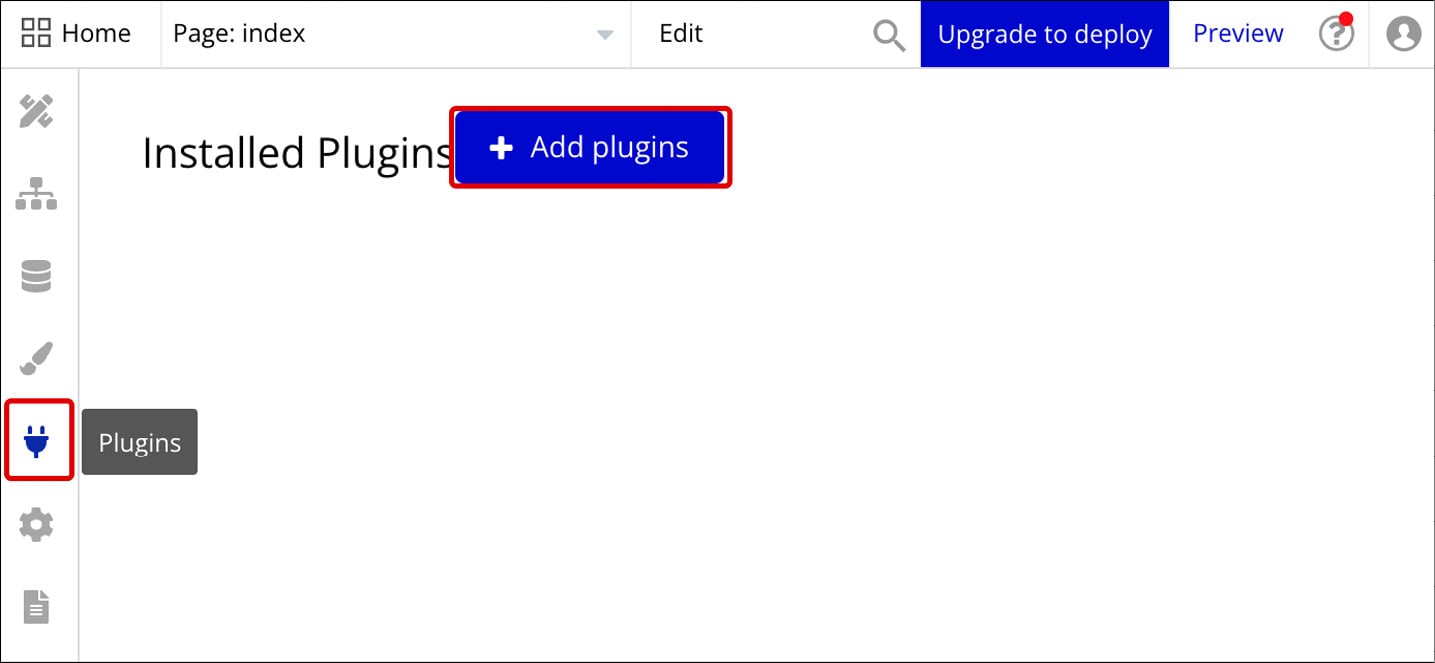
Figure 1.31: Bubble.io – Account templates

Figure 1.31: Bubble.io – Account templates

Using templates can be a good idea when starting a new project to save time and speed up your building process. Just be careful when using templates, because some can be challenging to understand and work with, so consider your existing level of Bubble experience before jumping into a too-complex template and getting stuck.

Inside the templates marketplace, you can search for diverse options and also use filters to help you find the specific template you are looking for. You can find a lot of free templates to use and also premium paid-for templates. It is fun and recommended to explore templates and see how they were designed and built inside the editor, this can also allow you to learn how to use Bubble. You should give it a try.

Figure 1.32: Bubble.io – Templates marketplace

Figure 1.32: Bubble.io – Templates marketplace

Plugins marketplace

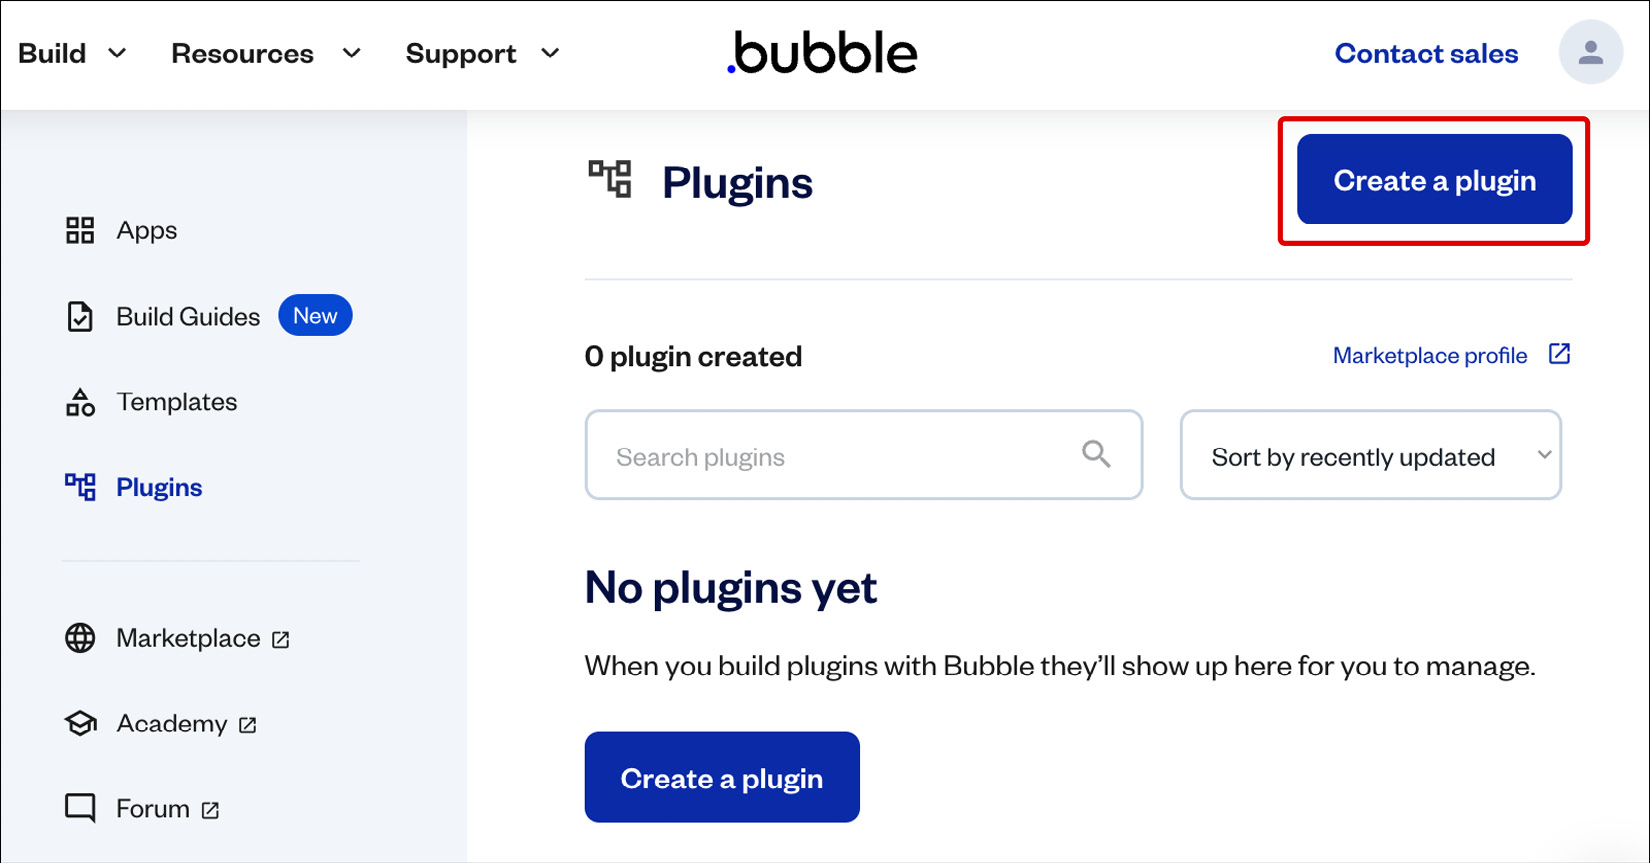
From your user account, you can access your Plugins area and see the plugins you have added or created. If want to find plugins, you can go to the Bubble marketplace via the website, or from inside a project, you can find plugins under the Plugins tab. I strongly recommend getting familiar with plugins because they allow you to build amazing things by leveraging extra features and third-party services that integrate with Bubble.

The Plugins page inside your Bubble user account is shown in the following screenshot:

Figure 1.33: Bubble.io – Account plugins

Figure 1.33: Bubble.io – Account plugins

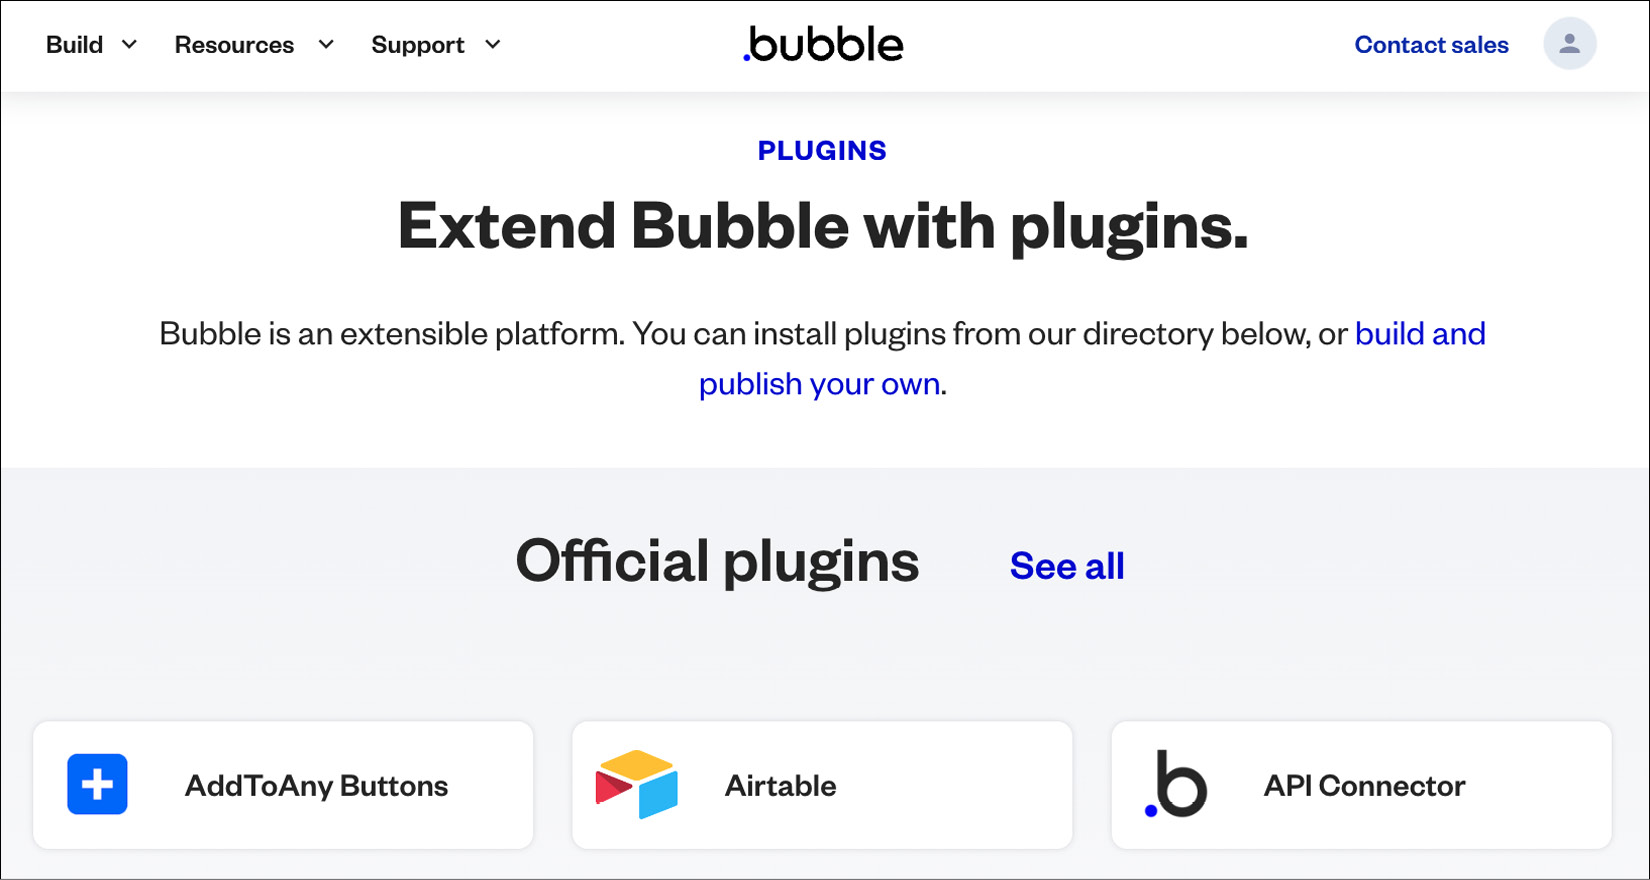
In the plugins marketplace, you can find thousands of plugins ready for you to plug and play into your Bubble web apps. Using plugins is a very good way to add powerful functionalities to your builds.

The plugins marketplace page on the Bubble’s website in the following screenshot:

Figure 1.34: Bubble.io – Plugins marketplace

Figure 1.34: Bubble.io – Plugins marketplace

With plugins you can go beyond what is possible with just the Bubble editor and native features, so make sure to take some time to explore plugins and find good ones that can take your project build to the next level.

Support

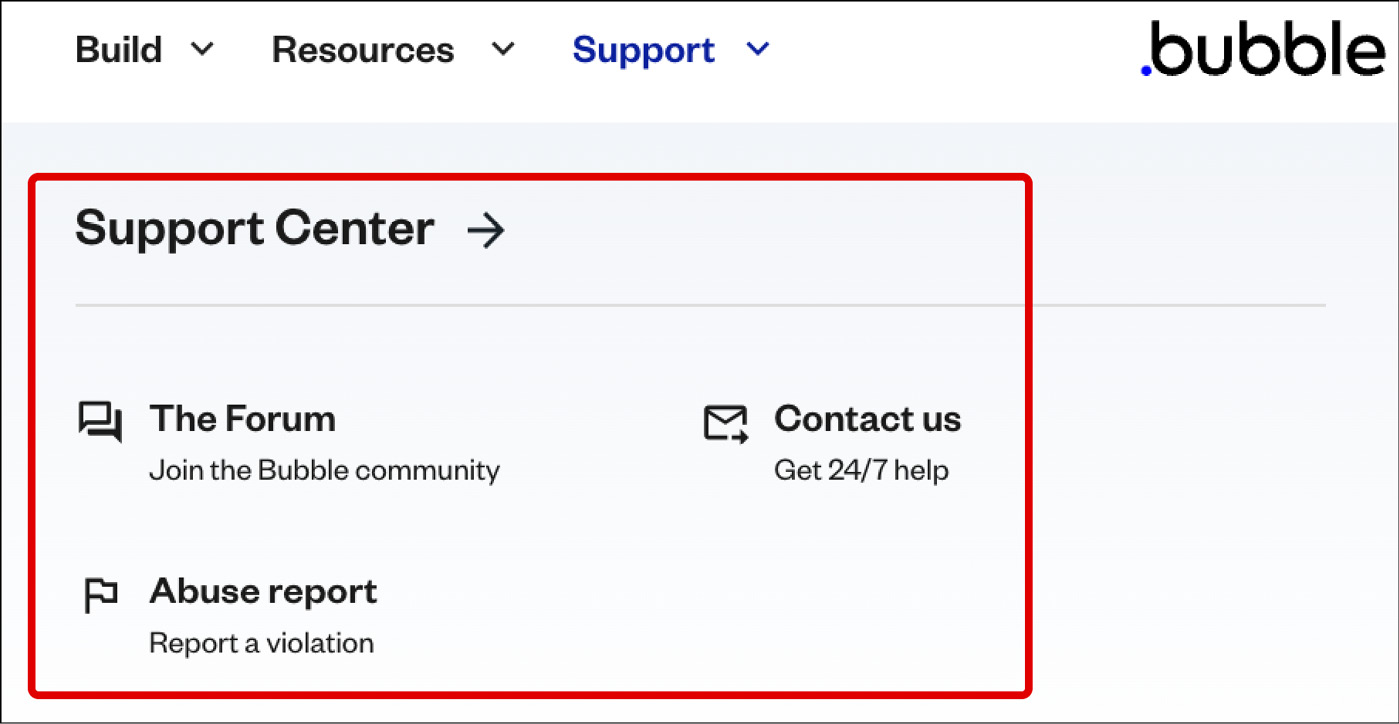
If you need help, Bubble offers support, especially if you are on paid plans. You can send a message via their website or send an email to open a ticket. To do that, log in to your account and find the Support tab. From there, you can contact sales, go to the support center, talk about partnerships, report a bug, report abuse, or just reach out to get help.

Figure 1.35: Bubble.io – Support Center

Figure 1.35: Bubble.io – Support Center

Forum and community

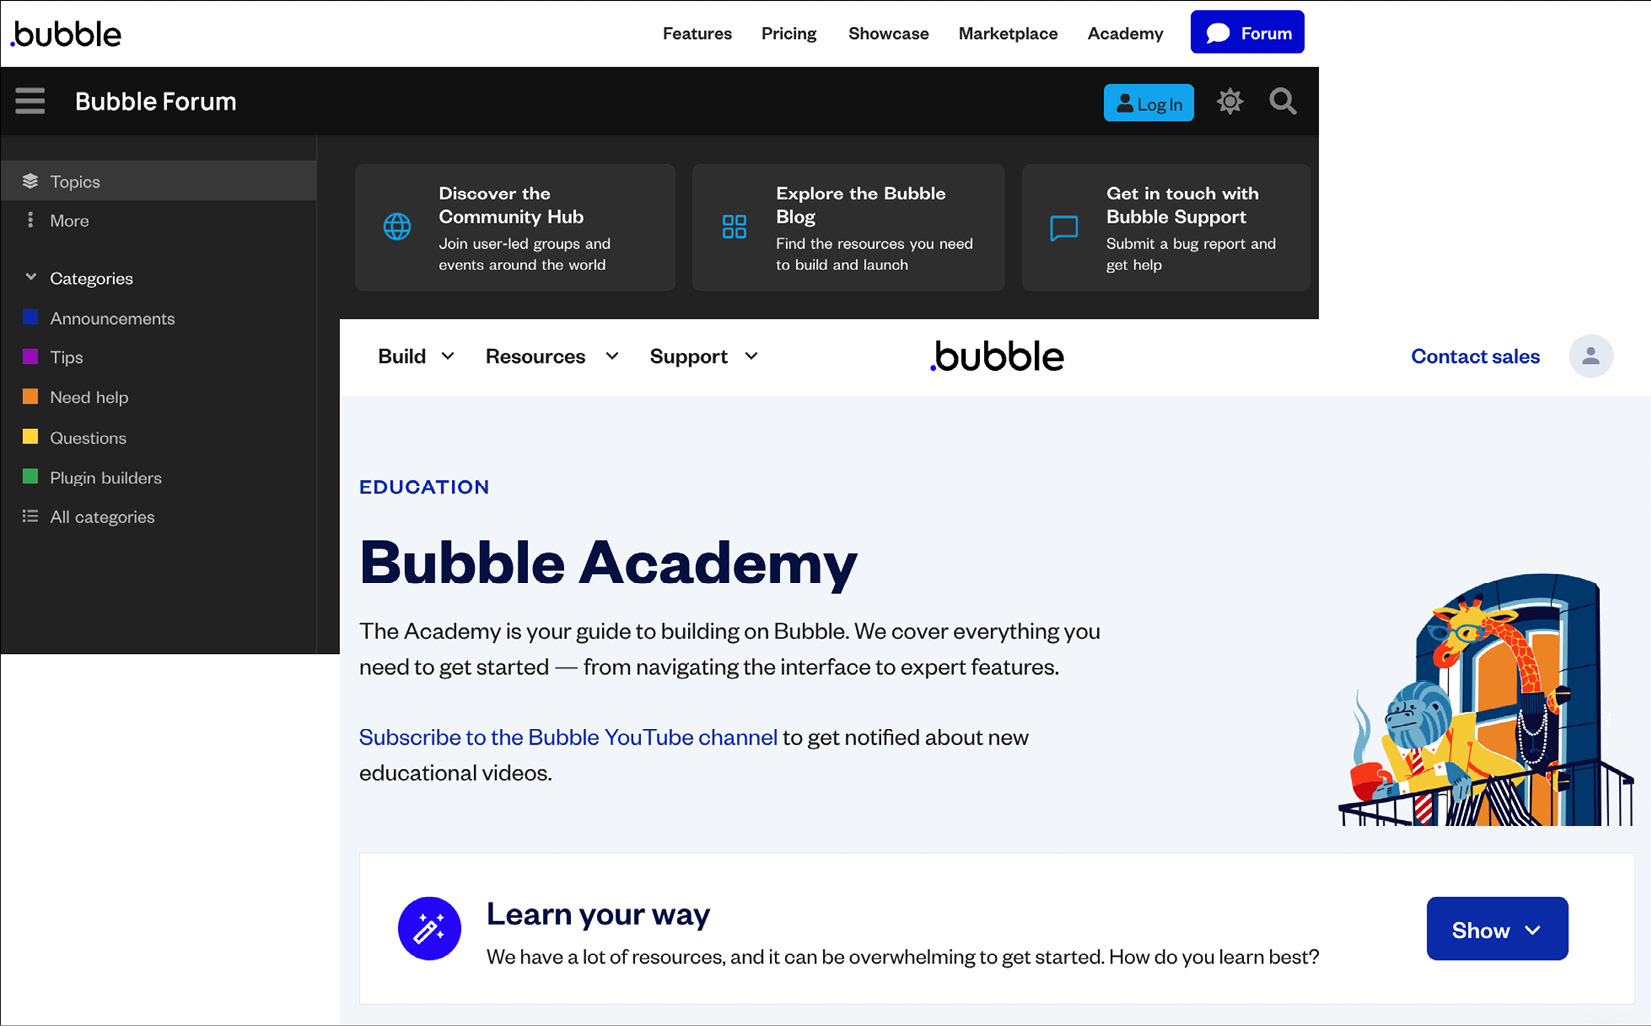
Bubble has a strong community, so help from the support team is not the only way to get assistance. There is a forum available for you to join and ask questions. The Bubble community is very supportive, so if you want to learn, teach, or get help, I recommend joining the forum. You can start by searching forum posts to check whether someone already asked your question, and if you don’t find an answer, you can easily create a new topic with your questions and someone will reply as soon as possible. The community is not only a place to get support, but to also meet and connect with other Bubblers out there. Make use of it!

Figure 1.36: Bubble.io – Forum and Academy

Figure 1.36: Bubble.io – Forum and Academy

By now you know what Bubble is, what you can build with it, and how to navigate the tool from the inside out. This knowledge is helpful because one of the main challenges for beginners when using a new tool is to identify where things are, and now you know every section of the Bubble editor and your account, so you will be able to navigate freely and locate features as you build your applications.

Summary

In this chapter, we’ve walked through the foundation of your Bubble learning journey by teaching you the first steps to be able to use this powerful tool. We covered the essentials about Bubble, what it is, and what you can build with it. You also learned how to create an account from scratch and how to set up your project using the application assistant.

We covered every area of the main editor in detail and saw how to navigate inside Bubble with a quick tour of the main areas of your account, so you know how to find anything you need while building and managing your applications.

This step is very important to guide you on your path to using Bubble and will form a strong base to allow you to understand more complex concepts in the future. In the next chapter, we will dive into the components and learn in more detail what they are and how they work.

You have been reading a chapter from
Democratizing No-Code Application Development with Bubble
Published in: Apr 2024Publisher: PacktISBN-13: 9781804610947
Register for a free Packt account to unlock a world of extra content!
A free Packt account unlocks extra newsletters, articles, discounted offers, and much more. Start advancing your knowledge today.
undefined
Unlock this book and the full library FREE for 7 days
Get unlimited access to 7000+ expert-authored eBooks and videos courses covering every tech area you can think of
Renews at €14.99/month. Cancel anytime

Author (1)

author image
Caio Calderari

Caio Calderari is a No-Code Expert, Startup Founder and Senior Product Designer with 17+ years of experience. Starting as a designer in 2005, he worked for advertising, digital agencies, corporate companies and startups worldwide. He learned no-code tools to be able to build his own startups and side projects and later decided to teach others too. In 2020, he created a YouTube channel about no-code tools offering courses and tutorials. By 2021, he became the Chief No-Code Officer at a U.S.-based company, helping entrepreneurs from various countries launch their startup ideas. Caio is a creative individual, passionate about sharing his knowledge. His goal is to bring no-code to more creators, helping them unlock this new world of possibilities.
Read more about Caio Calderari