

JupyterLab is the next generation of Jupyter. The idea is to try new features of Jupyter in a lab environment where some features may be dropped.
There are many familiar and new components available in Jupyter with JupyterLab.
JupyterLab has all the features of Jupyter plus the following:
- Drag-and-drop reordering of cells within a Notebook and across Notebooks
- The ability to run native code text files; for example,
sample.r - Working interactively between a cell and a kernel to speed up development of notebooks
- Expanding view inline capabilities for other graphical formats
- A large number of extensions to Jupyter for custom graphical interfaces applicable to a Notebook
This recipe will show you how to install JupyterLab. After installing JupyterLab, we will take a look at how to start it to create your own Jupyter Notebook.
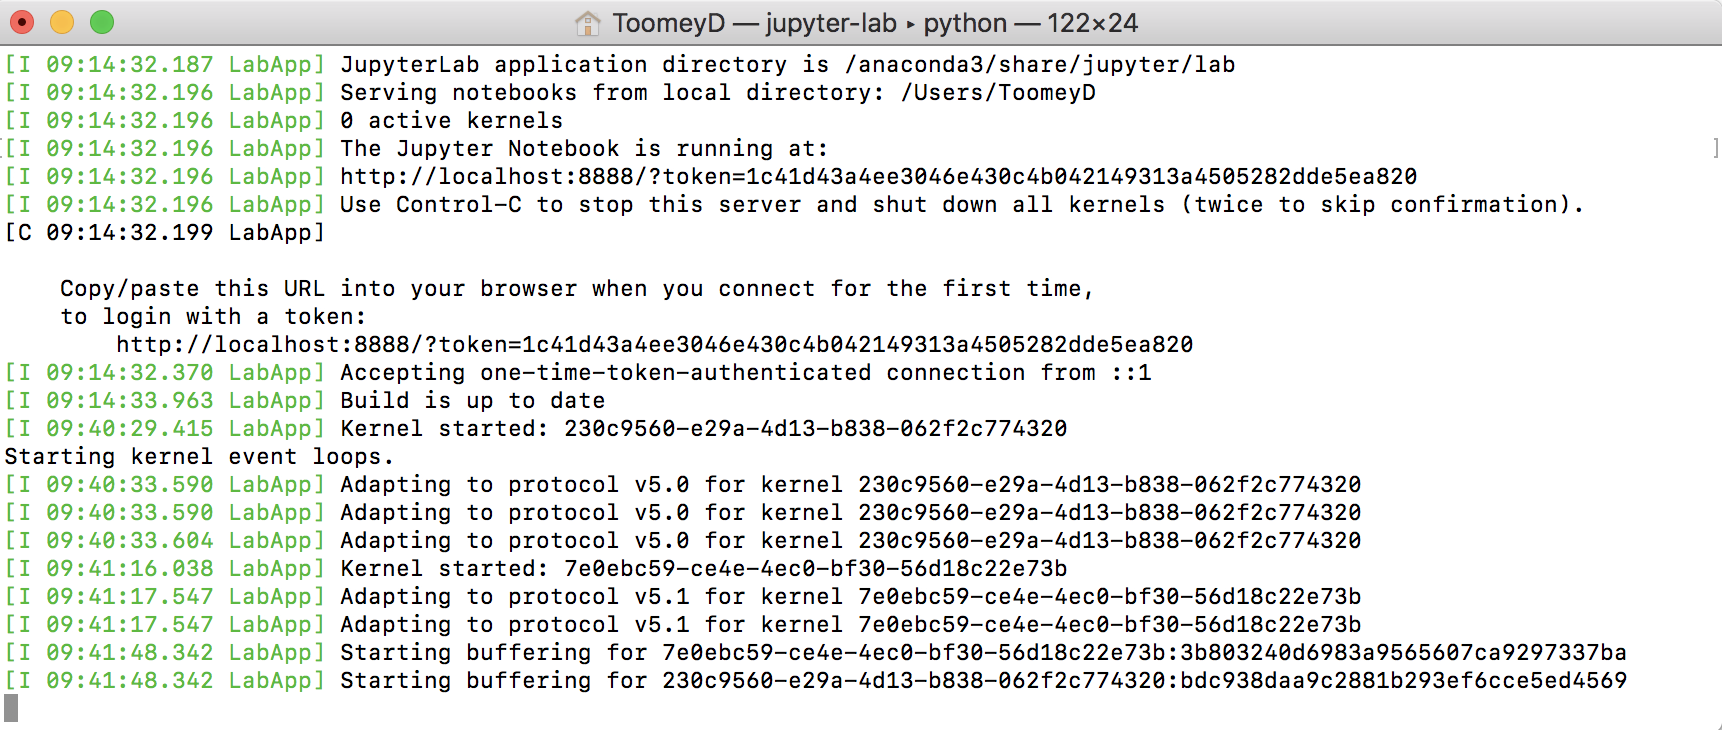
We can see several points of interest in the display:
- We are running JupyterLab versus Jupyter
- The code is installed as part of Anaconda
- New information: 0 active kernels, so we have the idea of multiple kernels running simultaneously
- We see the URL to use if we want to use token authentication (as described in the previous chapter)
- Then, there are several invocation lines as I moved around to different Notebooks in the system
- Now for something completely different: the JupyterLab display. Once the application starts, we open a new browser window, shown as follows:
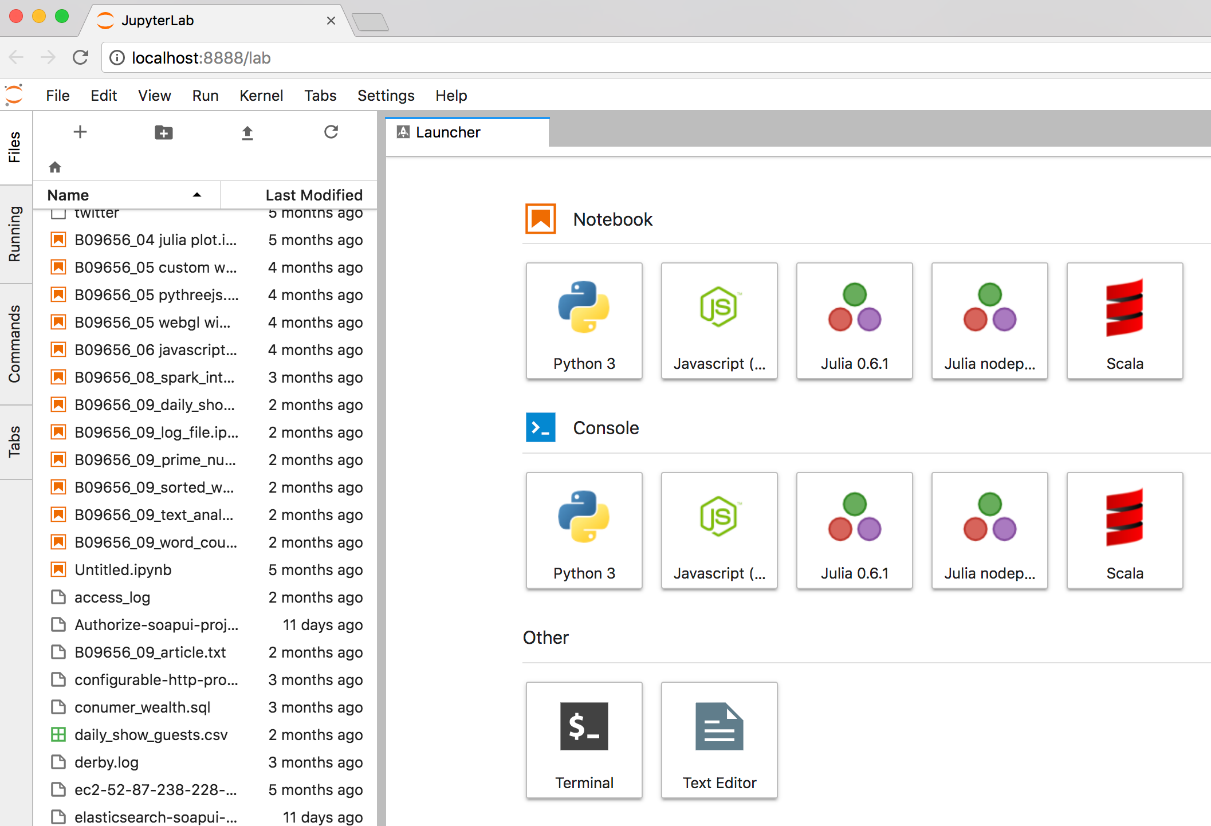
- The initial display (which is configurable) looks very different to Jupyter, as shown in the preceding screenshot.
- We have the screen split in two (this can be configured for more).
- The left panel is the familiar directory display we have seen before. Note that we are seeing filenames rather than the titles applied to the Notebooks.
- The right panel (also known as Launcher) is broken up into three sections...
This recipe will walk us through the different menus available once we start our JupyterLab.
- There are additional menus and menu items available, as shown in the following screenshot:

- The
Filemenu includes the following:
New: This creates a new console, Notebook, text file, or terminal windowNew Launcher: Opens another launcher windowNew View: We can now have different views of the same Notebook—completely configurableNew Console for Activity: Another console windowClose Launcher: Closes the launcherClose and Shutdown: Menu item versus Ctrl + C in the console window where Jupyter startsClose All: Closes all the programs that are runningSave options: This option is used to save the NotebookRevert to Saved: Notebooks are stored with checkpoints that can be recoveredRename...: To rename the Notebook that is runningTrust Notebook: As mentioned in the previous chapterExport Notebook As...: Familiar options to export the Notebook into a variety of formats:- HTML
- LaTeX...
With the help of this recipe, you will learn how to start your own Notebook.
- Double-clicking on a Notebook in the file display panel will start the Notebook in a new tab in the center portion of the screen, as shown in the following picture:
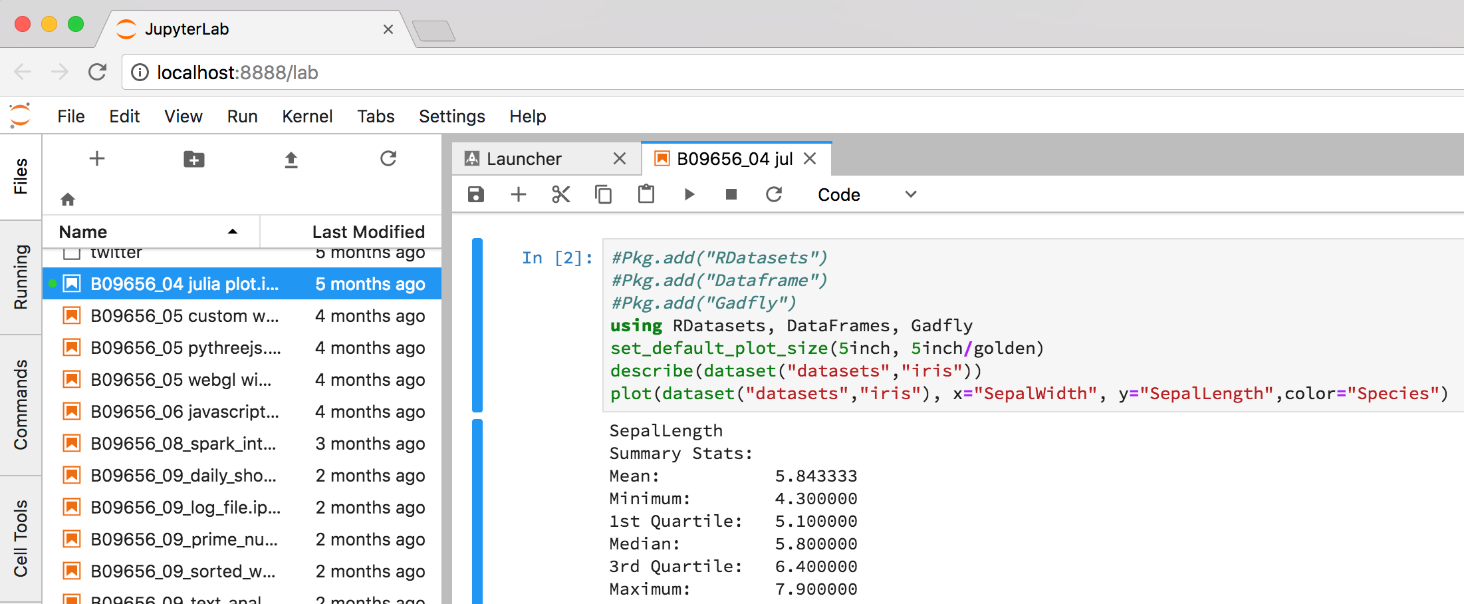
- Note that the Notebook takes another tab in the center display area. Otherwise, it looks very familiar. There is a vertical bar alongside each cell of the Notebook. To the right of the tab (not shown) is the Notebook engine in use by this Notebook.
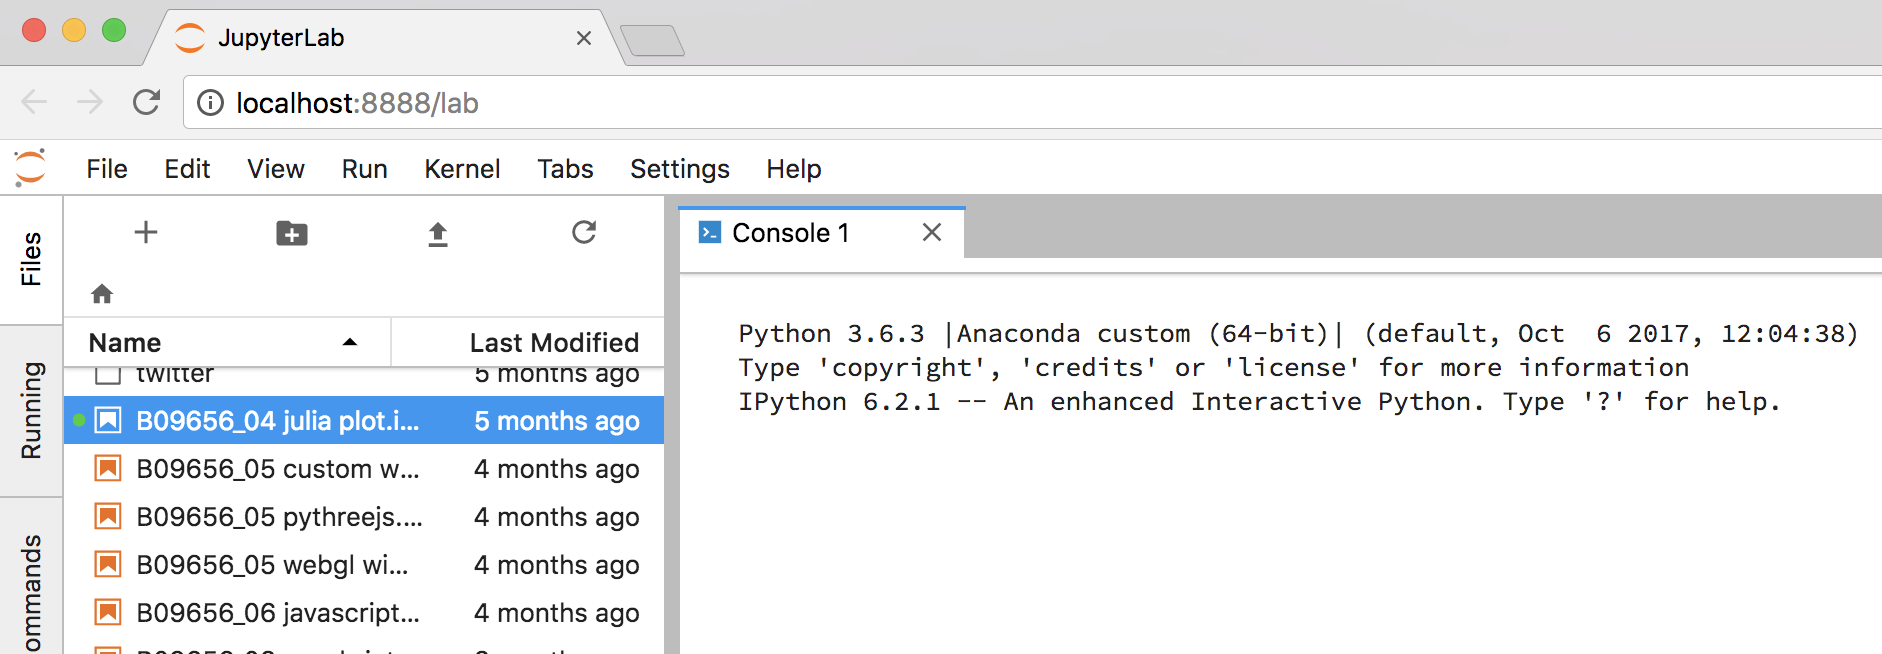
With the help of the following ways, you can start the console:
- If we were to select a
New Consolefrom theFilemenu or from the initial center display, we would see a tab taken up by the corresponding engine. For example, the Python console is shown in the following screenshot:
- I think this display change is a great step forward for Jupyter.
The rest of the chapter is locked
You have been reading a chapter from
Jupyter CookbookPublished in: Apr 2018Publisher: PacktISBN-13: 9781788839440
Register for a free Packt account to unlock a world of extra content!
A free Packt account unlocks extra newsletters, articles, discounted offers, and much more. Start advancing your knowledge today.
undefined
Unlock this book and the full library FREE for 7 days
Get unlimited access to 7000+ expert-authored eBooks and videos courses covering every tech area you can think of
Renews at $15.99/month. Cancel anytime