

You may have come across the word before, but what does it really mean?
According to the dictionary, automation is defined as:
The technique, method, or system of operating or controlling a process by highly automatic means
What this implies, is that a process or a device working by itself, with little or no human control is automation.
In this chapter, we will create a project that will help you understand this concept. We will be creating a Smart lighting system, which will turn on a light only when it is dark outside. Its smart, because it can do this without any human intervention, and hence is automatic!
Let's put together a problem statement for this project.
Problem Statement: Automating light depending on amount of ambient light.
Solution: A device that can sense the world around it using a light sensor, and depending on the amount of light, turn on, or off a light.
Let's look at the following new sensor that we are dealing with. We will be using a LDR, which stands for a Light Dependent Resistor. A LDR works on the principle of photo-conductivity An LDR is shown in the following figure to familiarize you with it:
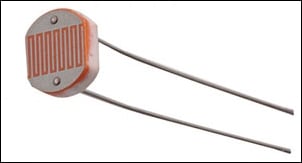
Image source : http://ninjagecko.co.uk/wp-content/uploads/2014/04/ldr.jpg
Photo conductivity is an optical phenomenon in which the material's conductivity (ability of the device to allow free flow of electrical charge) is increased when light is absorbed by the material.
The surface of the LDR is made of this photo-conductive material. Typically, the resistance (apposition to the free flow of electrical charge) of the LDR is very high when there is no light falling on it. When light strikes the surface of the LDR, the resistance drops because of photo-conductivity and allows more current to flow across it as shown in the following representation:
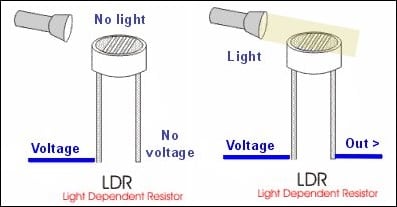
Image source: http://www.tnt-audio.com...
Once again, let's begin by making a high-level block diagram of this project as shown in the following diagram:
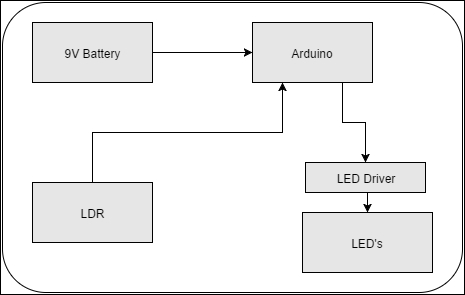
Let's now outline how this will all work together.
When our device senses that there is enough ambient or surrounding light, it will keep an attached LED off. But when then ambient light level goes below a certain threshold meaning the surroundings have gone dark, the device's light will turn on, more importantly, automatically!
We will be using conditional statements again and the flow chart is as follows:
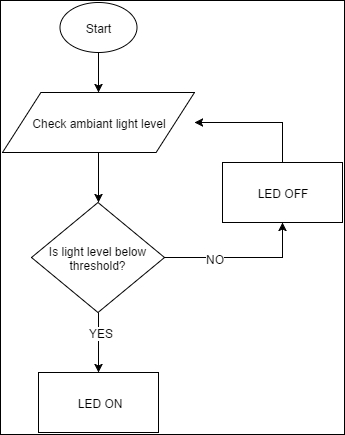
According to our flow chart, the sensor will constantly check the ambient light levels in a loop.
If there is enough light, the LED will stay off, but when the ambient light levels goes below a certain threshold, the LED will be turned ON.
We mentioned earlier that the Arduino takes in digital data, which means that it can only handle numbers.
But what can we do for cases when we have an infinite number of possibilities, like light levels which cannot be quantified as a 0 or a 1, or ON and OFF?
Data like these which are continuous in nature, and do not have discrete or distinct levels are known as analog data. These signals in terms of voltage do not exist only at 0V or 5V, but vary between these two levels.
How do we go about reading such a continuous data then? Worry not, and remember, for all our problems, there's always a solution, we only need to think harder and explore.
An ADC, or an Analog-to-Digital converter is a circuit that converts voltages that are analog in nature to digital form.
The Arduino Uno has a 10 bit ADC inside it, which means it can convert an analog input voltage range, 0 to 5 volts, to a digital value between 0 and 1023 (2^10, hence 10-bit!).
The following table shows...
Now, it may have become apparent after explaining how ADC's work, that the Arduino can measure only an analog voltage. But our LDR changes its resistance depending on the amount of light falling on it. So how can we effectively change the voltage across the Arduino depending on the change of the resistance of the LDR?
We use a voltage divider!
A voltage divider is a very fundamental and simple circuit which basically divides a larger voltage into a smaller one depending on the values of the resistors in its circuit.
A voltage divider uses two resistors in series with an input voltage and can output an output voltage that is a fraction of the input.
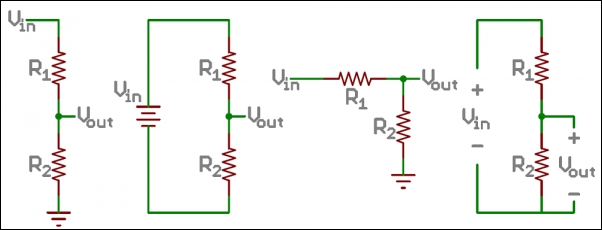
A voltage divider
Image source: https://cdn.sparkfun.com/r/600-600/assets/4/0/3/a/e/511948ffce395f7f47000000.png
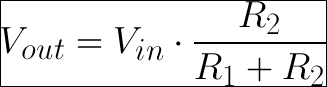
The output voltage depends on the resistances and the input voltage by the following equation:
Now, using this circuit, along with our LDR, we can manipulate the voltage input into our Arduino. All we have to do...
Now we have everything we need to know to start building our project, let's start by writing the code:
int sensorPin = A0;            // select the input pin for the ldr
unsigned int sensorValue = 0;  // variable to store the value coming from the ldr

void setup()
{
  pinMode(13, OUTPUT);
  //Start Serial port
  Serial.begin(9600);        // start serial for output - for testing
}

void loop()
{
  // read the value from the ldr:
  sensorValue = analogRead(sensorPin);
  if(sensorValue<400)
       digitalWrite(13, HIGH);   // set the LED on
  else digitalWrite(13, LOW);   // set the LED off

}
We start by storing the pin numbers in variables, so that it doesn't become confusing, and then initialize our LED pins for output.
The code consists of a if statement that checks the value of sensorValue. If the values stored in it is less than 400, meaning that...
Now that our code is ready, let's build our project. We use the circuit diagram as shown in the following screenshot:
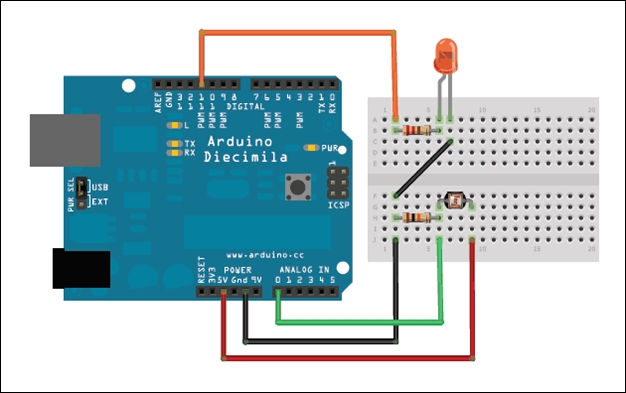
Once you have hooked up your circuit according to this diagram, it is time to take your automated lamp for a spin!
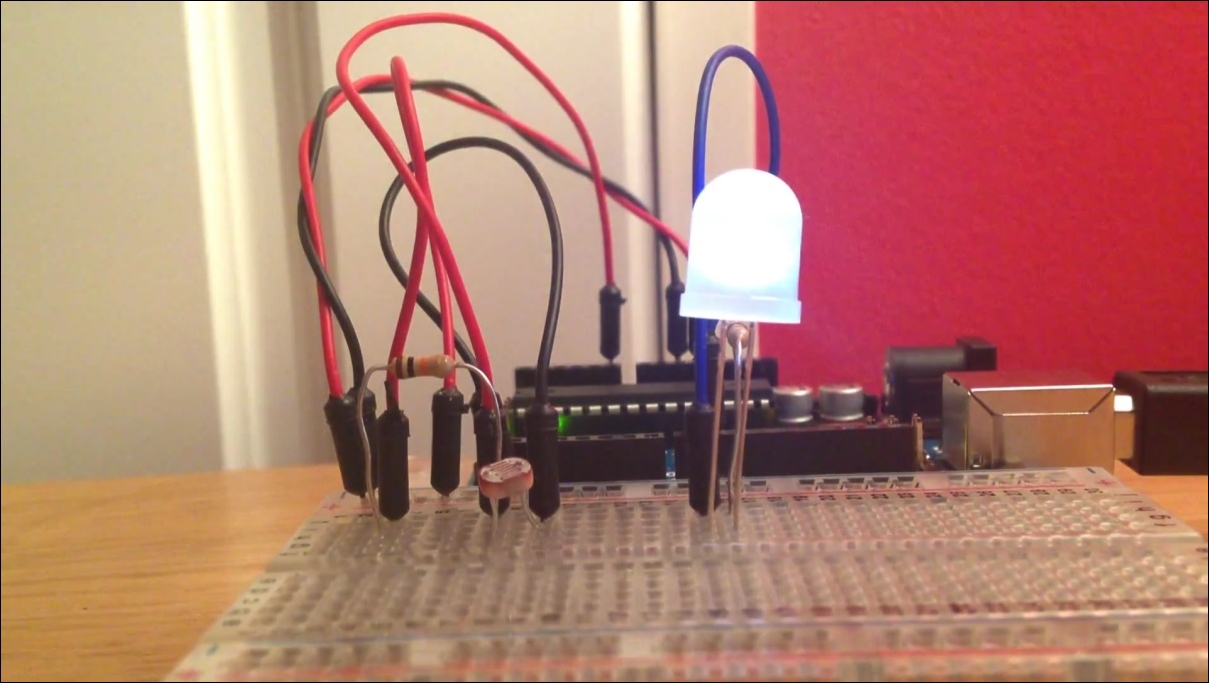
If you have set your threshold values right, you will find the LED to be OFF when there is ambient light present. Lower your threshold value in case the LED still remains on.
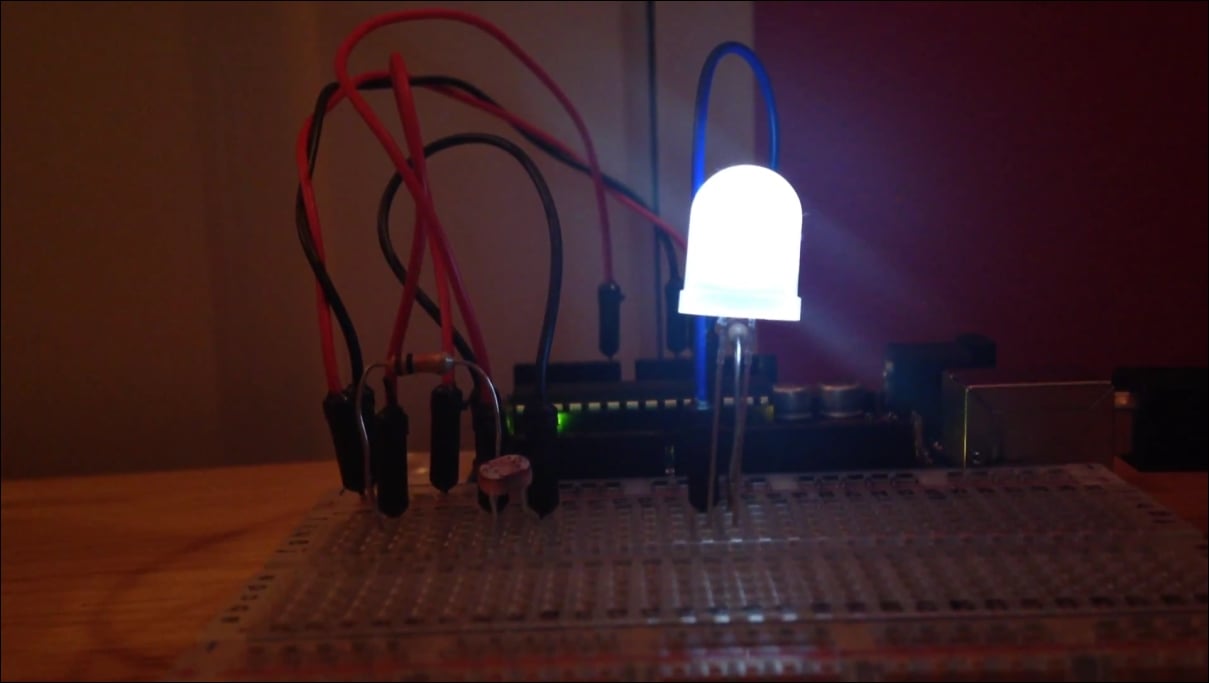
When your room goes dark, the LDR senses this change in ambient light levels and automatically turns your LED ON!
In this chapter we learnt:
Automation is all about devices working on their own without human intervention. Smart street lights that turn on at night, Smart gardening systems that water plants are some examples of automation.
Light Dependent Resistors and the phenomenon of photo-conductivity, where the conductivity of a material depends on the amount of light falling on it
How to read Analog data on the analog pins of the Arduino using the
analogRead()functionThe miracle of voltage dividers, and how they are used for converting a change in resistance to a change in voltage so that the Arduino can read it